


一直都提示找不到头文件,但我到处搜索,总算弄好了,网上真的很少protobuf比较新的编译方法,在此记录一下。
用网上的方式去弄,一直都在报各种问题。百思不得其解,以下为个人成功经验总结:
-
不要下载官网最新源码,很多人直接按照readme来编译,很难一次性通过。
-
如果直接拉github最新的源码。是没有autogen.sh或者configure文件的,当你跑去cmake里编译,他必然会提示各种变量未定义了,怎么都解决不了。
(2024.2.3凌晨更新:最新的库没有问题,是我技术有限没有编译通过,以下为最新版本编译通过的原文教程链接:https://blog.csdn.net/wzw1609119742/article/details/119712422
以下为我使用过程中做的笔记:
用我這個,一定能過
a.前提准备工作:git submodule update --init --recursive
b.跟着作者创建好文件,确定你的起始路径为以下:XXX/protobuf/cmake/build/release
c.复制以下命令:
cmake -G "Unix Makefiles" -DCMAKE_BUILD_TYPE=Release -DCMAKE_INSTALL_PREFIX=../../../install/release -Dprotobuf_BUILD_SHARED_LIBS=ON -Dprotobuf_WITH_ZLIB=OFF -Dprotobuf_BUILD_TESTS=OFF ../../..
d.以下为成功编译后的效果图:

e.开始cmake ,等待十分钟左右(可以适当的加上-j 参数加速,方法自己搜)
f.执行 make install即可安装成功
) -
以下我直说一种一定能成功的方法,不对其他版本的错误做特殊说明。
PART1 编译源码与验证
1.11 点击链接下载3.21.12版本源码。https://github.com/protocolbuffers/protobuf/releases/tag/v2
1.12 cd protobuf-21.12/
1.13 ./autogen.sh
1.14 ./configure --prefix=/usr/local/protobuf
1.15 make
1.16 sudo make install
1.17 sudo vim /etc/profile
1.18 #添加以下内容:

#(动态库搜索路径) 程序加载运⾏期间查找动态链接库时指定除了系统默认路径之外的其他路径
export LD_LIBRARY_PATH=$LD_LIBRARY_PATH:/usr/local/protobuf/lib/
#(静态库搜索路径) 程序编译期间查找动态链接库时指定查找共享库的路径
export LIBRARY_PATH=$LIBRARY_PATH:/usr/local/protobuf/lib/
#执⾏程序搜索路径
export PATH=$PATH:/usr/local/protobuf/bin/
#c程序头⽂件搜索路径
export C_INCLUDE_PATH=$C_INCLUDE_PATH:/usr/local/protobuf/include/
#c++程序头⽂件搜索路径
export CPLUS_INCLUDE_PATH=$CPLUS_INCLUDE_PATH:/usr/local/protobuf/include/
#pkg-config 路径
export PKG_CONFIG_PATH=/usr/local/protobuf/lib/pkgconfig/
1.18 source /etc/profile
1.19  protoc --version
执行之后应该看到==libprotoc 3.21.12==如果出现这个版本信息则安装成功


以上为我总结信息,原文信息:https://www.cnblogs.com/zz1254/articles/17725754.html#:~:text=%E6%89%BE%E5%88%B0%E7%9B%B8%E5%AF%B9%E5%BA%94%E7%9A%84%E7%89%88%E6%9C%AC%20ProtoBuf%E4%B8%8B%E8%BD%BD%E5%9C%B0%E5%9D%80%EF%BC%9A%20https%3A%2F%2Fgithub.com%2Fprotocolbuff,%E6%88%91%E4%B8%8B%E8%BD%BD%E7%9A%84%E6%98%AF3.21.12%20https%3A%2F%2Fgithub.com%2Fprotocolbuffers%2Fprotobuf%2Freleases%2Ftag%2Fv21.12%20wget%20https%3A%2F%2Fgithub.com%2Fprotocolbuffers%2Fprotobuf%2Freleases%2Fdownload%2Fv21.12%2Fprotobuf-all-21.12.tar.gz
PART2 撰写测试用例
参考链接:https://zhuanlan.zhihu.com/p/641283776
- 在本地新建一个文件:addressbook.proto并填充内容:
syntax = "proto2";

package tutorial;

message Person {
    optional string name = 1;
    optional int32 id = 2;
    optional string email = 3;

    enum PhoneType {
        MOBILE = 0;
        HOME = 1;
        WORK = 2;
    }

    message PhoneNumber {
        optional string number = 1;
        optional PhoneType type = 2 [default = HOME];
    }

    repeated PhoneNumber phones = 4;
}

message AddressBook {
    repeated Person people = 1;
}
./usr/local/protobuf/bin/protoc --cpp_out=. addressbook.proto(这个是绝对路径能保证你绝对不出错,如果你执行protoc --version得到的不是libprotoc 3.21.12版本,才这样做。如果是,则直接protoc --cpp_out=. addressbook.proto)
3.编写reader.cpp
#include <iostream>
#include <fstream>
#include <string>
#include "addressbook.pb.h"
using namespace std;

// Iterates though all people in the AddressBook and prints info about them.
void ListPeople(const tutorial::AddressBook& address_book) {
  for (int i = 0; i < address_book.people_size(); i++) {
    const tutorial::Person& person = address_book.people(i);

    cout << "Person ID: " << person.id() << endl;
    cout << "  Name: " << person.name() << endl;
    if (person.has_email()) {
      cout << "  E-mail address: " << person.email() << endl;
    }

    for (int j = 0; j < person.phones_size(); j++) {
      const tutorial::Person::PhoneNumber& phone_number = person.phones(j);

      switch (phone_number.type()) {
        case tutorial::Person::MOBILE:
          cout << "  Mobile phone #: ";
          break;
        case tutorial::Person::HOME:
          cout << "  Home phone #: ";
          break;
        case tutorial::Person::WORK:
          cout << "  Work phone #: ";
          break;
      }
      cout << phone_number.number() << endl;
    }
  }
}

// Main function:  Reads the entire address book from a file and prints all
//   the information inside.
int main(int argc, char* argv[]) {
  // Verify that the version of the library that we linked against is
  // compatible with the version of the headers we compiled against.
  GOOGLE_PROTOBUF_VERIFY_VERSION;

  if (argc != 2) {
    cerr << "Usage:  " << argv[0] << " ADDRESS_BOOK_FILE" << endl;
    return -1;
  }

  tutorial::AddressBook address_book;

  {
    // Read the existing address book.
    fstream input(argv[1], ios::in | ios::binary);
    if (!address_book.ParseFromIstream(&input)) {
      cerr << "Failed to parse address book." << endl;
      return -1;
    }
  }

  ListPeople(address_book);

  // Optional:  Delete all global objects allocated by libprotobuf.
  google::protobuf::ShutdownProtobufLibrary();

  return 0;
}
3.编写writer.cpp
#include <iostream>
#include <fstream>
#include <string>
#include "addressbook.pb.h"
using namespace std;

// This function fills in a Person message based on user input.
void PromptForAddress(tutorial::Person* person) {
  cout << "Enter person ID number: ";
  int id;
  cin >> id;
  person->set_id(id);
  cin.ignore(256, '\n');

  cout << "Enter name: ";
  getline(cin, *person->mutable_name());

  cout << "Enter email address (blank for none): ";
  string email;
  getline(cin, email);
  if (!email.empty()) {
    person->set_email(email);
  }

  while (true) {
    cout << "Enter a phone number (or leave blank to finish): ";
    string number;
    getline(cin, number);
    if (number.empty()) {
      break;
    }

    tutorial::Person::PhoneNumber* phone_number = person->add_phones();
    phone_number->set_number(number);

    cout << "Is this a mobile, home, or work phone? ";
    string type;
    getline(cin, type);
    if (type == "mobile") {
      phone_number->set_type(tutorial::Person::MOBILE);
    } else if (type == "home") {
      phone_number->set_type(tutorial::Person::HOME);
    } else if (type == "work") {
      phone_number->set_type(tutorial::Person::WORK);
    } else {
      cout << "Unknown phone type.  Using default." << endl;
    }
  }
}

// Main function:  Reads the entire address book from a file,
//   adds one person based on user input, then writes it back out to the same
//   file.
int main(int argc, char* argv[]) {
  // Verify that the version of the library that we linked against is
  // compatible with the version of the headers we compiled against.
  GOOGLE_PROTOBUF_VERIFY_VERSION;

  if (argc != 2) {
    cerr << "Usage:  " << argv[0] << " ADDRESS_BOOK_FILE" << endl;
    return -1;
  }

  tutorial::AddressBook address_book;

  {
    // Read the existing address book.
    fstream input(argv[1], ios::in | ios::binary);
    if (!input) {
      cout << argv[1] << ": File not found.  Creating a new file." << endl;
    } else if (!address_book.ParseFromIstream(&input)) {
      cerr << "Failed to parse address book." << endl;
      return -1;
    }
  }

  // Add an address.
  PromptForAddress(address_book.add_people());

  {
    // Write the new address book back to disk.
    fstream output(argv[1], ios::out | ios::trunc | ios::binary);
    if (!address_book.SerializeToOstream(&output)) {
      cerr << "Failed to write address book." << endl;
      return -1;
    }
  }

  // Optional:  Delete all global objects allocated by libprotobuf.
  google::protobuf::ShutdownProtobufLibrary();

  return 0;
}
编译:
c++ -std=c++14 writer.cpp addressbook.pb.cc -o writer -lpthread -lprotobuf
c++ -std=c++14 reader.cpp addressbook.pb.cc -o reader -lpthread -lprotobuf
4.测试写出来的东西
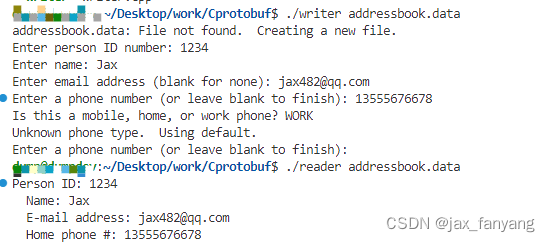
测验完毕。
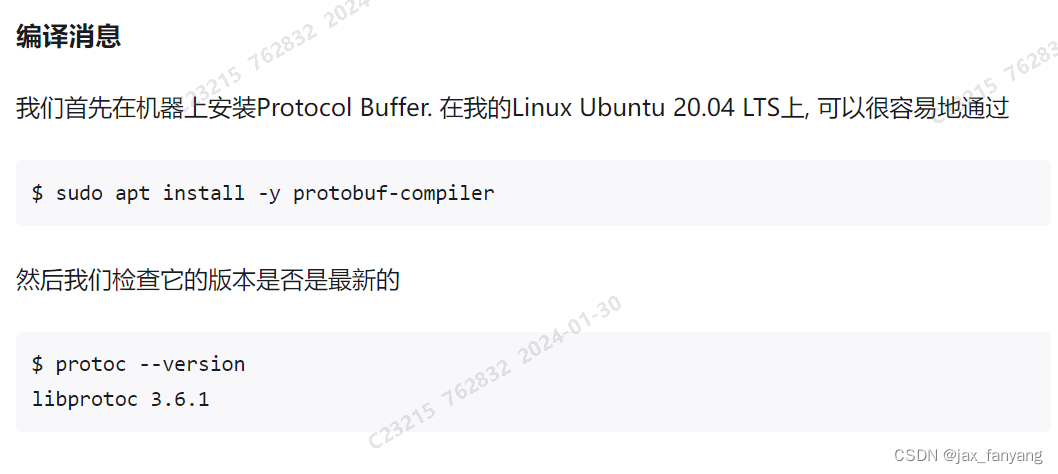
备注:
千万不要抄第二篇博客的安装protobuf软件手段,一定编译不出来!他写的这个我机器上没编译过。如果你抄了,请卸载:sudo apt autoremove protobuf-compiler 下图为我参考第二篇博客走的弯路。被这个坑了。
PART 3 拓展-protobuf-C的使用
参考链接吧,这个太简单了
https://blog.csdn.net/zb313982521/article/details/110341454
以下只介绍我用的源码版本及编译过程即可:
源码版本:https://github.com/protobuf-c/protobuf-c/releases/tag/v1.4.1
点击下面这个就会自动下载了,

注意,这个版本没有autogen文件,我是跟着readme自主编译的:./configure && make && make install
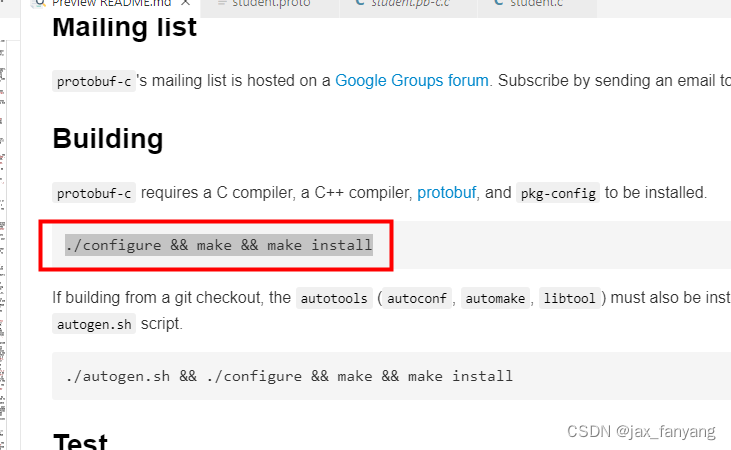
编译完成自己学着readme做了个测试
make check

这个是敲完source /etc/profile后,查看版本信息的情况。

protobuf测试结果:
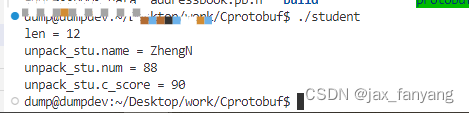
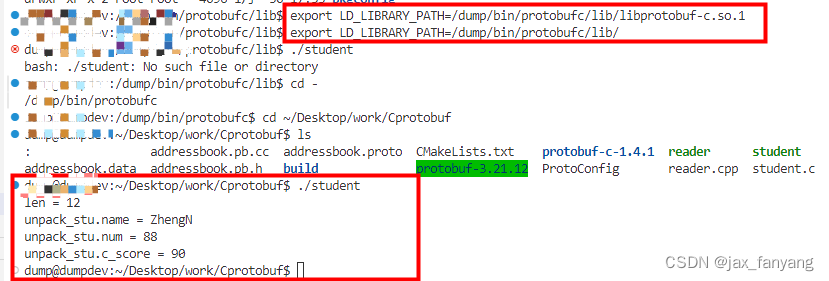
插曲:我执行student会报错但是去我的安装路径上去找,是找得到的,还不明白为什么,因此用了个手动引入环境变量来规避该问题:

规避后的成功执行效果:
本文章完毕


 1728
1728


 被折叠的 条评论
为什么被折叠?
被折叠的 条评论
为什么被折叠?
 到【灌水乐园】发言


