1、ElasticSearch 8.10.2 本地下载
下载地址:https://www.elastic.co/cn/downloads/past-releases/elasticsearch-8-10-2

2、运行
需要本地配置JAVA_HOME :jdk17
![]()
解压后进入文件夹:

双击elasticsearch.bat,即可运行

运行成功后,浏览器输入:http://localhost:9200/
成功则显示下面信息:

不成功可以看下一步(关闭安全认证)
3、安全认证
在根目录下打开config文件夹
修改elasticsearch.yml文件

修改参数:xpack.security.enabled

若为false,则不需要安全认证,访问以 http 开头
若为true,则需要安全认证,访问以 https 开头,同时访问需要输入账号和密码。
账号密码设置:(前提:xpack.security.enabled : true)
账号默认为:elastic
密码需要去设置,设置过程如下:
1、启动elasticsearch
2、在bin目录下启动cmd


敲击回车即可运行
然后输入:elasticsearch-reset-password -u elastic

输入y即可修改成功

密码自行保存下来。
3、重新启动elastisearch,即可成功修改密码。
4、集成springboot
pom依赖如下:
        <dependency>
            <groupId>org.elasticsearch.plugin</groupId>
            <artifactId>x-pack-sql-jdbc</artifactId>
            <version>8.10.2</version>
        </dependency>

        <dependency>
            <groupId>co.elastic.clients</groupId>
            <artifactId>elasticsearch-java</artifactId>
            <version>8.10.2</version>
        </dependency>

        <dependency>
            <groupId>com.fasterxml.jackson.core</groupId>
            <artifactId>jackson-databind</artifactId>
            <version>2.12.3</version>
        </dependency>

        <dependency>
            <groupId>jakarta.json</groupId>
            <artifactId>jakarta.json-api</artifactId>
            <version>2.0.1</version>
        </dependency>

        <dependency>
            <groupId>org.springframework.boot</groupId>
            <artifactId>spring-boot-starter-web</artifactId>
            <version>RELEASE</version>
            <scope>compile</scope>
        </dependency>
        <dependency>
            <groupId>cn.hutool</groupId>
            <artifactId>hutool-all</artifactId>
            <version>5.6.3</version>
        </dependency>
        <dependency>
            <groupId>com.alibaba.fastjson2</groupId>
            <artifactId>fastjson2</artifactId>
            <version>2.0.15</version>
        </dependency>
        <dependency>
            <groupId>org.apache.lucene</groupId>
            <artifactId>lucene-core</artifactId>
            <version>8.8.0</version>
        </dependency>
配置yml文件
spring:
  elasticsearch:
    rest:
      # 是否启用es
      enable: true
      uris: localhost:9200
      host: localhost
      port: 9200
      username: elastic
      password: HtGJDGu8LHcxHKPKG8RL // 你自己设置的密码
      index: indexName
      crtName: http_ca.crt
将安全证书放在resourses下面

安全证书位于:elasticsearch-8.10.2\config\certs

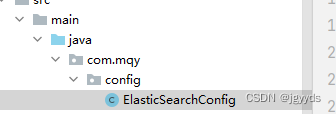
配置config(参考大佬:Geng)

package com.mqy.config;

import co.elastic.clients.elasticsearch.ElasticsearchAsyncClient;
import co.elastic.clients.elasticsearch.ElasticsearchClient;
import co.elastic.clients.json.jackson.JacksonJsonpMapper;
import co.elastic.clients.transport.ElasticsearchTransport;
import co.elastic.clients.transport.rest_client.RestClientTransport;
import org.apache.http.HttpHost;
import org.apache.http.auth.AuthScope;
import org.apache.http.auth.UsernamePasswordCredentials;
import org.apache.http.client.CredentialsProvider;
import org.apache.http.conn.ssl.NoopHostnameVerifier;
import org.apache.http.impl.client.BasicCredentialsProvider;
import org.apache.http.ssl.SSLContextBuilder;
import org.apache.http.ssl.SSLContexts;
import org.elasticsearch.client.RestClient;
import org.elasticsearch.client.RestClientBuilder;
import org.springframework.beans.factory.annotation.Value;
import org.springframework.context.annotation.Bean;
import org.springframework.context.annotation.Configuration;
import org.springframework.core.io.ClassPathResource;

import javax.annotation.PostConstruct;
import javax.net.ssl.SSLContext;
import java.io.IOException;
import java.io.InputStream;
import java.security.KeyManagementException;
import java.security.KeyStore;
import java.security.KeyStoreException;
import java.security.NoSuchAlgorithmException;
import java.security.cert.Certificate;
import java.security.cert.CertificateException;
import java.security.cert.CertificateFactory;

/**
 * es8的Java客户端配置
 * author:Geng
 */
@Configuration
//@Slf4j
public class ElasticSearchConfig {

    @Value("${spring.elasticsearch.rest.host}")
    private String host;
    @Value("${spring.elasticsearch.rest.enable}")
    private boolean enable;
    @Value("${spring.elasticsearch.rest.port}")
    private int port;
    @Value("${spring.elasticsearch.rest.username}")
    private String userName;
    @Value("${spring.elasticsearch.rest.password}")
    private String passWord;
    @Value("${spring.elasticsearch.rest.crtName}")
    private String tempCrtName;

    private static String crtName;

    @PostConstruct
    private void init() {
        crtName = tempCrtName;
    }

    /**
     * 解析配置的字符串,转为HttpHost对象数组
     *
     * @return
     */
    private HttpHost toHttpHost() {
        HttpHost httpHost = new HttpHost(host, port, "https");
        return httpHost;
    }

    /**
     * 同步客户端
     * @return
     * @throws Exception
     */
    @Bean
    public ElasticsearchClient clientBySync() throws Exception {
        ElasticsearchTransport transport = getElasticsearchTransport(userName, passWord, toHttpHost());
        return new ElasticsearchClient(transport);
    }

    /**
     * 异步客户端
     * @return
     * @throws Exception
     */
    @Bean
    public ElasticsearchAsyncClient clientByAsync() throws Exception {
        ElasticsearchTransport transport = getElasticsearchTransport(userName, passWord, toHttpHost());
        return new ElasticsearchAsyncClient(transport);
    }

    /**
     * 传输对象
     * @return
     * @throws Exception
     */
    @Bean
    public ElasticsearchTransport getTransport() throws Exception {
        return getElasticsearchTransport(userName, passWord, toHttpHost());
    }

    private static SSLContext buildSSLContext() {
        ClassPathResource resource = new ClassPathResource(crtName);
        SSLContext sslContext = null;
        try {
            CertificateFactory factory = CertificateFactory.getInstance("X.509");
            Certificate trustedCa;
            try (InputStream is = resource.getInputStream()) {
                trustedCa = factory.generateCertificate(is);
            }
            KeyStore trustStore = KeyStore.getInstance("pkcs12");
            trustStore.load(null, null);
            trustStore.setCertificateEntry("ca", trustedCa);
            SSLContextBuilder sslContextBuilder = SSLContexts.custom()
                    .loadTrustMaterial(trustStore, null);
            sslContext = sslContextBuilder.build();
        } catch (CertificateException | IOException | KeyStoreException | NoSuchAlgorithmException |
                KeyManagementException e) {
//            log.error("ES连接认证失败", e);
        }

        return sslContext;
    }

    private static ElasticsearchTransport getElasticsearchTransport(String username, String passwd, HttpHost... hosts) {
        // 账号密码的配置
        final CredentialsProvider credentialsProvider = new BasicCredentialsProvider();
        credentialsProvider.setCredentials(AuthScope.ANY, new UsernamePasswordCredentials(username, passwd));

        // 自签证书的设置,并且还包含了账号密码
        RestClientBuilder.HttpClientConfigCallback callback = httpAsyncClientBuilder -> httpAsyncClientBuilder
                .setSSLContext(buildSSLContext())
                .setSSLHostnameVerifier(NoopHostnameVerifier.INSTANCE)
                .setDefaultCredentialsProvider(credentialsProvider);

        // 用builder创建RestClient对象
        RestClient client = RestClient
                .builder(hosts)
                .setHttpClientConfigCallback(callback)
                .build();
        return new RestClientTransport(client, new JacksonJsonpMapper());
    }

}
5、对index的操作
@RestController
public class ESController {

    @Autowired
    private ElasticsearchClient esClient;

    @Autowired
    private ElasticsearchTransport transport;

    @GetMapping("/init1")
    public void initElastic() throws Exception{
        //获取索引客户端对象
        ElasticsearchIndicesClient indices = esClient.indices();

        //创建索引 采用构建器的方式构建(在创建之前需要先判断该索引是否存在)
        boolean exists = indices.exists(u -> u.index("user")).value();
        if (exists) {
            System.out.println("该索引已存在!!");
        } else {
            CreateIndexResponse createIndexResponse = indices.create(c -> c.index("user"));
        }

        //查询索引
        GetIndexResponse getResponse = indices.get(g -> g.index("user"));
        System.out.println("查询索引:"+getResponse);

        //删除索引
        DeleteIndexResponse deleteResponse = indices.delete(d -> d.index("user"));
        System.out.println("删除索引:"+deleteResponse.acknowledged());
    }
}
6、文档插入
@RestController
public class ESController {

    @Autowired
    private ElasticsearchClient esClient;

    @Autowired
    private ElasticsearchTransport transport;

    @GetMapping("/insert")
    public void insert() {

        Car car = new Car();

        try {
            esClient.create(s -> s
                    .index("car")      // 位于哪个索引
                    .id("10000")          // 唯一标识:id
                    .document(car)  // 映射实体
            );
        } catch (IOException e) {
            e.printStackTrace();
        }
    }
}
7、查询
普通的查询官网文档上都有,这里不再演示
官网链接:https://www.elastic.co/guide/en/elasticsearch/client/java-api-client/current/indexing.html
地理位置的查询:,本人在各个平台没有找到对应的例子,这里重点展示:
@PostMapping("/init2")
    public void init2Elastic() throws Exception {

        // 地理查询
        SearchResponse<Object> response = esClient.search(s -> s
                        .index("car")
                        .query(q -> q
                                .bool(b -> b
                                        .filter(f -> f
                                                .geoDistance(g -> g       // 地理查询
                                                        .field("location")
                                                        .distance("1km")      // 距离
                                                        .location(new GeoLocation.Builder().latlon(new LatLonGeoLocation.Builder().lat(31.32729921232273).lon(118.8924004074097).build()).build()) // 当前经纬度
                                                )
                                        )

                                )
                        ),
                Object.class
        );
        System.out.println(response);
        List<Hit<Object>> hits = response.hits().hits();
        for (Hit<Object> hit: hits) {
            Object object = hit.source();
            System.out.println(object);
        }
    }
对应的https请求:
POST http://localhost:9200/car/_search
{
  "query": {
    "bool": {
      "filter": {
        "geo_distance": {
          "distance": "1km",
          "distance_type": "plane",
          "location": {
            "lon":  118.8924004074097,
            "lat":   31.32729921232273
          }
        }
      }
    }
  }
}
感谢观看


 2496
2496

 被折叠的 条评论
为什么被折叠?


