


路由+面包屑联动
vite+vue3+elementplus+路由
基于路由的话,可以做到无论是点击菜单栏,还是点击面包屑,还是直接强行修改ulr,面包屑都能得到响应.
大概效果:
1 main.js + App.vue
main.js
import App from    './App.vue'
import router from './router'
const app = createApp(App)
app.use(router)
app.mount('#app')
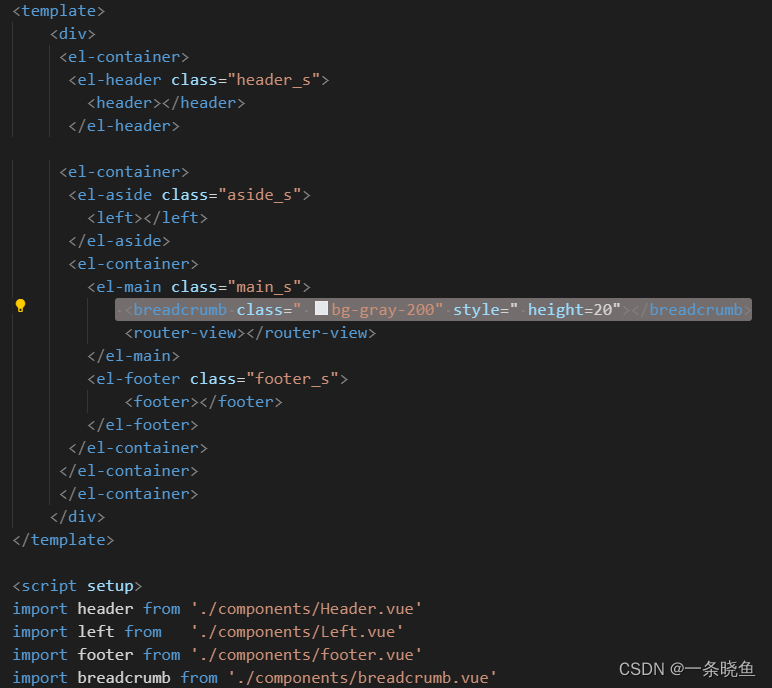
App.vue:
App直接就是 header+aside+main+footer的布局
main = 面包屑 + 路由
2 路由配置
v1
____sub1
____sub2
____sub3
____sub4:{sub-1,sub-2}
v2
v3
v4
{
            path: '/v1',
            name: 'v1',
            //component: index,
            redirect:'/v1/sub1',// 进入/index的时候,重定向到/index/a1
            meta: {keepAlive: true},
            children: [  //使用嵌套路由
                {
                    path: 'sub1',
                    name: 'sub1',
                    component:moves2
                },
                {
                    path: 'sub2',
                    name: 'sub2',
                    component:moves1
                },
                {
                    path: 'sub3',
                    name: 'sub3',
                    component:moves2
                },
                {
                    path: 'sub4',
                    name: 'sub4',
                    redirect:'/v1/sub4/sub-1',
                    meta: {keepAlive: true},
                    children: [  //使用嵌套路由
                        {
                            path: 'sub-1',
                            name: 'sub-1',
                            component:moves1
                        }
                    ]
                },
            ]
        },
        {
            path: '/v2',
            name: 'v2',
            component: moves2,
            props:true,
        },
        {
            path: '/v3',
            name: 'v3',
            component: moves1,
            props:true,
        },
        {
            path: '/v4',
            name: 'v4',
            component: moves2,
            props:true,
        },
3 aside.vue
<template>
    <el-row class="tac">
      <el-col :span="24">
        <h5 class="mb-2">Custom colors</h5>
        <el-menu
          active-text-color="#ffd04b"
          background-color="#545c64"
          class="el-menu-vertical-demo"
          default-active="2"
          text-color="#fff"
          @open="handleOpen"
          @close="handleClose"
          @select="handleSelect"
        >
          <el-sub-menu index="v1">
            <template #title>
              <el-icon><location /></el-icon>
              <span>Navigator One</span>
            </template>
            <el-menu-item-group title="Group One">
              <el-menu-item index="sub1">item one</el-menu-item>
              <el-menu-item index="sub2">item two</el-menu-item>
            </el-menu-item-group>

            <el-menu-item-group title="Group Two">
              <el-menu-item index="sub3">item three</el-menu-item>
            </el-menu-item-group>

            <el-sub-menu index="sub4">
              <template #title>item four</template>
              <el-menu-item index="sub-1">item one</el-menu-item>
            </el-sub-menu>
          </el-sub-menu>

          <el-menu-item index="v2">
            <el-icon><document /></el-icon>
            <span>Navigator Two</span>
          </el-menu-item>
          <el-menu-item index="v3">
            <el-icon><document /></el-icon>
            <span>Navigator Three</span>
          </el-menu-item>
          <el-menu-item index="v4">
            <el-icon><setting /></el-icon>
            <span>Navigator Four</span>
          </el-menu-item>
        </el-menu>
      </el-col>
    </el-row>
  </template>

<script>
  import {  getCurrentInstance } from "vue";
  //const { proxy } = getCurrentInstance();

  import {
    Document,
    Menu as IconMenu,
    Location,
    Setting,
  } from '@element-plus/icons-vue'


  export default{
        setup(){
            const handleClose2 = (key, keyPath) => {
                console.log(key, keyPath)
            }
            const  handleOpen2 = (key, keyPath) => {
                    console.log(key, keyPath)
                }
                return {handleClose2,handleOpen2 }
    },
  methods: {
    handleOpen(key, keyPath) {
        console.log("methods open",key, keyPath)
    },
    handleClose(key, keyPath){
        console.log("methods close",key, keyPath)
    },
    handleSelect(key, keyPath){
        let fullpath = '/'
        let i = 0
        for (i = 0; i < keyPath.length; i++) {
            fullpath += keyPath[i] + "/";
        }
        console.log("methods select",key, keyPath,fullpath)
        this.$router.push(fullpath)
    },
  }
}
  </script>
核心: 当点击菜单栏的时候,页面跳转
在handleSelect():里面进行路由跳转
4 面包屑
<template>
    <el-breadcrumb :separator-icon="ArrowRight">
        <el-breadcrumb-item :to="{ path: '/v1/sub1' }">home</el-breadcrumb-item>
      <el-breadcrumb-item :to="item.path" v-for="(item) in List.data" :key="item.path">
        {{ item.name }}
      </el-breadcrumb-item>

    </el-breadcrumb>
</template>

<script setup>
import { ArrowRight } from '@element-plus/icons-vue'
import { useRoute } from 'vue-router'
import { ref ,computed,reactive} from "vue";

const List = reactive({data:[]})
const route = useRoute()
List.data = computed(() => route.matched)

</script>
1.computed() 功能:关注的东西一旦发生变化,就会调用该函数.
页面的跳转都是经过路由的,route.matched记录了当前路由信息(跳转之后的).
2. reactive() 响应式数据.
route.matched 变 =>List.data变 =>页面响应
无论是点击菜单栏,还是点击面包屑,还是直接强行修改ulr,面包屑都能得到响应.


 1873
1873


 被折叠的 条评论
为什么被折叠?
被折叠的 条评论
为什么被折叠?
 到【灌水乐园】发言


