


首先我们要准备flume的安装包,这里我们安装的flume版本是apache-flume-1.6.0-bin.tar.gz
flume的运行环境是基于java环境下运行的,所以在安装flume之前我么你要先安装java环境
安装好java环境并测试成功后,我们开始安装flume
1、flume安装包放在/usr/flume,先解压安装包,解压了就可以了,不用再去安装啦tar -zxvf apache-flume-1.6.0-bin.tar.gz
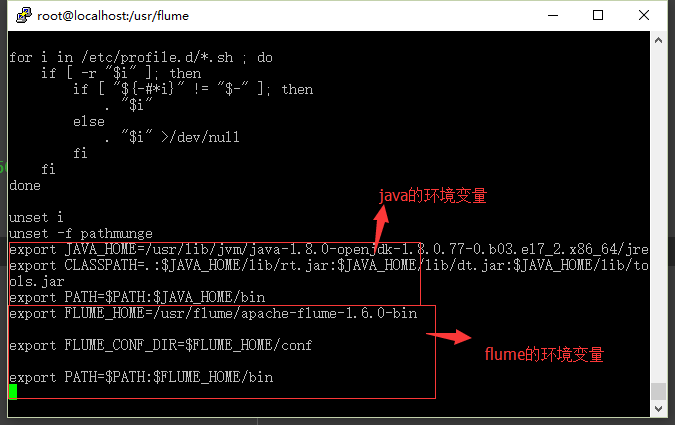
2、配置环境变量vi /etc/profile 在最后添加以下内容: export FLUME_HOME=/usr/flume/apache-flume-1.6.0-bin export FLUME_CONF_DIR=$FLUME_HOME/conf export PATH=$PATH:$FLUME_HOME/binsource /etc/profile#使配置生效 echo $PATH #查看环境变量
3、配置flume的基本配置(引入java环境)
(1):修改usr/flume/apache-flume-1.6.0-bin/conf/flume-env.sh.template# Licensed to the Apache Software Foundation (ASF) under one # or more contributor license agreements. See the NOTICE file # distributed with this work for additional information # regarding copyright ownership. The ASF licenses this file # to you under the Apache License, Version 2.0 (the # "License"); you may not use this file except in compliance # with the License. You may obtain a copy of the License at # # http://www.apache.org/licenses/LICENSE-2.0 # # Unless required by applicable law or agreed to in writing, software # distributed under the License is distributed on an "AS IS" BASIS, # WITHOUT WARRANTIES OR CONDITIONS OF ANY KIND, either express or implied. # See the License for the specific language governing permissions and # limitations under the License. # If this file is placed at FLUME_CONF_DIR/flume-env.sh, it will be sourced # during Flume startup. # Enviroment variables can be set here. export JAVA_HOME=/usr/lib/jvm/java-1.8.0-openjdk-1.8.0.91-0.b14.el7_2.x86_64/jre # Give Flume more memory and pre-allocate, enable remote monitoring via JMX export JAVA_OPTS="-Xms100m -Xmx2000m -Dcom.sun.management.jmxremote" # Note that the Flume conf directory is always included in the classpath. #FLUME_CLASSPATH=""(2)新建一个test.conf配置flume的source,实现简单的小例子,放在conf文件夹里面
a1.sources = r1
a1.sinks = k1
a1.channels = c1
# Describe/configure the source
a1.sources.r1.type = netcat
a1.sources.r1.bind = localhost
a1.sources.r1.port = 44444
# Describe the sink
a1.sinks.k1.type = logger
# Use a channel which buffers events in memory
a1.channels.c1.type = memory
a1.channels.c1.capacity = 1000
a1.channels.c1.transactionCapacity = 100
# Bind the source and sink to the channel
a1.sources.r1.channels = c1
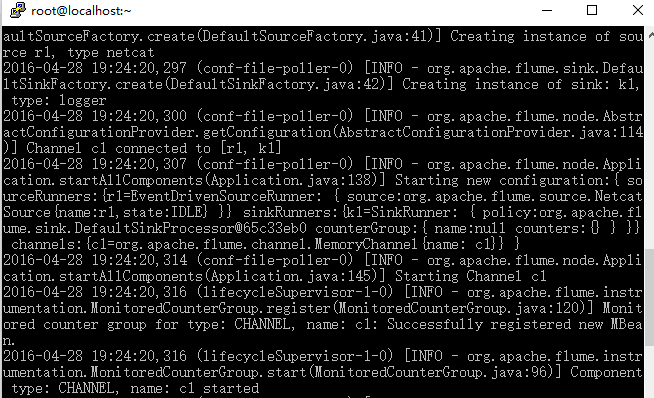
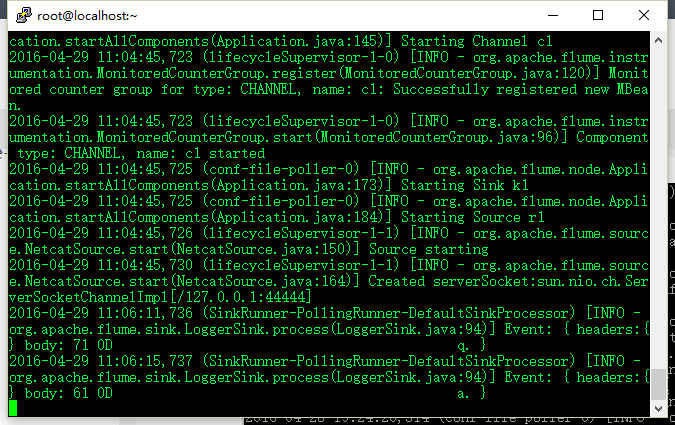
a1.sinks.k1.channel = c1启动flume:/usr/flume/apache-flume-1.6.0-bin/bin/flume-ng agent --conf /usr/flume/apache-flume-1.6.0-bin/conf/ --conf-file /usr/flume/apache-flume-1.6.0-bin/conf/test.conf --name a1 -Dflume.root.logger=INFO,console如图表示flume启动成功
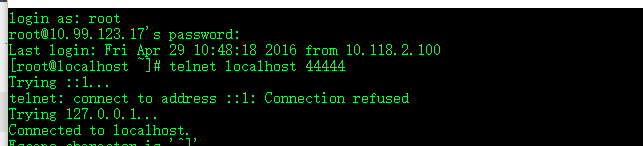
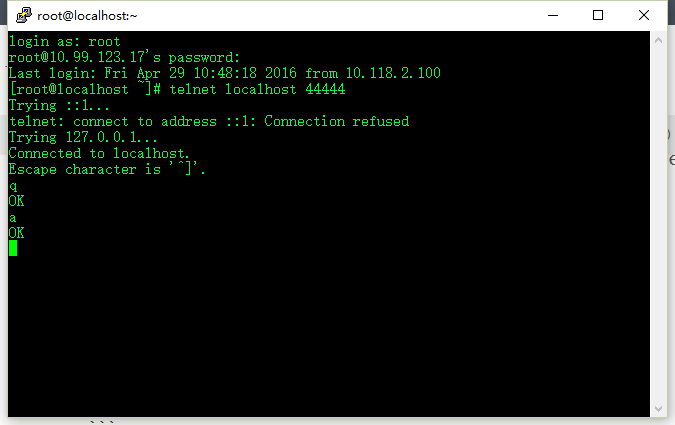
(3)再打开一个终端:telnet localhost 44444
如果提示无法识别telnetyum install telnet发送
结果


总结:到这里flume的安装配置,以及最简单的实例已经介绍完毕,这只是flume众多手机source中的一种,下面会一一举例。(flume集中简单的实例)


 1万+
1万+

 被折叠的 条评论
为什么被折叠?
被折叠的 条评论
为什么被折叠?
 到【灌水乐园】发言


