


 https://github.com/SamSamhuns/yolov5_export_cpu
主要配置两个环境即可
新建一个虚拟环境,我是新建一个python3.7的环境
然后进去openvino官网下载
 https://www.intel.com/content/www/us/en/developer/tools/openvino-toolkit/download.html
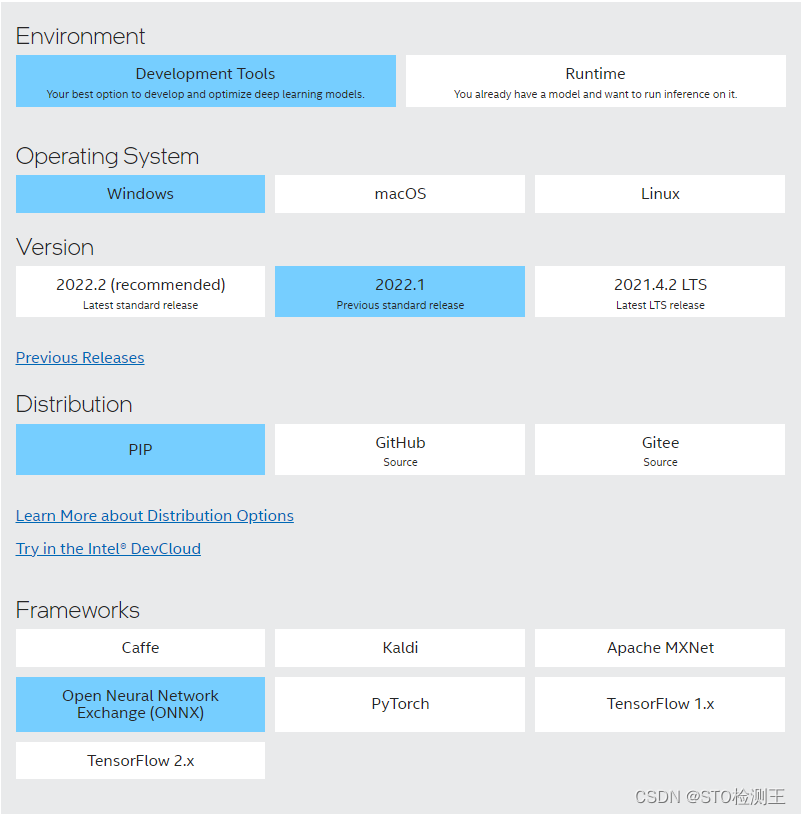
下面就会显示:
pip install openvino-dev[ONNX]==2022.1.0
然后再安装opencv-python
pip install opencv-python然后可以按着第二github链接操作即可,前提是将权重文件转成xml和bin文件格式
主要配置两个环境即可
新建一个虚拟环境,我是新建一个python3.7的环境
然后进去openvino官网下载
下面就会显示:
pip install openvino-dev[ONNX]==2022.1.0
然后再安装opencv-python
pip install opencv-python然后可以按着第二github链接操作即可,前提是将权重文件转成xml和bin文件格式
 3199
1809
3199
1809


 被折叠的 条评论
为什么被折叠?
被折叠的 条评论
为什么被折叠?
 到【灌水乐园】发言


