


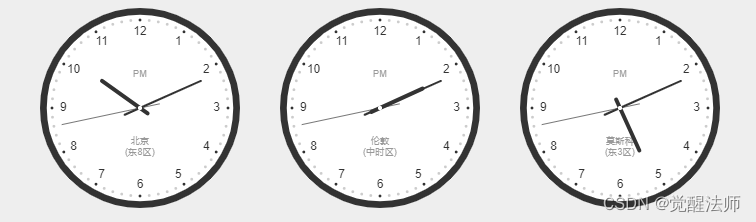
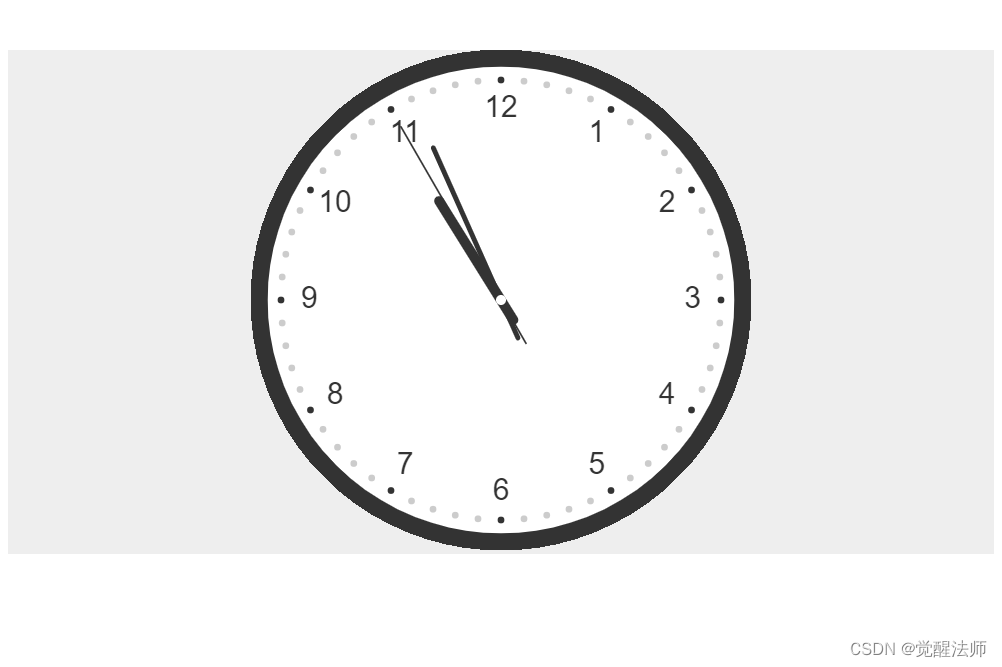
这里使用Javascript的class和canvas技术实现时钟的绘制,并且通过类实例来实现不同时区的时间显示,增强复用性。
如下图:
一、基本知识
在绘制前,我们先熟悉下本次使用到的Canvas相关基础知识,以便后面更好理解并使用。
1.1 颜色、样式
| 属性 | 描述 |
|---|---|
| fillStyle | 设置或返回用于填充绘画的颜色、渐变或模式 |
| strokeStyle | 设置或返回用于笔触的颜色、渐变或模式 |
1.2 线条样式
| 属性 | 描述 |
|---|---|
| lineCap | 设置或返回线条的结束端点样式 |
| lineWidth | 设置或返回当前的线条宽度 |
1.3 清除画面
| 方法 | 描述 |
|---|---|
| clearRect() | 在给定的矩形内清除指定的像素 |
1.4 路径
| 方法 | 描述 |
|---|---|
| fill() | 填充当前绘图(路径) |
| stroke() | 绘制已定义的路径 |
| beginPath() | 起始一条路径,或重置当前路径 |
| moveTo() | 把路径移动到画布中的指定点,不创建线条 |
| closePath() | 创建从当前点回到起始点的路径 |
| lineTo() | 添加一个新点,然后在画布中创建从该点到最后指定点的线条 |
| arc() | 创建弧/曲线(用于创建圆形或部分圆) |
1.5 转换
| 方法 | 描述 |
|---|---|
| translate() | 重新映射画布上的 (0,0) 位置 |
1.6 文本
| 属性 | 描述 |
|---|---|
| font | 设置或返回文本内容的当前字体属性 |
| textAlign | 设置或返回文本内容的当前对齐方式 |
| textBaseline | 设置或返回在绘制文本时使用的当前文本基线 |
| 方法 | 描述 |
|---|---|
| fillText() | 在画布上绘制“被填充的”文本 |
1.7 像素操作
| 属性 | 描述 |
|---|---|
| width | 返回 ImageData 对象的宽度 |
| height | 返回 ImageData 对象的高度 |
1.8 其他
| 方法 | 描述 |
|---|---|
| save() | 保存当前环境的状态 |
| restore() | 返回之前保存过的路径状态和属性 |
此次使用到的知识点,上述已全部罗列。需要了解更多属性和方法,请查询canvas文档。
二、绘制时钟
2.1 创建html和js文件
首先我们创建index.html文件,以及创建js/clock.js文件。在html代码中添加基本样式,以及引入js/clock.js。
javascript代码如下:
/**
 * 时钟类
 */
class Clock{
    constructor(idName){

    }
}
html代码如下:
<!DOCTYPE html>
<html lang="en">
<head>
    <meta charset="UTF-8">
    <meta http-equiv="X-UA-Compatible" content="IE=edge">
    <meta name="viewport" content="width=device-width, initial-scale=1.0">
    <title>时钟</title>
    <script type="text/javascript" src="js/clock.js"></script>
    <style type="text/css">
        .wrap{ width: 100%; text-align: center; margin: 100px 0; background-color: #eee; }
        .wrap .clock{ margin: 0 auto; }
    </style>
</head>
<body>
    <div class="wrap">
        <canvas id="clock" width="300px" height="300px" class="clock"></canvas>
    </div>

<script type="text/javascript">
window.onload = function(){
    var clock = new Clock('clock');
}
</script>
</body>
</html>
此时页面效果如下:
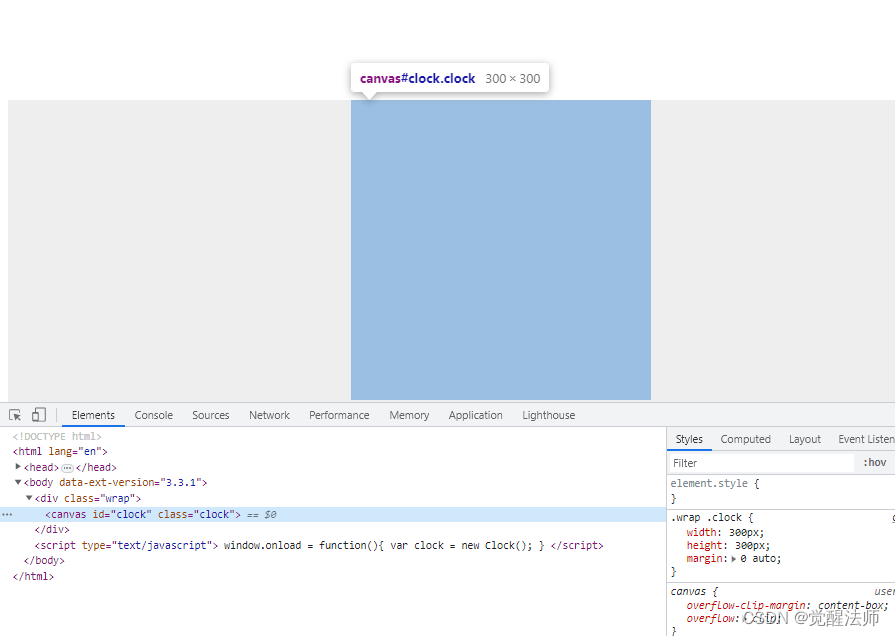
2.2 构造函数
我们在构造函数中,定义变量,获取画布、画布宽度和高度,时钟圆半径等。
代码如下:
/**
* 构造函数
* @param {String} idName
*/
constructor(idName){
this.canvas = document.getElementById(idName);
this.ctx = this.canvas.getContext('2d');
this.width = this.canvas.width;
this.height = this.canvas.height;
//计算半径
this.radius = this.width / 2;
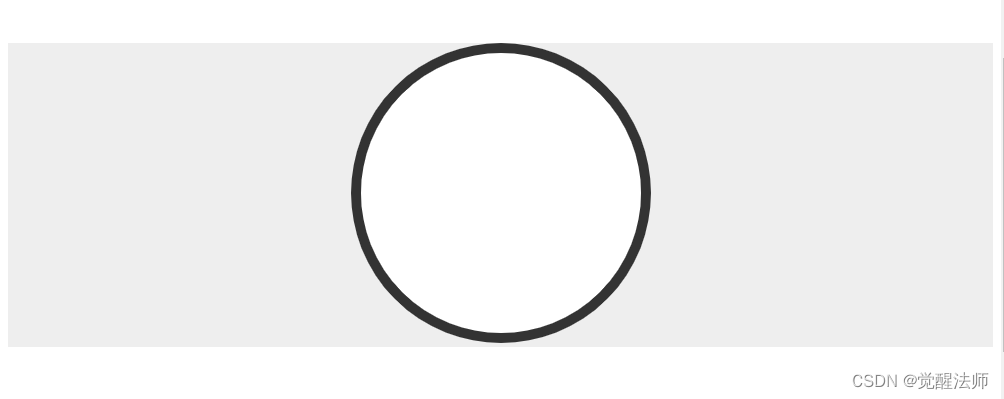
}2.3 绘制时钟边框
在类中定义start()函数和drawClock()函数,用于开始绘制执行功能。
在开始绘制前,通过translate设置绘制中心点位置;在填充圆的底色时,先设置用fillStyle设置底色颜色值,然后通过arc()函数进行绘制,圆的半径实际为画布宽一半减去线宽;注意是,fill()为填充,stroke()绘制路径,所以圆的边框我们使用stroke()来实现。
clock.js代码如下:
/**
 * 时钟类
 */
class Clock{
    /**
     * 构造函数
     * @param {String} idName
     */
    constructor(idName){
        this.canvas = document.getElementById(idName);
        this.ctx = this.canvas.getContext('2d');
        this.width = this.canvas.width;
        this.height = this.canvas.height;
        //计算半径
        this.radius = this.width / 2;
    }

    //绘制时钟
    drawClock(){
        //设置中心位置
        this.ctx.translate(this.radius, this.radius);

        //绘制底色
        this.ctx.beginPath();
        this.ctx.fillStyle = "#fff";
        this.ctx.arc(0, 0, this.radius - this.ctx.lineWidth, 0, 2*Math.PI, false);
        this.ctx.fill();

        //绘制时针边框
        this.ctx.beginPath();
        this.ctx.lineWidth = 10;
        this.ctx.strokeStyle = '#333333';
        this.ctx.arc(0, 0, this.radius - this.ctx.lineWidth / 2, 0, 2*Math.PI, false);
        this.ctx.stroke();
    }

    /**
     * 开始计时
     */
    start(){
        this.drawClock();
    }
}
页面效果图下:
2.4 绘制数字
现在我们给时钟添加对应时钟数值,在绘制前,先设置字体、颜色、文字上下居中等。然后通过for循环绘制到12小时数值,圆的起始点为0,结束点为2*Math.PI,所以除以12获取平均弧度,通过循环获取不同位置数值的弧度值。
x和y坐标值获取:
- x坐标点公式:Math.cos(圆弧度) * 圆半径
- y坐标点公式:Math.sin(圆弧度) * 圆半径
在drawClock()函数中追加如下代码:
//绘制时钟
drawClock(){
	//略

	//绘制数值
	this.ctx.font = "18px Arial";
	this.ctx.fillStyle = "#333";
	this.ctx.textAlign = "center";
	this.ctx.textBaseline = "middle";
	for(var i = 0; i < 12; i++){
		var radian = 2*Math.PI / 12 * i;
		//this.radius - 30是否半径缩小30像素
		var x = Math.cos(radian) * (this.radius - 35);
		var y = Math.sin(radian) * (this.radius - 35);
		this.ctx.fillText((i+1).toString(), x, y);
	}
}
效果如下图:

此时大家会发现,数值对应位置好像不对。这是因为canvas绘制坐标,是从1的位置开始的,如下图:
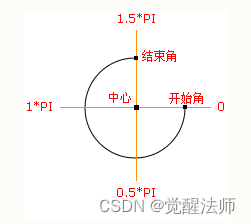
所以,我们要想从1.5*PI位置开始,其实也很简单,将12移到10的位置,i-2即可。代码如下:
//绘制时钟
drawClock(){
	//略

	//绘制数值
	this.ctx.font = "18px Arial";
	this.ctx.fillStyle = "#333";
	this.ctx.textAlign = "center";
	this.ctx.textBaseline = "middle";
	for(var i = 0; i < 12; i++){
		var radian = 2*Math.PI / 12 * (i-2);
		//this.radius - 30是否半径缩小30像素
		var x = Math.cos(radian) * (this.radius - 35);
		var y = Math.sin(radian) * (this.radius - 35);
		this.ctx.fillText((i+1).toString(), x, y);
	}
}
此时效果如下:
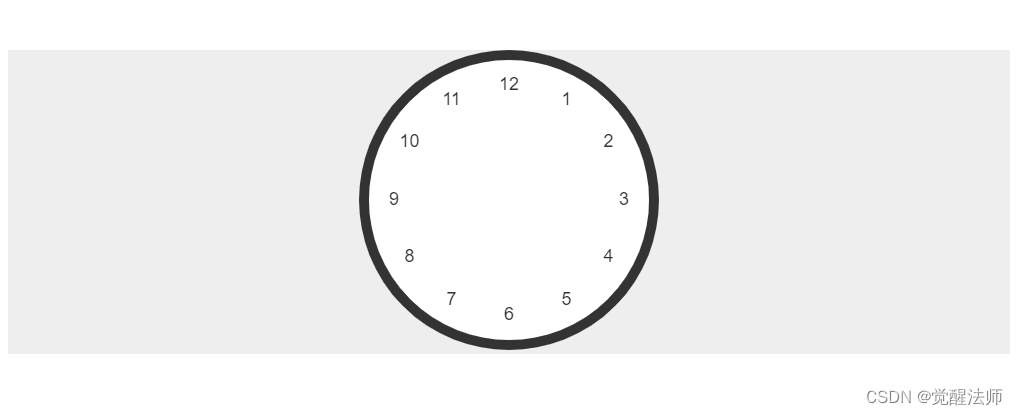
2.5 绘制时钟刻度
这里我还是和2.4中一样,通过计算弧度,来获取对应点的坐标点。
代码如下:
//绘制时钟
drawClock(){
	//略...

	//绘制圆点
	for(var j = 0; j < 60; j++){
		var radian = 2*Math.PI / 60 * (j - 15);
		//半径减去18时,圆点坐标向内缩小18像素
		var x = Math.cos(radian) * (this.radius - 18);
		var y = Math.sin(radian) * (this.radius - 18);

		this.ctx.beginPath();
		this.ctx.arc(x, y, 2, 2*Math.PI, 0, false);
		this.ctx.fill();
		this.ctx.closePath();
	}
}
效果如下:
此时需要将正对数值的点显示为黑色,其他显示为灰色,则在循环是通过模5即可判断出正对数值位置的点坐标,代码如下:
//绘制时钟
drawClock(){
//略...
//绘制圆点
for(var j = 0; j < 60; j++){
var radian = 2*Math.PI / 60 * (j - 15);
//半径减去18时,圆点坐标向内缩小18像素
var x = Math.cos(radian) * (this.radius - 18);
var y = Math.sin(radian) * (this.radius - 18);
this.ctx.beginPath();
//对应数值位置圆点标记为黑色
if(j%5==0){
this.ctx.fillStyle = "#333";
}else{
this.ctx.fillStyle = "#ccc";
}
this.ctx.arc(x, y, 2, 2*Math.PI, 0, false);
this.ctx.fill();
this.ctx.closePath();
}
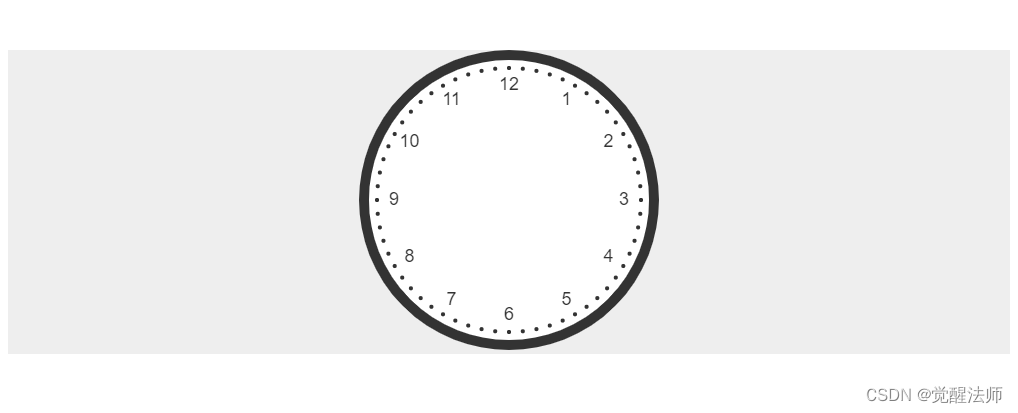
}效果如下图:

2.6 绘制时钟
接下来进行时针的绘制,在Clock类中定义方法drawHour(),用来绘制时钟位置。在drawClock()函数中,使用匿名函数统一获取日期对象,用于时分秒的绘制。
使用canvas中lineWidth属性设置线条宽度;lineCap属性,将线条两端设置为圆角。
moveTo设置为moveTo(0, 0)则从圆中心点位置开始绘制,此时将线条结束位置坐标加上负值,则进行反向绘制,使时针往后突出20%。
时钟数为12,则弧度平均值为2*Math.PI/12。在计算弧度时,hour为什么需要减3,这和前面数值绘制时,减2是同个意思。
代码如下:
/**
 * 时钟类
 */
class Clock{
    //略...

    //绘制时钟
    drawClock(){
        //略...

        //绘制时针
        (date => {
            //绘制时分秒
            this.drawHour(date.getHours());
        })(new Date());
    }

    /**
     * 绘制时钟
     * @param {*} hour
     */
    drawHour(hour){
        var radian = 2*Math.PI / 12 * (hour-3);
        var x = Math.cos(radian) * (this.radius - 80);
        var y = Math.sin(radian) * (this.radius - 80);

        //时针
        this.ctx.beginPath();
        this.ctx.lineWidth = 6;
        this.ctx.lineCap = 'round';
        this.ctx.moveTo(-x * .2, -y * .2);
        this.ctx.lineTo(x, y);
        this.ctx.stroke();
    }

    /**
     * 开始计时
     */
    start(){
        this.drawClock();
    }

}
效果如下:
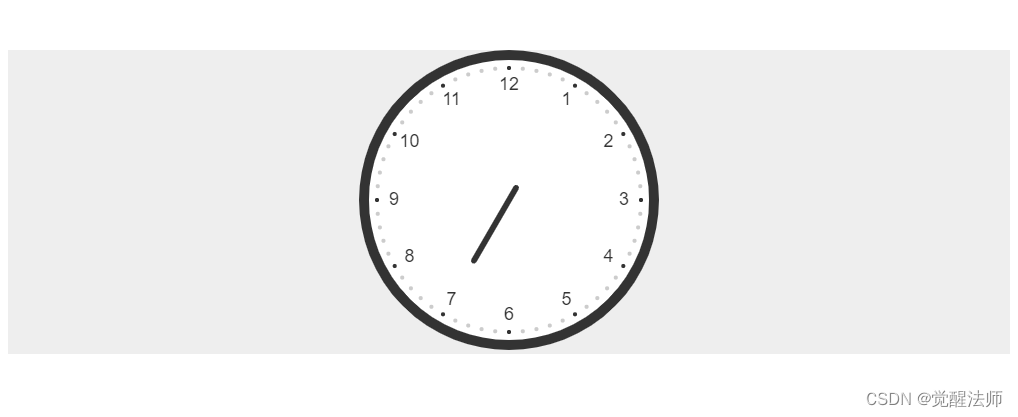
2.7 绘制分钟
在绘制分钟时,这里弧度平均值为2*Math.PI/60。同理,分钟值需减15将值偏移到12位置。
代码如下:
/**
 * 时钟类
 */
class Clock{
   //略...

    //绘制时钟
    drawClock(){
        //略...

        //绘制时针
        (date => {
            //绘制时分秒
            this.drawHour(date.getHours());
            this.drawMinute(date.getMinutes());
        })(new Date());
    }

	//略...

    /**
     * 绘制分针
     * @param {*} minute
     */
    drawMinute(minute){
        var radian = 2*Math.PI / 60 * (minute - 15);
        var x = Math.cos(radian) * (this.radius - 50);
        var y = Math.sin(radian) * (this.radius - 50);

        //分针
        this.ctx.beginPath();
        this.ctx.lineWidth = 3;
        this.ctx.lineCap = 'round';
        this.ctx.moveTo(-x * .25, -y * .25);
        this.ctx.lineTo(x, y);
        this.ctx.stroke();
    }

    /**
     * 开始计时
     */
    start(){
        this.drawClock();
    }

}
效果如下:
2.8 绘制秒钟
秒钟的绘制和分钟是一样的,只是线宽、线长作了细微调整。
代码如下:
/**
* 时钟类
*/
class Clock{
//略...
//绘制时钟
drawClock(){
//略...
//绘制时针
(date => {
//绘制时分秒
this.drawHour(date.getHours());
this.drawMinute(date.getMinutes());
this.drawSecond(date.getSeconds());
})(new Date());
}
//略...
/**
* 绘制秒钟
* @param {*} second
*/
drawSecond(second){
var radian = 2*Math.PI / 60 * (second - 15);
var x = Math.cos(radian) * (this.radius - 30);
var y = Math.sin(radian) * (this.radius - 30);
//秒针
this.ctx.beginPath();
this.ctx.lineWidth = 1;
this.ctx.lineCap = 'round';
this.ctx.moveTo(-x * .25, -y * .25);
this.ctx.lineTo(x, y);
this.ctx.stroke();
}
/**
* 开始计时
*/
start(){
this.drawClock();
}
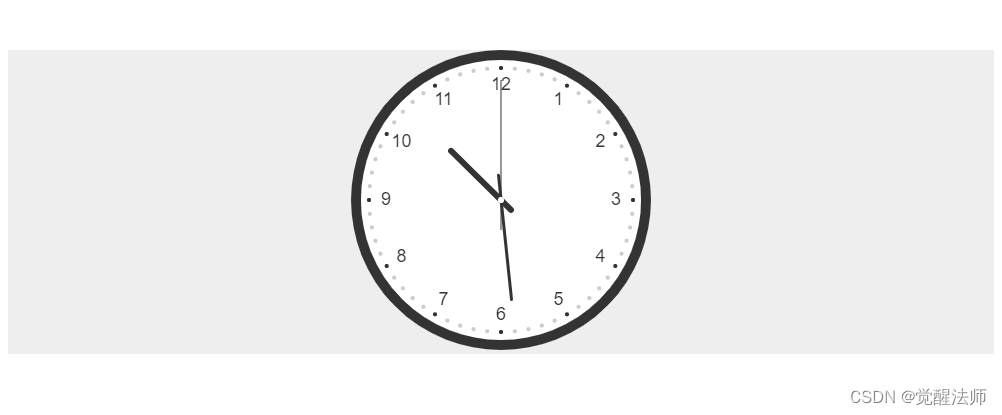
}效果如下:
2.9 绘制中心圆点
绘制中心圆点比较简单,在drawClock()函数后面追加圆点即可。代码如下:
//绘制时钟
drawClock(){
//略...
//绘制时针
(date => {
//绘制时分秒
this.drawHour(date.getHours());
this.drawMinute(date.getMinutes());
this.drawSecond(date.getSeconds());
})(new Date());
//绘制中间圆点
this.ctx.beginPath();
this.ctx.fillStyle = "#fff";
this.ctx.arc(0, 0, 3, 2*Math.PI, 0, false);
this.ctx.fill();
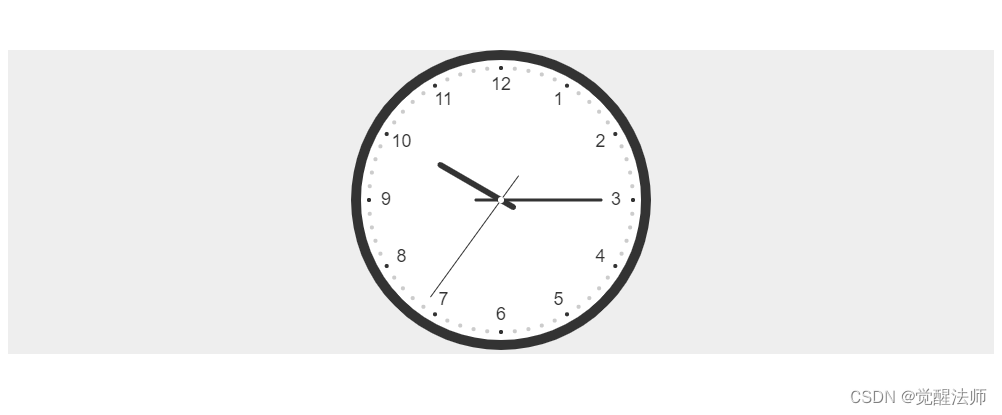
}效果如下:
2.10 调整时钟位置
不知大家有没有发现,绘制到现在,不管分钟在什么位置,时针始终指着对应小时数。这问题解决也不是难事,如10点到11点,走完1小时分钟需要走60步,所以往前偏移弧度为:2*Math.PI * (分钟数 / 60),将此追加到时钟的弧度上,则为:2*Math.PI * (小时数 - 3 + (分钟数 / 60))。代码如下:
/**
 * 绘制时钟
 * @param {*} hour
 * @param {*} minute
 */
drawHour(hour, minute){
	var radian = 2*Math.PI / 12 * (hour-3 + (minute/60));
	var x = Math.cos(radian) * (this.radius - 80);
	var y = Math.sin(radian) * (this.radius - 80);

	//时针
	this.ctx.beginPath();
	this.ctx.lineWidth = 6;
	this.ctx.lineCap = 'round';
	this.ctx.moveTo(-x * .2, -y * .2);
	this.ctx.lineTo(x, y);
	this.ctx.stroke();
}
匿名函数中,调用drawHour()函数时,添加分钟值,代码如下:
 //绘制时针
(date => {
	//绘制时分秒
	this.drawHour(date.getHours(), date.getMinutes());
	this.drawMinute(date.getMinutes());
	this.drawSecond(date.getSeconds());
})(new Date());
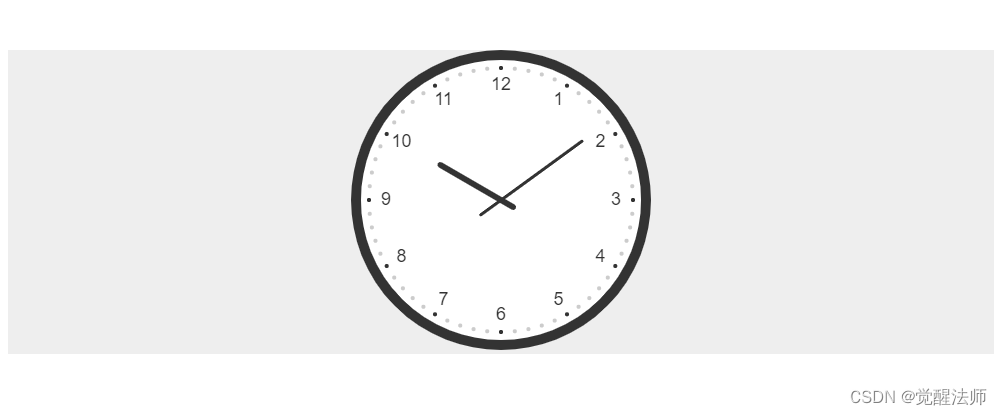
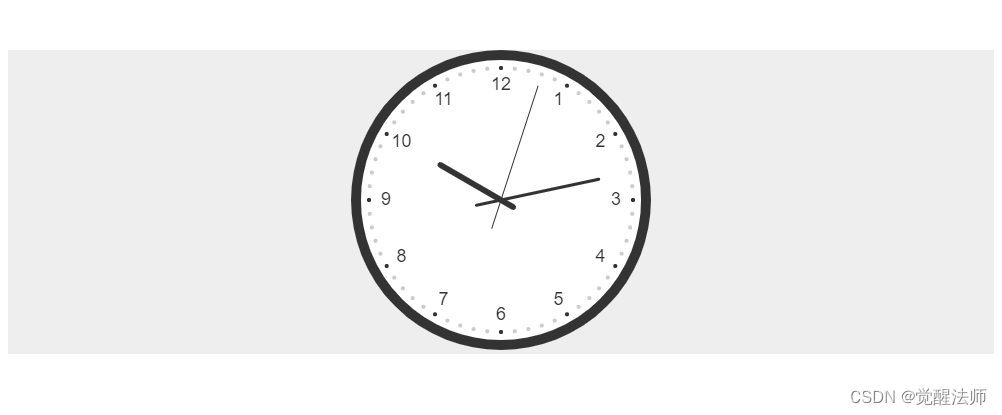
效果如下:
2.11 让指针走起来
如何让时分秒指针动起来?这里我们使用setInterval()定时器,每隔1秒钟,重新绘制一次时钟,即可实现。
注意在drawClock()开始和结果位置,分别添加save()和restore()函数。否则重新调用drawClock()函数时,会出现偏移现象。
- save()函数:用来保存最近一次的canvas状态和属性。
- restore()函数:用来获取save()函数保存的canvas之前的状态和属性。防止save后对Canvas执行的平移、放缩、旋转、错切、裁剪等可以改变画布的操作对后续的绘制的影响。
代码如下:
/**
 * 时钟类
 */
class Clock{
    //略...

    //绘制时钟
    drawClock(){
        this.ctx.save();

        //设置中心位置
        this.ctx.translate(this.radius, this.radius);

        //略...

        //绘制中间圆点
        this.ctx.beginPath();
        this.ctx.fillStyle = "#fff";
        this.ctx.arc(0, 0, 3, 2*Math.PI, 0, false);
        this.ctx.fill();

        this.ctx.restore();
    }

    //略...

    /**
     * 开始计时
     */
    start(){
        this.drawClock();

        setInterval(() => {
            this.drawClock();
        }, 1000);
    }

}
此时,时分秒则动起来了。
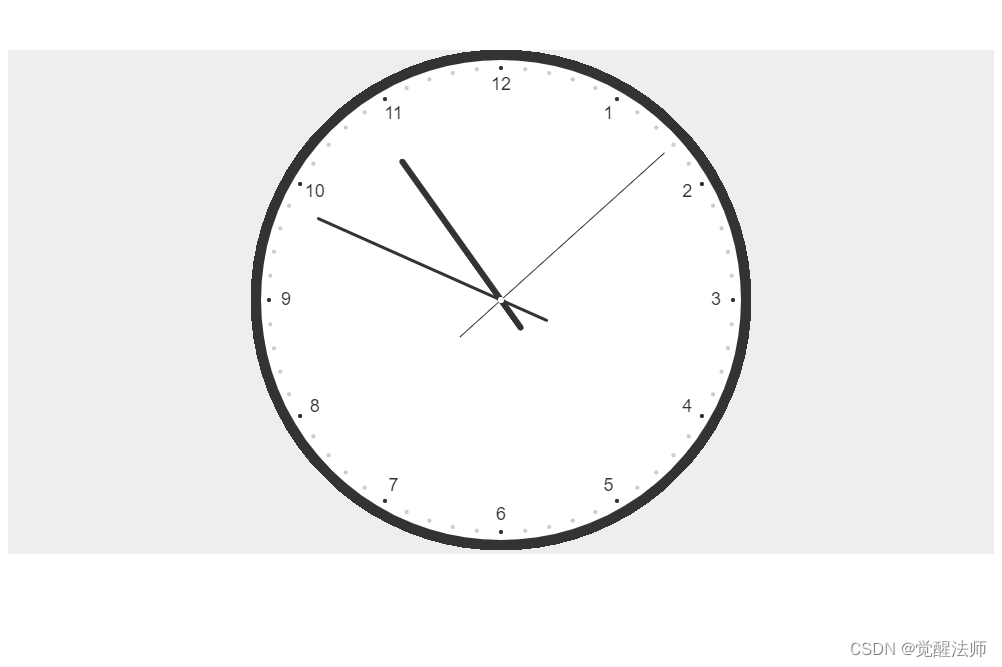
2.12 等比缩放
如果我们把canvas画布大小增大或缩小,则此时时钟效果如下:
代码如下:
<canvas id="clock" width="500px" height="500px" class="clock"></canvas>将原来300放大到500,可以看出时钟的是根据画布大小进行缩放了,但时数值、间距和线宽比例不协调。这里我们该怎么处理呢,其实原时钟我们是在300像素基础上开发的,如果画布放大或缩小了,只要按比例进行缩放即可。
这块就不细说了,直接贴代码,被添加比例计算值位置,自己花时间细心琢磨下即可明白。
代码如下:
/**
 * 时钟类
 */
class Clock{
    /**
     * 构造函数
     * @param {String} idName
     */
    constructor(idName){
        this.canvas = document.getElementById(idName);
        this.ctx = this.canvas.getContext('2d');
        this.width = this.canvas.width;
        this.height = this.canvas.height;
        //时针默认以300像素进行绘制,canvas画布放大或缩小情况下,需按比例进行修整
        this.ratio = this.width/300;
        //计算半径
        this.radius = this.width / 2;
    }

    //绘制时钟
    drawClock(){
        this.ctx.save();
        //设置中心位置
        this.ctx.translate(this.radius, this.radius);

        //绘制底色
        this.ctx.beginPath();
        this.ctx.fillStyle = "#fff";
        this.ctx.arc(0, 0, this.radius - this.ctx.lineWidth, 0, 2*Math.PI, false);
        this.ctx.fill();

        //绘制时针边框
        this.ctx.beginPath();
        this.ctx.lineWidth = 10 * this.ratio;
        this.ctx.strokeStyle = '#333333';
        this.ctx.arc(0, 0, this.radius - this.ctx.lineWidth / 2, 0, 2*Math.PI, false);
        this.ctx.stroke();

        //绘制数值
        this.ctx.font = (18 * this.ratio) + "px Arial";
        this.ctx.fillStyle = "#333";
        this.ctx.textAlign = "center";
        this.ctx.textBaseline = "middle";
        for(var i = 0; i < 12; i++){
            var radian = 2*Math.PI / 12 * (i-2);
            //this.radius - 30是否半径缩小30像素
            var x = Math.cos(radian) * (this.radius - 35 * this.ratio);
            var y = Math.sin(radian) * (this.radius - 35 * this.ratio);
            this.ctx.fillText((i+1).toString(), x, y);
        }

        //绘制圆点
        for(var j = 0; j < 60; j++){
            var radian = 2*Math.PI / 60 * (j - 15);
            //半径减去18时,圆点坐标向内缩小18像素
            var x = Math.cos(radian) * (this.radius - 18 * this.ratio);
            var y = Math.sin(radian) * (this.radius - 18 * this.ratio);

            this.ctx.beginPath();
            //对应数值位置圆点标记为黑色
            if(j%5==0){
                this.ctx.fillStyle = "#333";
            }else{
                this.ctx.fillStyle = "#ccc";
            }
            this.ctx.arc(x, y, 2 * this.ratio, 2*Math.PI, 0, false);
            this.ctx.fill();
            this.ctx.closePath();
        }


        //绘制时针
        (date => {
            //绘制时分秒
            this.drawHour(date.getHours(), date.getMinutes());
            this.drawMinute(date.getMinutes());
            this.drawSecond(date.getSeconds());
        })(new Date());

        //绘制中间圆点
        this.ctx.beginPath();
        this.ctx.fillStyle = "#fff";
        this.ctx.arc(0, 0, 3 * this.ratio, 2*Math.PI, 0, false);
        this.ctx.fill();

        this.ctx.restore();
    }

    /**
     * 绘制时钟
     * @param {*} hour
     * @param {*} minute
     */
    drawHour(hour, minute){
        var radian = 2*Math.PI / 12 * (hour-3 + (minute/60));
        var x = Math.cos(radian) * (this.radius - 80 * this.ratio);
        var y = Math.sin(radian) * (this.radius - 80 * this.ratio);

        //时针
        this.ctx.beginPath();
        this.ctx.lineWidth = 6 * this.ratio;
        this.ctx.lineCap = 'round';
        this.ctx.moveTo(-x * .2, -y * .2);
        this.ctx.lineTo(x, y);
        this.ctx.stroke();
    }

    /**
     * 绘制分针
     * @param {*} minute
     */
    drawMinute(minute){
        var radian = 2*Math.PI / 60 * (minute - 15);
        var x = Math.cos(radian) * (this.radius - 50 * this.ratio);
        var y = Math.sin(radian) * (this.radius - 50 * this.ratio);

        //分针
        this.ctx.beginPath();
        this.ctx.lineWidth = 3 * this.ratio;
        this.ctx.lineCap = 'round';
        this.ctx.moveTo(-x * .25, -y * .25);
        this.ctx.lineTo(x, y);
        this.ctx.stroke();
    }


    /**
     * 绘制秒钟
     * @param {*} second
     */
    drawSecond(second){
        var radian = 2*Math.PI / 60 * (second - 15);
        var x = Math.cos(radian) * (this.radius - 30 * this.ratio);
        var y = Math.sin(radian) * (this.radius - 30 * this.ratio);

        //秒针
        this.ctx.beginPath();
        this.ctx.lineWidth = 1 * this.ratio;
        this.ctx.lineCap = 'round';
        this.ctx.moveTo(-x * .25, -y * .25);
        this.ctx.lineTo(x, y);
        this.ctx.stroke();
    }

    /**
     * 开始计时
     */
    start(){
        this.drawClock();

        setInterval(() => {
            this.drawClock();
        }, 1000);
    }

}
效果如下:
如上图,进行等比缩放后的时钟,和宽度为300时基本一致。
三、时区功能
3.1 定义对应时区数据
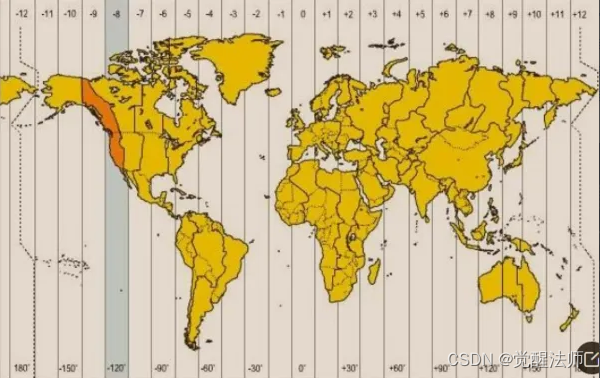
如上图,在clock.js中,定义时区数据,代码如下:
/**
 * 时区
 */
var TIME_ZONE = {
    London: {name: "伦敦", value: 0, zone: "中时区"},
    Berlin: {name: "柏林", value: 1, zone: "东1区"},
    Athens: {name: "雅典", value: 2, zone: "东2区"},
    Moscow: {name: "莫斯科", value: 3, zone: "东3区"},
    Kabul: {name: "喀布尔", value: 4, zone: "东4区"},
    NewDelhi: {name: "新德里", value: 5, zone: "东5区"},
    Colombo: {name: "科伦坡", value: 6, zone: "东6区"},
    Bangkok: {name: "曼谷", value: 7, zone: "东7区"},
    Beijing: {name: "北京", value: 8, zone: "东8区"},
    Tokyo: {name: "东京", value: 9, zone: "东9区"},
    Sydney: {name: "悉尼", value: 10, zone: "东10区"},
    SolomonIslands: {name: "所罗门群岛", value: 11, zone: "东11区"},
    Wellington: {name: "惠灵顿", value: 12, zone: "东12区"},
    CentralPacific: {name: "中太平洋", value: -12, zone: "西12区"},
    MidwayIsland: {name: "中途岛", value: -11, zone: "西11区"},
    Hawaii: {name: "夏威夷", value: -10, zone: "西10区"},
    Alaska: {name: "阿拉斯加", value: -9, zone: "西9区"},
    LosAngeles: {name: "洛杉矶", value: -8, zone: "西8区"},
    SaltLakeCity: {name: "盐湖城", value: -7, zone: "西7区"},
    MexicoCity: {name: "墨西哥城", value: -6, zone: "西6区"},
    Washington: {name: "华盛顿", value: -5, zone: "西5区"},
    Caracas: {name: "加拉加斯", value: -4, zone: "西4区"},
    RioDeJaneiro: {name: "里约热内卢", value: -3, zone: "西3区"},
    midAtlantic: {name: "中大西洋", value: -2, zone: "西2区"},
    DakarSenegal: {name: "塞内加尔达喀尔", value: -1, zone: "西1区"}
}
3.2 定义函数校验时区数据
在clock.js中定义函数,用来判断两数组长度是否相同,以及对应值是否相等。代码如下:
/**
 * 判断两数组是否相同
 * @param {*} arr1
 * @param {*} arr2
 * @returns 相等返回true,否则为false
 */
function isEqualArray(arr1, arr2){
    return arr1.length == arr2.length && arr1.every((v, i) => v == arr2[i]);
}
3.3 构造函数改造
在构造函数中,接收当前时钟以什么时区进行显示,代码如下:
/**
 * 构造函数
 * @param {String} idName
 * @param {Object} timeZone
 */
constructor(idName, timeZone){
	this.canvas = document.getElementById(idName);
	this.ctx = this.canvas.getContext('2d');
	this.width = this.canvas.width;
	this.height = this.canvas.height;
	//时针默认以300像素进行绘制,canvas画布放大或缩小情况下,需按比例进行修整
	this.ratio = this.width/300;
	//计算半径
	this.radius = this.width / 2;
	// 默认时区
	this.TimeZone = 'object'===typeof timeZone && isEqualArray(Object.keys(timeZone), ['name', 'value', 'zone'])? timeZone : TIME_ZONE.Beijing;
}
3.4 对应时区时间获取
在Clock类中,定义getLocalDate()函数,用来获取对应时区的Date实例。代码如下:
/**
 * 获取时区时间
 * @param {Number} regionNumber
 */
getLocalDate(zone){
	zone = 'number'===typeof zone?zone:0;

	var date = new Date();
	var time = date.getTime();
	//本地时间与GMT时间的时间偏移差(注意:GMT=UTC)
	var offset = date.getTimezoneOffset() * 60000;
	var utcTime = time + offset;
	return new Date(utcTime + 3600000 * zone);
}上面计算方式也是参考别人的文章,如有不理解的,可以查看原文章,地址:JavaScript获取当前时区 时间转换 (实用)_js获取东八区时间_chelen_jak的博客-CSDN博客
3.4 添加对应时区和城市信息
在drawClock()函数中,给时钟添加 时区和城市信息内容,代码如下:
//绘制时钟
drawClock(){
this.ctx.save();
//略...
//绘制时区
this.ctx.font = (14 * this.ratio) + "px Arial";
this.ctx.fillStyle = "#999";
this.ctx.fillText(this.TimeZone.name, 0, this.radius/3);
this.ctx.fillText('('+this.TimeZone.zone+')', 0, this.radius/3+(16 * this.ratio));
//绘制时针
(date => {
//绘制时分秒
this.drawHour(date.getHours(), date.getMinutes());
this.drawMinute(date.getMinutes());
this.drawSecond(date.getSeconds());
})(this.getLocalDate(this.TimeZone.value));
//绘制中间圆点
this.ctx.beginPath();
this.ctx.fillStyle = "#fff";
this.ctx.arc(0, 0, 3 * this.ratio, 2*Math.PI, 0, false);
this.ctx.fill();
this.ctx.restore();
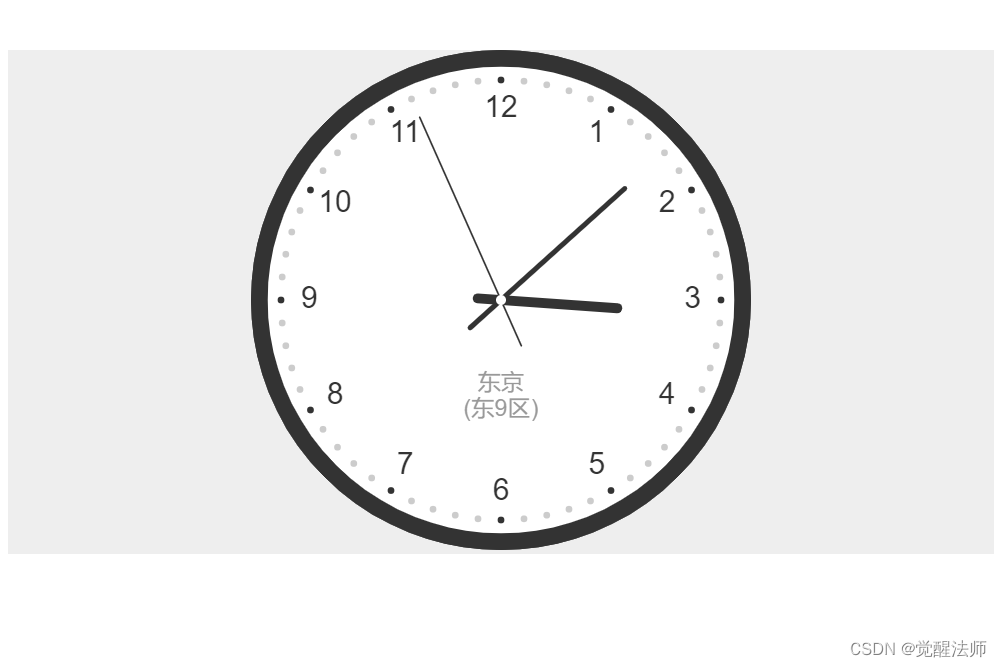
}写到这里,可以来查看下效果了,我们先将html中的Clock实例中,添加时区信息。在实例对象中,添加TIME_ZONE.Tokyo。 代码如下:
<script type="text/javascript">
window.onload = function(){
    var clock = new Clock('clock', TIME_ZONE.Tokyo);
    clock.start();
}
</script>
效果图如下:
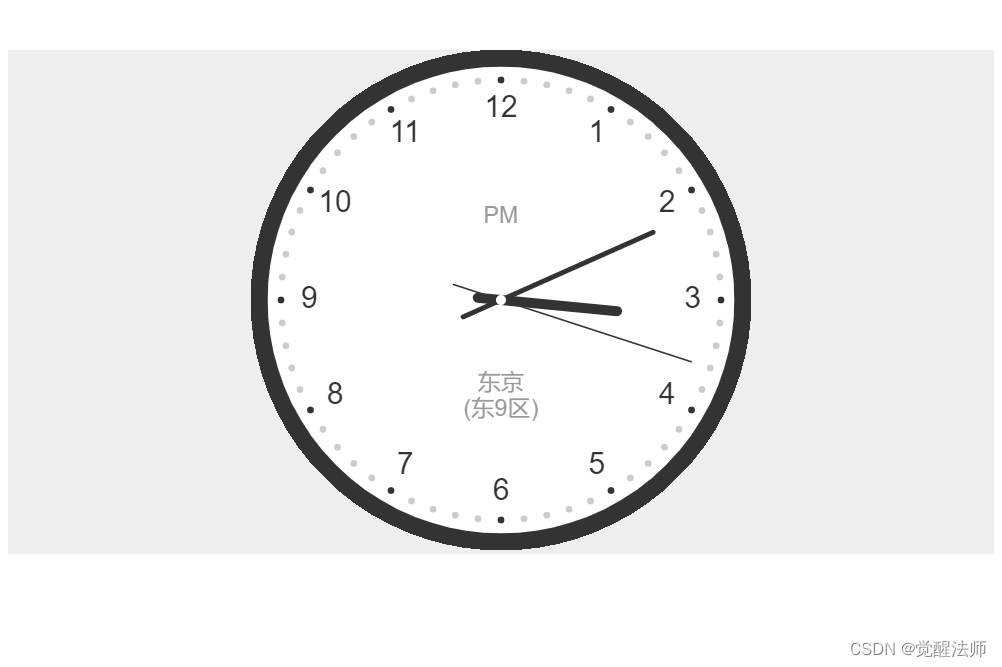
3.5 显示AM和PM
在时钟上面空白区域,添加AM和PM提示,用来区分当前时间为上午还是下午。在匿名函数中添加,代码如下:
//绘制时针
(date => {
	//显示上午或下午
	this.ctx.fillText((date.getHours()<=12?'AM':'PM'), 0,  -this.radius/3);

	//绘制时分秒
	this.drawHour(date.getHours(), date.getMinutes());
	this.drawMinute(date.getMinutes());
	this.drawSecond(date.getSeconds());
})(this.getLocalDate(this.TimeZone));
效果如下:
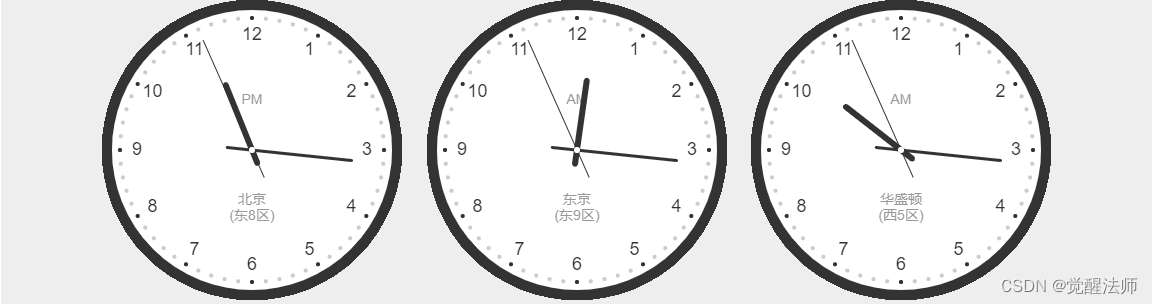
至此,时钟开发完成了,如果我们想同时显示多个时区的时钟,创建多个实例即可。代码如下:
html代码如下:
<body>
    <div class="wrap">
        <canvas id="clock" width="300px" height="300px" class="clock"></canvas>
        <canvas id="clock2" width="300px" height="300px" class="clock"></canvas>
        <canvas id="clock3" width="300px" height="300px" class="clock"></canvas>
    </div>

<script type="text/javascript">
window.onload = function(){
    var clock = new Clock('clock');
    clock.start();

    var clock2 = new Clock('clock2', TIME_ZONE.Tokyo);
    clock2.start();

    var clock3 = new Clock('clock3', TIME_ZONE.Washington);
    clock3.start();
}
</script>
</body>
效果如下:
此篇完结,仅供参考!


 82
82


 被折叠的 条评论
为什么被折叠?
被折叠的 条评论
为什么被折叠?
 到【灌水乐园】发言


