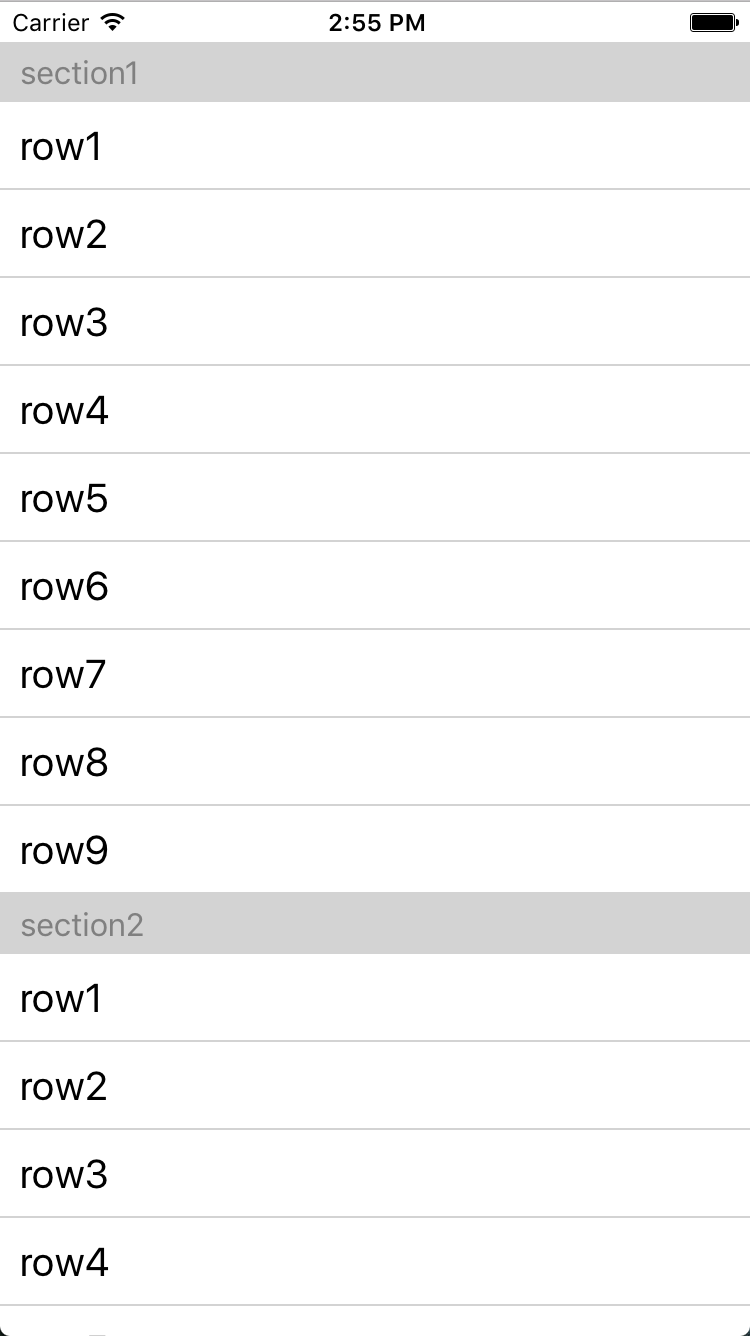
使用组件ListView实现iOS中UITableView的简单展示效果,包含row和section。
效果图:
直接上代码:
import React, { Component } from 'react';
import {
    AppRegistry,
    StyleSheet,
    ListView,
    Text,
    View
} from 'react-native';


class AwesomeProject extends Component {

    constructor(props) {
        super(props);
        var ds = new ListView.DataSource(
            {
                rowHasChanged: (r1, r2) => r1 !== r2,
                sectionHeaderHasChanged: (s1, s2) => s1 !== s2
            });
        this.state = {
            dataSource: ds.cloneWithRowsAndSections(
                {'section1':['row1', 'row2', 'row3','row4', 'row5', 'row6','row7', 'row8', 'row9'],
                'section2': ['row1', 'row2', 'row3','row4', 'row5', 'row6','row7', 'row8', 'row9'],
                'section3': ['row1', 'row2', 'row3','row4', 'row5', 'row6','row7', 'row8', 'row9'],
                'section4': ['row1', 'row2', 'row3','row4', 'row5', 'row6','row7', 'row8', 'row9']}),
        };
    }

    rendSection = (sectionData, sectionId) => {
        return(
            <View style={styles.listS}>
                <Text style={styles.listSectionText}>
                    {sectionId}
                </Text>
            </View>
        );
    }

    rendRow = (rowData) => {
        return(
            <View style={styles.listV}>
                <Text style={styles.listRowText}>
                    {rowData}
                </Text>
            </View>
        );
    }

    render() {
        return (
            <ListView
                dataSource={this.state.dataSource}
                renderSectionHeader={(sectionData, sectionId) => this.rendSection(sectionData, sectionId)}
                renderRow={(rowData) => this.rendRow(rowData)}
                style={styles.listStyle}
            />
        );
    }

}

const styles = StyleSheet.create({
    listStyle: {
        marginTop: 20,
    },
    listS: {
        backgroundColor: '#d3d3d3',
        height: 30,
        paddingLeft: 10,
        paddingTop: 0,
        marginTop: 0,
        justifyContent: 'center',
    },
    listV: {
        paddingLeft: 10,
        justifyContent: 'center',
        height: 44,
        borderColor: '#d3d3d3',
        borderBottomWidth: 1,
    },
    listRowText: {
        fontSize: 20,
    },
    listSectionText: {
        fontSize: 16,
        color: 'gray'
    }
});

AppRegistry.registerComponent('AwesomeProject', () => AwesomeProject);
我也是初学React Native,如果有什么不对的地方,欢迎批评指正。


 2668
2668

 被折叠的 条评论
为什么被折叠?


