


模板编程器指南
<dependency>
    <groupId>org.freemarker</groupId>
    <artifactId>freemarker</artifactId>
    <version>2.3.31</version>
</dependency>
freemarker官网参考:
https://freemarker.apache.org/docs/pgui_quickstart_all.html
模板由freemarker.template.template实例表示。通常,您可以使用其从Configuration实例中获取Template实例。getTemplate方法。如果您将示例模板存储在前面集合目录的test.ftlh文件中,则可以执行以下操作:
Template temp=cfg.getTemplate(“test.ftlh”);
这为您提供了一个Template实例,该实例是通过读取/where/you/store/templates/test.ftlh并对其进行解析而创建的。Template实例以解析后的形式存储模板,而不是以文本形式存储。如果模板丢失或语法不正确,getTemplate将引发异常。
配置缓存模板实例,因此当您下次调用cfg.getTemplate(“test.ftlh”)时,它可能不会再次读取和解析模板文件,只是返回与第一次相同的模板实例。
data-model + template = output
它将数据模型和一个Writer作为参数。它将生成的输出写入Writer
一旦获得了Template实例,就可以无限次地将其与不同的数据模型合并(Template实例是无状态的)。此外,test.ftlh文件仅在创建Template实例时访问,而不是在调用process方法时访问。
@Service
public class TemplateServiceImpl implements TemplateService {
    // 本地模板文件:resources/freemarker/test.ftlh
    @Override
    public String getTemplateContentFromFile(){

        Configuration cfg = new Configuration(Configuration.VERSION_2_3_31);
        cfg.setDefaultEncoding("UTF-8");
        try {
            ClassPathResource freemarker = new ClassPathResource("freemarker");
            File file = freemarker.getFile();
            cfg.setDirectoryForTemplateLoading(file);
        } catch (IOException e) {
            e.printStackTrace();
        }
        cfg.setSQLDateAndTimeTimeZone(TimeZone.getDefault());
        StringWriter writer = null;
        try {
            Template template = cfg.getTemplate("test.ftlh");
            Product product = new Product();
            product.setName("zjy");
            product.setUrl("www.baidu.com");
            HashMap<String, Object> map = new HashMap<>();
            map.put("user", "wwowowow");
            map.put("latestProduct", product);

            writer = new StringWriter();
            template.process(map, writer);
        } catch (IOException | TemplateException e) {
            e.printStackTrace();
        } finally {
            IOUtils.closeQuietly(writer);
        }
        return writer.toString();
    }

    @Override
    public String getTemplateContentFromString(String content, Map<String, Object> dataModal) {
    	if (MapUtil.isEmpty(dataModal)) {
            return null;
        }
        String fileName = dataModal.getOrDefault("fileName", "demo.html").toString();

        StringReader reader = new StringReader(content);
        StringWriter writer = null;
        try {
            Template template = new Template(fileName, reader, null, "UTF-8");
            writer = new StringWriter();
            template.process(dataModal, writer);

        } catch (IOException e) {
            e.printStackTrace();
        } catch (TemplateException e) {
            e.printStackTrace();
        } finally {
            org.apache.commons.io.IOUtils.closeQuietly(writer);
        }

        return writer.toString();
    }
}
// 浏览器下载
@RequestMapping(value = "/text/upload", method = RequestMethod.GET)
@ResponseBody
public HttpServletResponse upload(HttpServletResponse response) {
    String templateContent = templateService.getTemplateContentFromFile();
    try (StringReader reader = new StringReader(templateContent);
         ServletOutputStream output = response.getOutputStream()) {

        response.reset();
        // 定义输入文件名
        String encode = URLEncoder.encode("zjy.html", "UTF-8");
        response.setHeader("Content-Disposition", "attachment;filename=" + encode);
        // 定义输出类型
//            response.setContentType("bin");
//            response.setContentType("application/x-msdownload");
        response.setContentType("application/octet-stream");
        response.setCharacterEncoding("UTF-8");
        IOUtils.copy(reader, output, Charset.forName("UTF-8"));

    } catch (IOException e) {
        e.printStackTrace();
    }
    return response;
}

// 下载到本地resources
@RequestMapping(value = "/text/local", method = RequestMethod.GET)
@ResponseBody
public void localDown() {
    try {
        String templateContent = templateService.getTemplateContentFromFile();
        ClassPathResource resource = new ClassPathResource("bak/test.html");
        File file = resource.getFile();
        FileUtil.writeUtf8String(templateContent, file);
    } catch (IOException e) {
        e.printStackTrace();
    }

}
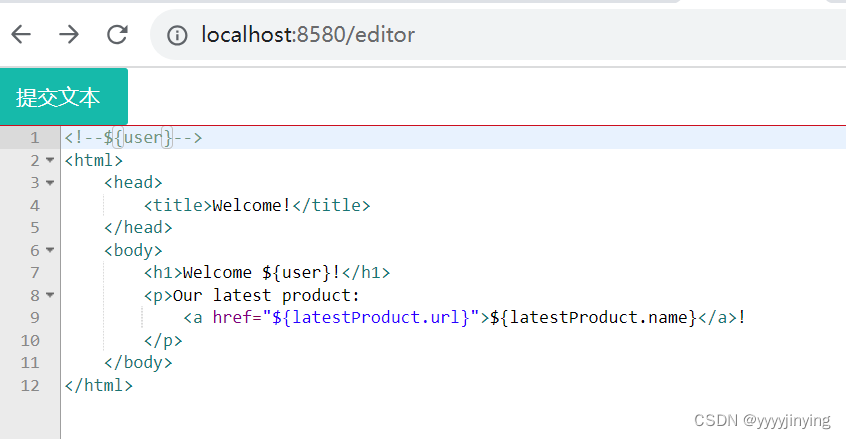
手动维护模板并生成文件
/**
     * 编辑器保存的是字符串,
     * 使用freemarker模板引擎,
     * 将dataModal数据填充到模板中
     * 返回完成文件
     * @param data
     * @return
     */
@RequestMapping(value = "/text/save", method = RequestMethod.POST)
@ResponseBody
public String save(@Nullable @RequestBody String data) {
// 1. 创建datamodal数据
    Product product = new Product();
    product.setTemplateFileName("demo.html");
    product.setName("zjy");
    product.setUrl("www.baidu.com");
    HashMap<String, Object> map = new HashMap<>();
    map.put("user", "wwowowow");
    map.put("latestProduct", product);
    // 2. data-model + template = output
    String content = templateService.getTemplateContentFromString(data, map);
    //      字符串模板创建指定文件,如果不存在新建,存在覆盖
    FileUtil.writeUtf8String(content, "E:\\note\\flowable-project\\liteflow-demo\\liteflow-example\\src\\main\\java\\com\\yomahub\\liteflow\\example\\controller\\demo.html");
    return content;
}
xml
元素、文本、注释、处理指令等
The parse method removescomment and processing instruction nodes by default
解析方法 会删除 注释和 处理指令节点
no_esc
HashMap<String, Object> map = new HashMap<>();
List<String> lists = new ArrayList<>();
lists.add("aaa");
lists.add("bbb");
map.put("lists", JSONObject.toJSONString(lists));
map.put("listStr", lists);
//        不是字符串是可以遍历的集合
//        <#list listStr as i>
//              ${i}
//         </#list>
使用toJSONString可以将数据在页面显示;
```html
<html>
<#if test1 ??>
    <Test1>${test1}</Test1>
</#if>
<#-- 判断对象是不是null, 和空串 -->
<#if test3 ?? && test3?trim?length gt 0>
    <Test3>${test3}</Test3>
</#if>
${lists}
显示为:["aaa","bbb"]
</html>
总结要想显示对象,必须是json对象:
//        List<String> lists = new ArrayList<>();
//        lists.add("aaa");
//        lists.add("bbb");
//        方案一
//        map.put("lists", JSONObject.toJSONString(lists));
//        直接变量显示${lists}
//      方案二
//        String listStr = lists.toString();
//        直接变量显示${lists}
//        map.put("lists", listStr);
//     方案三: 显示json对象
//        List<Map<String, Object>> listMap = new ArrayList<>();
//        listMap.add(MapUtil.builder(new HashMap<String, Object>()).put("name", "zhao").put("age", 1).build());
        String listMapStr = listMap.toString(); // list = [{name=zhao, age=1}]
//        String listMapStr = JSONObject.toJSONString(listMap); // list = [{"name":"zhao","age":1}]
//        map.put("listMap", listMapStr);
//        方案四:显示pojo
//        Product product1 = new Product();
//        product1.setName("abc");
//        product1.setUrl("http:baidu.com");
//        product1.setTemplateFileName("template");
        map.put("pojo", product1);  // pojo = Product(templateFileName=template, url=http:baidu.com, name=abc)
//        map.put("pojo", JSONObject.toJSONString(product1)); // list = {"name":"abc","templateFileName":"template","url":"http:baidu.com"}
        String content = templateService.getTemplateContentFromString(data, map);


 2万+
2万+

 被折叠的 条评论
为什么被折叠?
被折叠的 条评论
为什么被折叠?
 到【灌水乐园】发言


