


记录
12 月 5 日 星期二 00:25
测试一下 aeon 库,先准备环境 aeon-toolkit/aeon:使用时间序列数据执行机器学习任务的工具包 (github.com)
# 创建虚拟环境
conda create -n MLpro python=3.8
# 启动虚拟环境
conda actiavte MLpro
# 安装 aeon 和必要的库
conda install scikit-learn
conda install scikit-learn-intelex
conda install numpy

pip install aeon
快速开始一下.运行一下 aeon 的 github 主页上的预测和分类代码
预测代码:
import pandas as pd
from aeon.forecasting.trend import TrendForecaster

y = pd.Series([20.0, 40.0, 60.0, 80.0, 100.0])
>>> 0     20.0
>>> 1     40.0
>>> 2     60.0
>>> 3     80.0
>>> 4    100.0
>>> dtype: float64

forecaster = TrendForecaster()
forecaster.fit(y)  # fit the forecaster
>>> TrendForecaster()

pred = forecaster.predict(fh=[1, 2, 3])  # forecast the next 3 values
>>> 5    120.0
>>> 6    140.0
>>> 7    160.0
>>> dtype: float64
分类代码:
import numpy as np
from aeon.classification.distance_based import KNeighborsTimeSeriesClassifier

X = [[[1, 2, 3, 4, 5, 5]],  # 3D array example (univariate)
     [[1, 2, 3, 4, 4, 2]],  # Three samples, one channel, six series length,
     [[8, 7, 6, 5, 4, 4]]]
y = ['low', 'low', 'high']  # class labels for each sample
X = np.array(X)
y = np.array(y)

clf = KNeighborsTimeSeriesClassifier(distance="dtw")
clf.fit(X, y)  # fit the classifier on train data
>>> KNeighborsTimeSeriesClassifier()

X_test = np.array(
    [[[2, 2, 2, 2, 2, 2]], [[5, 5, 5, 5, 5, 5]], [[6, 6, 6, 6, 6, 6]]]
)
y_pred = clf.predict(X_test)  # make class predictions on new data
>>> ['low' 'high' 'high']
运行结果和代码示例里的也是一样.到这里就代表 aeon 库安装完成而且可以正常运作了
12 月 5 日 9:59
看一下我们的题目:Random Dilated Shapelet Transform: A New Approach for Time Series Shapelets | Papers With Code
论文的开源代码库:baraline/convst:随机扩张 Shapelet 变换算法以及可解释性工具的实现。 (github.com)
这是库里写的是 RDST(随机扩张 Shapelet 变换算法)的源码.我们先简单看一下这个库的文档.

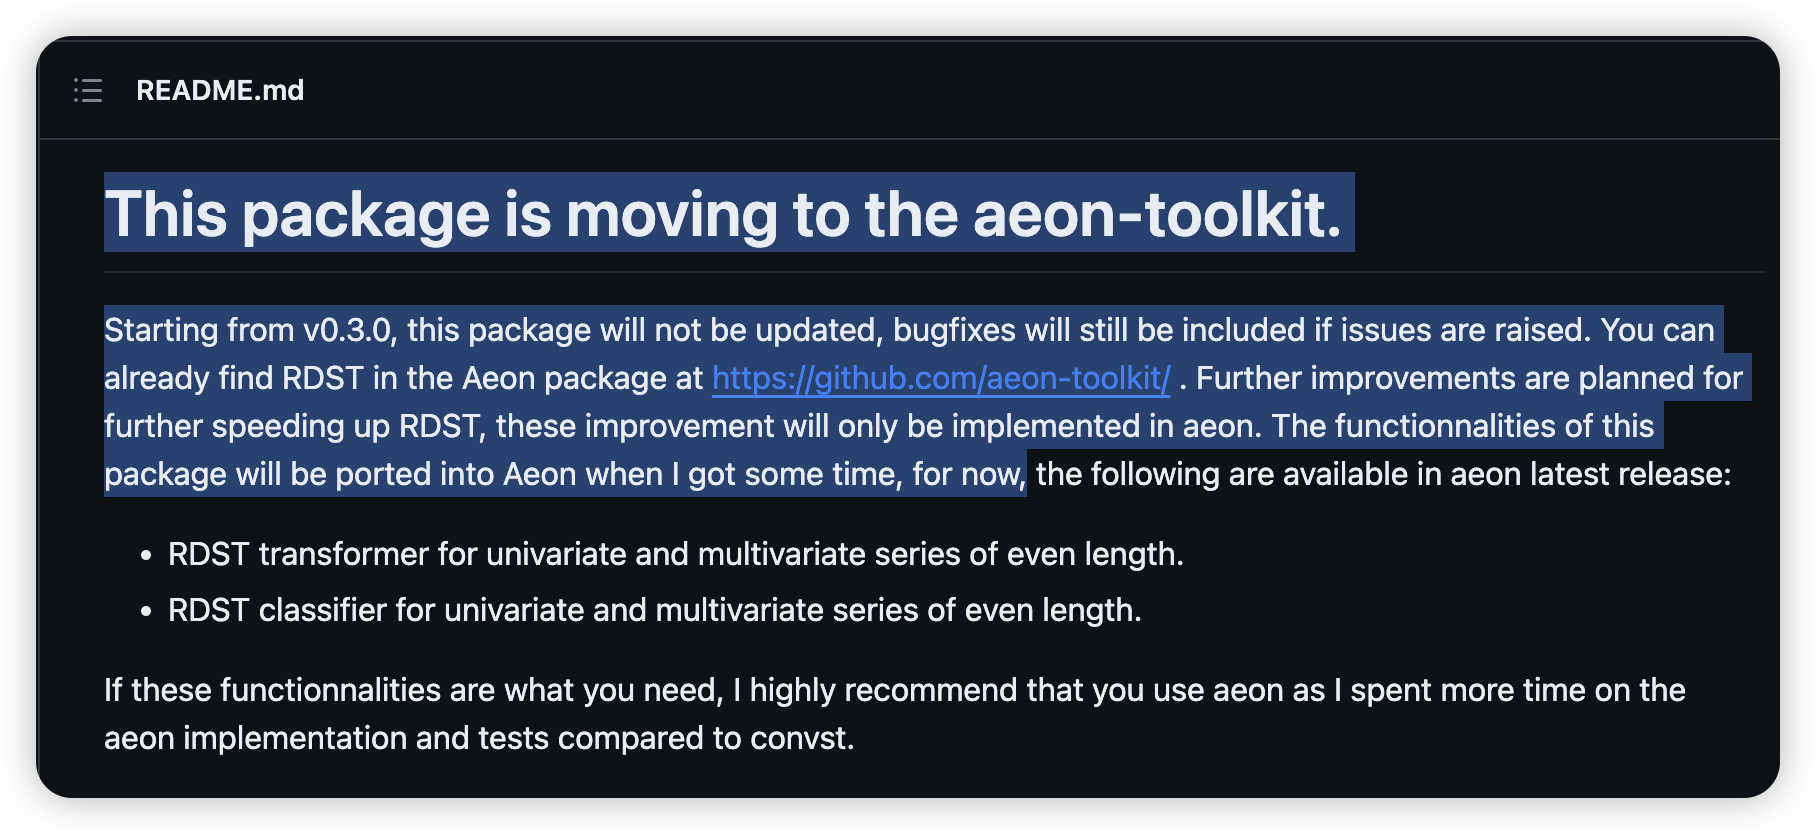
readme中有这句话,大意是作者的代码迁移到 aeon-toolkit 这个工具包里了.我们可以通过这个叫 aeon 的工具包直接调用RDST.
那么现在有两条路走:
- 继续研究convst 的 RDSTbaraline/convst:随机扩张 Shapelet 变换算法以及可解释性工具的实现. (github.com)
优点:代码完善,复现稳定
缺点:功能不是最新的. - 转战研究 aeon 工具包和其中的 RDSTaeon-toolkit/aeon:使用时间序列数据执行机器学习任务的工具包 (github.com)
优点:得到最新的支持和功能
缺点:没有什么参考,基本是从 0 开始理解.
Convst way
先看第一条路.打开网页baraline/convst:随机扩张 Shapelet 变换算法以及可解释性工具的实现。ReadTheDocs 文档目前不是最新版本。 (github.com)
我们先按照要求在本机搭建环境
# 进入工作目录(没有需自己创建), 进入虚拟环境
cd workspace/ML/
conda activate MLpro

# 按照 readme 的意思.先拉取源码
git clone https://github.com/baraline/convst.git
cd convst

# pip 安装一下依赖包.(这个包的版本应该不是最新的,但是也是依赖项)
pip install convst
pip install toml

# 安装源码的软件包
python setup.py install

# 如果有 N卡的话,再执行这个命令
conda install -c numba irr_rt
#如果找不到irr——rt, 运行
conda install numba
搭建好环境之后,用一个小型数据集 Gunpoint 来测试一下 RDST_Ridge 模型的性能
from convst.classifiers import R_DST_Ridge
from convst.utils.dataset_utils import load_UCR_UEA_dataset_split

X_train, X_test, y_train, y_test, _ = load_UCR_UEA_dataset_split('GunPoint')

# First run may be slow due to numba compilations on the first call.
# Run a small dataset like GunPoint if this is the first time you call RDST on your system.
# You can change n_shapelets to 1 to make this process faster. The n_jobs parameter can
# also be changed to increase speed once numba compilation are done.

rdst = R_DST_Ridge(n_shapelets=10_000, n_jobs=1).fit(X_train, y_train)
print("Accuracy Score for RDST : {}".format(rdst.score(X_test, y_test)))
准确率是1.0

复现论文实验结果
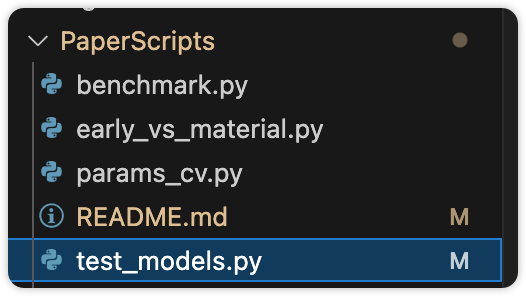
打开文件test_models.py
默认运行,对UCR中所有数据集进行实验。这个数据量非常庞大,我们第一步试一试把数据集改小些。
找到变量dataset_name的来源。
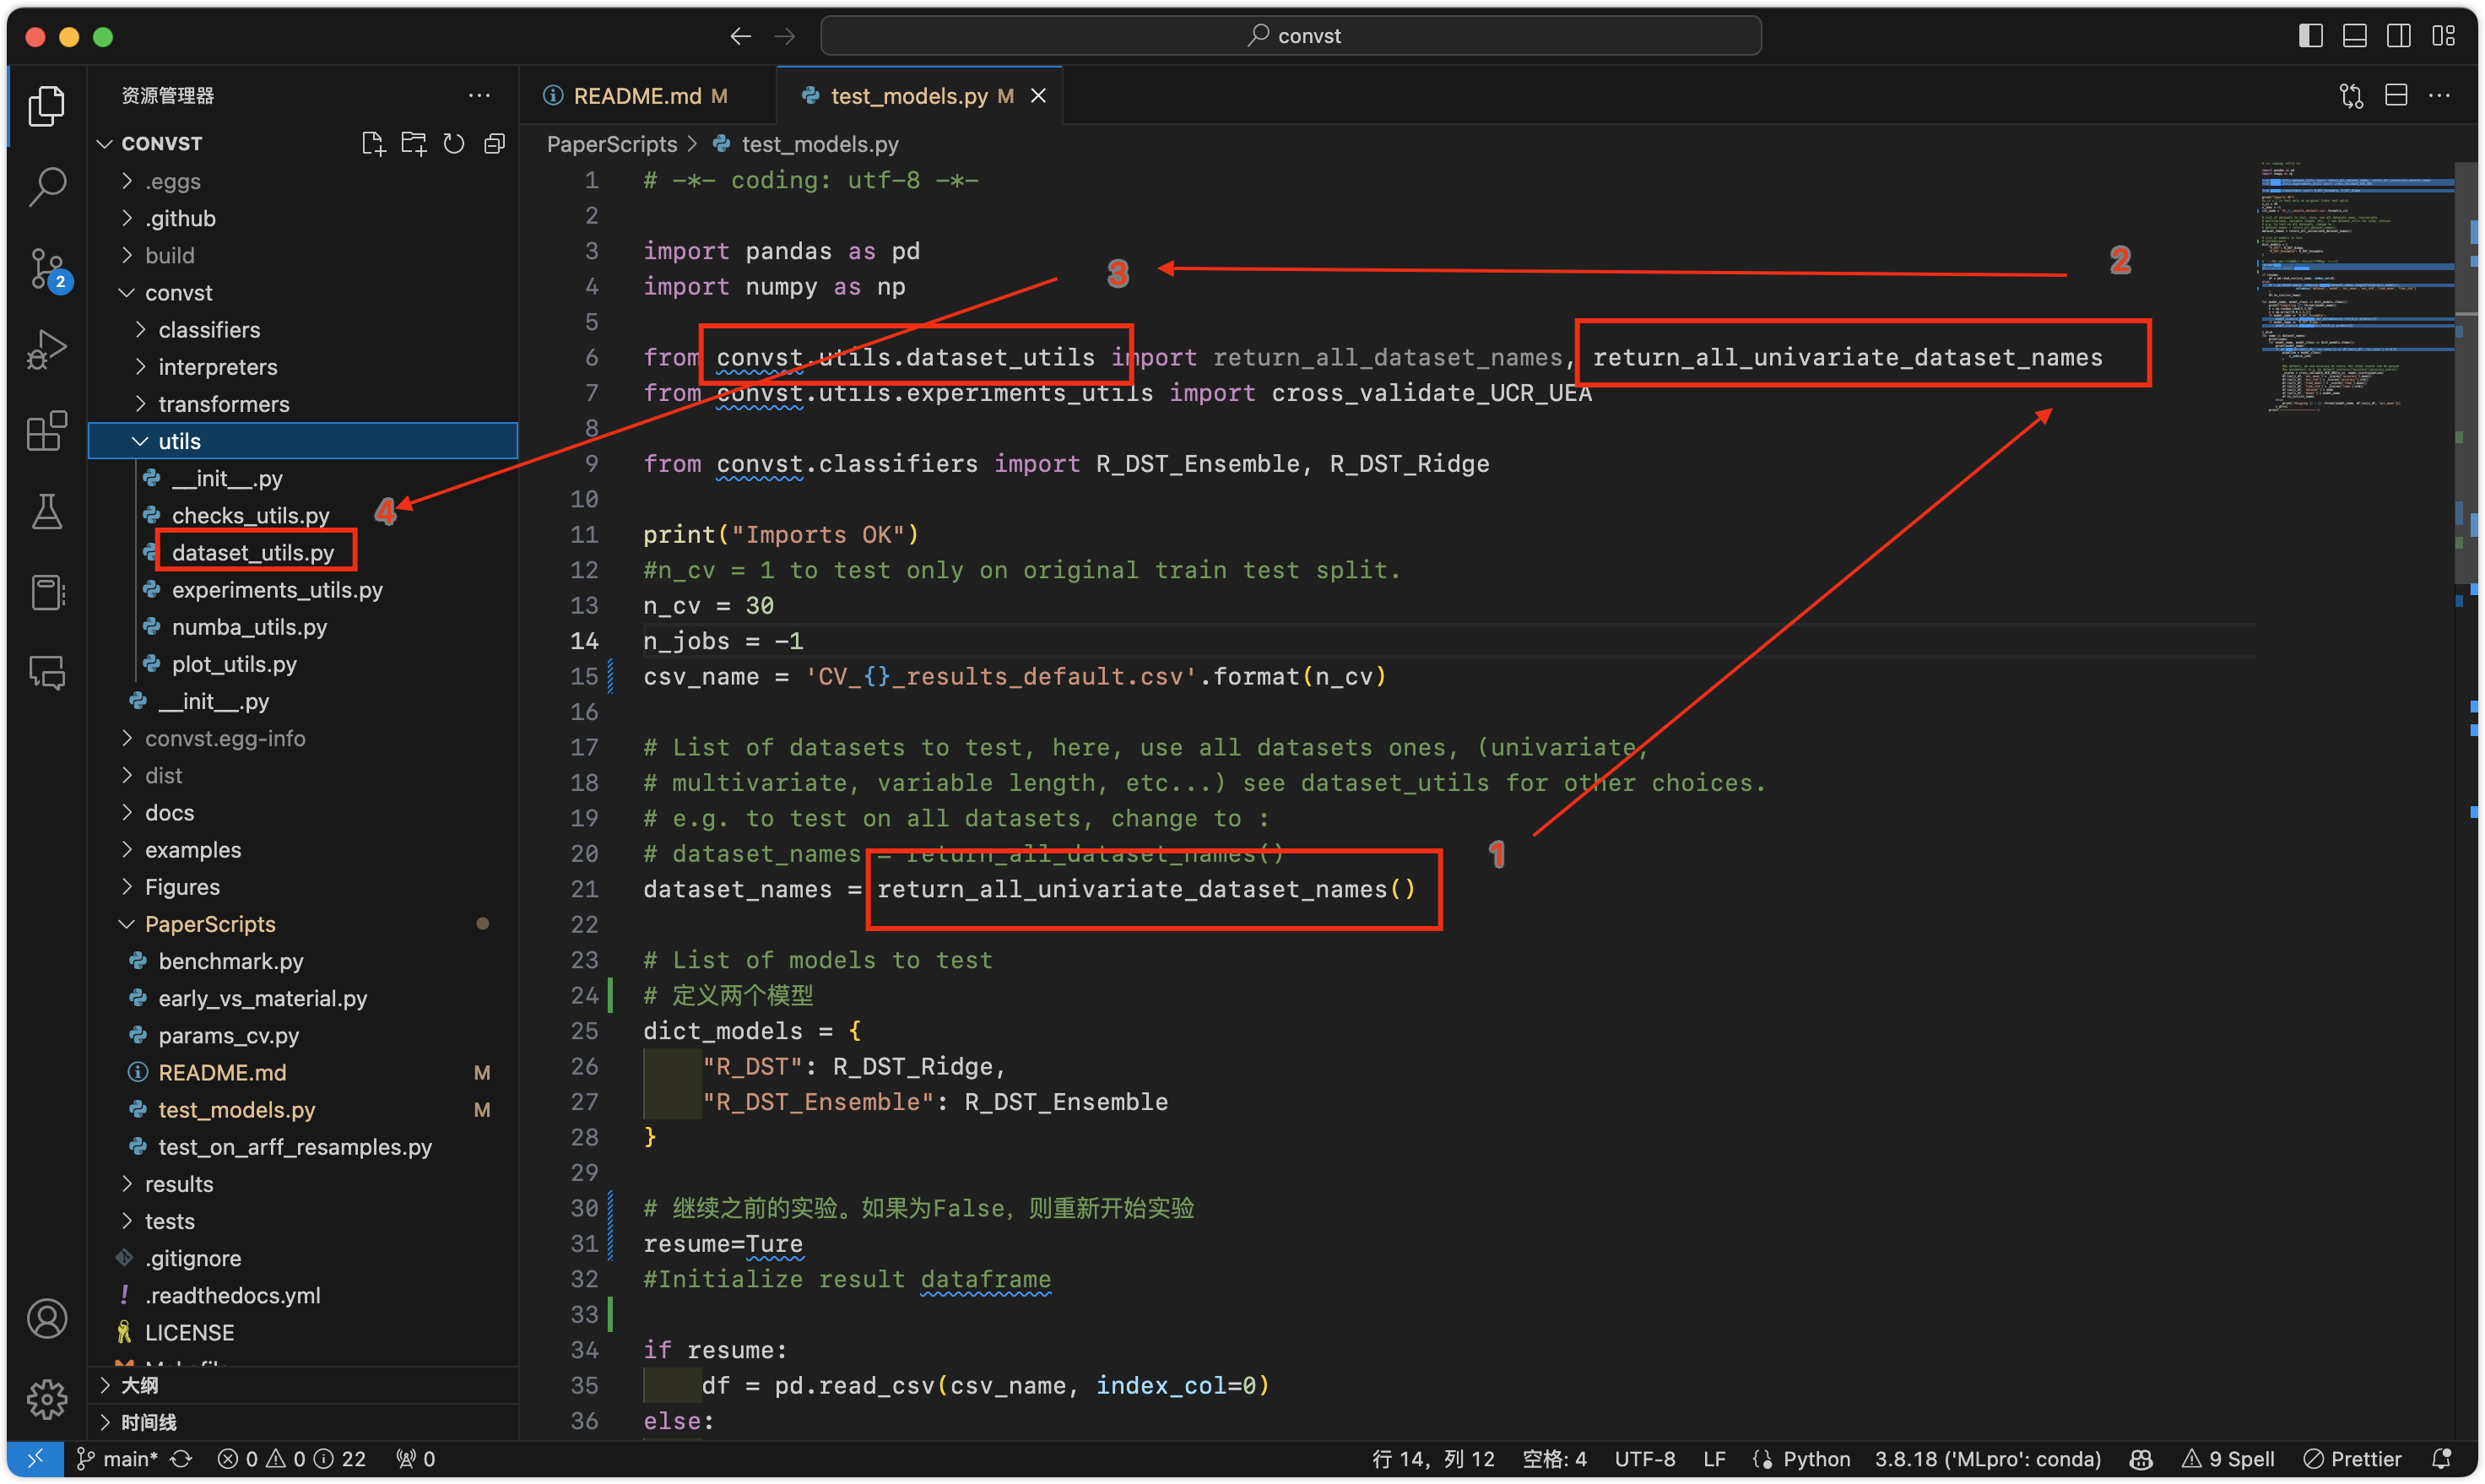

函数 return_all_unicariate_dataset_names返回112个单变量UCR数据集。
那我们把dataset改成单个数据集试一试。
回到test_models.py把数据集改成单个ACSF1。
注意保持列表的形式np.asarray([...]) ,否则报错:无shape类型

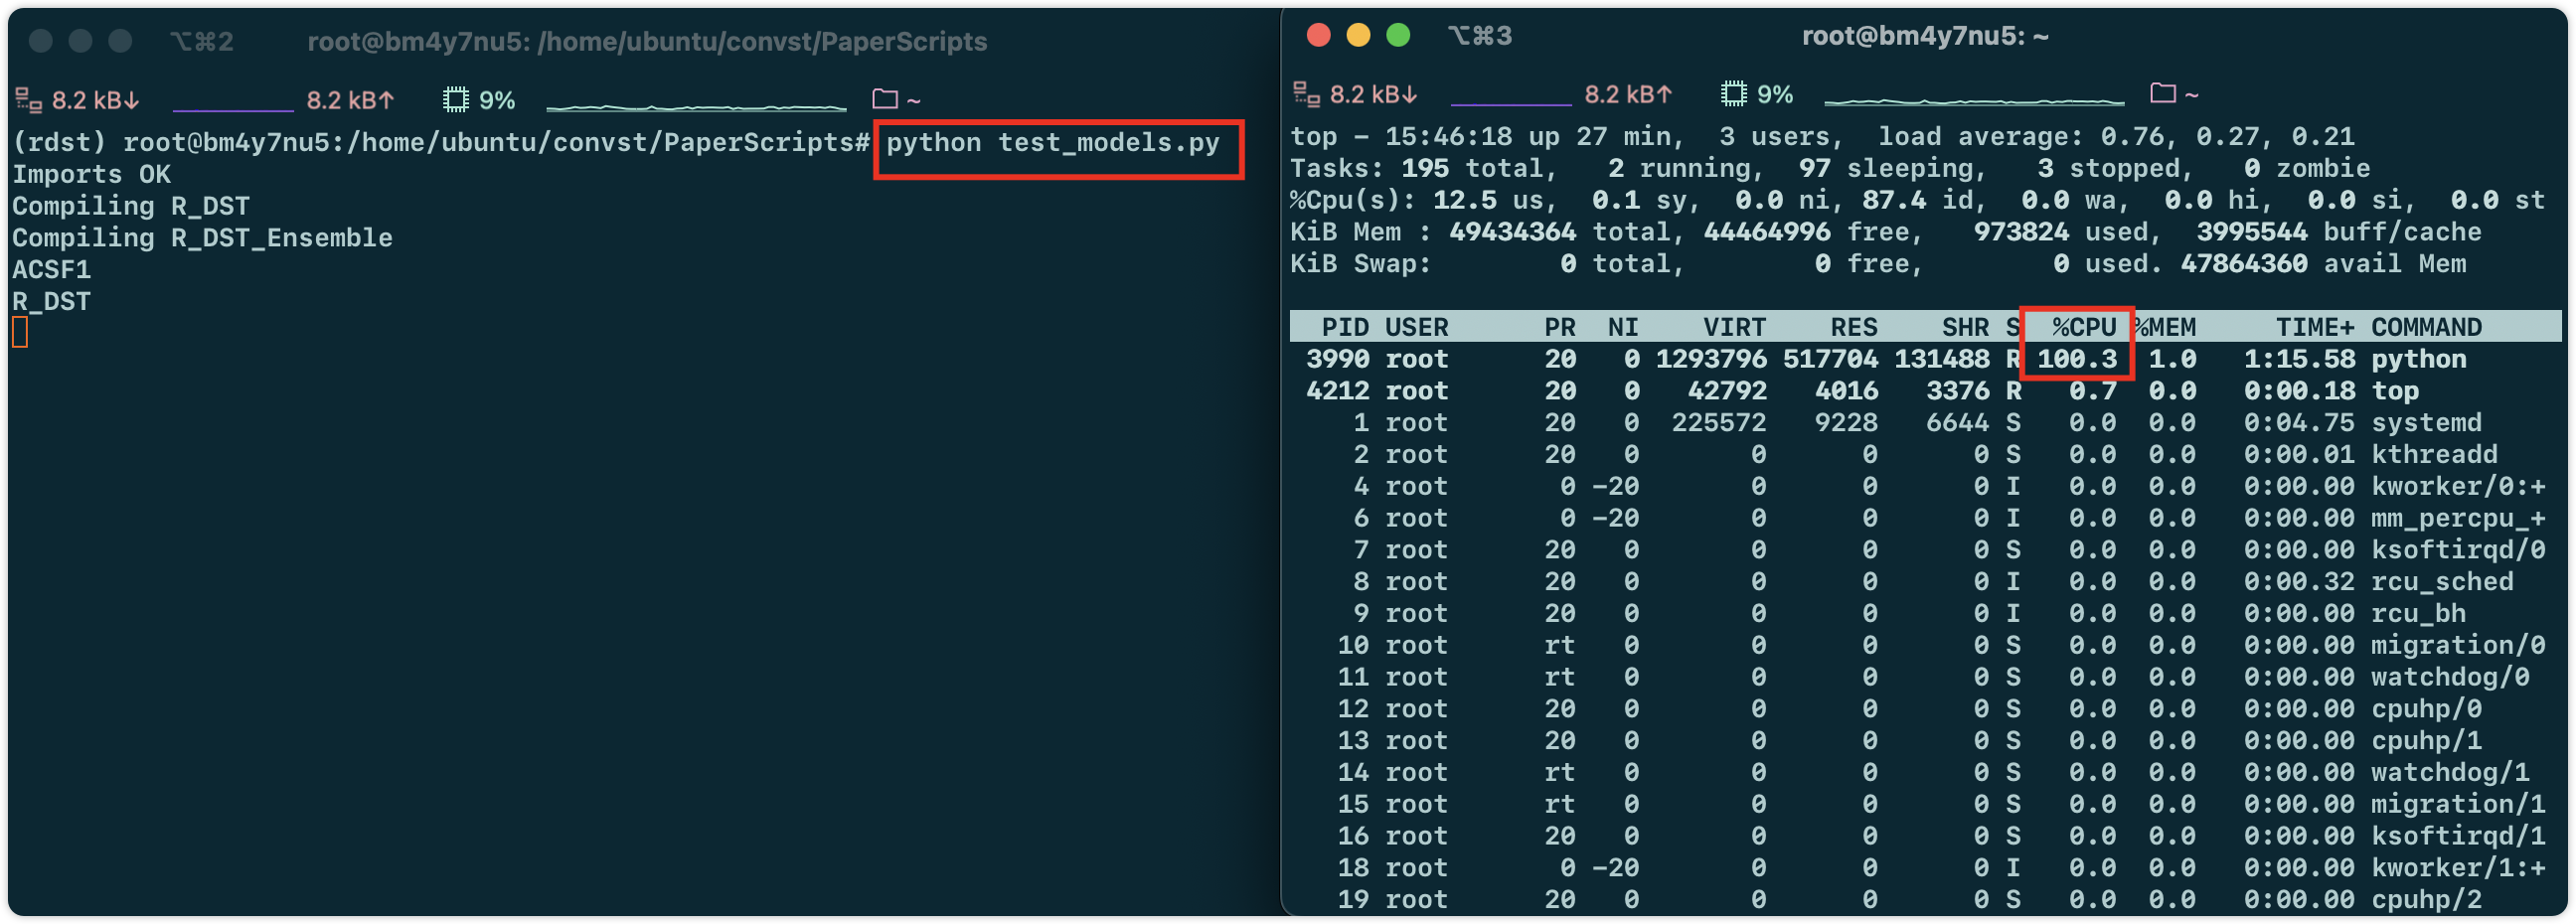
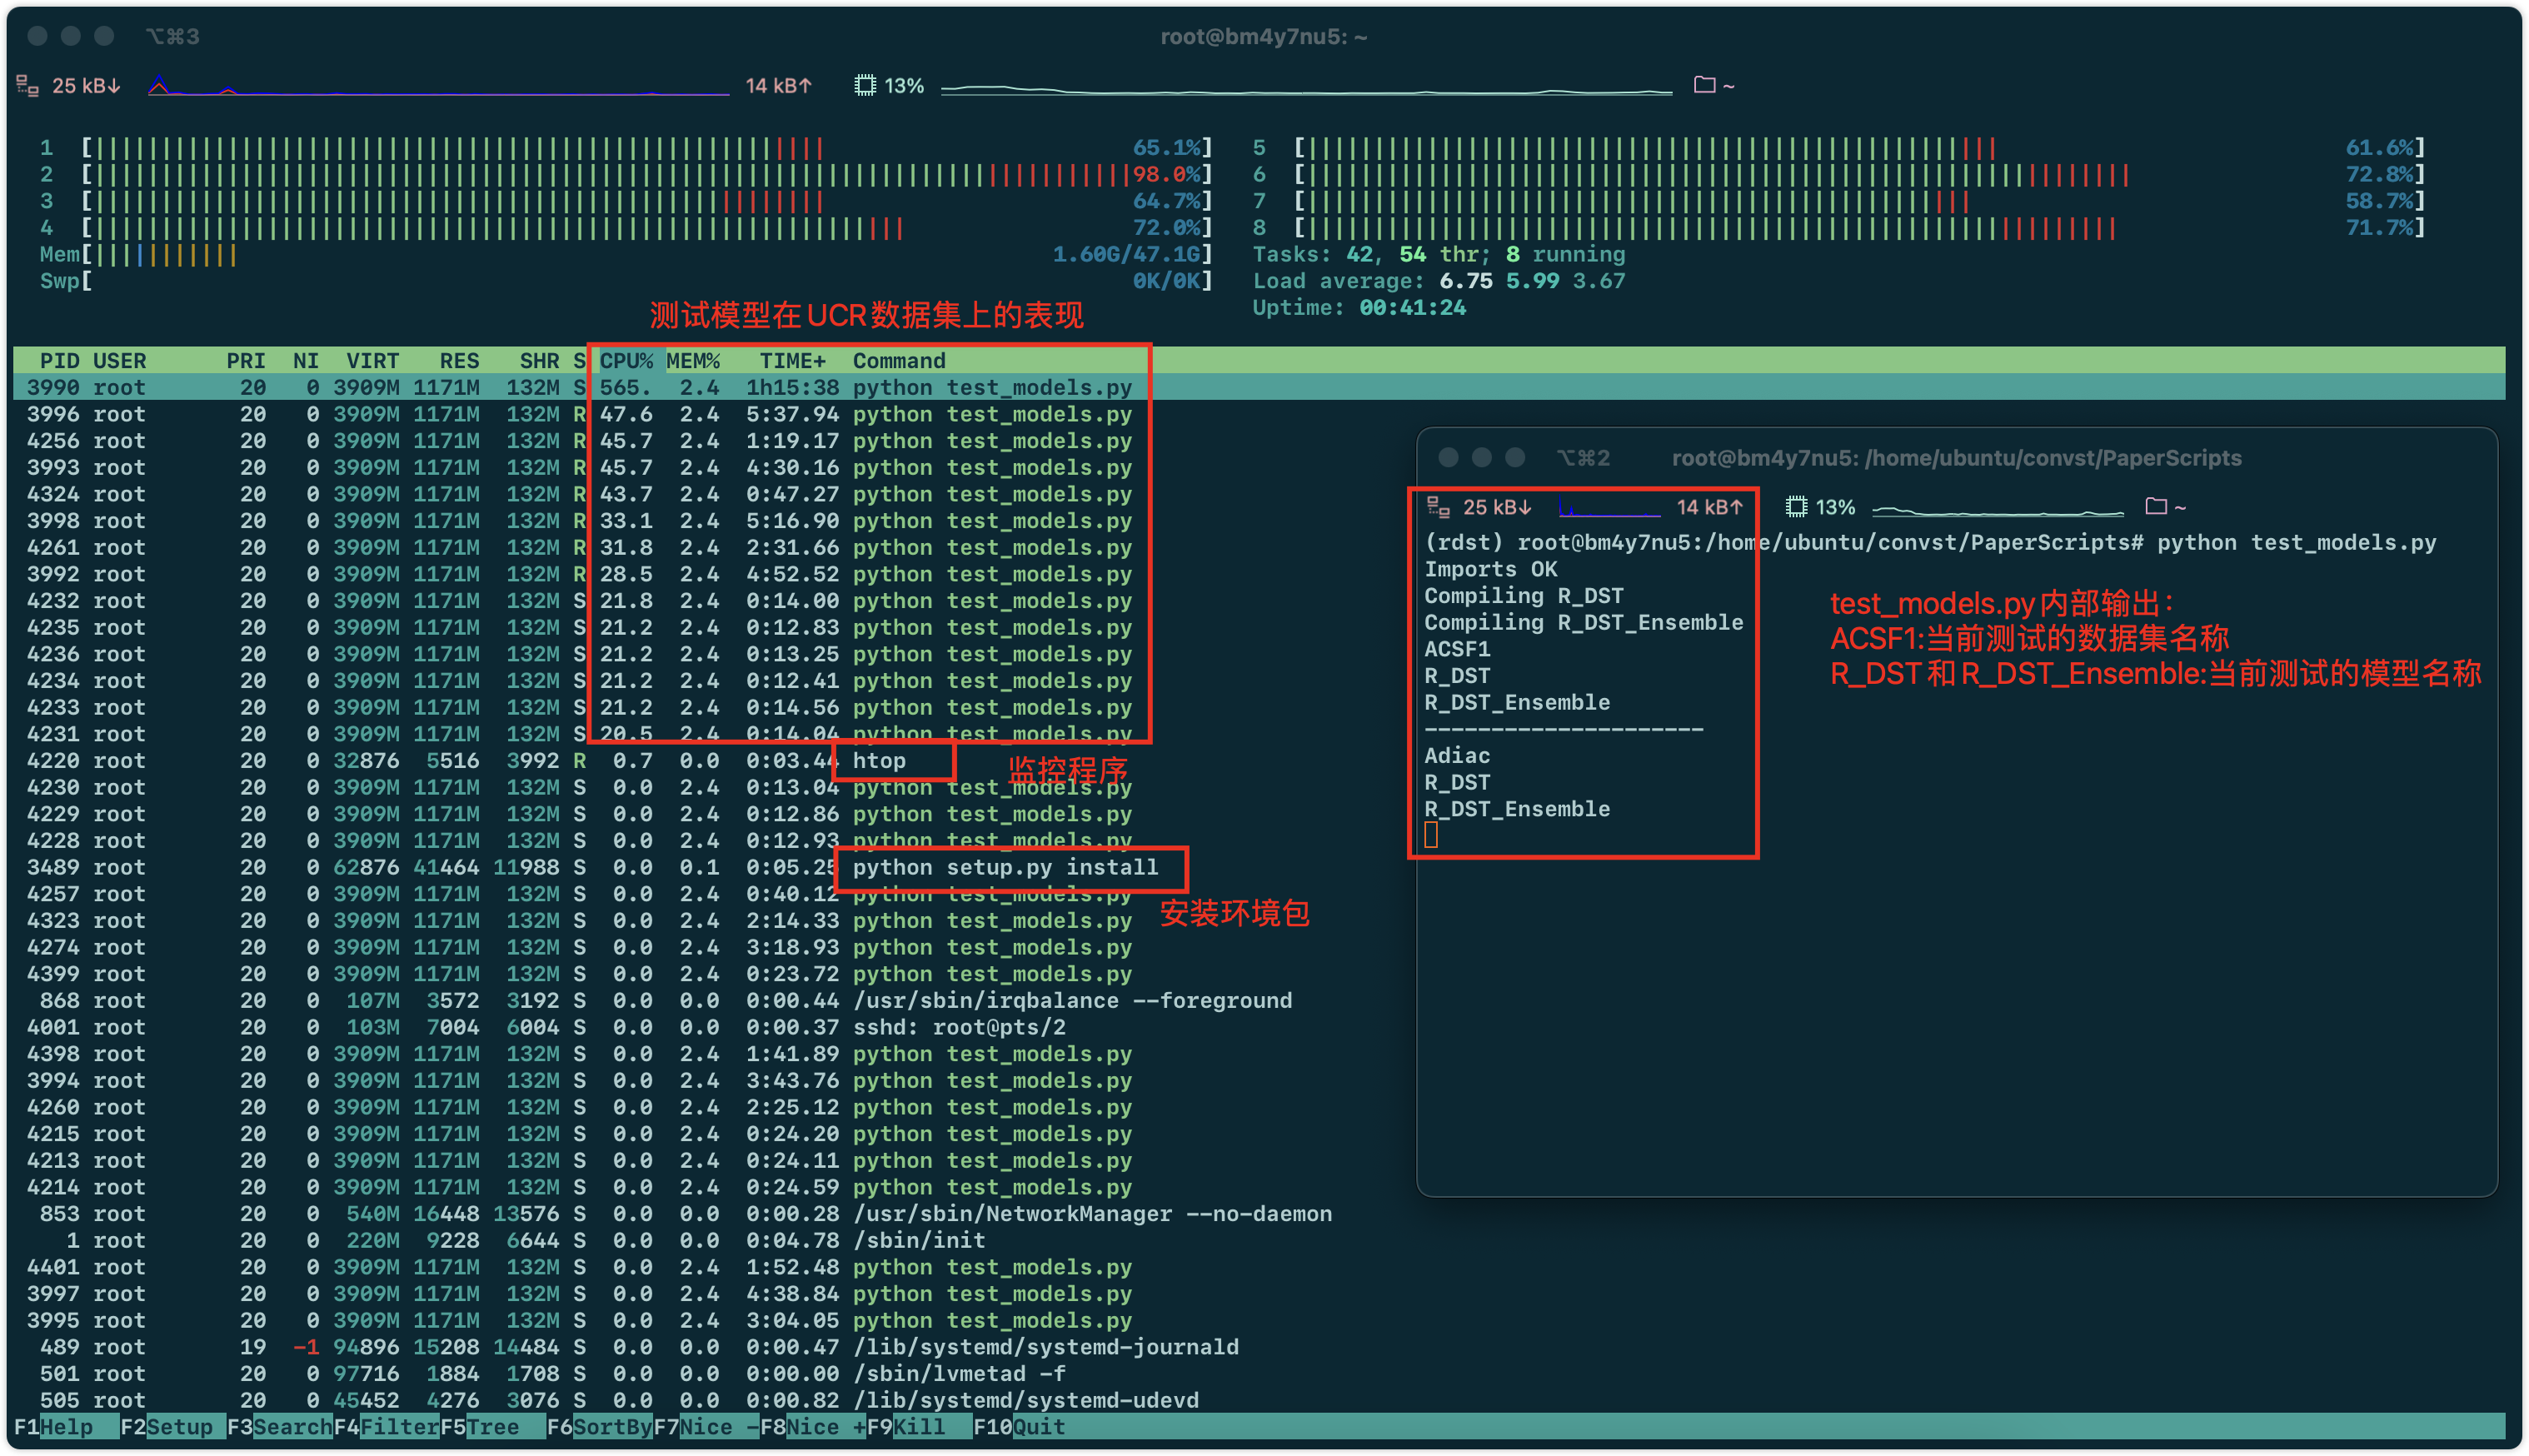
运行文件

看到正在用cpu跑
12月11日15:39:代码跑完了。查看一下csv文件结果

在一个数据技术ACSF1上,两个模型:R_DST和R_DST_Ensemble的表现如下
平均准确率:0.836和0.842。
还有比如准确率标准差和运行时间等看上图。
12月12日 15:14
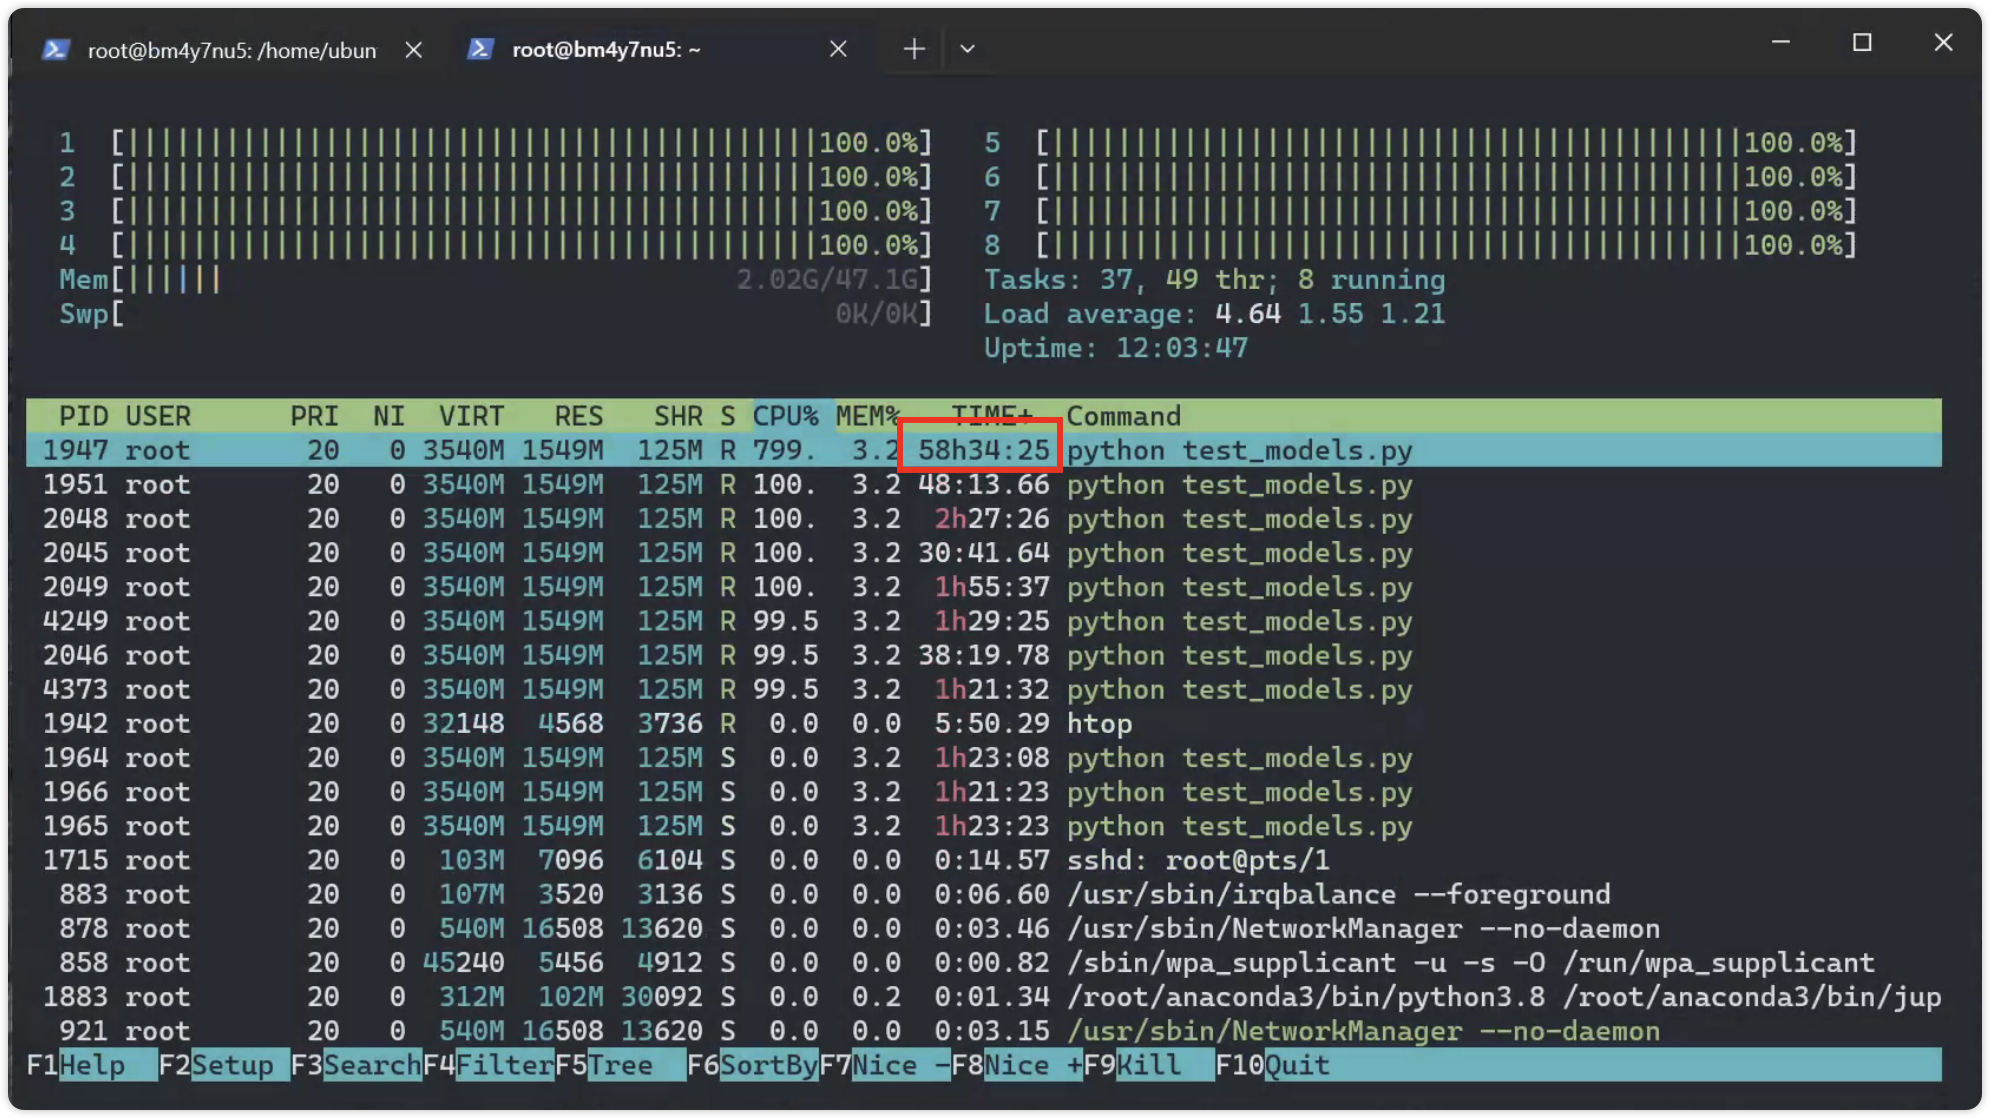
租用服务器跑完ucr数据集。

进入服务器终端,按照之前的笔记配置一遍环境
15:46.环境配好了,cd到convst的test_models.py。开始运行,同时监测性能
12月13日 1:06
服务器48G内存都溢出了。重启服务器然后继续跑代码
12月13日 13:07
代码已经运行了开·两天多了
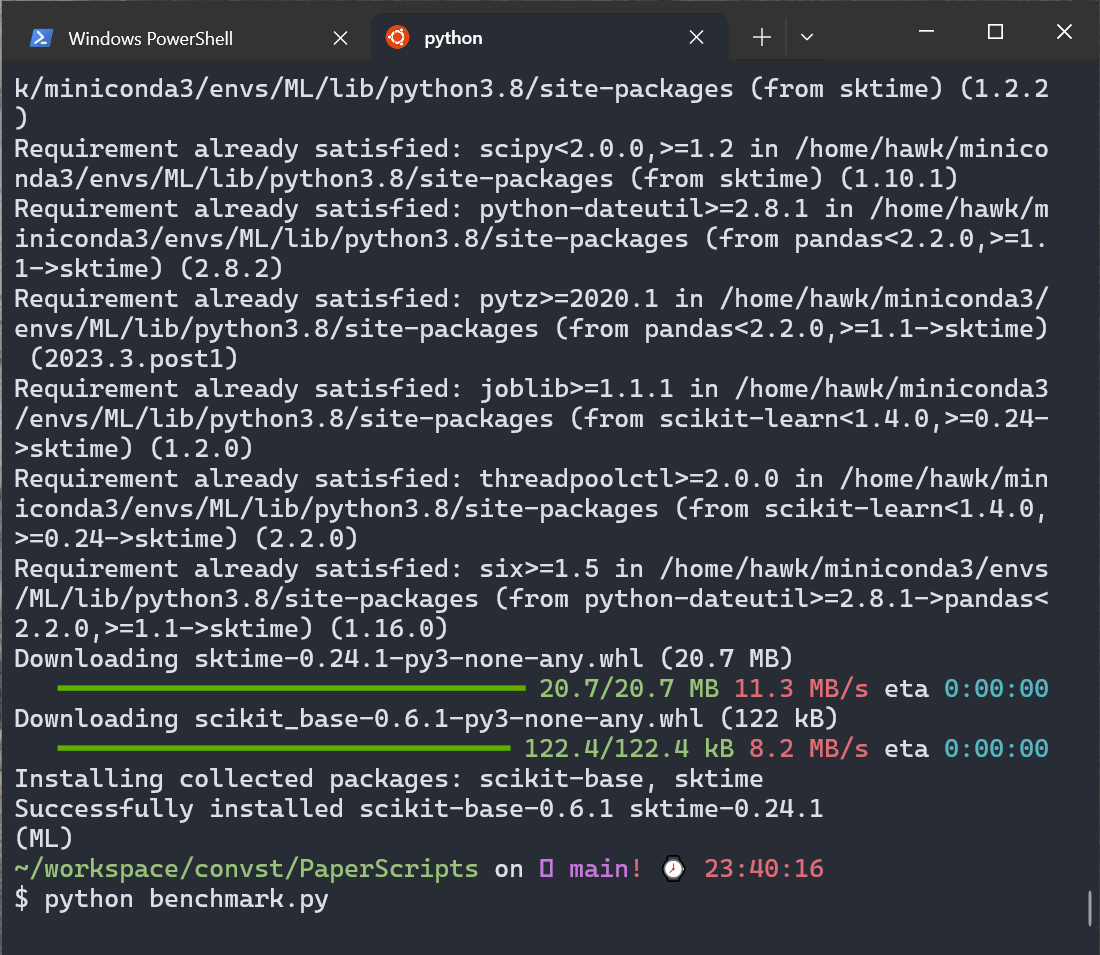
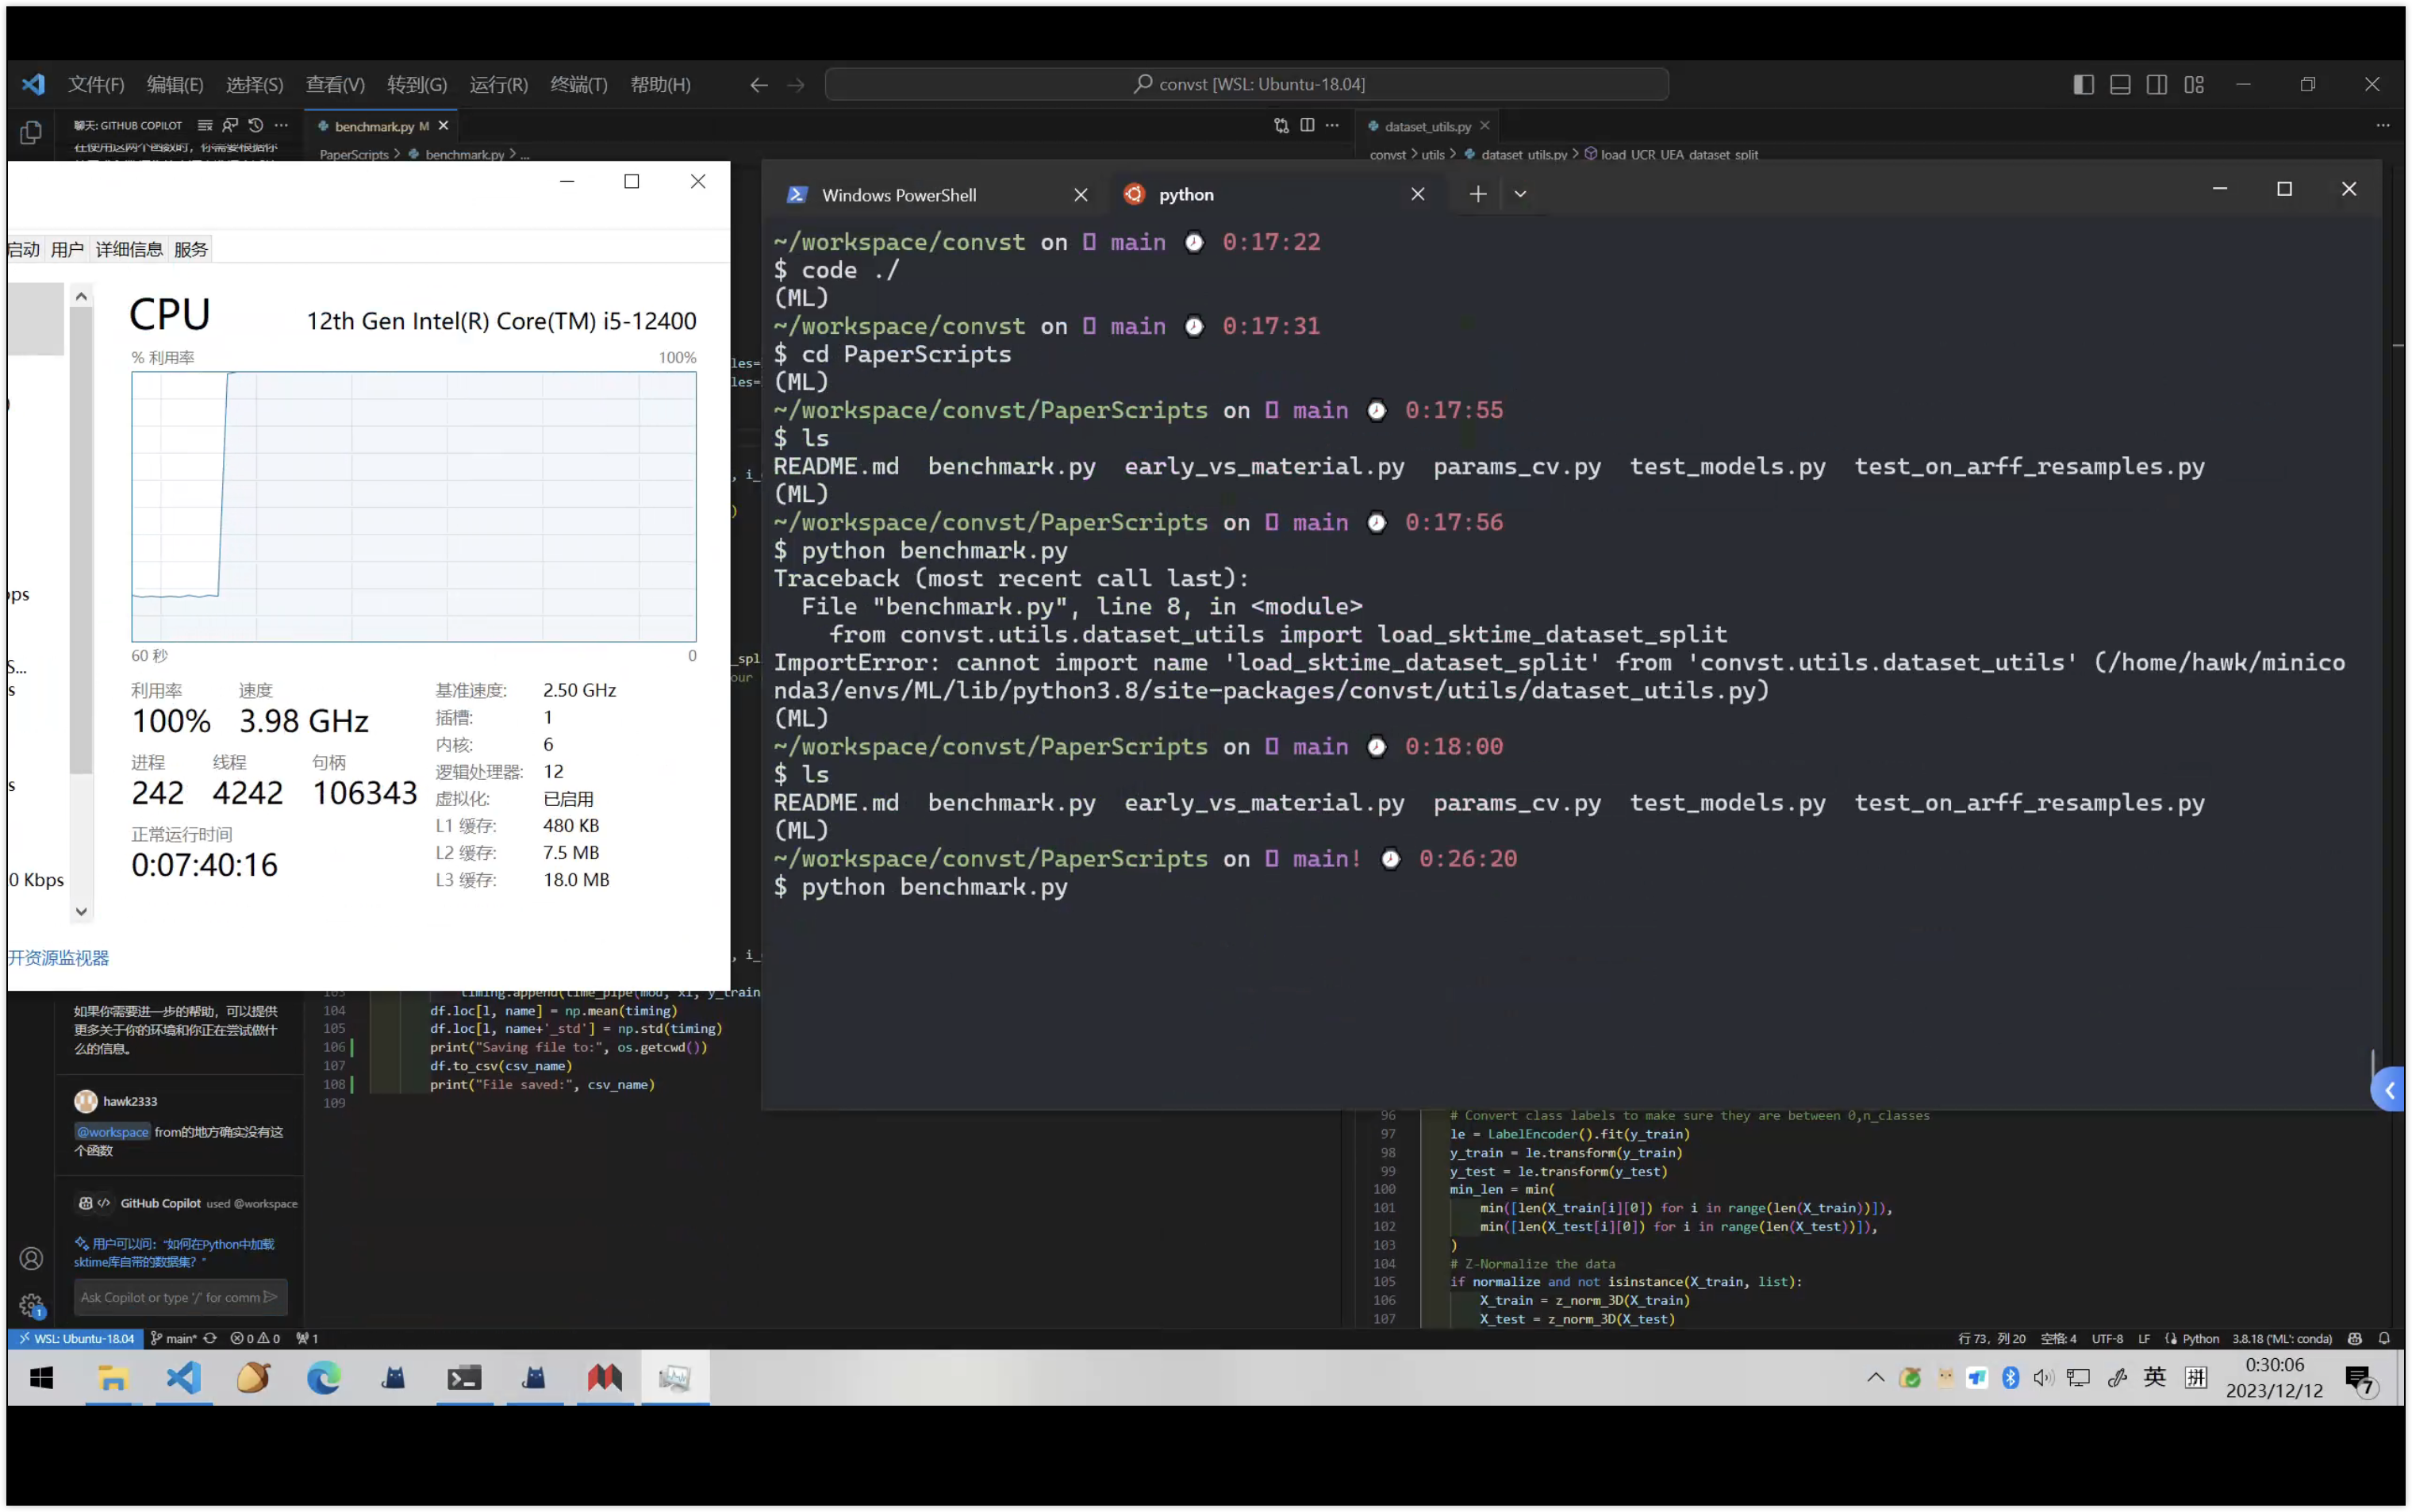
跑benchmark
第一个bug:源码里没有函数load_sktime_dataset
尝试:替换函数load_sktime_dataset为load_UCR_UEA_dataset_split
第二个bug:
⋊> ~/w/M/convst /opt/homebrew/Caskroom/miniconda/base/envs/MLpro/bin/python /Users/hawk/workspace/ML/convst/convst/PaperScripts/benchmark.py
Traceback (most recent call last):
  File "/Users/hawk/workspace/ML/convst/convst/PaperScripts/benchmark.py", line 11, in <module>
    from sktime.classification.hybrid import HIVECOTEV2
ModuleNotFoundError: No module named 'sktime'
尝试:pip install sktime 解决
23点42分:运行中。
00点03分:代码被kill了,内存太小了。。。。
再跑一次
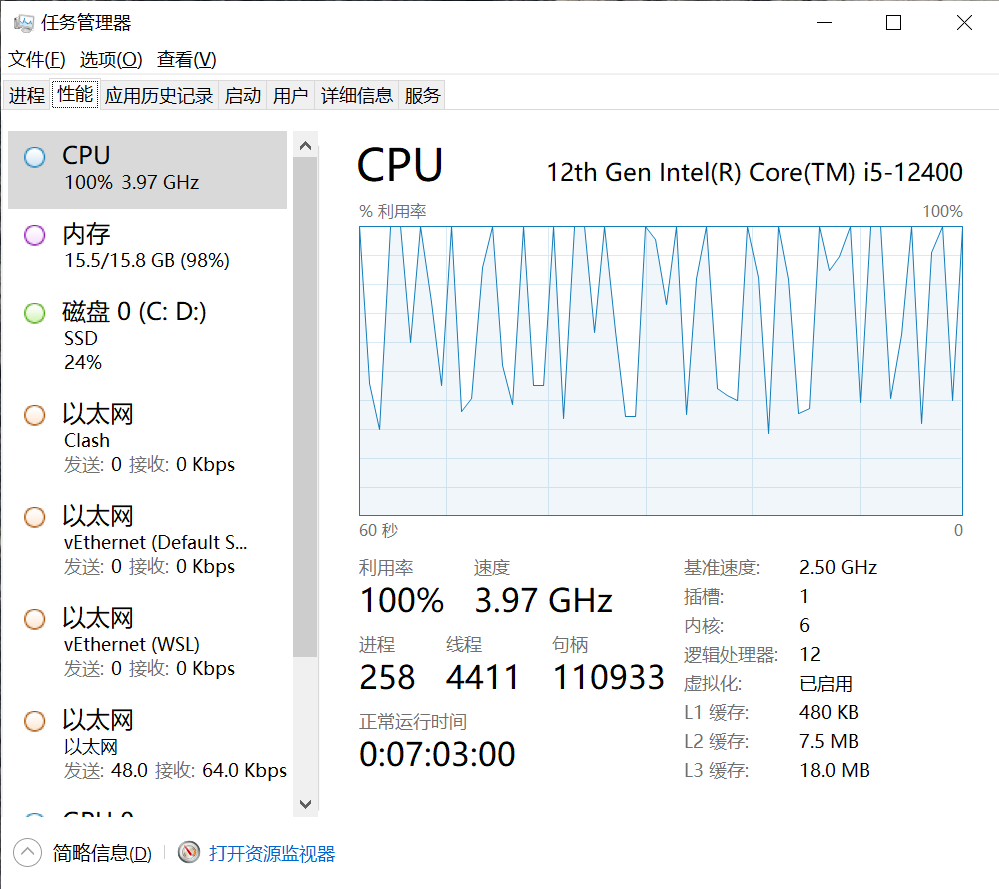
时间:00:30
内存顶满在跑,随时会被kill掉。。。如履薄冰

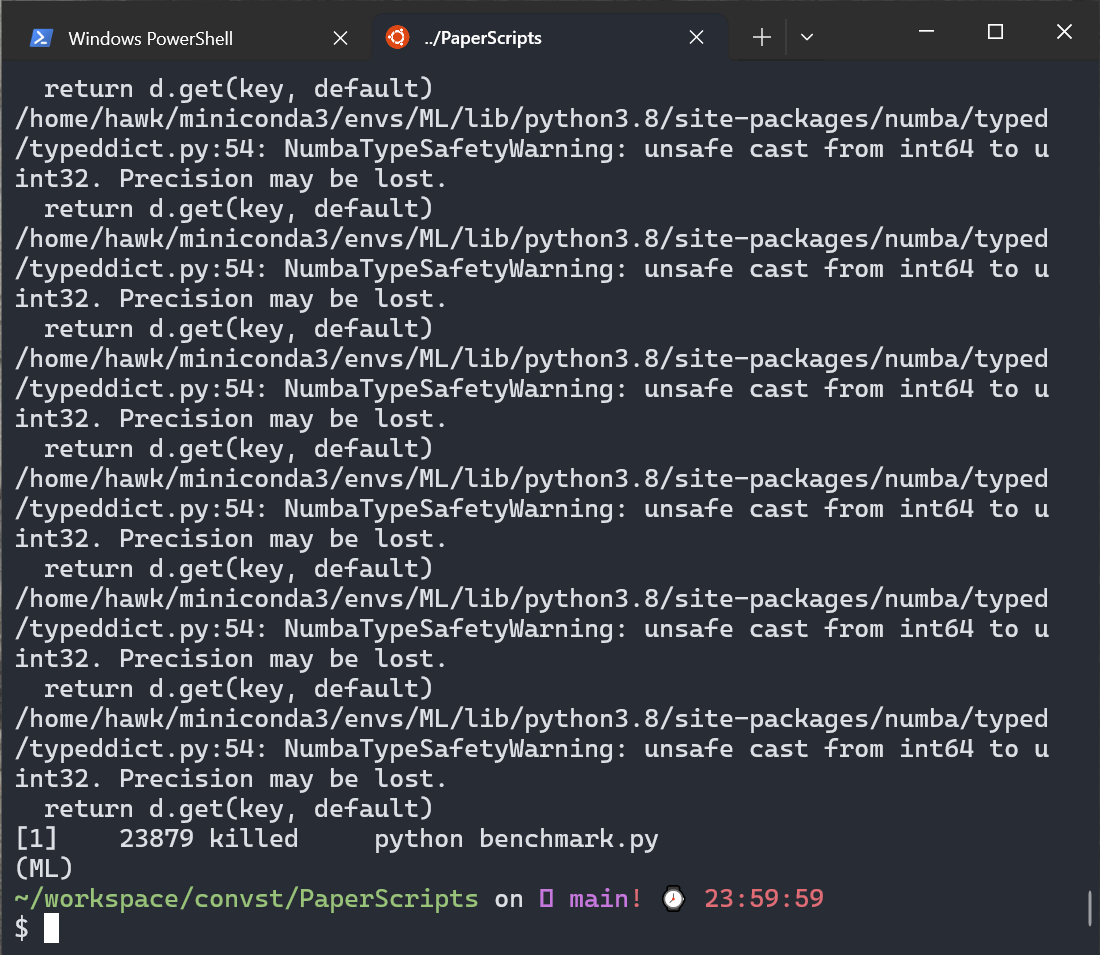
早上起来发现代码又被kill了。排查一下发现问题是numba预编译的时候把int64类型的值转换为uint32类型时导致内存溢出。
解决方法:把py文件分段保存为notebook。不执行numba编译那一段。现在在正常跑
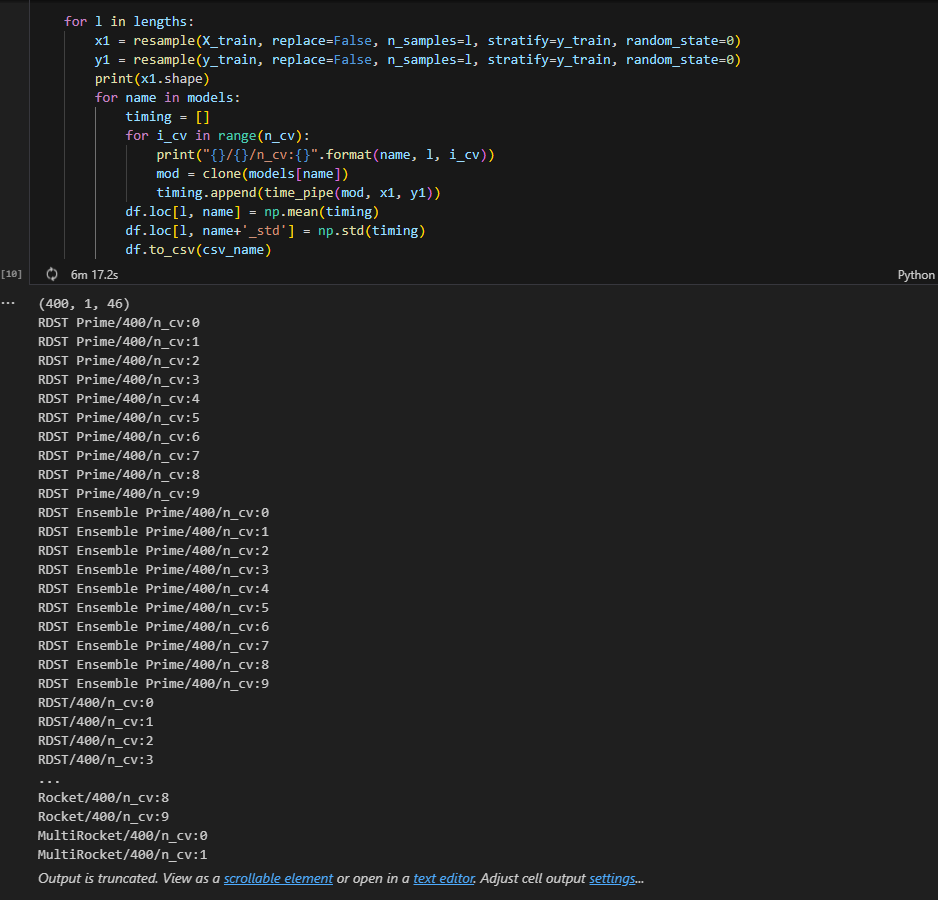
13点35分:内核崩溃了
输出部分实验结果:
,RDST Prime,RDST Ensemble Prime,RDST,RDST Ensemble,Rocket,MultiRocket,DrCIF,TDE,STC,HC2,RDST Prime_std,RDST Ensemble Prime_std,RDST_std,RDST Ensemble_std,Rocket_std,MultiRocket_std
400,0.7435659422000015,1.1724606225000058,0.6513903840000126,1.3271155426999826,14.765655556799999,159.6057917571,0,0,0,0,0.048736055285819306,0.08568224702321867,0.031562035770134195,0.21017713107302385,0.22218698184143373,1.736722462163107
尝试去掉除rdst之外的其他模型。只跑rdst

释放内存,重新跑这四个模型
14点04分:跑完了(截图)
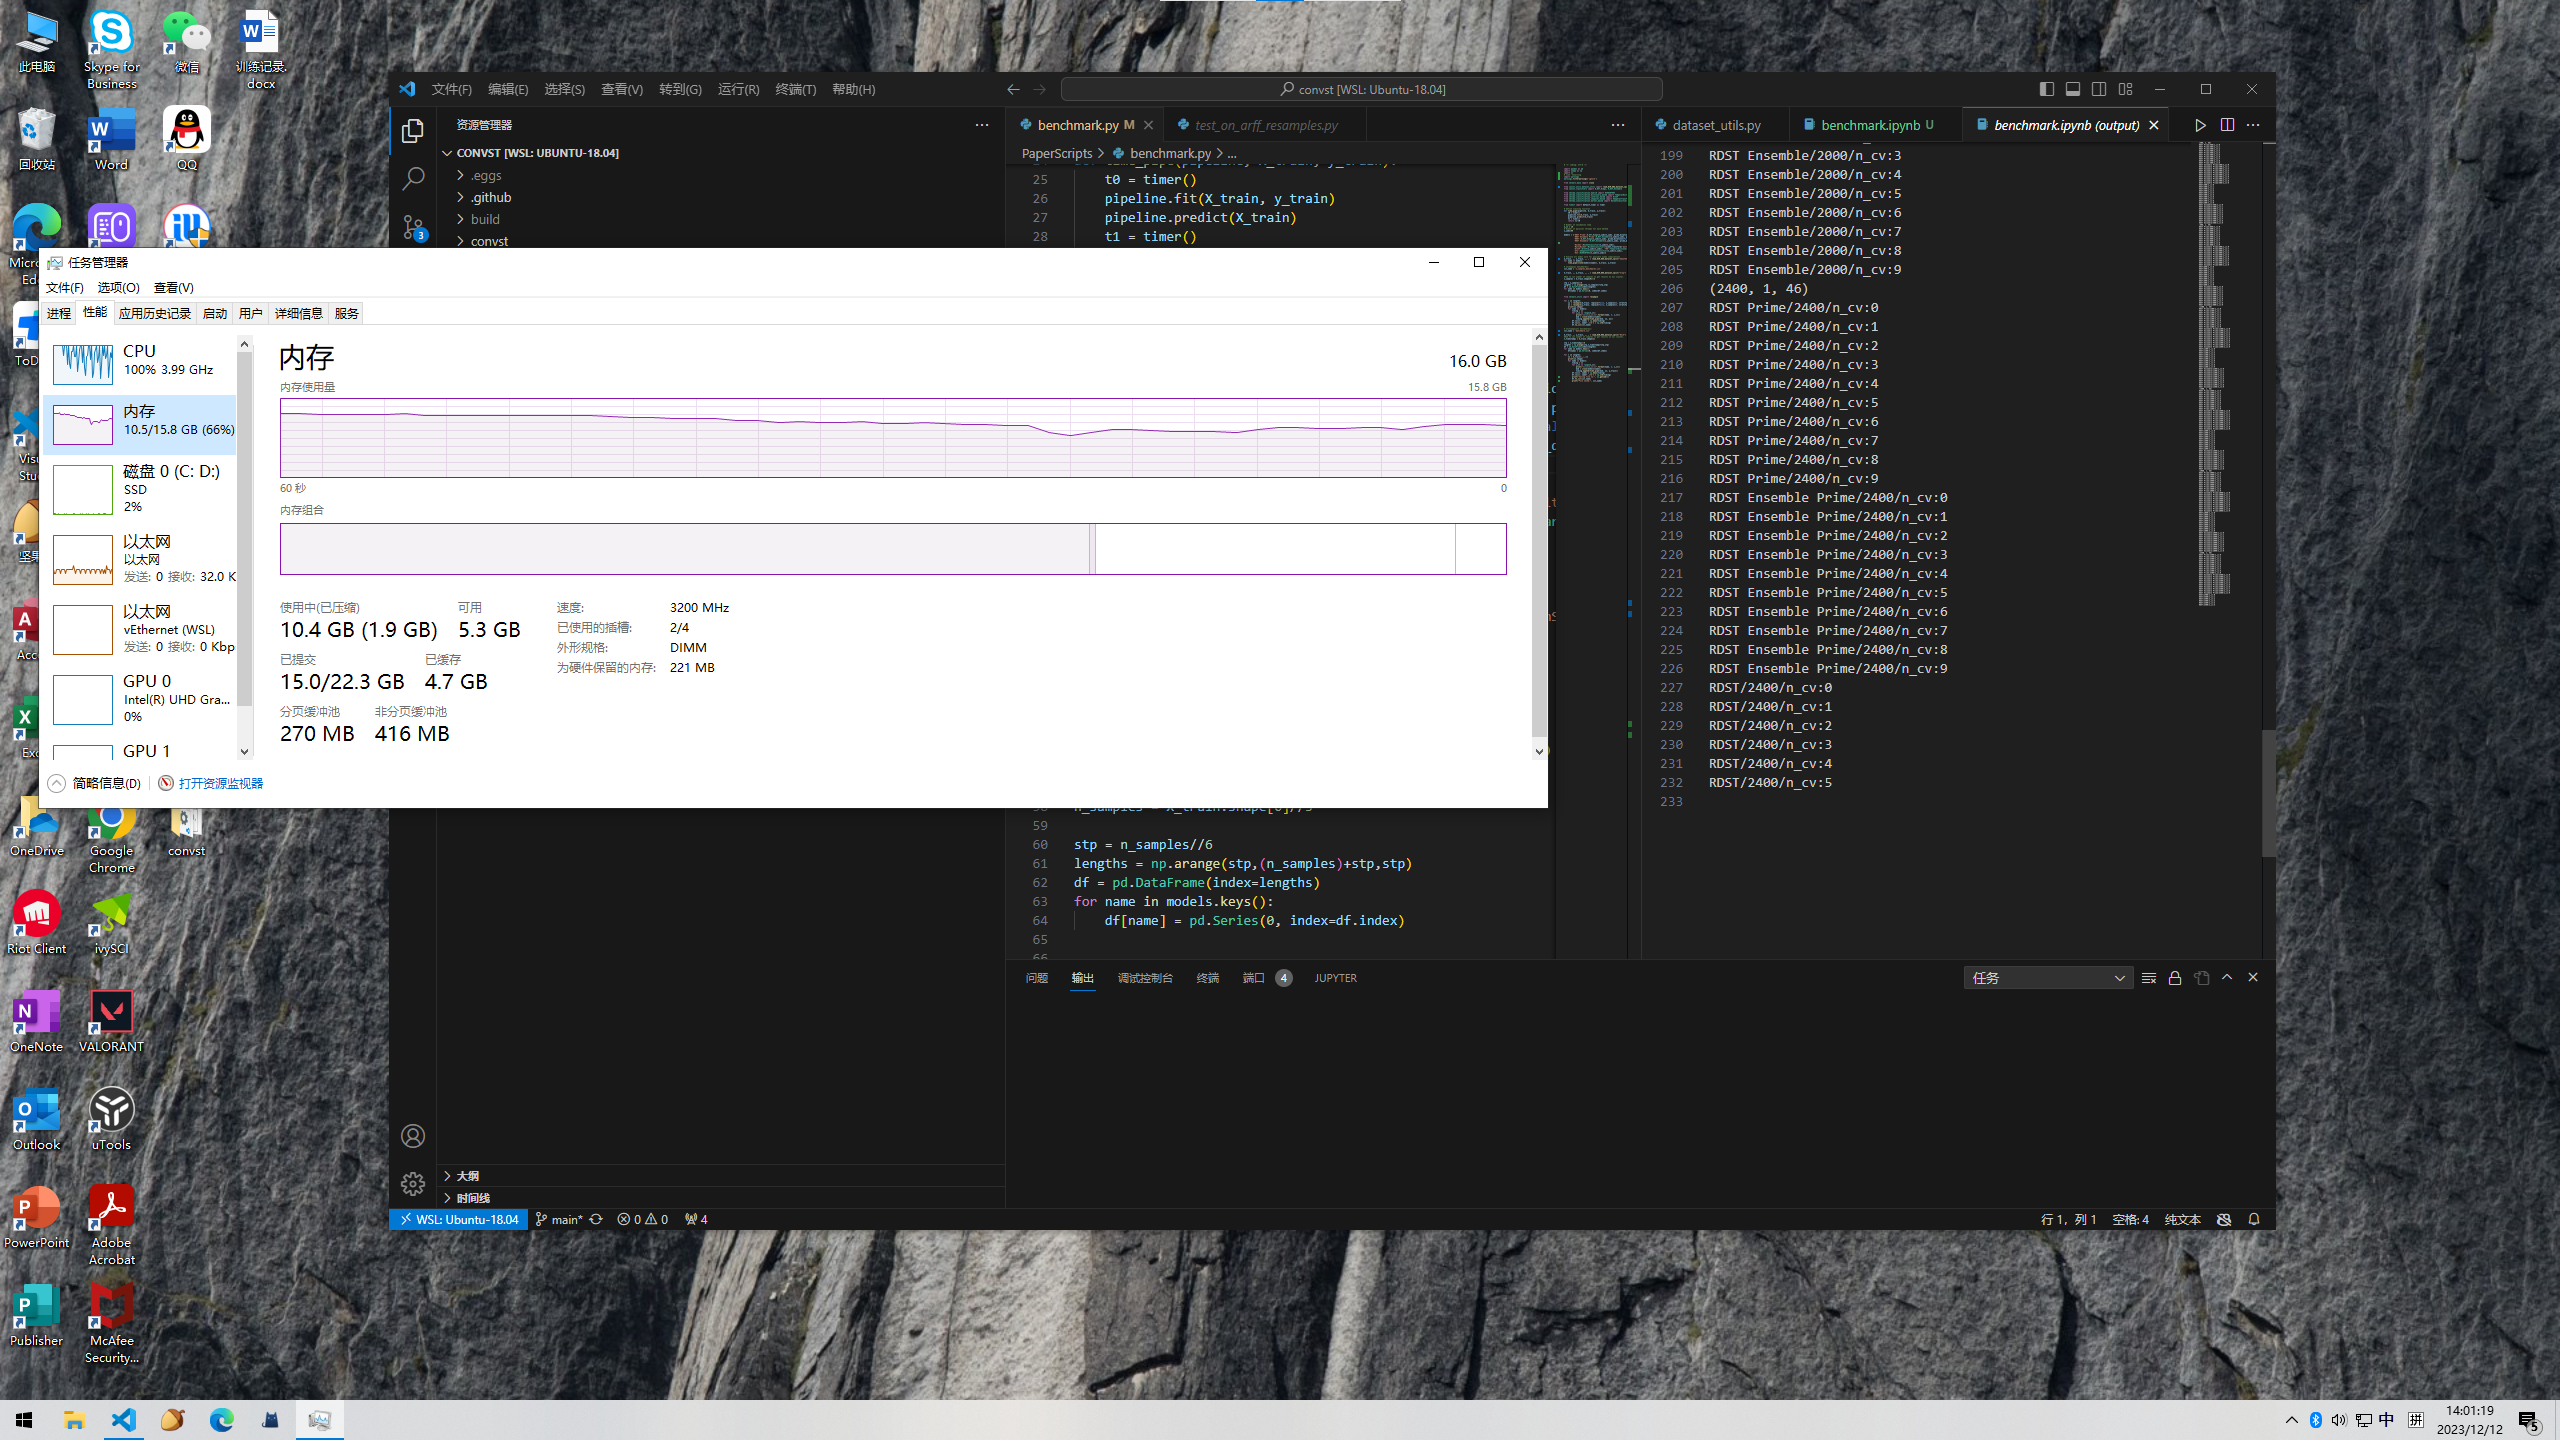
查看一下输出结果
,RDST Prime,RDST Ensemble Prime,RDST,RDST Ensemble,RDST Prime_std,RDST Ensemble Prime_std,RDST_std,RDST Ensemble_std
400,0.6670092139999998,1.0960306812999998,0.6694053398000023,1.0358112999,0.028153030778719224,0.08721807257017125,0.02629543842482472,0.046537976980042466
800,1.8705514385999997,3.0768019516999985,1.8156302853999975,2.847034808800001,0.07080536217197123,0.17626372793357645,0.08888960568150042,0.1385587114254787
1200,2.9517092885999943,4.850071625800004,3.0434600689000035,4.859736295099998,0.06803805556364058,0.2002040754580971,0.08476344991295455,0.19876979397334105
1600,4.119112845599995,6.677785492399994,4.114398992899988,6.734877460900009,0.12102688478303336,0.21824973336856854,0.18728515037023713,0.28816897614020254
2000,5.469180671099991,9.917715974100009,5.614825271899997,9.775538594399995,0.2442752027956037,0.2020803104506247,0.1949682248451399,0.3435159253686046
2400,7.6546442835,13.436765114700005,7.877349317700032,13.481795858500027,0.2020217493187331,0.3370203412067863,0.3964364572024426,0.5487246682416889
解读:
每一行代表一个特定的样本数量,从400到2400,每次增加400。每一行中的每个数字都是对应模型在该样本数量下的平均运行时间(以秒为单位)。
例如,第一行的数据表示,在400个样本的情况下,RDST Prime模型的平均运行时间是0.667秒,RDST Ensemble Prime模型的平均运行时间是1.096秒,RDST模型的平均运行时间是0.669秒,RDST Ensemble模型的平均运行时间是1.036秒。
此外,每个模型还有一个对应的标准差(_std),表示运行时间的变异性。例如,RDST Prime模型的运行时间标准差是0.028秒,这意味着实际的运行时间可能会在平均运行时间的基础上上下浮动0.028秒。
12月7日20:35
aeon
之前说到RDST的作者把他的代码并入aeon工具包中,我们查看一下aeon-toolkit的贡献者列表,确有其人。
Contributors - aeon 0.5.0 documentation (aeon-toolkit.org)

尝试用aeon-api运行RDST
既然RDST代码库合并到了aeon工具包里,我们应该可以import或用相应的api来调用RDST
首先进入aeon的文档网站aeon 0.5.0 documentation --- aeon 0.5.0 文档 (aeon-toolkit.org)搜索有关RDST的文档
找到了一篇关于RDST的API的文档
写一个小型的测试代码
from aeon.classification.shapelet_based import RDSTClassifier
from aeon.datasets import load_unit_test
X_train, y_train = load_unit_test(split="train", return_X_y=True)
X_test, y_test = load_unit_test(split="test", return_X_y=True)
clf = RDSTClassifier(
    max_shapelets=10
)
clf.fit(X_train, y_train)

y_pred = clf.predict(X_test)
print("Predictions: ", y_pred)
print("Accuracy: ", clf.score(X_test, y_test))
输出了预测结果
# 第一次
Predictions:  ['1' '1' '1' '1' '1' '1' '1' '1' '1' '1' '1' '1' '2' '2' '1' '2' '2' '1'
 '2' '2' '2' '1']
Accuracy:  0.8636363636363636

# 第二次
Predictions:  ['1' '1' '1' '1' '1' '1' '1' '1' '1' '1' '1' '1' '2' '2' '1' '2' '2' '1'
 '2' '2' '2' '2']
Accuracy:  0.9090909090909091

# 第三次
Predictions:  ['1' '2' '1' '2' '1' '1' '1' '1' '1' '1' '1' '1' '2' '2' '1' '2' '2' '1'
 '2' '2' '2' '1']
Accuracy:  0.7727272727272727

# 第四次
Predictions:  ['1' '1' '1' '1' '1' '1' '1' '1' '1' '1' '1' '1' '2' '2' '1' '2' '2' '1'
 '2' '2' '2' '1']
Accuracy:  0.8636363636363636
看来准确率在0.772727到0.9090之间。
代码到这里已经可以跑通源码,跑出实验结果了。之后打算看论文理解理论部分


 4593
4593


 被折叠的 条评论
为什么被折叠?
被折叠的 条评论
为什么被折叠?
 到【灌水乐园】发言


