


安卓之百度地图定位模式实现定位图层转变方式
在这里我就不细讲了,我之前的文章具体我都已经介绍了。
现在直接上代码(相当于对我前几篇文章的一个小描述)。
首先需要实现和百度SDK进行连接。我上一篇已介绍,在这里我就不在介绍了。
首先创建一个安卓项目.
在xml中编写如下代码:
<RelativeLayout xmlns:android="http://schemas.android.com/apk/res/android"
    xmlns:tools="http://schemas.android.com/tools"
    android:layout_width="match_parent"
    android:layout_height="match_parent"
    tools:context="com.example.lbstest7.MainActivity" >

    <com.baidu.mapapi.map.MapView
        android:id="@+id/mapView"
        android:layout_width="fill_parent"
        android:layout_height="fill_parent"
        android:clickable="true" />

    <LinearLayout
        android:layout_width="wrap_content"
        android:layout_height="wrap_content"
        android:layout_alignParentRight="true"
        android:layout_marginTop="80dip"
        android:background="#FFB6C1"
        android:minWidth="100dip"
        android:orientation="vertical"
        android:padding="2dp" >

        <RadioGroup
            android:id="@+id/radioGroup"
            android:layout_width="wrap_content"
            android:layout_height="wrap_content"
            android:contentDescription="定位icon" >

            <RadioButton
                android:id="@+id/radioButton1"
                android:layout_width="wrap_content"
                android:layout_height="wrap_content"
                android:checked="true"
                android:text="默认图标" >
            </RadioButton>

            <RadioButton
                android:id="@+id/radioButton2"
                android:layout_width="wrap_content"
                android:layout_height="wrap_content"
                android:text="自定义图标" >
            </RadioButton>
        </RadioGroup>
    </LinearLayout>

    <Button
        android:id="@+id/button1"
        android:layout_width="wrap_content"
        android:layout_height="wrap_content"
        android:layout_alignParentRight="true"
        android:layout_alignParentTop="true"
        android:layout_marginRight="12dp"
        android:layout_marginTop="10dip" />

</RelativeLayout>
主要是用按钮和单选按钮来实现切换模式。
在java中编写如下代码:
public class MainActivity extends Activity {
    private MyLocationConfiguration.LocationMode locationMode;//英语意思是位置模式
    MapView mapView;
    BaiduMap baiduMap;
    Button requestLocButton;
    BitmapDescriptor bitmapDescriptor;//位图描述 用户自定义定位图标
    boolean isFirstLoc = true;// 判断是否首次定位
    LocationClient locationClient;//定位服务的客户端。宿主程序在客户端声明此类,并调用

    @Override
    protected void onCreate(Bundle savedInstanceState) {
        super.onCreate(savedInstanceState);
        SDKInitializer.initialize(getApplicationContext());//初始化地图SDK,必须放在setContentView(R.layout.activity_main)之前,否则会出错误
        setContentView(R.layout.activity_main);
        locationClient = new LocationClient(this);
        locationClient.registerLocationListener(new MyLocationListener());// 注册定位监听函数

        mapView = (MapView) findViewById(R.id.mapView);
        baiduMap = mapView.getMap();//开启定位图层
        baiduMap.setMyLocationEnabled(true);//是否开启定位
        LocationClientOption option = new LocationClientOption();// LocationClientOption主要意思是选择定位服务模式的类型
        option.setOpenGps(true);// 打开gps
        option.setCoorType("bd09ll"); // 设置坐标类型
        option.setScanSpan(2000);//setScanSpan()设置更新的间隔
        locationClient.setLocOption(option);// 使用设置
        locationClient.start();//开始定位,定位的结果会回调到我们前面注册的监听器中MyLocationListener

        locationMode = MyLocationConfiguration.LocationMode.NORMAL;//定位图层显示方式
        requestLocButton = (Button) findViewById(R.id.button1);
        requestLocButton.setText("普通");
        requestLocButton.setOnClickListener(new OnClickListener() {
            @Override
            public void onClick(View v) {
                switch (locationMode) {

                        case NORMAL:
                            requestLocButton.setText("跟随");
                            locationMode = MyLocationConfiguration.LocationMode.FOLLOWING;//跟随态,保持定位图标在地图中心
                            baiduMap
                                    .setMyLocationConfigeration(new MyLocationConfiguration(
                                            locationMode, true, bitmapDescriptor));
                            break;
                        case COMPASS:
                            requestLocButton.setText("普通");
                            locationMode = MyLocationConfiguration.LocationMode.NORMAL;//普通态: 更新定位数据时不对地图做任何操作
                            baiduMap
                                    .setMyLocationConfigeration(new MyLocationConfiguration(
                                            locationMode, true, bitmapDescriptor));
                            break;
                        case FOLLOWING:
                            requestLocButton.setText("罗盘");
                            locationMode = MyLocationConfiguration.LocationMode.COMPASS;//罗盘态,显示定位方向圈,保持定位图标在地图中心
                            baiduMap
                                    .setMyLocationConfigeration(new MyLocationConfiguration(
                                            locationMode, true, bitmapDescriptor));
                            break;
                        default:
                            break;
                    }
                }

        });
        RadioGroup radioGroup = (RadioGroup) this.findViewById(R.id.radioGroup);
        radioGroup.setOnCheckedChangeListener(new RadioGroup.OnCheckedChangeListener() {
            @Override
            public void onCheckedChanged(RadioGroup group, int checkedId) {
                if (checkedId == R.id.radioButton1) {
                    bitmapDescriptor = null;
                    //设置定位图层配置信息,只有先允许定位图层后设置定位图层配置信息才会生效
                    baiduMap.setMyLocationConfigeration(new MyLocationConfiguration(locationMode, true, null));
                }
                if (checkedId == R.id.radioButton2) {
                 //BitmapDescriptorFactory是bitmap 描述信息工厂类,在使用该类方法之前请确保已经调用了 SDKInitializer.initialize(Context) 函数以提供全局 Context 信息。
                    bitmapDescriptor = BitmapDescriptorFactory
                            .fromResource(R.drawable.one);//fromResource()根据资源 Id 创建 bitmap 描述信息
                    //设置定位图层配置信息,只有先允许定位图层后设置定位图层配置信息才会生效
                    baiduMap.setMyLocationConfigeration(new MyLocationConfiguration(locationMode, true, bitmapDescriptor));
                }
            }
        });


    }


    private class MyLocationListener implements BDLocationListener {
        @Override
        public void onReceiveLocation(BDLocation bdLocation) {//BDLocation里面封装了许多关于定位的方法
            if (bdLocation == null || mapView == null) {
                Toast.makeText(MainActivity.this, "地图为空", Toast.LENGTH_SHORT).show();
            }
            MyLocationData myLocationData = new MyLocationData.Builder()//MyLocationData定位数据建造器
                    .accuracy(bdLocation.getRadius())//accuracy()定位精度
                    // 此处设置开发者获取到的方向信息,顺时针0-360
                    .direction(100).latitude(bdLocation.getLatitude())//direction()GPS定位时方向角度
                    .longitude(bdLocation.getLongitude()).build();
            baiduMap.setMyLocationData(myLocationData);
            if (isFirstLoc) {
                isFirstLoc = false;
                LatLng latLng = new LatLng(bdLocation.getLatitude(),
                        bdLocation.getLongitude());
                MapStatusUpdate mapStatusUpdate = MapStatusUpdateFactory.newLatLng(latLng);
                baiduMap.animateMapStatus(mapStatusUpdate);
            }
        }
    }
    @Override
    protected void onPause() {
       mapView.onPause();
        super.onPause();
    }

    @Override
    protected void onResume() {
        mapView.onResume();
        super.onResume();
    }

    @Override
    protected void onDestroy() {
        // 退出时销毁定位
       locationClient.stop();
        // 关闭定位图层
        baiduMap.setMyLocationEnabled(false);
        mapView.onDestroy();
        mapView = null;
        super.onDestroy();
    }


}
上面的代码中都有注释,在这里我就不介绍了。
最主要的是别忘了在Manifest.xml中要编写权限和百度密钥,如下所示:
<manifest xmlns:android="http://schemas.android.com/apk/res/android"
    xmlns:tools="http://schemas.android.com/tools"
    package="com.example.lbstest7">
    <!-- 这个权限用于进行网络定位-->
    <uses-permission android:name="android.permission.ACCESS_COARSE_LOCATION"></uses-permission>
    <!-- 这个权限用于访问GPS定位-->
    <uses-permission android:name="android.permission.ACCESS_FINE_LOCATION"></uses-permission>
    <!-- 用于访问wifi网络信息,wifi信息会用于进行网络定位-->
    <uses-permission android:name="android.permission.ACCESS_WIFI_STATE"></uses-permission>
    <!-- 获取运营商信息,用于支持提供运营商信息相关的接口-->
    <uses-permission android:name="android.permission.ACCESS_NETWORK_STATE"></uses-permission>
    <!-- 这个权限用于获取wifi的获取权限,wifi信息会用来进行网络定位-->
    <uses-permission android:name="android.permission.CHANGE_WIFI_STATE"></uses-permission>
    <!-- 写入扩展存储,向扩展卡写入数据,用于写入离线定位数据-->
    <uses-permission android:name="android.permission.WRITE_EXTERNAL_STORAGE"></uses-permission>
    <!-- 访问网络,网络定位需要上网-->
    <uses-permission android:name="android.permission.INTERNET"></uses-permission>
    <uses-permission android:name="android.permission.READ_PHONE_STATE" />
    <uses-permission android:name="android.permission.MOUNT_UNMOUNT_FILESYSTEMS"
        tools:ignore="ProtectedPermissions" />
    <uses-permission android:name="android.permission.READ_LOGS"
        tools:ignore="ProtectedPermissions" />
    <application
        android:allowBackup="true"
        android:icon="@mipmap/ic_launcher"
        android:label="@string/app_name"
        android:roundIcon="@mipmap/ic_launcher_round"
        android:supportsRtl="true"
        android:theme="@style/AppTheme">
        <activity android:name=".MainActivity">
            <intent-filter>
                <action android:name="android.intent.action.MAIN" />

                <category android:name="android.intent.category.LAUNCHER" />
            </intent-filter>
        </activity>
        <meta-data android:name="com.baidu.lbsapi.API_KEY"
            android:value="ADuRoL0gilmwrS6MnskQyWGSaaQxhwaH"/>
        <service android:name="com.baidu.location.f" android:enabled="true"
            android:process=":remote"
            />
    </application>

</manifest>
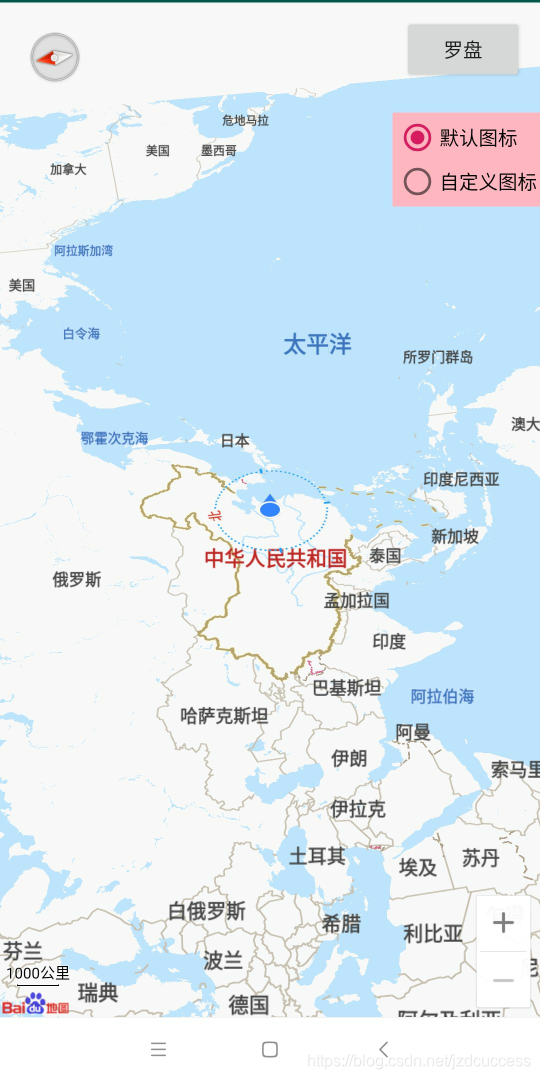
效果图如下:


 528
528

 被折叠的 条评论
为什么被折叠?
被折叠的 条评论
为什么被折叠?
 到【灌水乐园】发言


