


 本文介绍如何使用Qt实现左右两个图片的同步缩放、拖动与还原功能。通过自定义bigImageLabel控件,利用信号与槽机制,实现了鼠标操作下图片的互动。代码基于QLabel,改进自特定参考文章。
最近开发一个产品,需要开发一个模块,左右两边各有一个label,分别显示图像,两幅图像同步实现图像的缩小、放大、拖动与还原功能。
由于多个网友联系要购买这个资源,所以我将这部分代码独立了出来,有意者可以下载,点击Qt实现左右两个图片的同步缩放、拖动与还原的源码链接
本功能主要参考了文章https://blog.csdn.net/lwei3600103/article/details/78532523的代码,在其基础上进行的改进。
原文中,图片是直接画在QWidget控件上,本文则将图片画在QLabel上,功能都是一样的,所用的函数也都是差不多的。毕竟QLabel也是在QWidget基础上发展出来的。在本例中去掉了右键弹出菜单项,所有功能都是鼠标操作完成:左键按住移动鼠标是拖动,滚轮是放大图片,双击左键是还原图片。
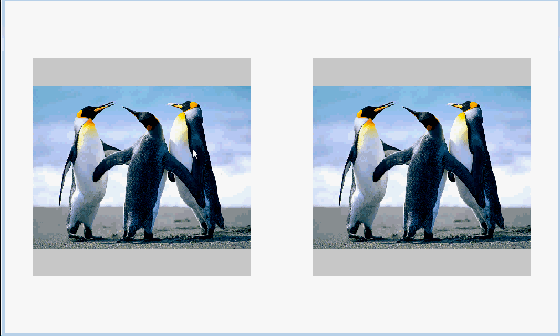
具体效果如下图:
双击还原功能通过重写mouseDoubleClickEvent(),调用onPresetImage()函数,在这里做一下补充说明:
//双击还原功能通过重写mouseDoubleClickEvent(),调用onPresetImage()函数
void bigImageLabel::mouseDoubleClickEvent(QMouseEvent *event)
{
    emit this->resetting();
    this->onPresetImage();
}
本文重在讲述如何实现在任意一个图片上进行操作,将这个操作同步到另外一个图片。反之亦然。为了功能复用,左右两边的QLabel都是从自定义控件bigImageLabel实例化而来,因此左右两个QLabel都是完全一样的。对两边图像的操作是通过更上一层控件connect两边的QLabel的信号与槽实现的。
下面是bigImageLabel的.h文件。
#ifndef BIGIMAGELABEL_H
#define BIGIMAGELABEL_H

#include <QWidget>
#include <QLabel>
#include <QPaintEvent>
#include <QWheelEvent>
#include <QImage>

class bigImageLabel : public QLabel
{
    Q_OBJECT
public:
    explicit bigImageLabel(double w, double h, QWidget *parent = nullptr);
    void resetSize(double w, double h);
    void drawImg(QPixmap);//用于将生成的图片绘制到控件上
    void drawBlinkRect(QRect);//用于在控件上绘制闪烁的矩形

protected:
    void paintEvent(QPaintEvent *);
    void wheelEvent(QWheelEvent *event);
    void mouseDoubleClickEvent(QMouseEvent *event);
    void mousePressEvent(QMouseEvent *ev);
    void mouseReleaseEvent(QMouseEvent *ev);
    void mouseMoveEvent(QMouseEvent *ev);


private:
    double outShellWidth;
    double outShellHeight;
    int minMargin = 100; //与外层控件的最小距离
    double width;
    double height;
    double imgWidth = 300;
    double imgheight = 300;
    QImage m_Image;
    qreal m_ZoomValue = 1.0;
    int m_XPtInterval = 0;//图像x方向总偏移量,用于图片拖动
    int m_YPtInterval = 0;//图像y方向总偏移量,用于图片拖动
    QPoint m_OldPos;//鼠标旧位置,该变量用于鼠标拖动图片
    bool m_Pressed = false;

    void setBaseStyle();
    void loadImage();

signals:
    void zoomming(qreal);
    void resetting();
    void dragging(int, int, QPoint, bool);

public slots:
    void onZoomInImage(void);
    void onZoomOutImage(void);
    void onPresetImage(void);
    void byZoomming(qreal);
    void byResetting();
    void byDragging(int, int, QPoint, bool);
};

#endif // BIGIMAGELABEL_H
该控件的信号zoomming(),resetting(),dragging()分别是缩放、重置、拖动的信号,在相应的鼠标事件被触发时发送对应的信号。同时在槽函数中增加byZoomming(),byResetting(),byDragging(),用于接收对应的信号。信号不需要定义,下面是对应的槽函数的实现:
//响应缩放的槽函数
void bigImageLabel::byZoomming(qreal zoomValue)
{
    this->m_ZoomValue = zoomValue;
    this->update();
}

//响应重置的槽函数
void bigImageLabel::byResetting()
{
    this->onPresetImage();
}

//响应拖动的槽函数
void bigImageLabel::byDragging(int xint, int yint, QPoint oldpos, bool pressed)
{
    this->m_XPtInterval = xint;
    this->m_YPtInterval = yint;
    this->m_OldPos = oldpos;
    this->m_Pressed = pressed;
    this->update();
}
下面是在上一层控件topWidget中添加的connect连接,其中leftShower和rightshower是在topWidget中实例化的bigImageLabel的对象,分别显示左右两个图像。
void topWidget::addConnect()
{
    connect(leftShower, SIGNAL(zoomming(qreal)), rightShower, SLOT(byZoomming(qreal)));
    connect(rightShower, SIGNAL(zoomming(qreal)), leftShower SLOT(byZoomming(qreal)));
    connect(leftShower, SIGNAL(resetting()), rightShower, SLOT(byResetting()));
    connect(rightShower, SIGNAL(resetting()), leftShower, SLOT(byResetting()));
    connect(leftShower, SIGNAL(dragging(int,int,QPoint,bool)),
            rightShower, SLOT(byDragging(int,int,QPoint,bool)));
    connect(rightShower, SIGNAL(dragging(int,int,QPoint,bool)),
            leftShower, SLOT(byDragging(int,int,QPoint,bool)));
}
添加好connect之后,就可以实现左右两个图片的同步操作了。目前做的例子左右两边加载的是相同的图片,但是加载不同的图片应该也是可以实现的。将来有时间了我再继续更新尝试。
第一次发布文章,鼓励自己一下。


 1万+
1万+

 被折叠的 条评论
为什么被折叠?
被折叠的 条评论
为什么被折叠?
 到【灌水乐园】发言


