


Packet Sniffing and Spoofing Lab
本次实验的目的有两点:学习使用报文嗅探&欺骗的工具、理解其背后的原理。
实验配置
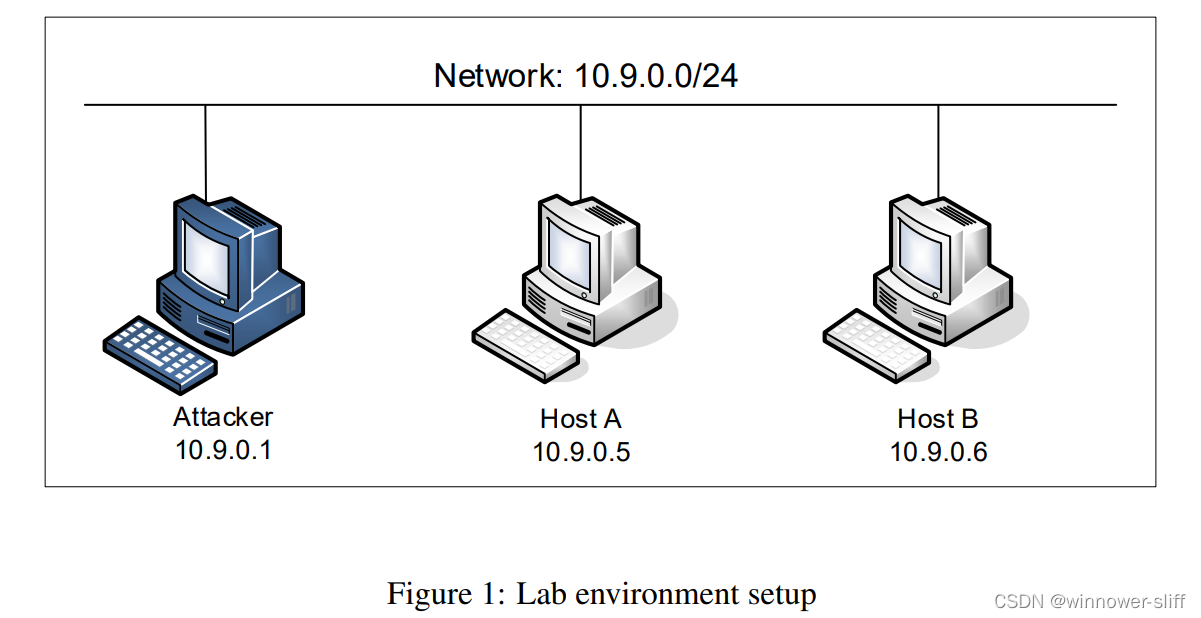
本次实验使用处在同一局域网下的三台机器,使用docker运行,其文件在官网上可以下载,具体使用方法可以参考我的PKI实验报告。网络拓扑如图:
Task Set 1 使用Scapy来嗅探&欺骗报文
1.1 嗅探报文
最简单的一个嗅探代码,利用ifconfig得到接口名:
#!/usr/bin/env python3
from scapy.all import *
def print_pkt(pkt):
	pkt.show()
pkt = sniff(iface='br-c93733e9f913', filter='icmp', prn=print_pkt)
1.1A
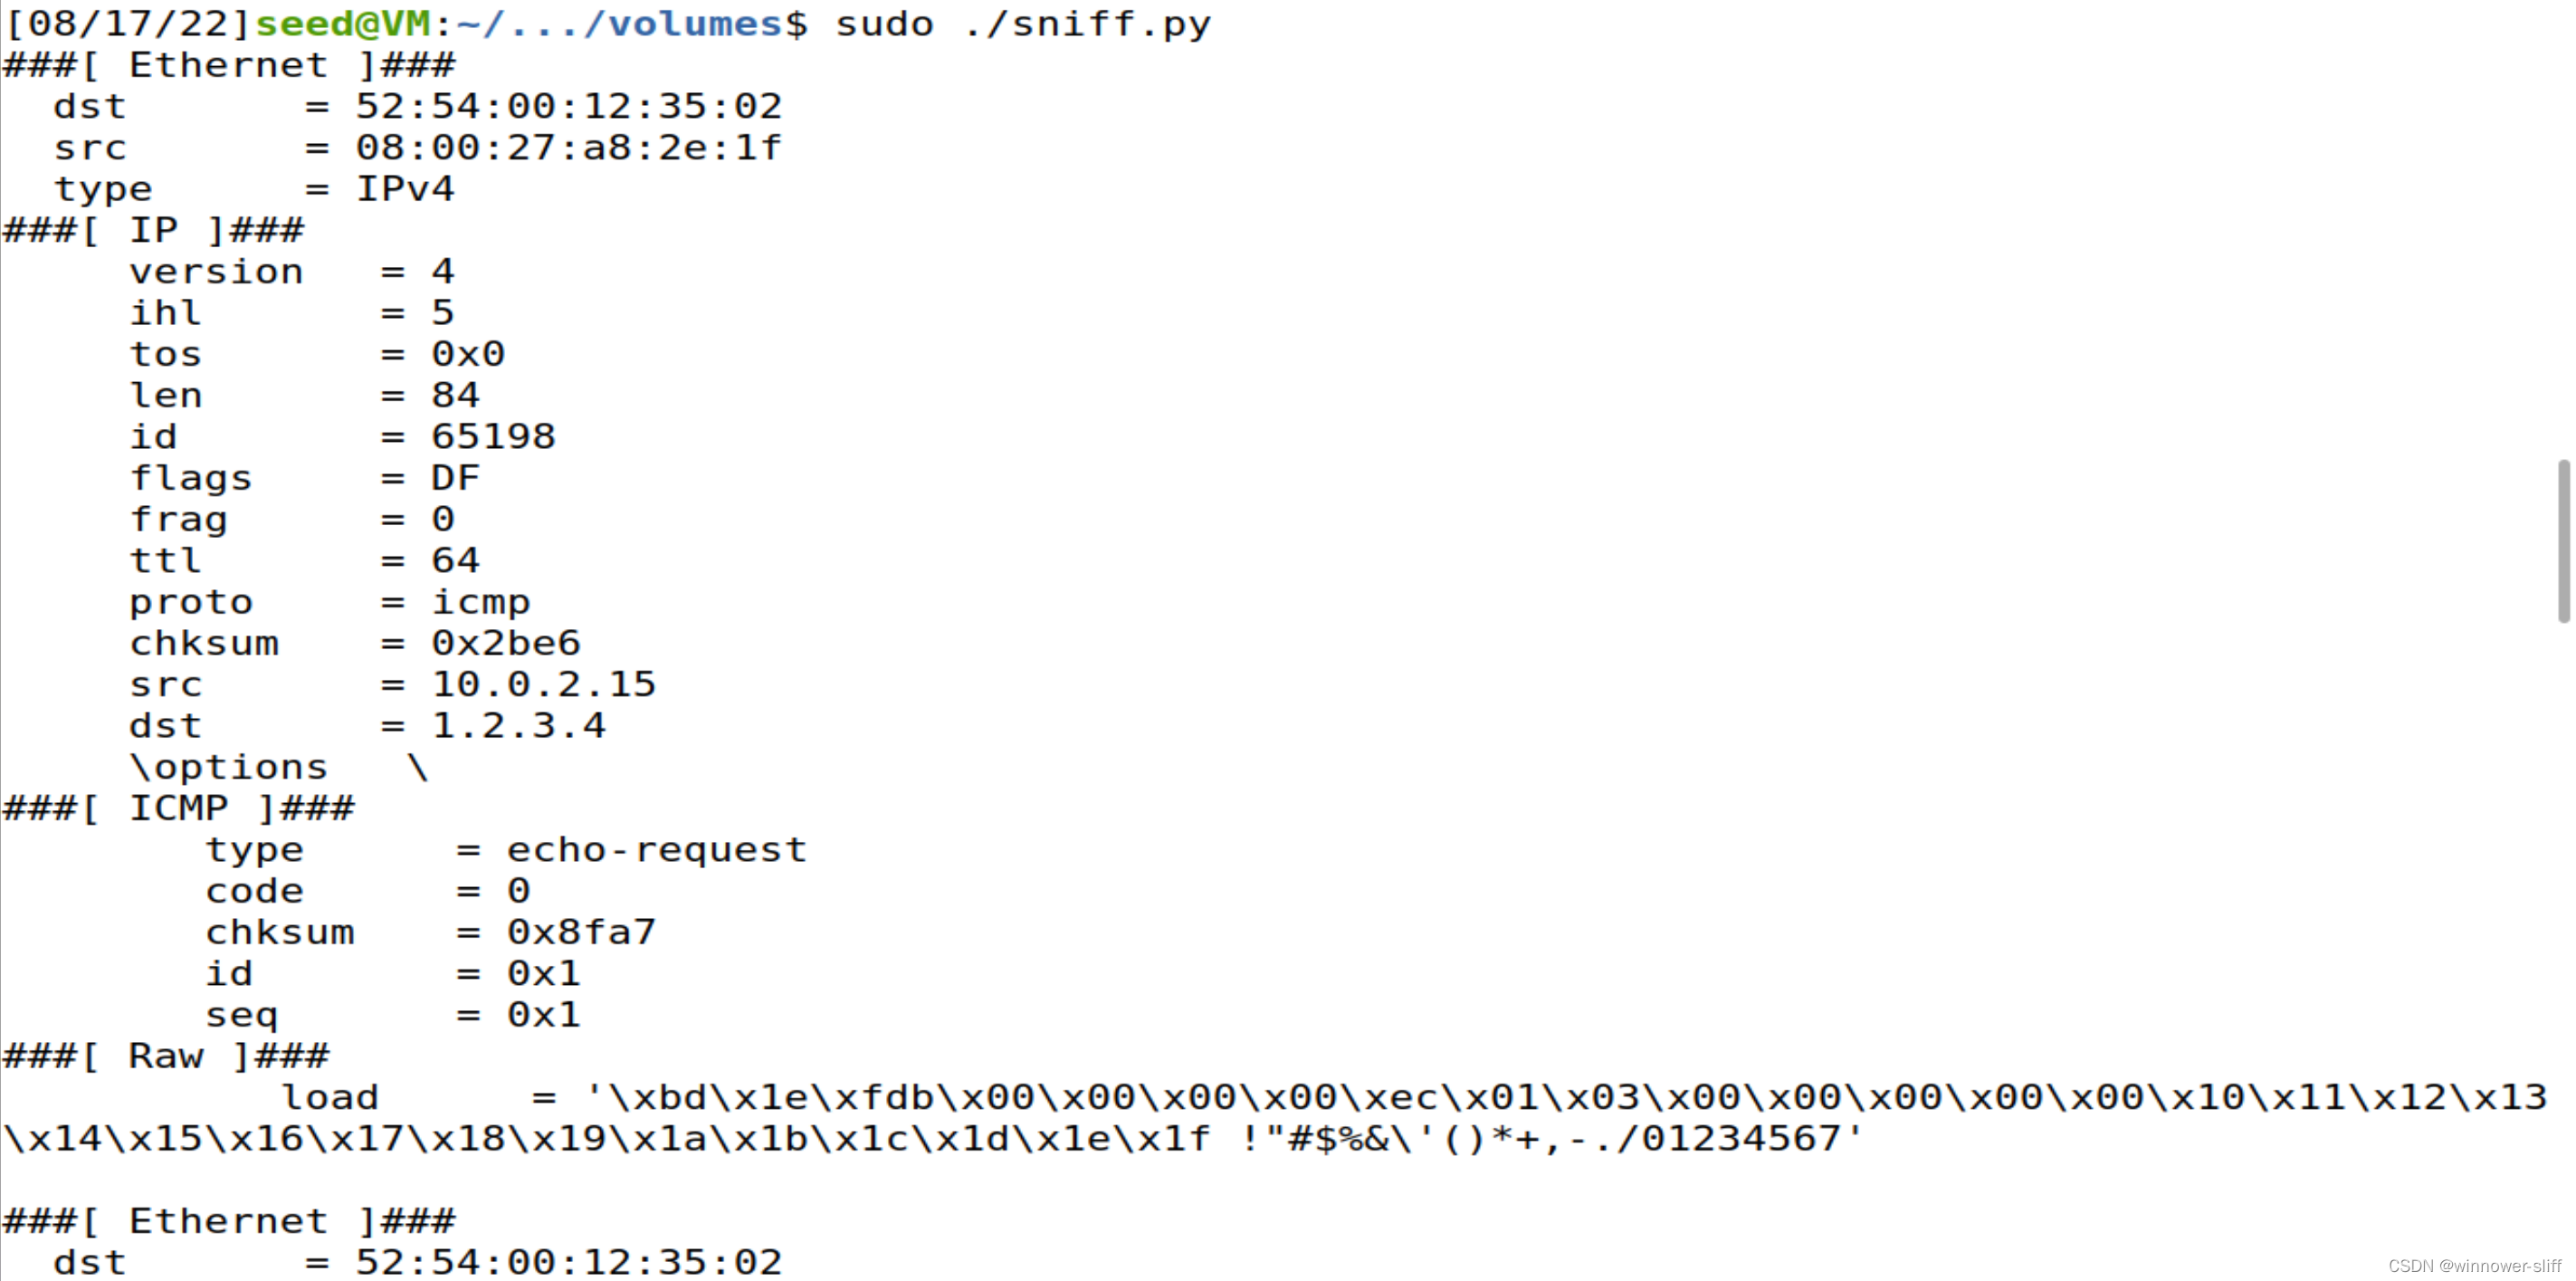
iface也可以传入一个列表元素,其值为接口名。filter为过滤器,prn则是将捕捉到的报文传入的函数,这里是直接将其展出。如图:
1.1B
使用过滤器完成以下过滤:
• Capture only the ICMP packet
• Capture any TCP packet that comes from a particular IP and with a destination port number 23.
• Capture packets comes from or to go to a particular subnet. You can pick any subnet, such as 128.230.0.0/16; you should not pick the subnet that your VM is attached to.
- filter=‘icmp’ 只抓取ICMP报文
- filter=‘tcp and host 1.2.3.4 and port 23’ 只抓取来自1.2.3.4的23端口的TCP报文
- filter=‘net 192.168.31.0/24’ 只抓取来自该网段的报文
1.2 发出欺骗ICMP报文
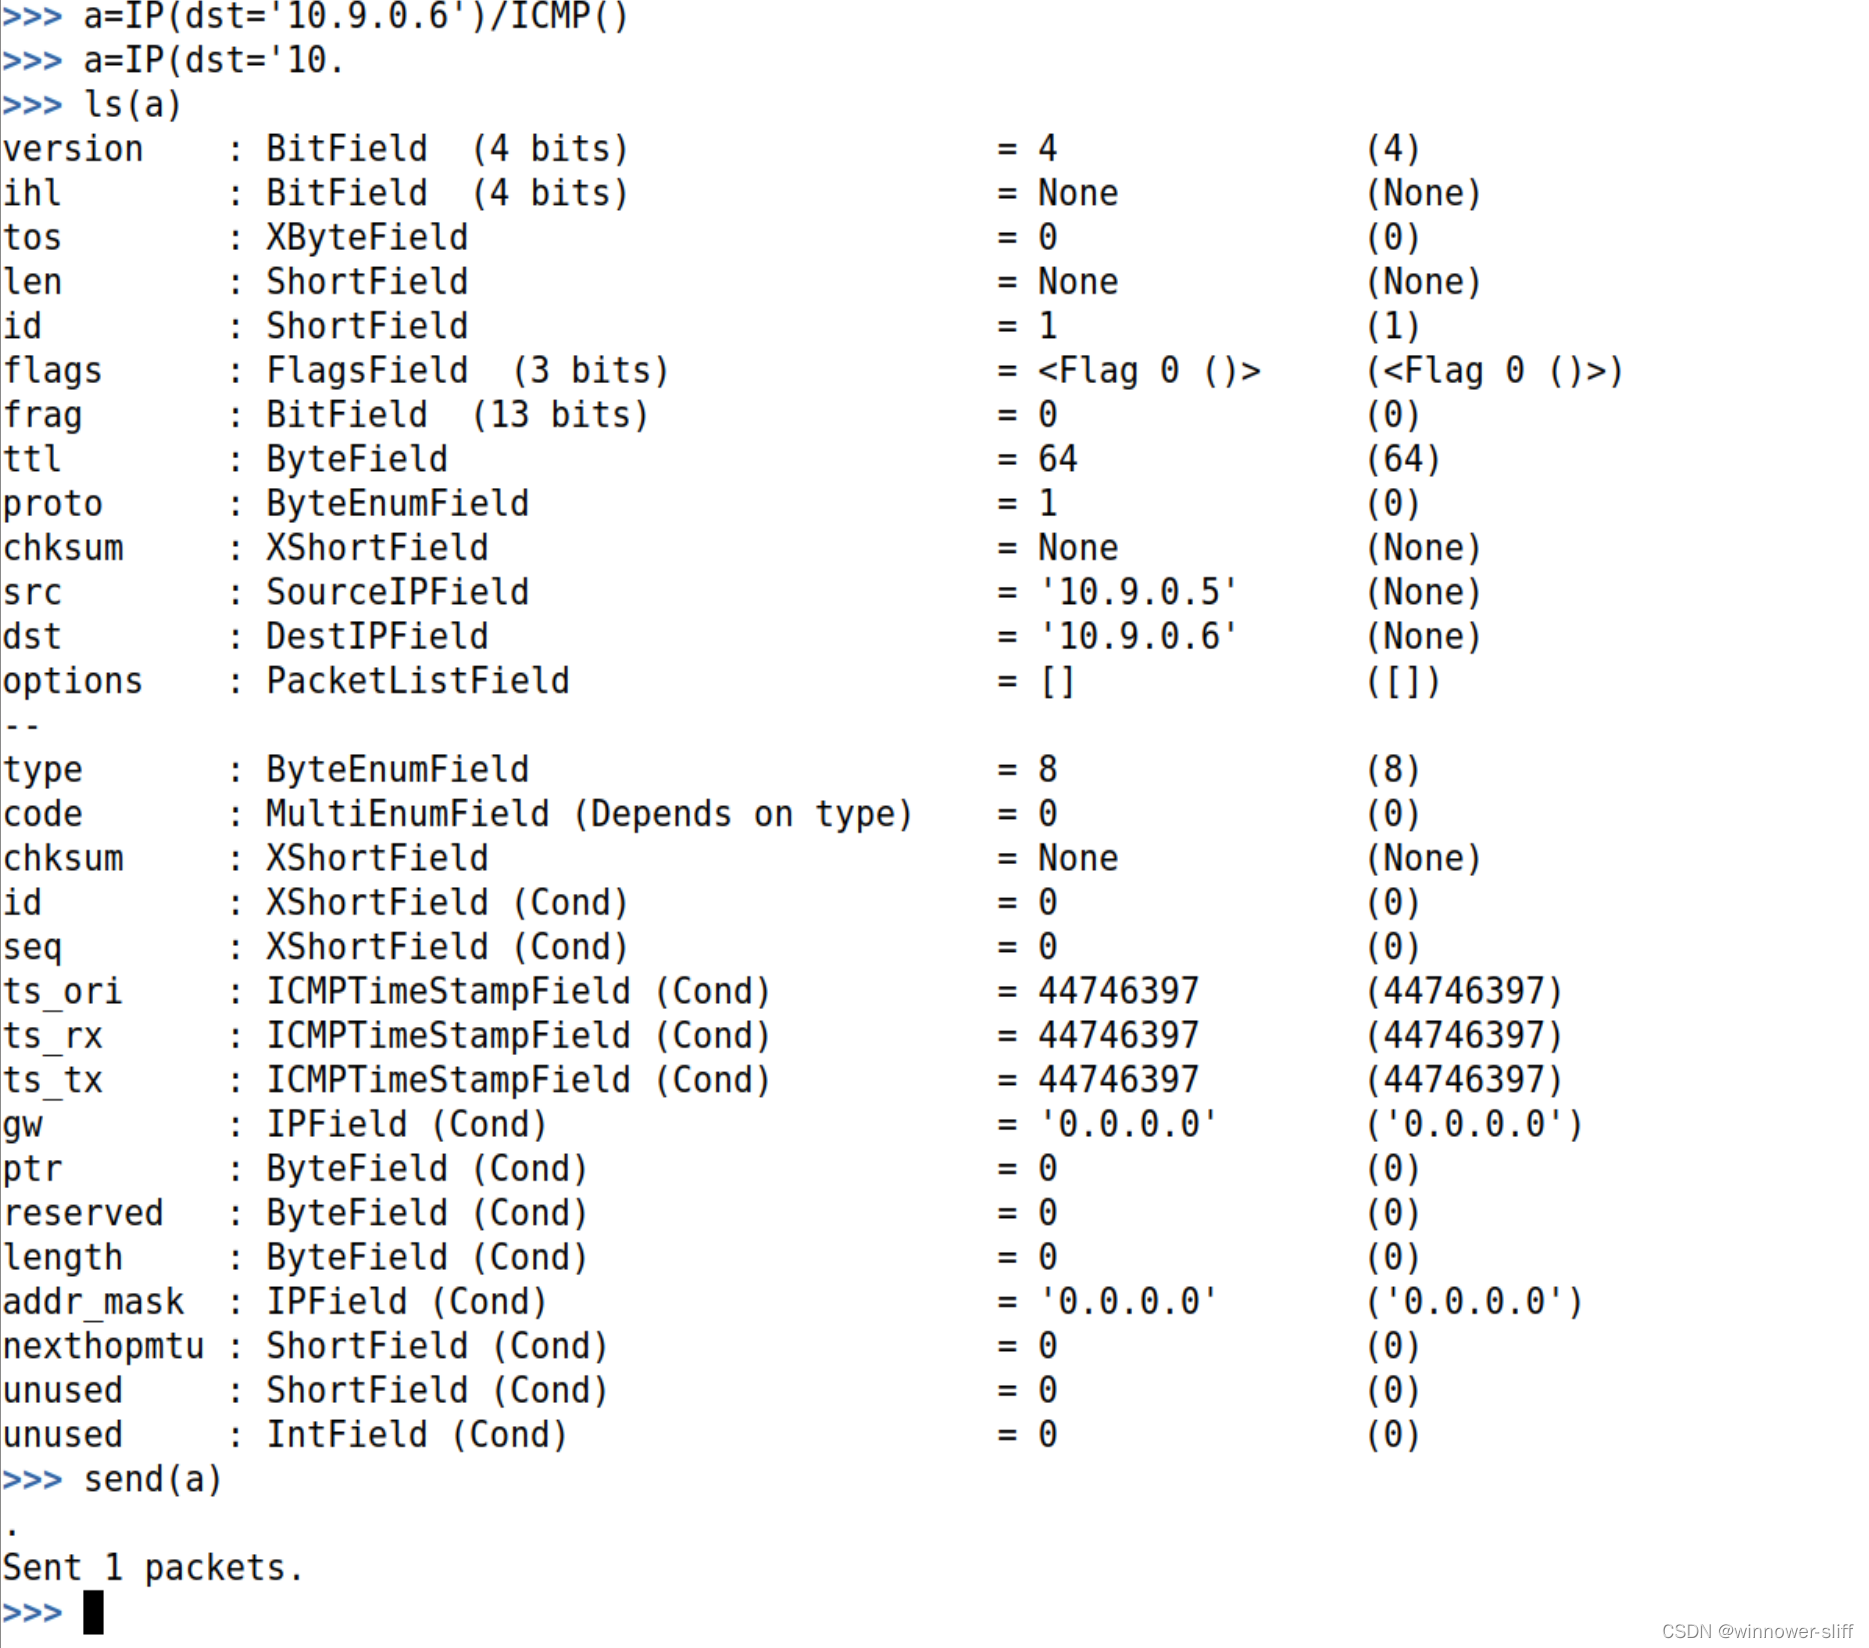
发现可以收到报文:
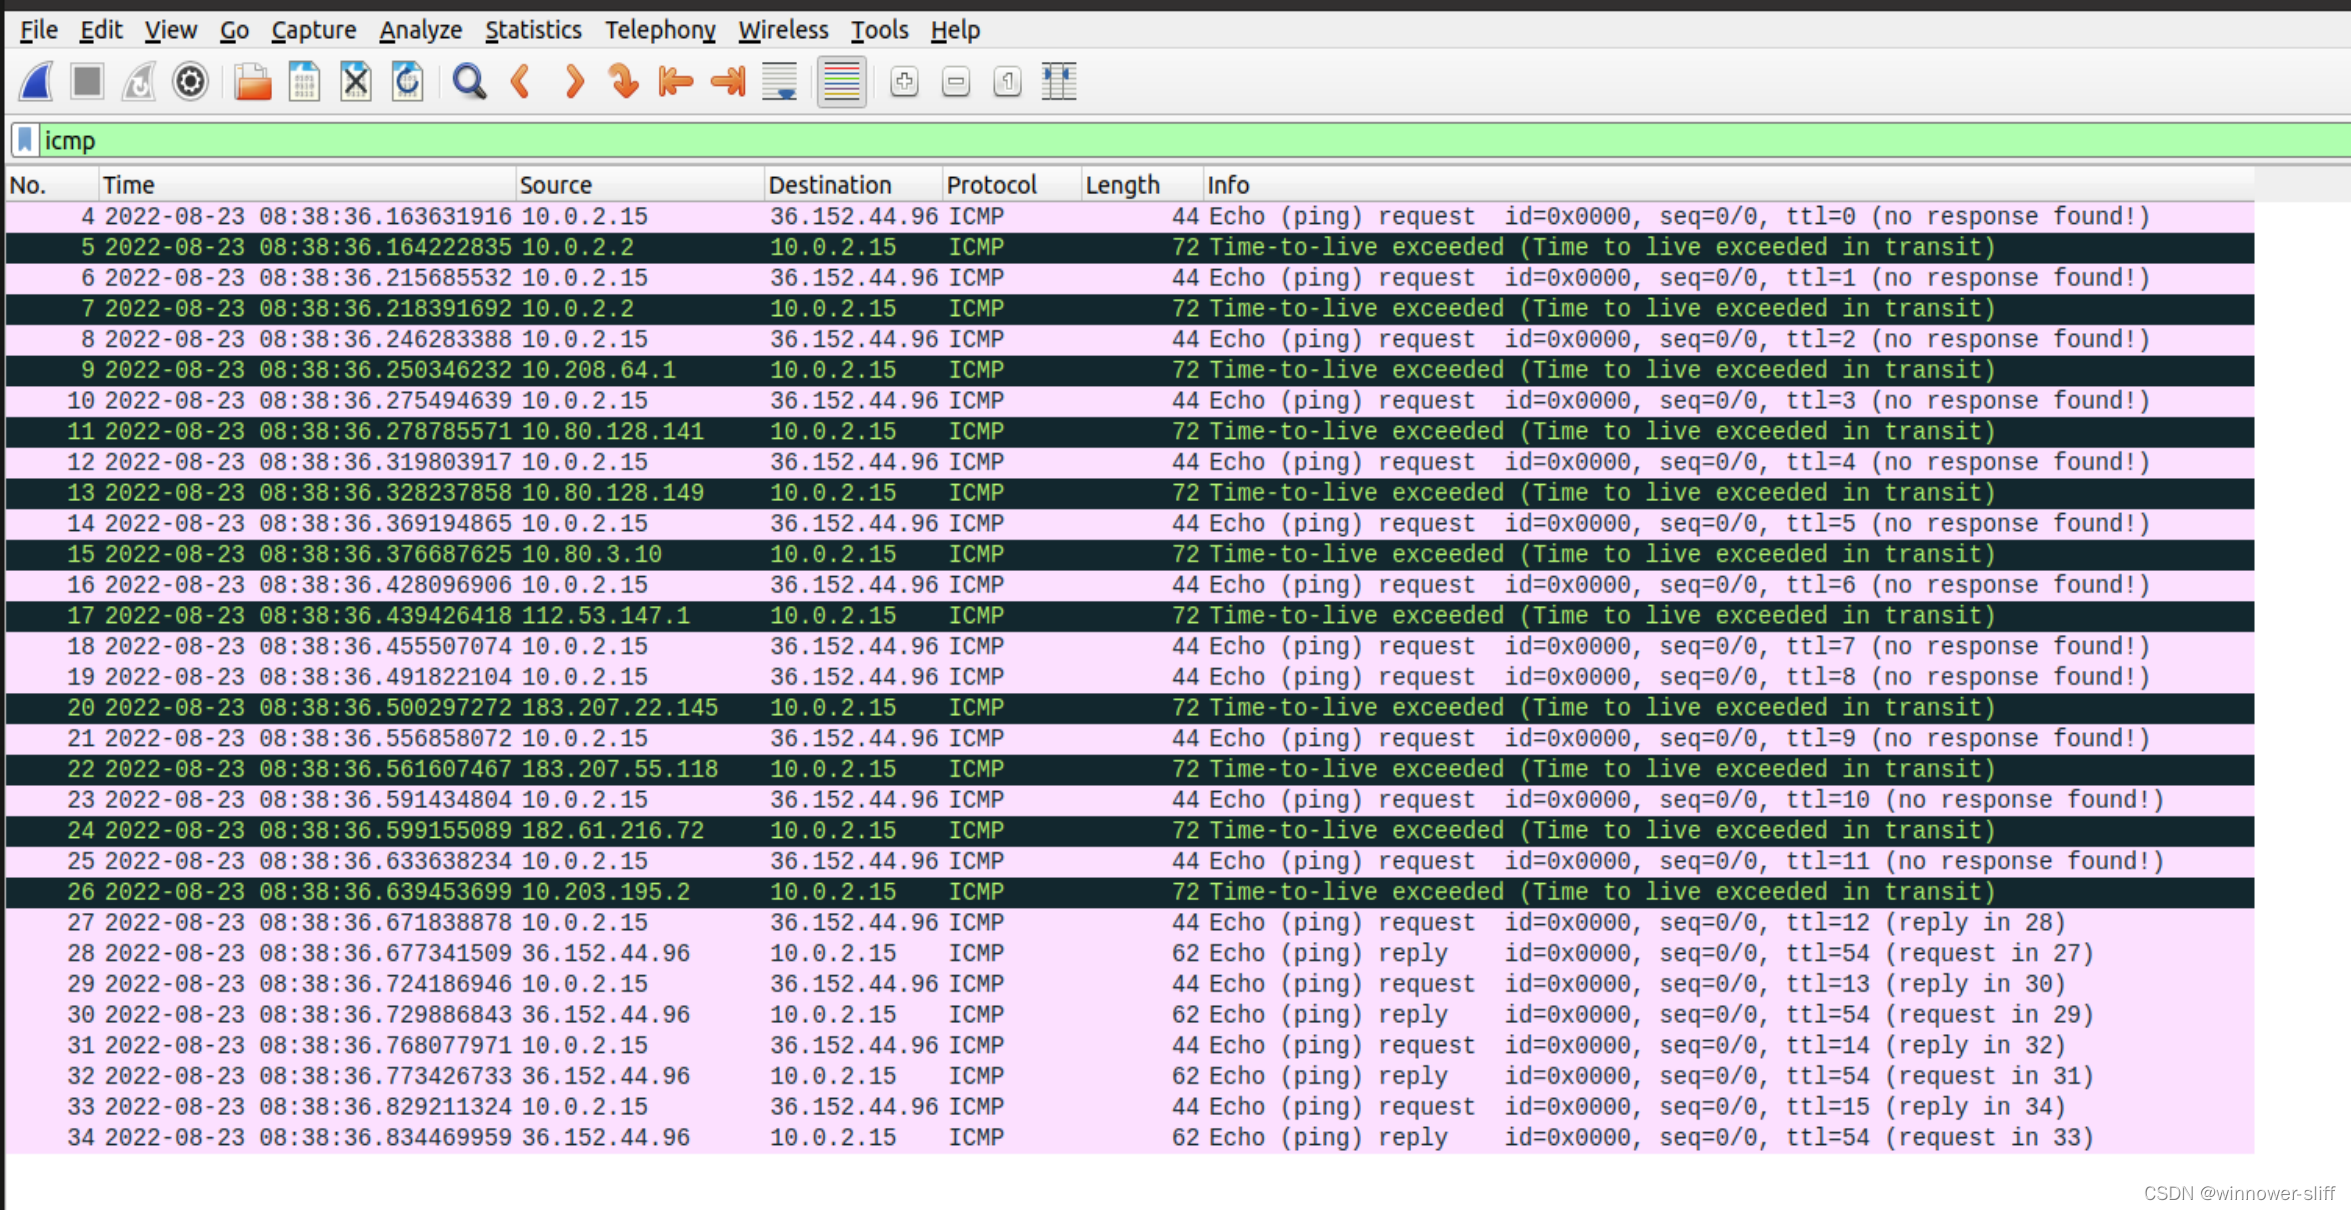
1.3 寻踪
代码:
#!/usr/bin/python3
from scapy.all import *

a=IP(dst='36.152.44.96')/ICMP()
for i in range(16):
    a[IP].ttl=i
    send(a)
截图:
1.4 嗅探与欺骗
这里icmp对发送报文的筛选与wireshark并不相同,BPF的筛选过于古老了(2009的文档┻┳|・ω・))
与此同时,还应处理ICMP的检查和,根据scapy的功能会自动计算处于空缺的检查和,所以直接提前删除即可。
#!/usr/bin/env python3
from scapy.all import *
def print_pkt(pkt):
print(pkt.summary())
pkt[ICMP].type=0
del pkt[ICMP].chksum
newpkt=IP(dst=pkt[IP].src, src=pkt[IP].dst)/pkt[ICMP]/pkt[Raw]
#newpkt=Ether()/IP(dst=pkt[IP].src)/ICMP(type=0)/pkt[Raw]
print(newpkt.summary())
send(newpkt)
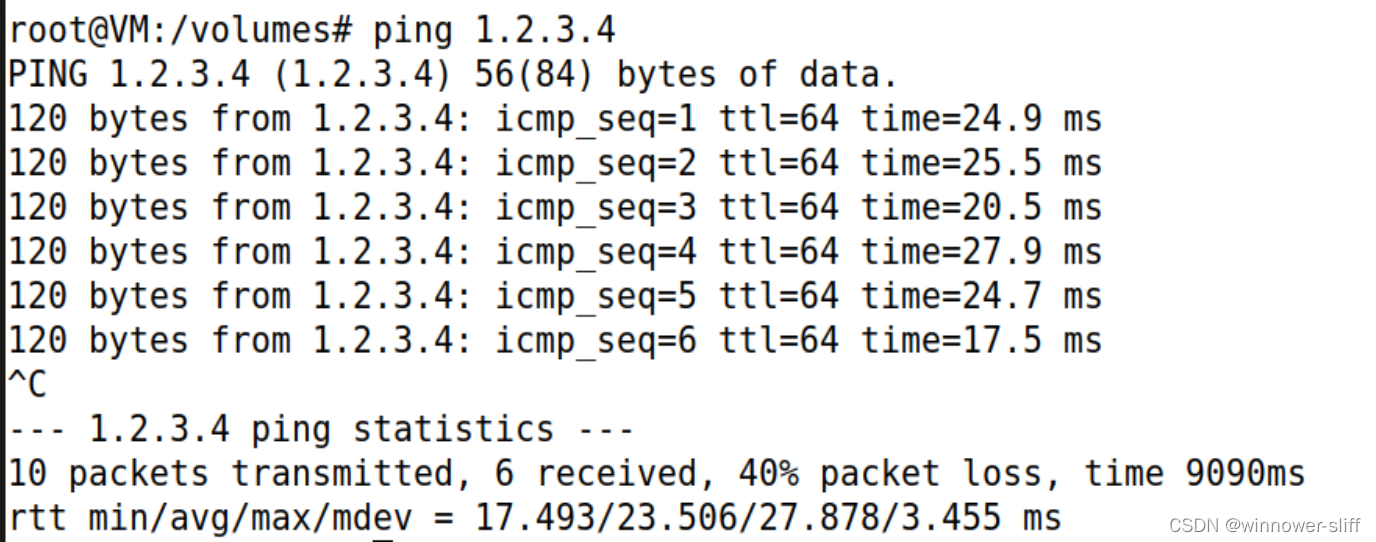
pkt = sniff(iface='enp0s3', filter='icmp[icmptype]==8', prn=print_pkt)
1.2.3.4
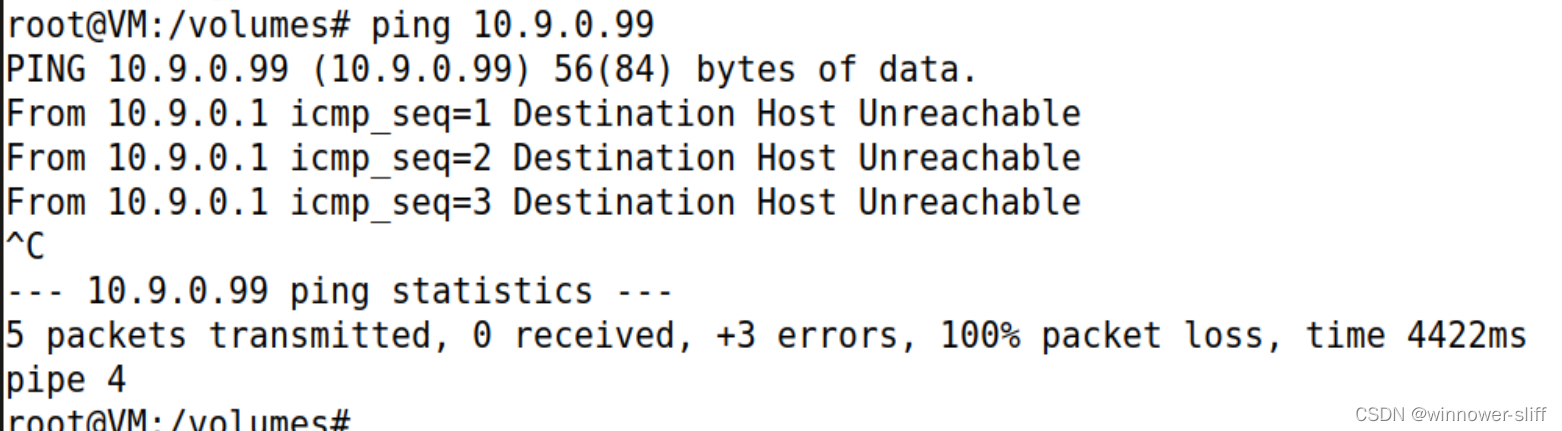
10.9.0.99,由于监听的端口是enp0s3,所以并没有监听到其内部发送的ICMP报文。
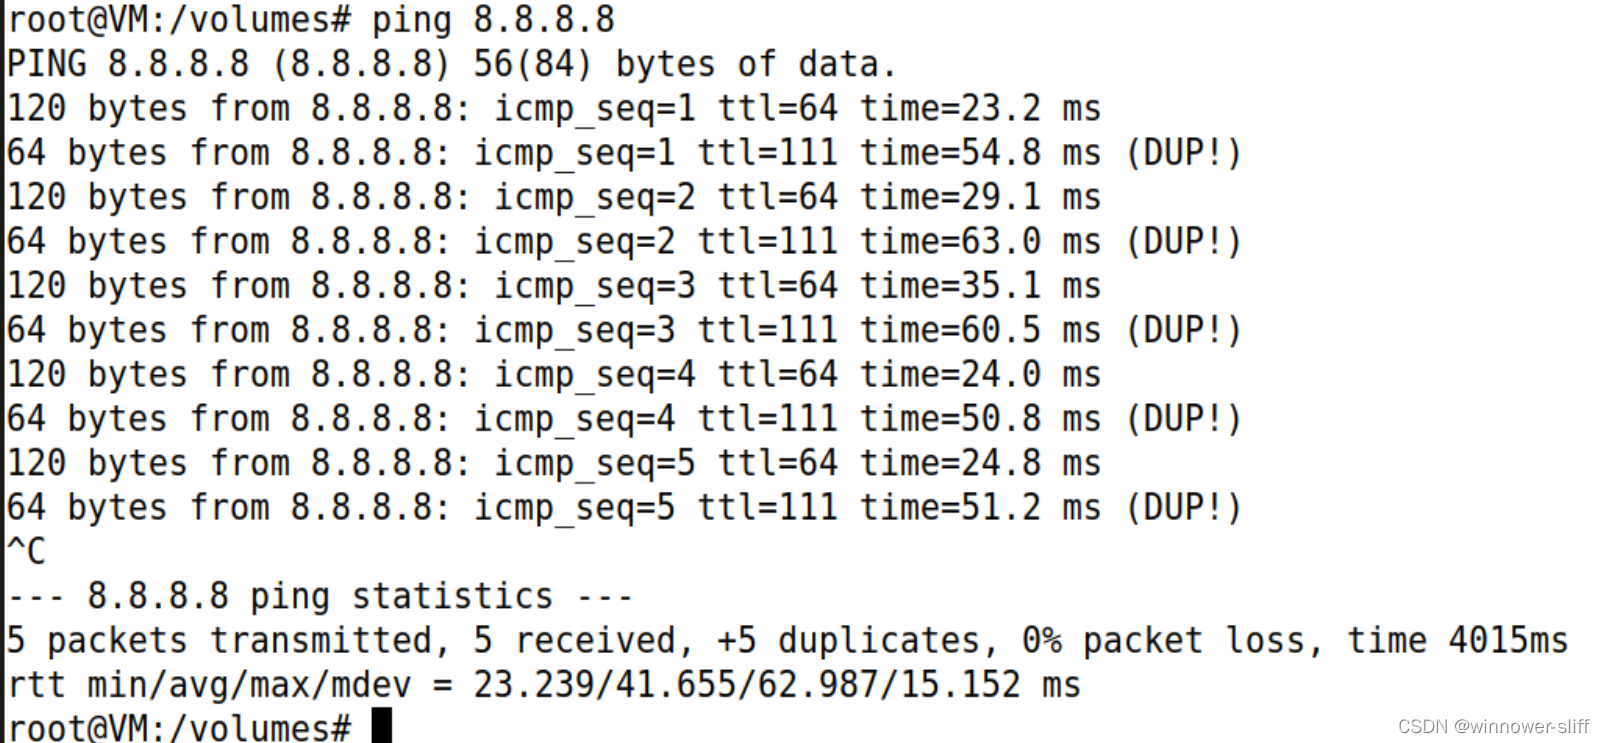
8.8.8.8,由于真实的服务器也会返回一个报文,所以容器中会接收到两份返回报文出现冗余。
Task Set 2 写程序实现抓包欺骗
2.1 抓包
根据实验手册提供的代码,将监听端口名改为我们需要监听的端口(e.g.:enp0s3):
#include <pcap.h>
#include <stdio.h>
#include <stdlib.h>
/* This function will be invoked by pcap for each captured packet.
We can process each packet inside the function.
*/
void got_packet(u_char *args, const struct pcap_pkthdr *header, const u_char *packet)
{
	printf("Got a packet\n");
}
int main()
{
	pcap_t *handle;
	char errbuf[PCAP_ERRBUF_SIZE];
	struct bpf_program fp;
	char filter_exp[] = "icmp";
	bpf_u_int32 net;
	// Step 1: Open live pcap session on NIC with name eth3.
	// Students need to change "eth3" to the name found on their own
	// machines (using ifconfig). The interface to the 10.9.0.0/24
	// network has a prefix "br-" (if the container setup is used).
	handle = pcap_open_live("enp0s3", BUFSIZ, 1, 1000, errbuf);
	// Step 2: Compile filter_exp into BPF psuedo-code
	pcap_compile(handle, &fp, filter_exp, 0, net);
	if (pcap_setfilter(handle, &fp) !=0) {
		pcap_perror(handle, "Error:");
		exit(EXIT_FAILURE);
	}
	// Step 3: Capture packets
	pcap_loop(handle, -1, got_packet, NULL);
	pcap_close(handle); //Close the handle
	return 0;
}
// Note: don’t forget to add "-lpcap" to the compilation command.
// For example: gcc -o sniff sniff.c -lpcap
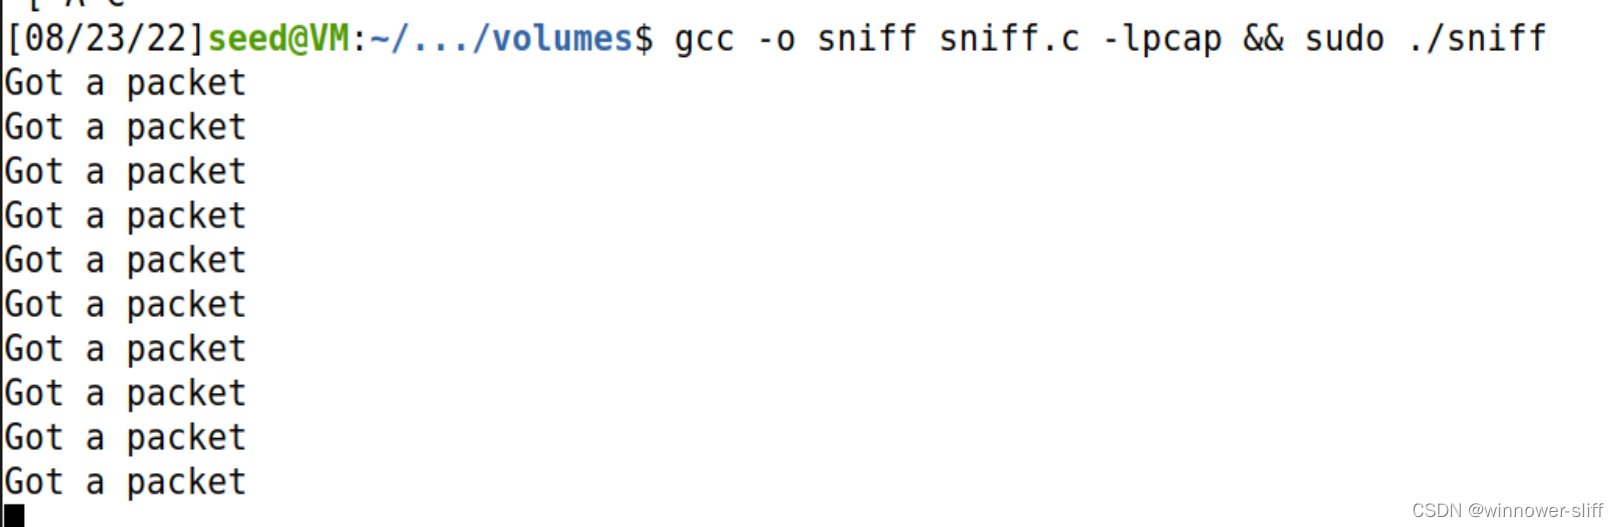
发送ping请求,可以发现已经可以抓取:
2.1A 理解嗅探器是如何工作的
• Question 1. Please use your own words to describe the sequence of the library calls that are essential for sniffer programs. This is meant to be a summary, not detailed explanation like the one in the tutorial or book.
• Question 2. Why do you need the root privilege to run a sniffer program? Where does the program fail if it is executed without the root privilege?
• Question 3. Please turn on and turn off the promiscuous mode in your sniffer program. The value 1 of the third parameter in pcap open live() turns on the promiscuous mode (use 0 to turn it
off). Can you demonstrate the difference when this mode is on and off? Please describe how you can demonstrate this. You can use the following command to check whether an interface’s promiscuous mode is on or off (look at the promiscuity’s value).# ip -d link show dev br-f2478ef59744
1249: br-f2478ef59744: <BROADCAST,MULTICAST,UP,LOWER_UP> mtu 1500 …
link/ether 02:42:ac:99:d1:88 brd ff:ff:ff:ff:ff:ff promiscuity 1 …
-
Q1:
首先handle使用pcap_open_live打开一个活跃监听句柄,其次利用pcap_compile在监听句柄中编译一个过滤器语法,并在编译错误时结束程序;如果编译通过,则开始监听,直至程序退出。 -
Q2:
因为如果任意权限用户都能够监听,将会导致安全危机与隐私泄露。当没有root权限时,进程将由于没有监听网络区域的存储器的访问权限,出现权限冲突而退出。 -
Q3:
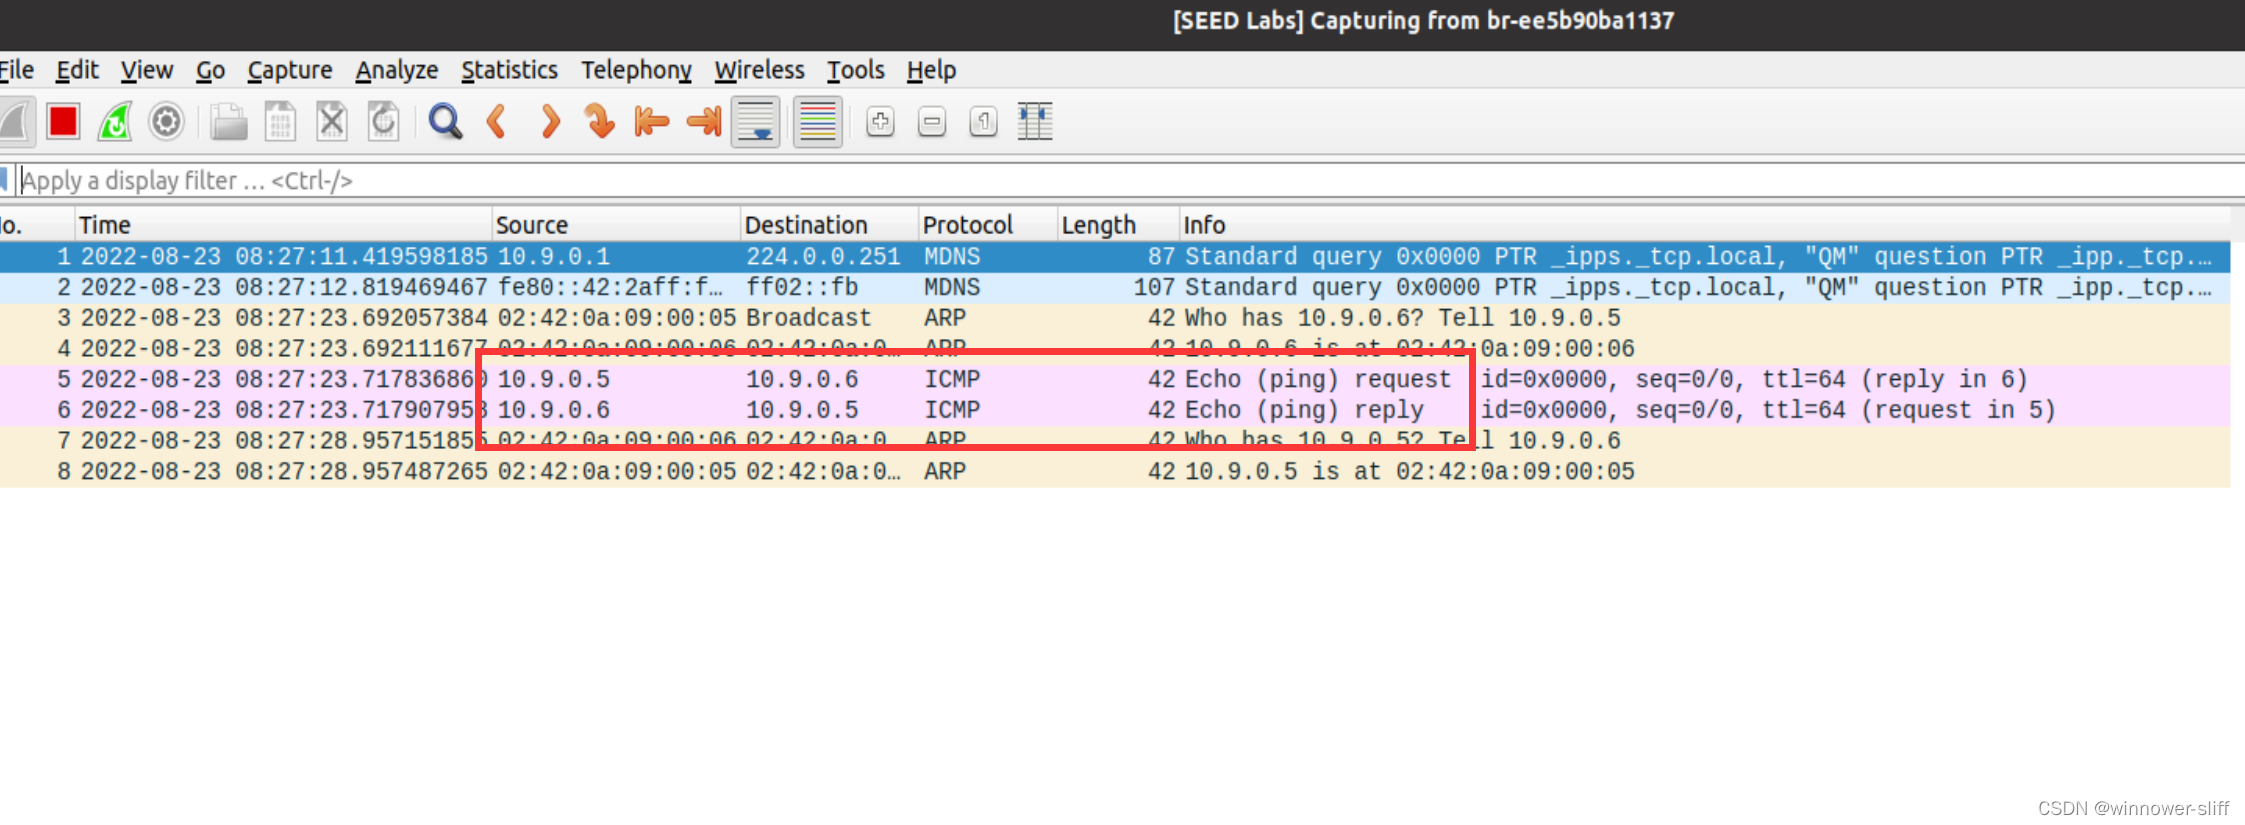
由于我们的程序并不能永久修改接口混杂模式的开启,所以只能在程序运行时开启另一个终端检测混杂模式的开启状态。测试思路:使用10.9.0.5向109.0.6发送ping报文,并在主机或10.9.0.1使用程序进行监听。若开启混杂则应收到,否则没有响应。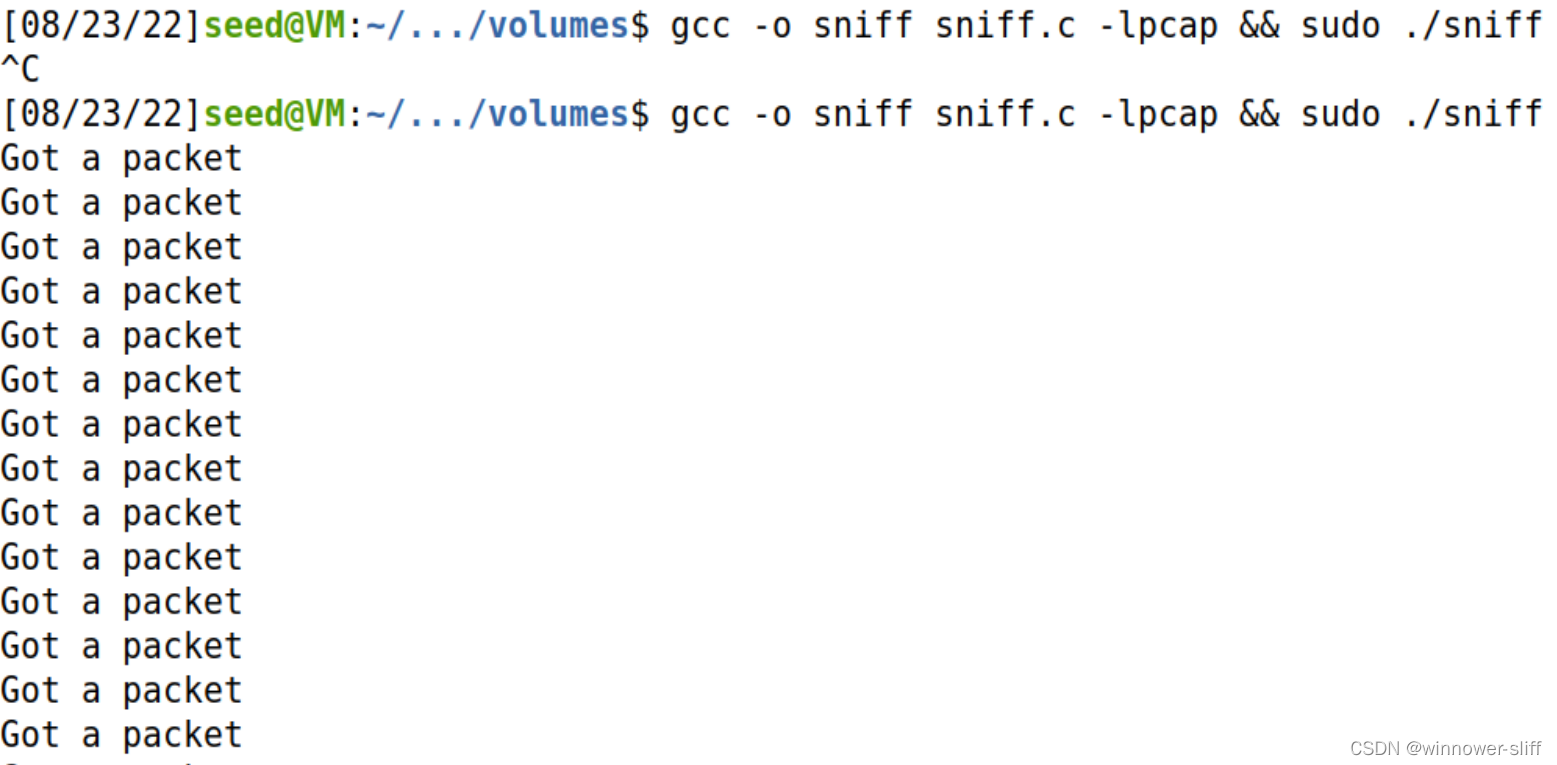
如图首先未未开启混杂,无法收到报文,只能退出;而下方由于开启了混杂则正常收到了报文。
2.1B 撰写过滤器
• Capture the ICMP packets between two specific hosts.
• Capture the TCP packets with a destination port number in the range from 10 to 100.
- icmp and dst host 10.9.0.5 and src host 10.9.0.6
如果要获取反方向的,只需交换dst与src。如果要双向的,可以使用或操作,甚至可以直接省去dst与src

- tcp and dst portrange 10-100
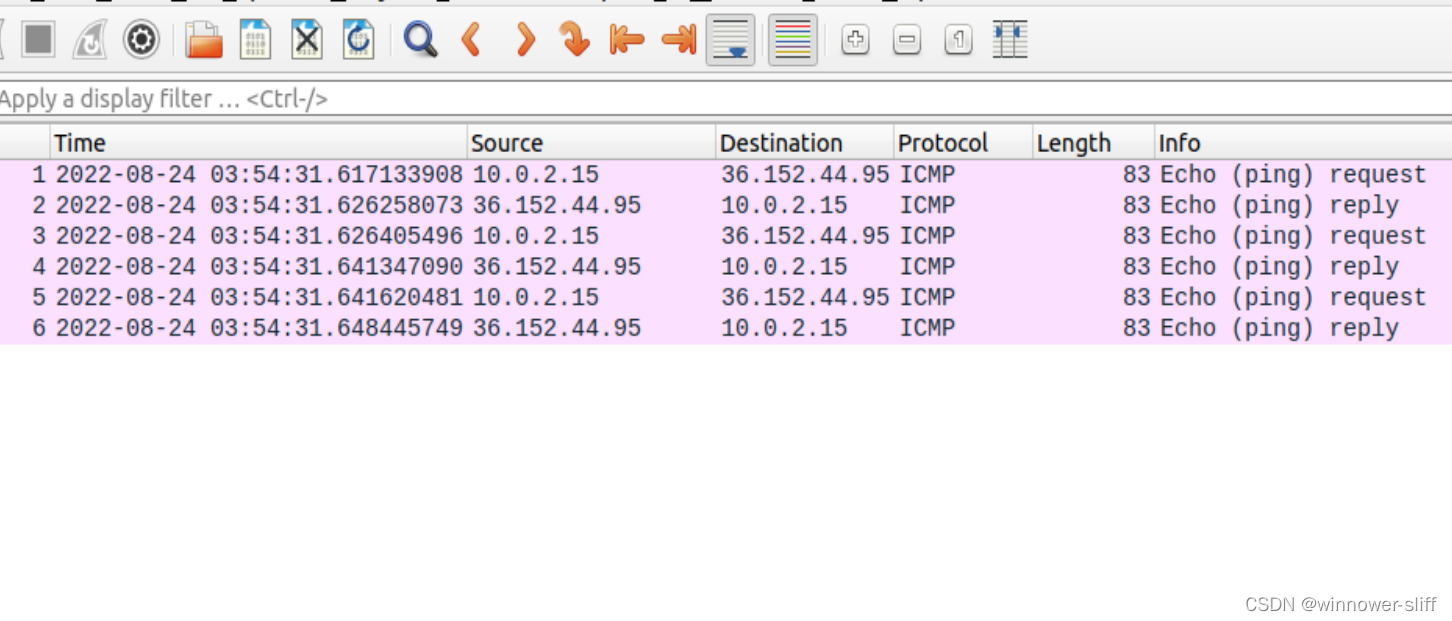
使用Telnet远程登录23端口,


2.1C 嗅探密码
终于叫我抓住了,先上图:
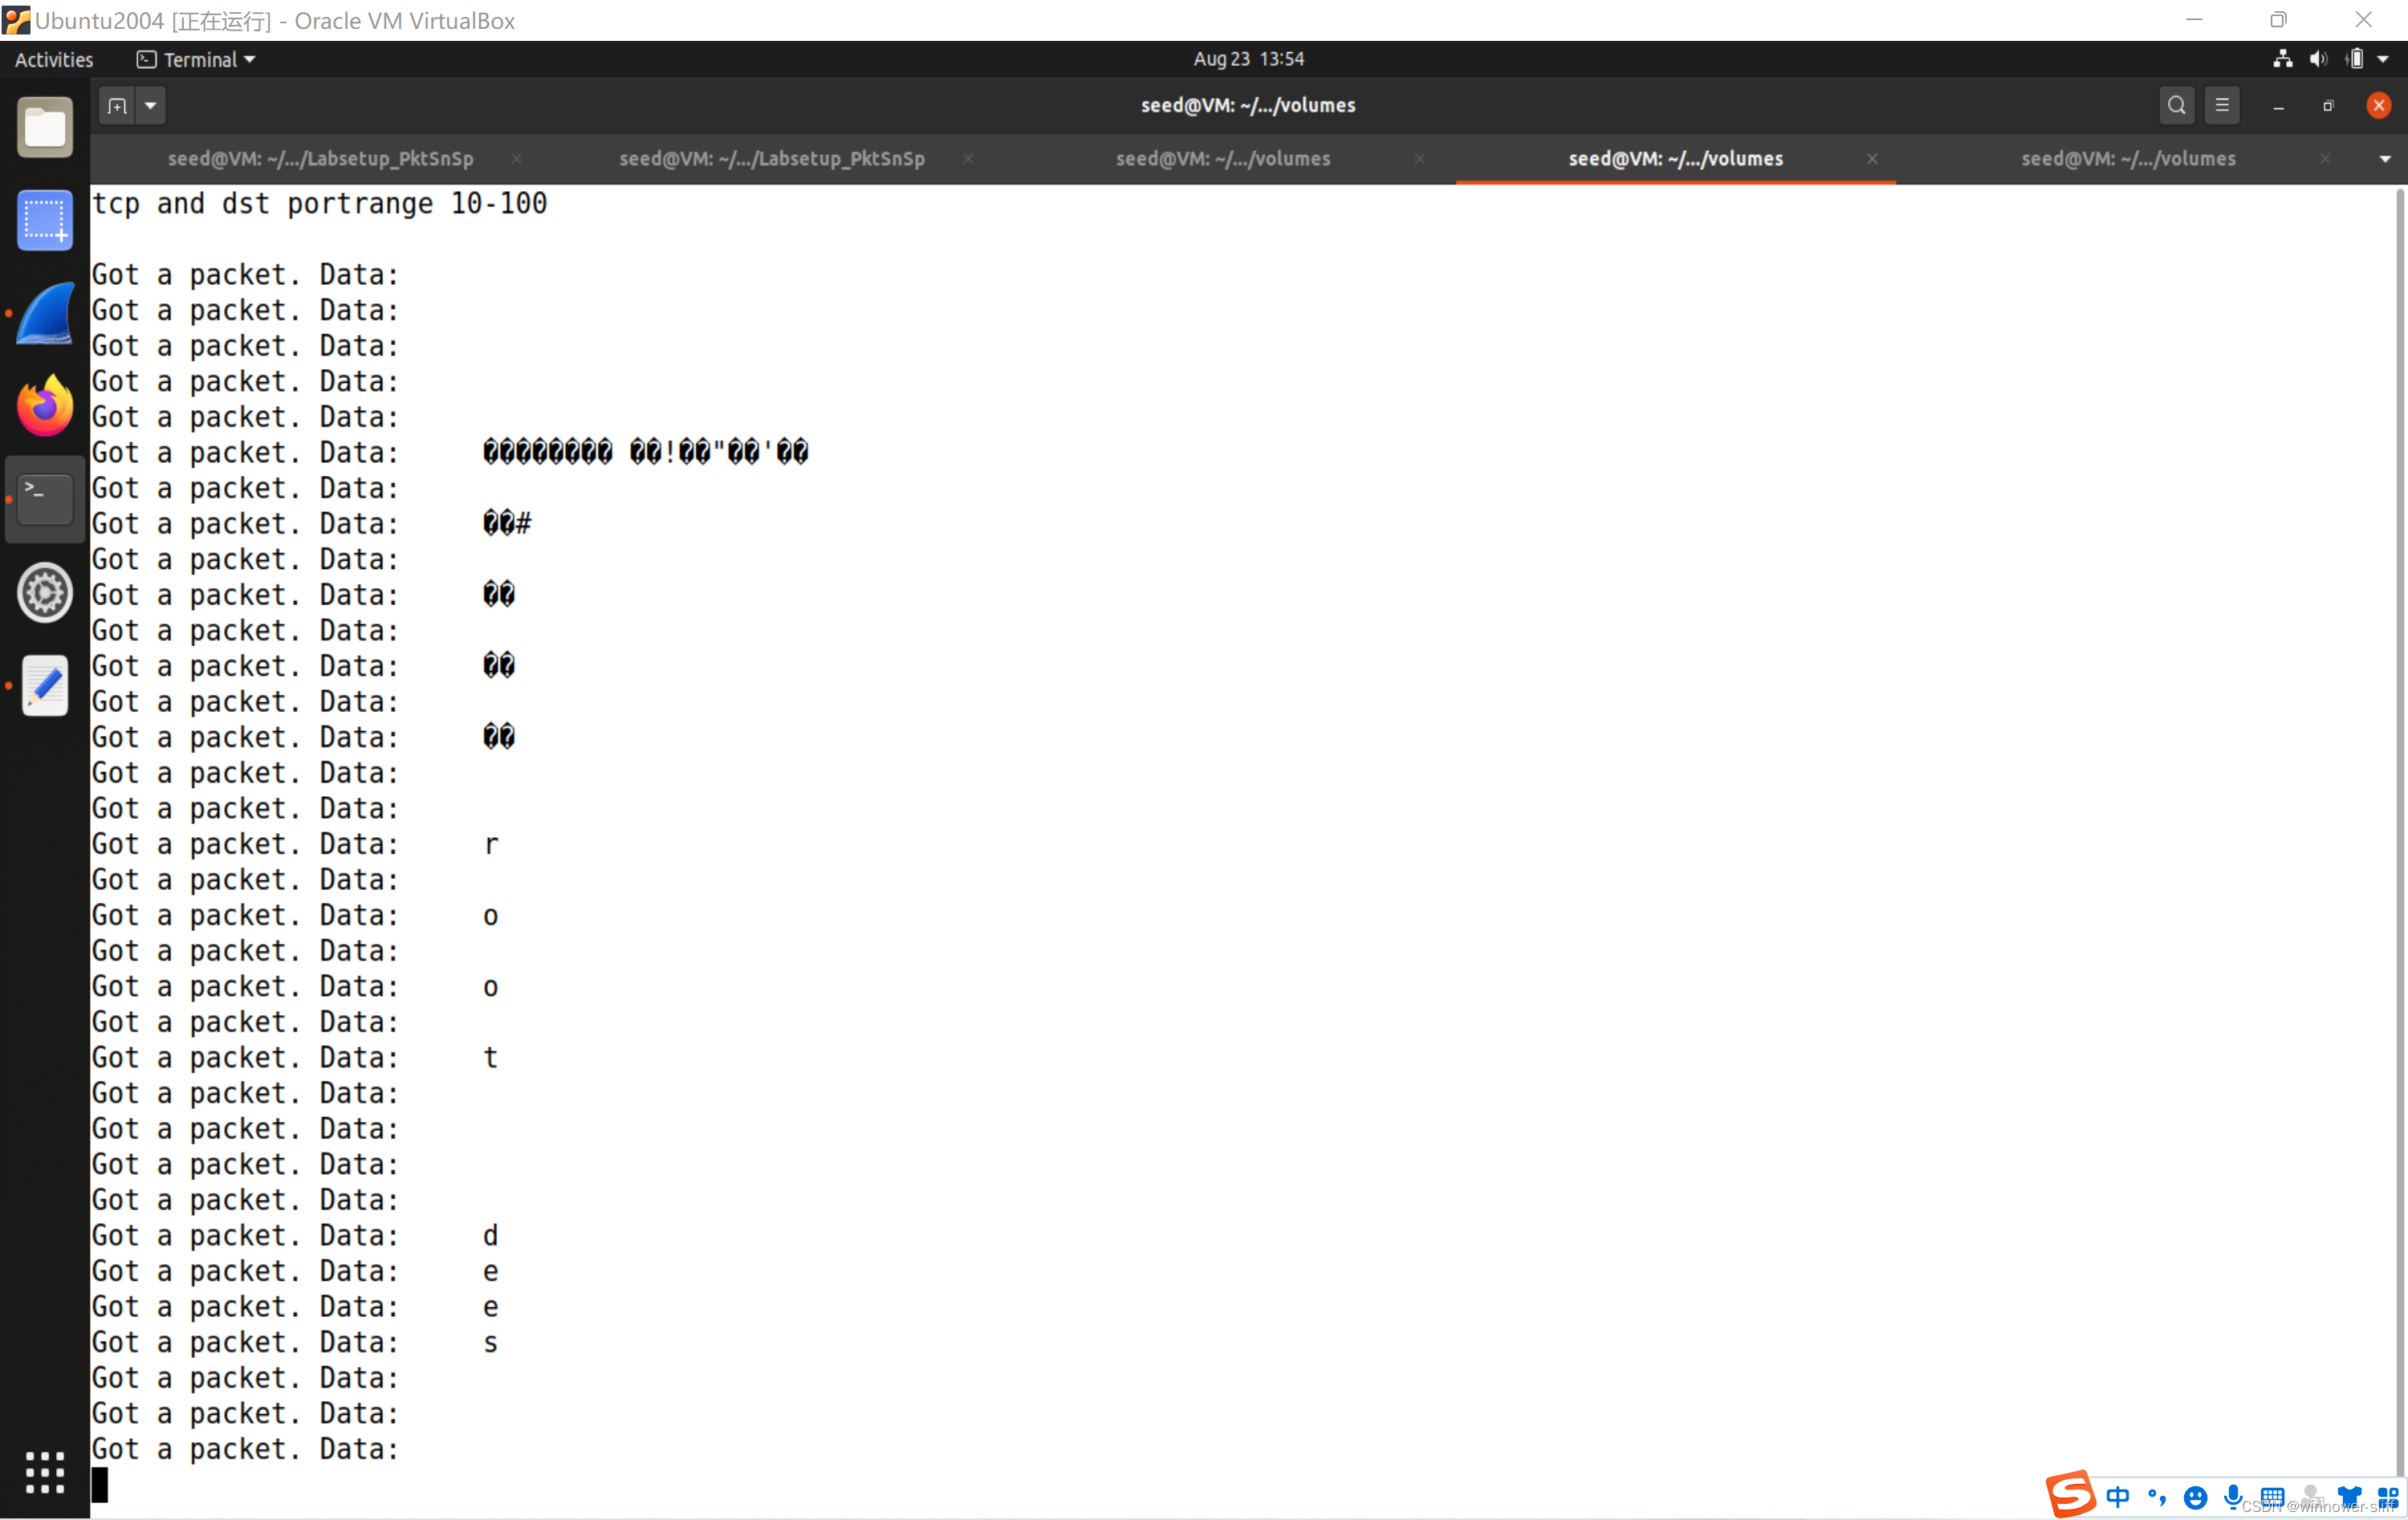
Telnet发送的数据用wireshark抓包后可以发现,固定在报文第66字节,直接输出(早知道这个就不用弄2个小时了。。)
上代码:
void got_packet(u_char *args, const struct pcap_pkthdr *header, const u_char *packet)
{
	printf("\nGot a packet. Data:");
	printf("\t%s",(char *)(packet+66));
}
做到此处,AM1:58,头疼欲裂,睡也。
2.2 欺骗
2.2A 写一个欺骗程序
IP报文头参考
ICMP报文头参考
代码参考2.3节。在root权限下能够实现发包与接收,使用wireshark查看:
2.2B发送一个欺骗报文
发送一个来自虚假IP的ICMP请求报文,发现本机
any端口收到以下:
然而在10.9.0.0/24网段(即docker网段)只有一个报文:
在enp0s3端口收到:
在主虚机内部接收到:


由此可以得出结论,报文在通过主虚机时,源地址会被转换;同时也证明本程序运行成功。另外其实本程序并非在10.9.0.5的容器中运行的,所以欺骗工作成功
• Question 4. Can you set the IP packet length field to an arbitrary value, regardless of how big the
actual packet is?
• Question 5. Using the raw socket programming, do you have to calculate the checksum for the IP
header?
• Question 6. Why do you need the root privilege to run the programs that use raw sockets? Where
does the program fail if executed without the root privilege?
- Q4 :
确实可以随机设置IP报文头中的报文长度参数,但必须保证向socket发送的原始报文是正确的长度,这样当下一条进行转发时会将错误的长度进行修正(即根据我们现有的报文写一个新的发送出去)。如果长度参数与我们发送的大小一致,则可能发送出去报文之后检验和不匹配,无法收到回显报文。 - Q5:
是的,必须计算检验和,否则默认填写0x00,在终点服务器会检验不通过直接丢弃该报文。 - Q6:
类似2.1A中Q2的回答,不允许无权限的用户执行发送&接收报文的操作。
2.3 抓包&欺骗
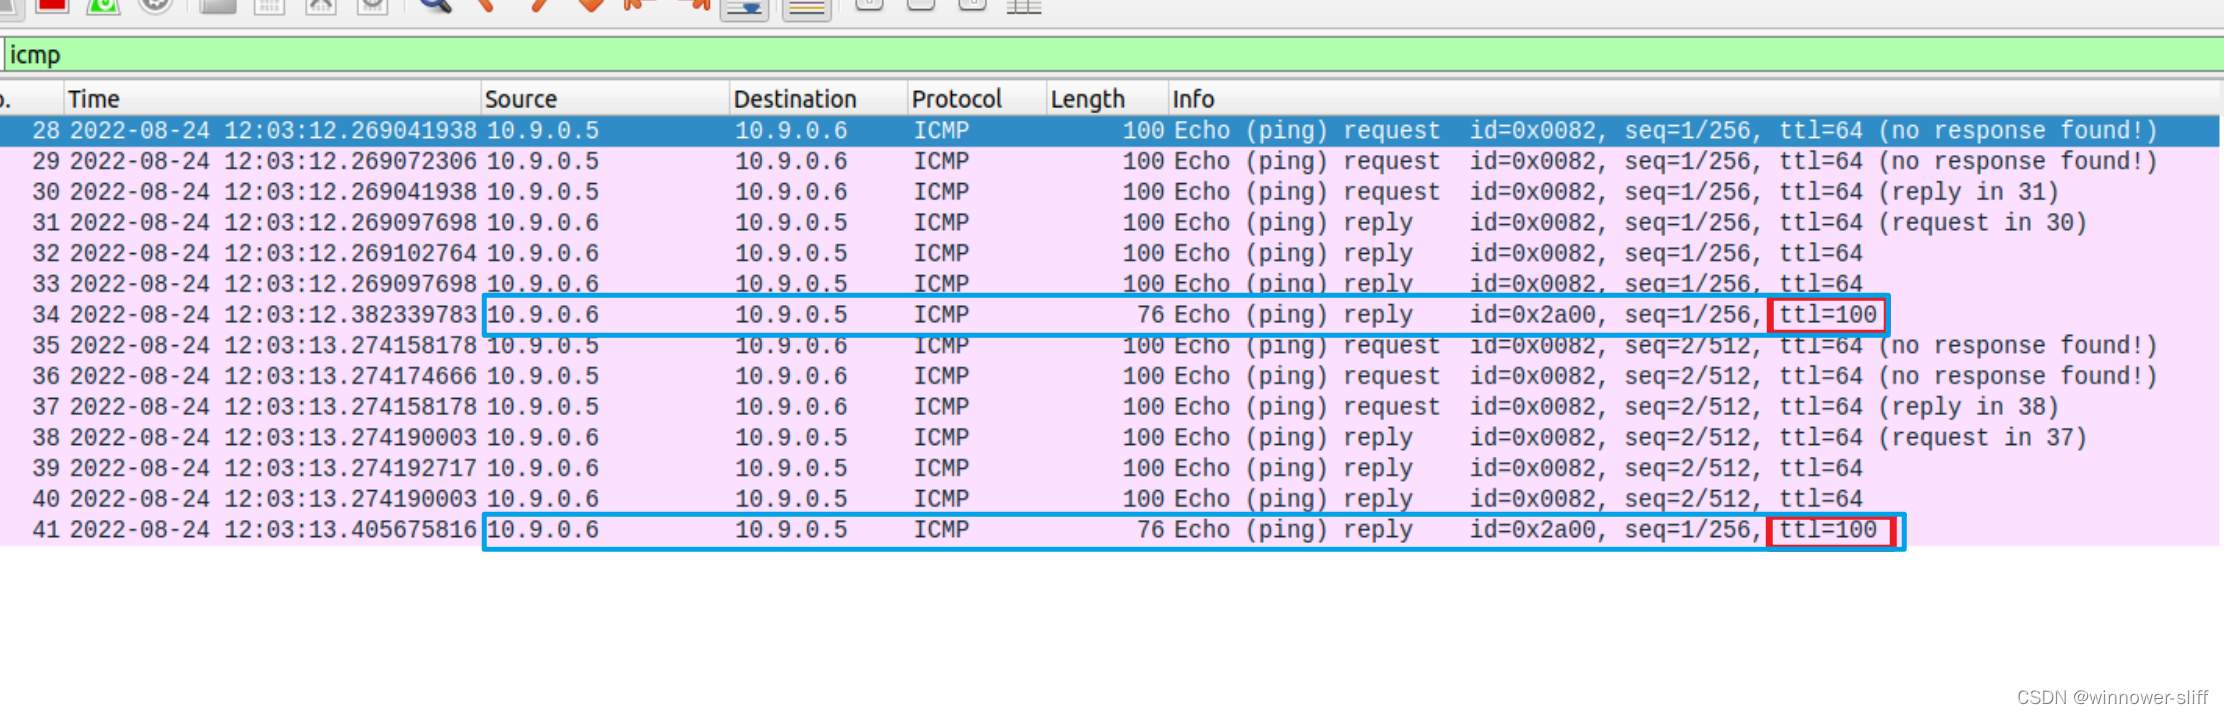
如图,可以看到具有我们程序特色的回显报文。不过由于该回显报文是仿照上述请求报文的格式进行生成的,所以与当前的请求报文并不匹配,因此在ping界面并未收到冗余提示(如1.4),这里便不再展示。
附上代码:
//这里大部分库可能都没用到,我也不知道哪些有用哈哈哈哈哈哈,一股脑全加进来了
#include <pcap.h>
#include <stdio.h>
#include <stdlib.h>
#include<string.h>
#include<netinet/in.h>
#include<time.h>
//#include <stdio.h>
#include <signal.h>
#include <arpa/inet.h>
#include <sys/socket.h>
#include <sys/types.h>
#include <sys/timerfd.h>
#include <unistd.h>
//#include <netinet/in.h>
#include <netinet/ip.h>
#include <netinet/ip_icmp.h>
#include <netdb.h>
#include <errno.h>
#include <malloc.h>
//#include <stdlib.h>
//#include <string.h>
#include <stdint.h>
#include <pthread.h>
#include <arpa/inet.h>
#include <asm/byteorder.h>


#define BYTE u_char
#define DWORD u_long
#define USHORT u_short

//IP报头
typedef struct IP_HEADER {
#if defined(__LITTLE_ENDIAN_BITFIELD)
	__u8	ihl:4,			//4位头部长度 一位4个字节,,最多15*4个字节(可选项)
		version:4;		//4位版本号
#elif defined (__BIG_ENDIAN_BITFIELD)
	__u8	version:4,
  		ihl:4;
#else
#error	"Please fix <asm/byteorder.h>"
#endif
	__u8	tos;			//8位服务类型
	__be16	tot_len;		//16位总长度
	__be16	id;			//16位标识符
	__be16	frag_off;		//3位标志加13位片偏移
	__u8	ttl;			//8位生存时间
	__u8	protocol;		//8位上层协议号
	__sum16	check;		//16位校验和
	__be32	saddr;			//32位源IP地址
	__be32	daddr;			//32位目的IP地址
	/*The options start here. */
} IP_HEADER;

//ICMP报头
typedef struct ICMP_HEADER
{
    u_char type;    //8位类型字段
    u_char code;    //8位代码字段
    u_short cksum; //16位校验和
    u_short id;    //16位标识符
    u_short seq;   //16位序列号
} ICMP_HEADER;

//计算网际校验和函数
u_short checksum(u_short* pBuf, int iSize)
{
    unsigned long cksum = 0;
    while (iSize > 1)
    {
        cksum += *pBuf++;
        iSize -= sizeof(u_short);
    }
    if (iSize)//如果 iSize 为正,即为奇数个字节
    {
        cksum += *(u_char*)pBuf; //则在末尾补上一个字节,使之有偶数个字节
    }
    cksum = (cksum >> 16) + (cksum & 0xffff);
    cksum += (cksum >> 16);
    return (u_short)(~cksum);
}

void sendSpoof(const u_char *packet);

/* This function will be invoked by pcap for each captured packet.
We can process each packet inside the function.
*/
void got_packet(u_char *args, const struct pcap_pkthdr *header, const u_char *packet)
{
	printf("Got a packet.\n");
	sendSpoof(packet);
}

void sendSpoof(const u_char *packet)
{
    	int sd;
	struct sockaddr_in sin;
	char buffer[1024]; // You can change the buffer size
	/* Create a raw socket with IP protocol. The IPPROTO_RAW parameter
	 * tells the sytem that the IP header is already included;
	 * this prevents the OS from adding another IP header. */

	//构造ICMP回显请求消息,并以TTL递增的顺序发送报文
	//ICMP类型字段
	const BYTE ICMP_ECHO_REQUEST = 8;    //请求回显
	const BYTE ICMP_ECHO_REPLY = 0;    //回显应答
	const BYTE ICMP_TIMEOUT = 11;   //传输超时

	//其他常量定义
	const int DEF_ICMP_DATA_SIZE = 32;    //ICMP报文默认数据字段长度
	const int MAX_ICMP_PACKET_SIZE = 1024;  //ICMP报文最大长度(包括报头)
	const DWORD DEF_ICMP_TIMEOUT = 3000;  //回显应答超时时间
	const int DEF_MAX_HOP = 30;    //最大跳站数

	//填充ICMP报文中每次发送时不变的字段
	char * IcmpSendBuf = buffer+sizeof(IP_HEADER);//发送缓冲区
	memset(IcmpSendBuf, 0, sizeof(IcmpSendBuf));               //初始化发送缓冲区
	//char IcmpRecvBuf[MAX_ICMP_PACKET_SIZE];                    //接收缓冲区
	//memset(IcmpRecvBuf, 0, sizeof(IcmpRecvBuf));               //初始化接收缓冲区

	/*填写ICMP头,回显请求*/
	ICMP_HEADER* pIcmpHeader = (ICMP_HEADER*)IcmpSendBuf;
	pIcmpHeader->type = ICMP_ECHO_REPLY;
	pIcmpHeader->code = 0;
	/*ID字段为当前进程号*/
	//pIcmpHeader->id = (USHORT)GetCurrentProcessId();
	pIcmpHeader->id = 0x002a;
	memset(IcmpSendBuf + sizeof(ICMP_HEADER), 'E', DEF_ICMP_DATA_SIZE);//数据字段

	//填充ICMP报文中每次发送变化的字段
        ((ICMP_HEADER*)IcmpSendBuf)->cksum = 0;                   //校验和先置为0
        //((ICMP_HEADER*)IcmpSendBuf)->seq = htons(usSeqNo++);      //填充序列号
        ((ICMP_HEADER*)IcmpSendBuf)->seq = 256;
        ((ICMP_HEADER*)IcmpSendBuf)->cksum = checksum((USHORT*)IcmpSendBuf, sizeof(ICMP_HEADER) + DEF_ICMP_DATA_SIZE); //计算校验和
	//printf("%d$$$$$$$$$$\n",sizeof(char));
	IP_HEADER* pIPHeader = (IP_HEADER*)buffer;

	pIPHeader->version	= 4;
	pIPHeader->ihl		= 5;
	pIPHeader->tos		= 0;
	pIPHeader->tot_len	= (sizeof(IP_HEADER) + sizeof(ICMP_HEADER) + DEF_ICMP_DATA_SIZE);
	pIPHeader->id		= 1;
	pIPHeader->frag_off	= 0x000;
	pIPHeader->ttl		= 100;
	pIPHeader->protocol	= 1;	//TCP的协议号为6,UDP的协议号为17。ICMP的协议号为1,IGMP的协议号为2
	pIPHeader->saddr	= inet_addr("10.9.0.99");
	pIPHeader->daddr	= inet_addr("36.152.44.95");
	memcpy(&pIPHeader->saddr,packet+30,4);
	memcpy(&pIPHeader->daddr,packet+26,4);

	pIPHeader->check	= checksum((USHORT*)buffer, sizeof(IP_HEADER)+sizeof(ICMP_HEADER)+DEF_ICMP_DATA_SIZE);


	sd = socket(AF_INET, SOCK_RAW, IPPROTO_RAW);
	if(sd < 0) {
		perror("socket() error"); exit(-1);
	}
	/* This data structure is needed when sending the packets
	 * using sockets. Normally, we need to fill out several
	 * fields, but for raw sockets, we only need to fill out
	 * this one field */
	sin.sin_family = AF_INET;
	// Here you can construct the IP packet using buffer[]
	// - construct the IP header ...
	// - construct the TCP/UDP/ICMP header ...
	// - fill in the data part if needed ...
	// Note: you should pay attention to the network/host byte order.
	/* Send out the IP packet.
	 * ip_len is the actual size of the packet. */
	int ip_len = (sizeof(IP_HEADER) + sizeof(ICMP_HEADER) + DEF_ICMP_DATA_SIZE);
	if(sendto(sd, buffer, ip_len, 0, (struct sockaddr *)&sin, sizeof(sin)) < 0) {
		perror("sendto() error"); exit(-1);
	}
	else {
		printf("SEND OUT!!!%d\n",pIPHeader->tot_len);
	}

}


int main()
{
	pcap_t *handle;
	char errbuf[PCAP_ERRBUF_SIZE];
	struct bpf_program fp;
	char filter_exp[] = "icmp[icmptype]==8";
	printf("%s\n",filter_exp);
	bpf_u_int32 net;
	// Step 1: Open live pcap session on NIC with name eth3.
	// Students need to change "eth3" to the name found on their own
	// machines (using ifconfig). The interface to the 10.9.0.0/24
	// network has a prefix "br-" (if the container setup is used).
	handle = pcap_open_live("br-ee5b90ba1137", BUFSIZ, 1, 1000, errbuf);
	// Step 2: Compile filter_exp into BPF psuedo-code
	pcap_compile(handle, &fp, filter_exp, 0, net);
	if (pcap_setfilter(handle, &fp) !=0) {
		pcap_perror(handle, "Error:");
		exit(EXIT_FAILURE);
	}
	// Step 3: Capture packets
	pcap_loop(handle, -1, got_packet, NULL);
	pcap_close(handle); //Close the handle
	return 0;
}
// Note: don’t forget to add "-lpcap" to the compilation command.
// For example: gcc -o sniff sniff.c -lpcap
总结
最大的收获就是基本理解了ip报文的产生与发送,以及利用监听手段接收报文。以后再用到了就可以直接复制了(bushi)


 6177
6177

 被折叠的 条评论
为什么被折叠?
被折叠的 条评论
为什么被折叠?
 到【灌水乐园】发言


