


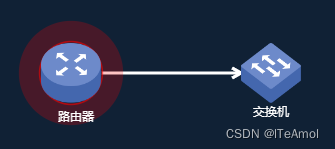
实现效果:双击节点后,节点外围向外闪动光圈
默认状态下:

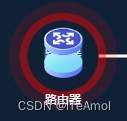
双击节点后:
代码实现:(主要参考G6官方文档的自定义节点)
注册自定义节点:
G6.registerNode(
    'resource-node',
    {
      afterDraw: function afterDraw(cfg, group) {
        let size = cfg.size
        let width = size[0]
        let height = size[1]
        const image = group.addShape('image', {
        attrs: {
          x: -width / 2,
          y: -height / 2,
          width: width,
          height: height,
          img: cfg.img,
        },
        name: 'image-shape',
        draggable: true,
      });
      console.log(cfg)
      const text = group.addShape('text', {
          attrs: {
            text: cfg.mylabel,
            x: -width / 2 + 17,
            y:51,
            fill: '#fff',
          },
          name: 'resource-node-text',
          draggable: true,
        })
        let r = size / 2
        if (isNaN(r)) {
        r = cfg.size[0] / 2 ;
      }
      console.log(cfg)
        var back1 = group.addShape('circle', {
          zIndex: -3,
          attrs: {
            x: 0,
            y: 0,
            r: r,
            fill: 'red',
            opacity: 0.6,
          },
          name: 'circle-shape1',
        })
        var back2 = group.addShape('circle', {
          zIndex: -2,
          attrs: {
            x: 0,
            y: 0,
            r: r,
            fill: 'red', // 为了显示清晰,随意设置了颜色
            opacity: 0.6,
          },
          name: 'circle-shape2',
        })
        var back3 = group.addShape('circle', {
          zIndex: -1,
          attrs: {
            x: 0,
            y: 0,
            r: r,
            fill: 'red',
            opacity: 0.6,
          },
          name: 'circle-shape3',
        })
        group.sort() // 排序,根据zIndex 排序
        back1.animate(
          {
            // 逐渐放大,并消失
            r: r + 30,
            opacity: 0.1,

          },
          {
            repeat: true, // 循环
            duration:3000,
            easing: 'easeCubic',
            delay: 0, // 无延迟
          },
        ) // 无延迟

        back2.animate(
          {
            // 逐渐放大,并消失
            r: r + 30,
            opacity: 0.1,
            repeat: true, // 循环
          },
          {
            repeat: true, // 循环
            duration:3000,
            easing: 'easeCubic',
            delay: 1000, // 无延迟
          },
        ) // 1 秒延迟
        back3.animate(
          {
            // 逐渐放大,并消失
            r: r + 30,
            opacity: 0.1,
            repeat: true, // 循环
          },
          {
            repeat: true, // 循环
            duration:3000,
            easing: 'easeCubic',
            delay: 2000, // 无延迟
          },
        ) // 2 秒延迟
      },
      },
    'circle',
  )
双击节点触发事件:
 graph.value.on('node:dblclick', function (e) {
  const item = e.item;
  graph.value.updateItem(item,{label:null})
  graph.value.updateItem(item, {
  type: 'resource-node'});
}
遇到的问题:
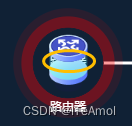
- 双击节点闪动时,继承的节点circle底色是白色的(如下图),想要改变其颜色

解决:在默认节点下改变circle类型节点的填充色
defaultNode: {
      // 节点样式修改
      type:'circle',
      style:{
        fill: '#102135',
        stroke:'#102135',
        // labelCfg: {
        // position: 'bottom',
        // offset: 10,
        // }
      },
      size: [70, 70], // 节点大小
      status: 0,
    },
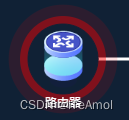
效果如下:
- 在闪动时节点底部有文字,想要去掉它(圆圈里的字是节点自带的label属性,圆圈外的字是在自定义节点时加上去的)
解决:定位到该文字是继承的节点circle的label,在双击事件添加自定义节点时把label置空,就可以让圆圈里的字消失;然后新增一个属性mylabel来接收label值,让自定义节点的文字值(就是上面完整代码的text)为mylabel,这样在默认节点下有图有文字,在自定义节点下也有图有文字(目前只想到了这种办法。。。)
graph.value.on('node:dblclick', function (e) {
  const item = e.item;
  graph.value.updateItem(item,{label:null})
  graph.value.updateItem(item, {
  type: 'resource-node'});
}
因为是从左侧图例处拖一个图例到画布上生成一个节点,所以在画布上新增节点的函数中,新增mylabel属性(画布渲染的数据是data,节点信息存在nodes中,type和e是另一个组件自定义事件传过来的参数,type-节点信息,e-鼠标事件)
const addNodes = (type: any, e: any) => {
  // 将屏幕/页面坐标转换为渲染坐标
  const point = graph.value.getPointByClient(e.x, e.y)
  // 新创建的节点信息
  const model = {
    id: 'node' + Math.random(), // id使用了随机数,尽可能避免重复
    label: type.label, // 文本标签
    labelCfg: {
      style: {
        fill: '#fff',
      },
    },
    type: 'image', // 图片类型的节点
    x: point.x,
    y: point.y,
    img: type.src, // 图片地址
    size: [70, 70],
    status: 0,
    mylabel:type.label
  }
  graph.value.addItem('node', model, true)
  data.nodes.push(model)
}
效果如下:


 9023
9023


 被折叠的 条评论
为什么被折叠?
被折叠的 条评论
为什么被折叠?
 到【灌水乐园】发言


