three.js是JavaScript编写的WebGL第三方库。提供了非常多的3D显示功能。Three.js 是一款运行在浏览器中的 3D 引擎,你可以用它创建各种三维场景,包括了摄影机、光影、材质等各种对象。你可以在它的主页上看到许多精采的演示。不过,这款引擎目前还处在比较不成熟的开发阶段,其不够丰富的 API 以及匮乏的文档增加了初学者的学习难度(尤其是文档的匮乏)three.js的代码托管在github上面。
上面摘自百度百科。依我来看就是一个在HTML5画布(canvas)上显示的3D引擎。如果你之前折腾过本地3D引擎,比如Steam,寒霜,那上手这个就非常简单了。
学习这个引擎难处有几点:第一,正如上面所说,没有比较系统的文档,只有一些大神写的Demo,对于一些js基础不好或者英语不好的童鞋来说简直不能历届;第二,一般人对游戏引擎里面的纹理、光源、材质等词不甚理解。第三,不晓得怎么去调试。
在开始正式介绍之前,可以先看看Demo,了解一下这个引擎能做什么。
官方网站上的例子:http://threejs.org/
GitHub上的例子:http://stemkoski.github.io/Three.js/
其中几个比较有特色的列一下(提提你们的胃口~)(都不要使用IE或基于IE的浏览器打开!推荐使用Chrome):
最基本的Hello World:http://stemkoski.github.io/Three.js/HelloWorld.html
调用你的摄像头:http://stemkoski.github.io/Three.js/Webcam-Texture.html
体感操作(你没有看错!):http://stemkoski.github.io/Three.js/Webcam-Motion-Detection-Texture.html
支持你的游戏手柄(XBox等):http://stemkoski.github.io/Three.js/Mesh-Movement-Gamepad.html
3D建模和方向键控制移动方向:http://stemkoski.github.io/Three.js/Model-Animation-Control.html
SkyBox和3个气泡渲染(可见Three.js的渲染真心不赖):http://stemkoski.github.io/Three.js/Metabubbles.html
3D红蓝偏光的名车展(打开前自备偏光镜):http://threejs.org/examples/webgl_materials_cars_anaglyph.html
帅爆了的元素周期表:http://threejs.org/examples/css3d_periodictable.html
跑车游戏:http://hexgl.bkcore.com/
有没有和小伙伴们都惊呆了?——至少我是的。没有使用Flash,没有大量的图片拼接,绝大多数的特效靠代码实现,包括文章配图那款SS跑车,AMAZING!
Three.js环境的准备
正文现在开始。
我整个例子有不少地方参考的是http://www.hiwebgl.com/?p=1058。向这样的译者表示绝对的敬意!(话说原文是日文的,我这个看英语文档无压力的无论如何也受不鸟日文啊……)
Three.js从GitHub库中获取:https://github.com/mrdoob/three.js/,下载请点击在页面右边的“Download ZIP”按钮。比较齐活的例子在:https://github.com/stemkoski/stemkoski.github.com可以下载。
Three.js至少需要build目录下的three,js,three.min.js是前者的压缩版。docs下的index.html是器官方文档(我还没细致看过,质量怎么样没法说)。example目录下都是例子,值得一提的是,这些例子必须要挂到服务器里面预览,本地打开会有问题,IIS或者Tomcat或者Apache都可以(以后会说到为什么)。
运行第一个Three.js
第一个例子也用来确定一下Three.js是否能正常运行。在WebRoot下建一个js文件夹,把three,js拷贝进去(three.min.js也行)。
在WebRoot下建一个index.html,内容如下:
- <!DOCTYPE html>
- <html>
- <head>
- <meta charset="UTF-8">
- <title>Three.js チュートリアル1</title>
- <script src="Three.js"></script>
- <style type="text/css">
- div#canvas-frame {
- border: none;
- cursor: pointer;
- width: 600px;
- height: 600px;
- background-color: #EEEEEE;
- }
- </style>
- <script>
- var renderer;
- function initThree() {
- width = document.getElementById('canvas-frame').clientWidth;
- height = document.getElementById('canvas-frame').clientHeight;
- renderer = new THREE.WebGLRenderer({
- antialias : true
- });
- renderer.setSize(width, height);
- document.getElementById('canvas-frame')
- .appendChild(renderer.domElement);
- <span style="color:#FF0000;">renderer.setClearColor(0xFFFFFF, 1.0);</span>
- }
-
- var camera;
- function initCamera() {
- camera = new THREE.PerspectiveCamera(45, width / height, 1, 10000);
- camera.position.x = 100;
- camera.position.y = 20;
- camera.position.z = 50;
- camera.up.x = 0;
- camera.up.y = 0;
- camera.up.z = 1;
- camera.lookAt({
- x : 0,
- y : 0,
- z : 0
- });
- }
- var scene;
- function initScene() {
- scene = new THREE.Scene();
- }
- var light;
- function initLight() {
- light = new THREE.DirectionalLight(0xFF0000, 1.0, 0);
- light.position.set(100, 100, 200);
- scene.add(light);
- }
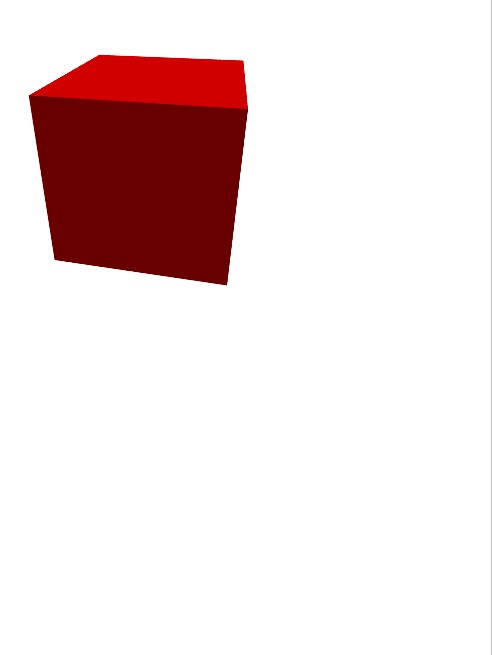
- var cube;
- function initObject() {
- cube = new THREE.Mesh(new THREE.CubeGeometry(50, 50, 50), //形状の設定
- new THREE.MeshLambertMaterial({
- color : 0xff0000
- }) //材質の設定
- );
- scene.add(cube);
- cube.position.set(0, 0, 0);
- }
- function threeStart() {
- initThree();
- initCamera();
- initScene();
- initLight();
- initObject();
- renderer.clear();
- renderer.render(scene, camera);
- }
- </script>
- </head>
-
- <body onload="threeStart();">
- <div id="canvas-frame"></div>
- </body>
- </html>
执行的结构应该是这样,Three.js也比较大,网的质量可能不好,看不到效果的多刷几次:http://tonythegod.eu5.org/three.js/1/demo1.html
自二个例子:一个可控制的长方体
最后的效果(没看到效果多刷几次):http://tonythegod.eu5.org/three.js/1/demo2.html
我没有给李兴华打广告……只是这本书在我写Demo时就在我手边,然后就当了模特了~
贴出主要的代码,附上一些主要的注释:
- <!doctype html>
- <html lang="en">
- <head>
- <title>Template (Three.js)</title>
- <meta charset="utf-8">
- <meta name="viewport"
- content="width=device-width, user-scalable=no, minimum-scale=1.0, maximum-scale=1.0">
- <link rel=stylesheet href="css/base.css" />
- </head>
-
- <body>
- <script src="../js/Three.js"></script>
- <script src="../js/Detector.js"></script>
- <script src="../js/Stats.js"></script>
- <script src="../js/OrbitControls.js"></script>
- <script src="../js/THREEx.KeyboardState.js"></script>
- <script src="../js/THREEx.FullScreen.js"></script>
- <script src="../js/THREEx.WindowResize.js"></script>
- <script src="../js/Texture.js"></script>
-
- <div id="ThreeJS"
- style="z-index: 1; position: absolute; left: 0px; top: 0px"></div>
- <script>
- //
- // MAIN //
- //
- // standard global variables
- var container, scene, camera, renderer, controls, stats;
- var keyboard = new THREEx.KeyboardState();
- var clock = new THREE.Clock();
-
- // custom global variables
- var cube;
-
- // initialization
- init();
-
- // animation loop / game loop
- animate();
-
- ///
- // FUNCTIONS //
- ///
-
- function init() {
- ///
- // SCENE //
- ///
- scene = new THREE.Scene();
-
-
- // CAMERA //
-
-
- // set the view size in pixels (custom or according to window size)
- // var SCREEN_WIDTH = 400, SCREEN_HEIGHT = 300;
- var SCREEN_WIDTH = window.innerWidth, SCREEN_HEIGHT = window.innerHeight;
- // camera attributes
- var VIEW_ANGLE = 45, ASPECT = SCREEN_WIDTH / SCREEN_HEIGHT, NEAR = 0.1, FAR = 20000;
- // set up camera
- camera = new THREE.PerspectiveCamera(VIEW_ANGLE, ASPECT, NEAR, FAR);
- // add the camera to the scene
- scene.add(camera);
- // the camera defaults to position (0,0,0)
- // so pull it back (z = 400) and up (y = 100) and set the angle towards the scene origin
- camera.position.set(-400, 150, 200);
- camera.lookAt(scene.position);
-
- //
- // RENDERER //
- //
-
- // create and start the renderer; choose antialias setting.
- if (Detector.webgl)
- renderer = new THREE.WebGLRenderer({
- antialias : true
- });
- else
- renderer = new THREE.CanvasRenderer();
-
- renderer.setSize(SCREEN_WIDTH, SCREEN_HEIGHT);
-
- // attach div element to variable to contain the renderer
- container = document.getElementById('ThreeJS');
- // alternatively: to create the div at runtime, use:
- // container = document.createElement( 'div' );
- // document.body.appendChild( container );
-
- // attach renderer to the container div
- container.appendChild(renderer.domElement);
-
-
- // EVENTS //
-
-
- // automatically resize renderer
- THREEx.WindowResize(renderer, camera);
- // toggle full-screen on given key press
- THREEx.FullScreen.bindKey({
- charCode : 'm'.charCodeAt(0)
- });
-
- //
- // CONTROLS //
- //
-
- // move mouse and: left click to rotate,
- // middle click to zoom,
- // right click to pan
- controls = new THREE.OrbitControls(camera, renderer.domElement);
-
- ///
- // STATS //
- ///
-
- // displays current and past frames per second attained by scene
- stats = new Stats();
- stats.domElement.style.position = 'absolute';
- stats.domElement.style.bottom = '0px';
- stats.domElement.style.zIndex = 100;
- container.appendChild(stats.domElement);
-
- ///
- // LIGHT //
- ///
-
- // create a light
- var light = new THREE.PointLight(0xffffff);
- light.position.set(0, 250, 0);
- scene.add(light);
-
- // CUBE
- var cubeGeometry = new THREE.CubeGeometry(260, 35, 185, 1, 1, 1);
-
- var cubeMaterialArray = [];
- cubeMaterialArray.push(new THREE.MeshBasicMaterial({
- map : new THREE.ImageUtils.loadTexture('img/side-up.png')
- }));
- cubeMaterialArray.push(new THREE.MeshBasicMaterial({
- map : new THREE.ImageUtils.loadTexture('img/side-up.png')
- }));
- cubeMaterialArray.push(new THREE.MeshBasicMaterial({
- map : new THREE.ImageUtils.loadTexture('img/up.png')
- }));
- cubeMaterialArray.push(new THREE.MeshBasicMaterial({
- map : new THREE.ImageUtils.loadTexture('img/down.png')
- }));
- cubeMaterialArray.push(new THREE.MeshBasicMaterial({
- map : new THREE.ImageUtils.loadTexture('img/side-right.png')
- }));
- cubeMaterialArray.push(new THREE.MeshBasicMaterial({
- map : new THREE.ImageUtils.loadTexture('img/side-left.png')
- }));
- var cubeMaterials = new THREE.MeshFaceMaterial(cubeMaterialArray);
-
- cube = new THREE.Mesh(cubeGeometry, cubeMaterials);
- cube.position.set(0, 0, 0);
- scene.add(cube);
-
- }
-
- function animate() {
- requestAnimationFrame(animate);
- render();
- update();
- }
-
- function update() {
- // delta = change in time since last call (in seconds)
- var delta = clock.getDelta();
-
- controls.update();
- stats.update();
- }
-
- function render() {
- renderer.render(scene, camera);
- }
- </script>
-
- </body>
- </html>
其实学习Three.js大多是这样,因为缺少相应的文档,看大牛们写的注释是最快上手的办法。
这次就先到这儿,下次再说怎么一点点在画布上作画。
ps:可能用的three.js版本不一致,红色代码处与原文不一致


 9万+
9万+

 被折叠的 条评论
为什么被折叠?
被折叠的 条评论
为什么被折叠?
 到【灌水乐园】发言


