


在网上看到一个果冻效果的demo,在他的基础上加上自己的需求,用swift实现了一下
自定义一个类MyCuteView
import UIKit
let deviceWidth = UIScreen.mainScreen().bounds.size.width
let deviceHeigth = UIScreen.mainScreen().bounds.size.height
let minHeight:CGFloat = 100.0
class MyCuteView: UIView {
var mHeigth:CGFloat = 0.0
dynamic var curveX:CGFloat = 0.0 // dynamic 修饰才走观察者的代理方法
dynamic var curveY:CGFloat = 0.0
var cureView:UIView?
let shapeLayer:CAShapeLayer = CAShapeLayer()
var displayLink:CADisplayLink?
var isAnimating:Bool?
//初始化
override init(frame: CGRect) {
super.init(frame: frame)
//注册观察者
self.addObserver(self, forKeyPath:"curveX", options:.New, context: nil)
self.addObserver(self, forKeyPath:"curveY", options:.New, context: nil)
configShapeLayer()
configCurveView()
configAction()
}
//观察者方法
override func observeValueForKeyPath(keyPath: String?, ofObject object: AnyObject?, change: [String : AnyObject]?, context: UnsafeMutablePointer<Void>) {
if(keyPath == "curveX" || keyPath == "curveY"){
updateShapeLayerPath()
}
}
//手势
func configAction(){
mHeigth = 100 // 手势移动时相对高度
isAnimating = false // 是否处于动效状态
// 手势
let pan : UIPanGestureRecognizer! = UIPanGestureRecognizer.init(target: self, action: Selector("handlePanAction:"))
self.userInteractionEnabled = true
self .addGestureRecognizer(pan)
//CADisplayLink默认每秒运行60次calculatePath是算出在运行期间_curveView的坐标,从而确定_shapeLayer的形状
displayLink = CADisplayLink(target: self, selector: Selector("update"))
displayLink?.addToRunLoop(NSRunLoop.currentRunLoop(), forMode: NSRunLoopCommonModes)
displayLink?.paused = true
}
//shapLayer(也是)
func configShapeLayer() {
shapeLayer.fillColor = UIColor.yellowColor().CGColor
layer.addSublayer(shapeLayer)
}
//小红点
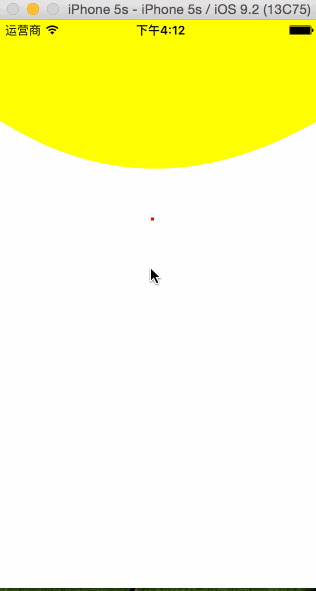
func configCurveView() {
curveX = deviceWidth / 2.0
curveY = minHeight
cureView = UIView.init(frame: CGRect.init(x: curveX, y: curveY , width: 3, height: 3))
cureView!.backgroundColor = UIColor.redColor()
self.addSubview(cureView!)
}
func handlePanAction(pan:UIPanGestureRecognizer) ->Void{
if isAnimating == false {
if (pan.state == .Changed){
// 手势移动时,_shapeLayer跟着手势向下扩大区域
let point:CGPoint = pan.translationInView(self)
mHeigth = point.y*0.7 + minHeight
curveX = deviceWidth / 2.0 + point.x
curveY = mHeigth > minHeight ? mHeigth : minHeight
cureView?.frame = CGRect.init(x: curveX, y: curveY, width: (cureView?.frame.size.width)!, height: (cureView?.frame.size.height)!)
}else if (pan.state == .Cancelled || pan.state == .Failed || pan.state == .Ended){
isAnimating = true // 手势结束时,_shapeLayer返回原状并产生弹簧动效
displayLink!.paused = false //开启displaylink,会执行方法
UIView.animateWithDuration(1.0, delay: 0.0, usingSpringWithDamping: 0.5, initialSpringVelocity:0, options:.OverrideInheritedDuration, animations: { () -> Void in
self.cureView?.frame = CGRect.init(x: deviceWidth/2.0, y: minHeight, width: 3, height: 3)
}, completion: { (Bool) -> Void in
self.displayLink!.paused = true
self.isAnimating = false
})
}
}
}
func updateShapeLayerPath() -> Void{
// 更新_shapeLayer形状
let tPath = UIBezierPath.init()
tPath.moveToPoint(CGPoint.init(x: 0, y: 0))
tPath.addLineToPoint(CGPoint.init(x: deviceWidth, y: 0))
tPath.addLineToPoint(CGPoint.init(x: deviceWidth, y: minHeight))
tPath.addQuadCurveToPoint(CGPoint.init(x: 0, y: minHeight), controlPoint: CGPoint.init(x: curveX, y: curveY))
tPath.closePath()
shapeLayer.path = tPath.CGPath
}
func update() -> Void{
// 由于手势结束时,r5执行了一个UIView的弹簧动画,把这个过程的坐标记录下来,并相应的画出_shapeLayer形状
let layer = cureView?.layer.presentationLayer()
curveX = layer!.position.x;
curveY = layer!.position.y;
}
required init?(coder aDecoder: NSCoder) {
fatalError("init(coder:) has not been implemented")
}
//删除
deinit {
self.removeObserver(self, forKeyPath: "curveX")
self.removeObserver(self, forKeyPath: "curveY")
}
}在VC中调用
import UIKit

class ViewController: UIViewController {

    override func viewDidLoad() {
        super.viewDidLoad()

        let cuteView = MyCuteView.init(frame: CGRectMake(0, 0, 320, 568))
        cuteView.backgroundColor = UIColor.whiteColor()
        self.view .addSubview(cuteView)


    }


 438
438

 被折叠的 条评论
为什么被折叠?
被折叠的 条评论
为什么被折叠?
 到【灌水乐园】发言


