


目录
一、聊天界面功能
1、下拉拉取消息(静态)
下拉时会触发自定义函数nextPage进行拉取,该函数有两个步骤,展示刷新动画并拉取消息。
刷新动画通过setInterval 方法按照指定周期重复执行,在此同时调用获取新消息的函数。
其中,需满足nowpage>=0,当拉取完所有消息后,该值计为-1,即拉取所有消息后不再运行剩余代码;以及beginloading为真,准备加载状态下可以运行剩余代码,开始运行函数后,设置为false表示正在运行,防止重复运行。
//拉取
			nextPage: function(){
				if(this.nowpage>=0 && this.beginloading){
					this.isloading=false;

					this.beginloading=false;

					var animation=uni.createAnimation({
						duration:1000,
						timingFunction:'step-start',
					})

					this.animation=animation
					//this.animationData=animation.export()
					let i=1;
					this.loading=setInterval(function(){
						animation.rotate(i*30).step()
						this.animationData=animation.export()
						i++;
						if(i>20){
							this.getMsg(this.nowpage);
						}
					}.bind(this),100)
				}
			},
二、聊天界面样式
消息的展示主要在考虑消息发送者(自己、其他人)以及消息类型。
根据消息发送者不同分别设计了左聊天框和右聊天框不同样式组件(主要是位置不同,通过flex-direction样式属性设置从左到右和从右到左的顺序排列,左为row,右为row-reverse;一些间距的左右对称不同):
.msg-left{
flex-direction: row;
.msg-text{
margin-left: 16rpx;
background-color: #fff;
border-radius: 0rpx 20rpx 20rpx 20rpx;
}
.msg-img{
margin-left: 16rpx;
.playvideo{
width:30rpx;
height: 30rpx;
}
}
.playvideo{
.playvideo-img{
float:right;
width:120rpx;
height:120rpx;
margin-top: -140rpx;
padding-right: 20rpx;
}
}
.msg-map{
margin-left: 16rpx;
border-radius: 0rpx 20rpx 20rpx 20rpx;
}
.voice{
text-align: right;
}
.voice-img{
float: left;
padding-bottom: 4rpx;
transform: rotate(180deg);
width: 36rpx;
height: 36rpx;
}
}
.msg-right{
flex-direction: row-reverse;
.msg-text{
margin-right: 16rpx;
background-color: #fff260;
border-radius: 20rpx 0rpx 20rpx 20rpx;
}
.msg-img{
margin-right: 16rpx;
}
.playvideo{
.playvideo-img{
float:right;
width:120rpx;
height:120rpx;
margin-top: -140rpx;
padding-right: 20rpx;
}
}
.msg-map{
margin-right: 16rpx;
border-radius: 20rpx 0rpx 20rpx 20rpx;
}
.voice{
text-align: left;
}
.voice-img{
float: right;
padding-top: 4rpx;
width: 36rpx;
height: 36rpx;
}
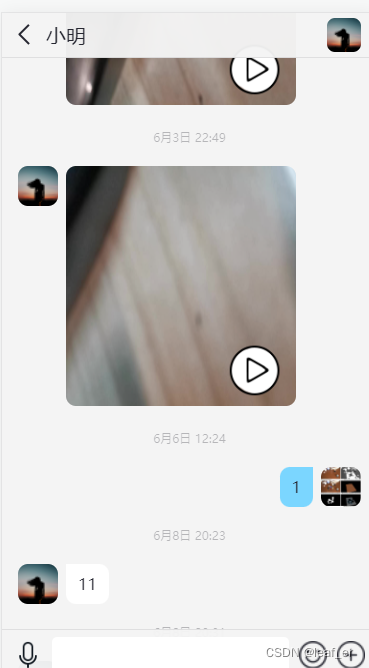
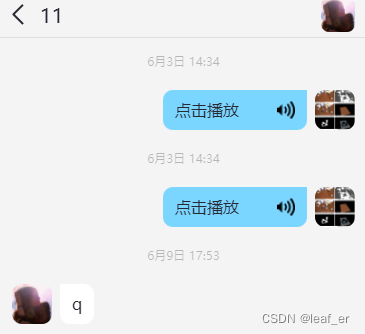
}通过消息信息里的type属性判断属性类型,根据不同类型制定了相应聊天框展示样式,图片、视频等通过使用uni-app组件,语音通过自带函数进行播放,视频则通过点击跳转到另外的页面调用组件播放:
<view class="message" v-if="item.type == 'TIMTextElem'">
<view class="msg-text">{{item.payload.text}}</view>
</view>
<view class="message" v-if="item.type == 'TIMImageElem'">
<image class="msg-img" :src="item.payload.imageInfoArray[0].imageUrl" mode="widthFix" @tap="previewImg(item.message)"></image>
</view>
<view class="message" v-if="item.type == 'TIMVideoFileElem'" @tap="playVideo(item.payload.remoteVideoUrl)">
<!-- <video class="msg-img" :src="item.payload.remoteVideoUrl" controls></video> -->
<image class="msg-img" :src="item.payload.remoteVideoUrl+'?x-oss-process=video/snapshot,t_0,f_jpg'">
<view class="playvideo">
<image class="playvideo-img" src="../../static/images/submit/playvideo.png"></image>
</view>
</image>
</view>
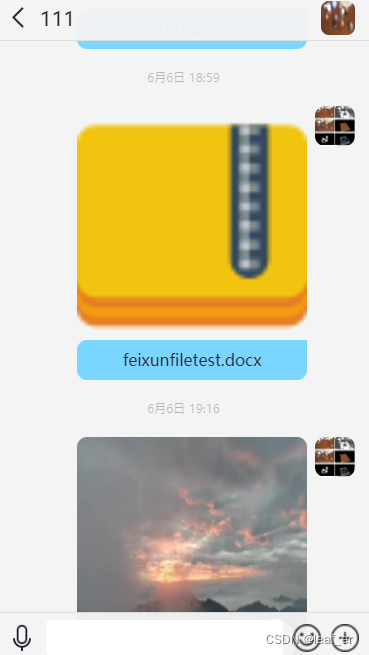
<view class="message" v-if="item.type == 'TIMFileElem'">
<image class="msg-img" src="../../static/images/submit/fileShow.png" mode="widthFix" @tap="saveFile(item.payload.fileUrl)"></image>
<view class="msg-text" style="text-align: center;">{{item.payload.fileName}}</view>
</view>
<view class="message" v-if="item.type == 'TIMSoundElem'">
<view class="msg-text voice" :style="{width:30 * 4 + 'px'}" @tap="playVoice(item.payload.url)">
<image class="voice-img" src="../../static/images/common/voice.png"></image>
<!-- {{changeTime(item.payload.second * 1000)}}" -->
点击播放
</view>
</view>
<view class="message" v-if="item.type == 'TIMLocationElem'">
<view class="msg-map" @tap="openLocation(item.payload)">
<view class="map-name">{{item.payload.description}}</view>
<view class="map-address">{{item.payload.description}}</view>
<image src="../../static/images/common/map.png" mode="aspectFit" class="map-img"></image>
<!-- <map class="map" :latitude="item.message.latitude" :longitude="item.message.longitude" :markers="covers(item.message)"></map> -->
</view>
</view>
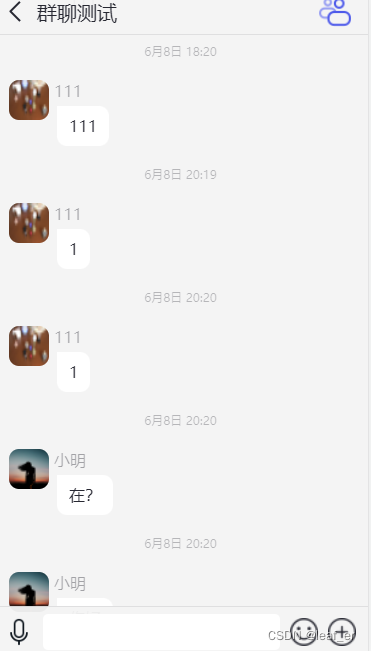
▲新增群聊页面显示他人昵称(优先群昵称,然后是用户昵称,最后是用户id)。
效果如下:


 6680
6680


 被折叠的 条评论
为什么被折叠?
被折叠的 条评论
为什么被折叠?
 到【灌水乐园】发言


