


背景:
在前面学习android framework开发时候,搭建ubuntu系统上源码环境时候都是以手机为主,还没有专门针对车机模拟器的编译进行详细的介绍,虽然二者其实差异就一个lunch目标及一个emulator的差异点,所以前面也没有针对aaos的车机模拟器编译专门写文章,但是近来比较多学员朋友都有问到了车机模拟器的编译相关文章有没有,这里干脆给大家拿老文章修改一下专门针对车载aaos相关模拟器编译。
详细步骤
ps:环境ubuntu版本20.04
sudo apt install curl
test@test-Lenovo:~$ mkdir ~/bin
test@test-Lenovo:~$ PATH=~/bin:$PATH
test@test-Lenovo:~$ curl https://storage.googleapis.com/git-repo-downloads/repo > ~/bin/repo
test@test-Lenovo:~$ chmod a+x ~/bin/repo
这里的google网站如果不行就变成如下:
curl https://mirrors.tuna.tsinghua.edu.cn/git/git-repo -o repo
chmod a+x repo
mv repo ~/bin/repo
查看链接:
https://mirrors.tuna.tsinghua.edu.cn/help/git-repo/
3.
test@test-Lenovo:~$ mkdir aosp
test@test-Lenovo:~$ cd aosp/
est@test-Lenovo:~/aosp$ repo init -u https://mirrors.tuna.tsinghua.edu.cn/git/AOSP/platform/manifest
/usr/bin/env: ‘python’: No such file or directory
python3 had installed,so should link:
test@test-Lenovo:~$ cd /usr/bin/
test@test-Lenovo:/usr/bin$ ls -l | grep python
lrwxrwxrwx 1 root root          23 7月  22 03:07 pdb3.8 -> ../lib/python3.8/pdb.py
lrwxrwxrwx 1 root root          31 7月  22 03:07 py3versions -> ../share/python3/py3versions.py
lrwxrwxrwx 1 root root           9 7月  22 03:07 python3 -> python3.8
-rwxr-xr-x 1 root root     5490352 6月   2 18:49 python3.8
-rwxr-xr-x 1 root root         384 3月  28  2020 python3-futurize
-rwxr-xr-x 1 root root         388 3月  28  2020 python3-pasteurize
test@test-Lenovo:/usr/bin$ sudo ln -s python3 python
test@test-Lenovo:/usr/bin$ ls -l | grep python
lrwxrwxrwx 1 root root          23 7月  22 03:07 pdb3.8 -> ../lib/python3.8/pdb.py
lrwxrwxrwx 1 root root          31 7月  22 03:07 py3versions -> ../share/python3/py3versions.py
lrwxrwxrwx 1 root root           7 11月 15 22:53 python -> python3
lrwxrwxrwx 1 root root           9 7月  22 03:07 python3 -> python3.8
-rwxr-xr-x 1 root root     5490352 6月   2 18:49 python3.8
-rwxr-xr-x 1 root root         384 3月  28  2020 python3-futurize
-rwxr-xr-x 1 root root         388 3月  28  2020 python3-pasteurize
这里repo时候如果不指定分支就是默认master分支,master可能不稳定,不建议,最好末尾加上 -b android-13.0.0_r6,下面所有的repo init都建议末尾加上自己要repo的版本
这里的
repo init -u https://mirrors.tuna.tsinghua.edu.cn/git/AOSP/platform/manifest -b android-13.0.0_r6
上面末尾加的:-b android-13.0.0_r6 就代表版本号android13的r6版本,具体版本号大家自己根据情况来确定。
test@test-Lenovo:~/aosp$ repo init -u https://mirrors.tuna.tsinghua.edu.cn/git/AOSP/platform/manifest -b android-13.0.0_r6
repo: error: "git" is not available
repo: error: [Errno 2] No such file or directory: 'git'
Please make sure git is installed and in your path.
test@test-Lenovo:~/aosp$ sudo apt-get install git
test@test-Lenovo:~/aosp$ repo init -u https://mirrors.tuna.tsinghua.edu.cn/git/AOSP/platform/manifest -b android-13.0.0_r6
Downloading Repo source from https://gerrit.googlesource.com/git-repo
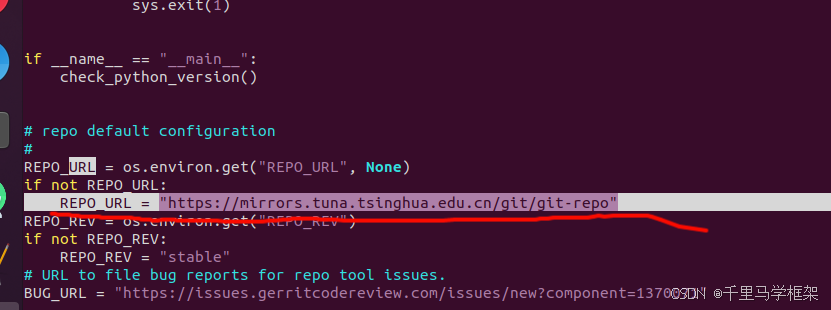
repo的运行过程中会尝试访问官方的git源(errit.googlesource.com)更新自己,如果想使用tuna的镜像源进行更新,可以将如下内容复制到你的~/.bashrc里
export REPO_URL='https://mirrors.tuna.tsinghua.edu.cn/git/git-repo'
test@test-Lenovo:~/aosp$ vi ~/.bashrc
test@test-Lenovo:~/aosp$ sudo apt-get install vim
test@test-Lenovo:~/aosp$ source ~/.bashrc
这里REPO_URL也可以直接repo文件中修改:
修改根目录的~/bin/repo文件
vi ~/bin/repo
test@test-Lenovo:~/aosp$ repo init -u https://mirrors.tuna.tsinghua.edu.cn/git/AOSP/platform/manifest -b android-13.0.0_r6
Downloading Repo source from https://mirrors.tuna.tsinghua.edu.cn/git/git-repo
fatal: cannot make /home/test/aosp/.repo/repo directory: File exists
fatal: cloning the git-repo repository failed, will remove '.repo/repo'

test@test-Lenovo:~/aosp$ rm .repo/ -rf

test@test-Lenovo:~/aosp$ repo init -u https://mirrors.tuna.tsinghua.edu.cn/git/AOSP/platform/manifest -b android-13.0.0_r6
Downloading Repo source from https://mirrors.tuna.tsinghua.edu.cn/git/git-repo
fatal: unable to access 'https://mirrors.tuna.tsinghua.edu.cn/git/git-repo/': server certificate verification failed. CAfile: none CRLfile: none

test@test-Lenovo:~/aosp$ git config --global http.sslverify false
test@test-Lenovo:~/aosp$ git config --global user.email "test@example.com"
test@test-Lenovo:~/aosp$  git config --global user.name "test"
test@test-Lenovo:~/aosp$ repo init -u https://mirrors.tuna.tsinghua.edu.cn/git/AOSP/platform/manifest -b android-13.0.0_r6
repo has been initialized in /home/test/aosp

test@test-Lenovo:~/aosp$ repo sync
install java jdk (非必须):
sudo apt-get install openjdk-8-jdk
10
install all libs:
sudo apt-get install libx11-dev:i386 libreadline6-dev:i386 libgl1-mesa-dev
sudo apt-get install -y git flex bison gperf build-essential libncurses5-dev:i386
sudo apt-get install tofrodos python-markdown libxml2-utils xsltproc zlib1g-dev:i386
sudo apt-get install dpkg-dev libsdl1.2-dev
sudo apt-get install git-core gnupg flex bison gperf build-essential
sudo apt-get install zip curl zlib1g-dev gcc-multilib
sudo apt-get install libc6-dev-i386
sudo apt-get install lib32ncurses5-dev x11proto-core-dev libx11-dev
sudo apt-get install libgl1-mesa-dev libxml2-utils xsltproc unzip m4
sudo apt-get install lib32z-dev ccache
sudo apt-get install libssl-dev libncurses5
11.与手机差异部分在这里
. build/envsetup.sh
  lunch sdk_car_x86_64-userdebug #must this,必须选这个目标
  make
  emulator
上面编译13-r6版本源码后,直接emulator会发现模拟器启动后一直黑屏:
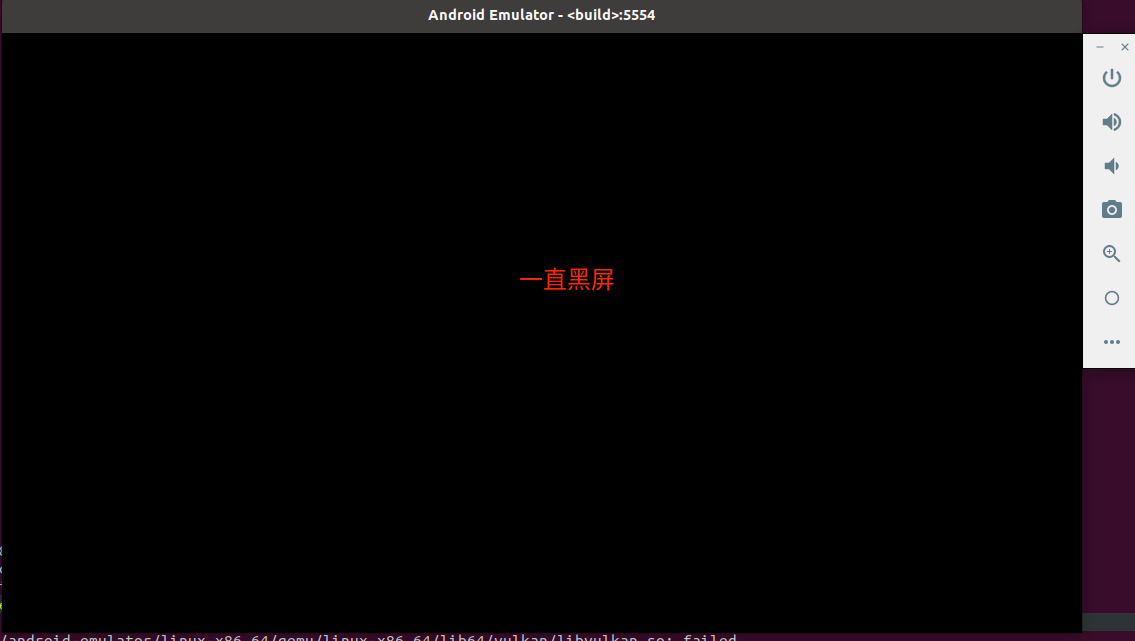 需要对emulator执行时候加上相关skin指定,用以下命令:
emulator -skin 1200x800
这样才可以正常启动:
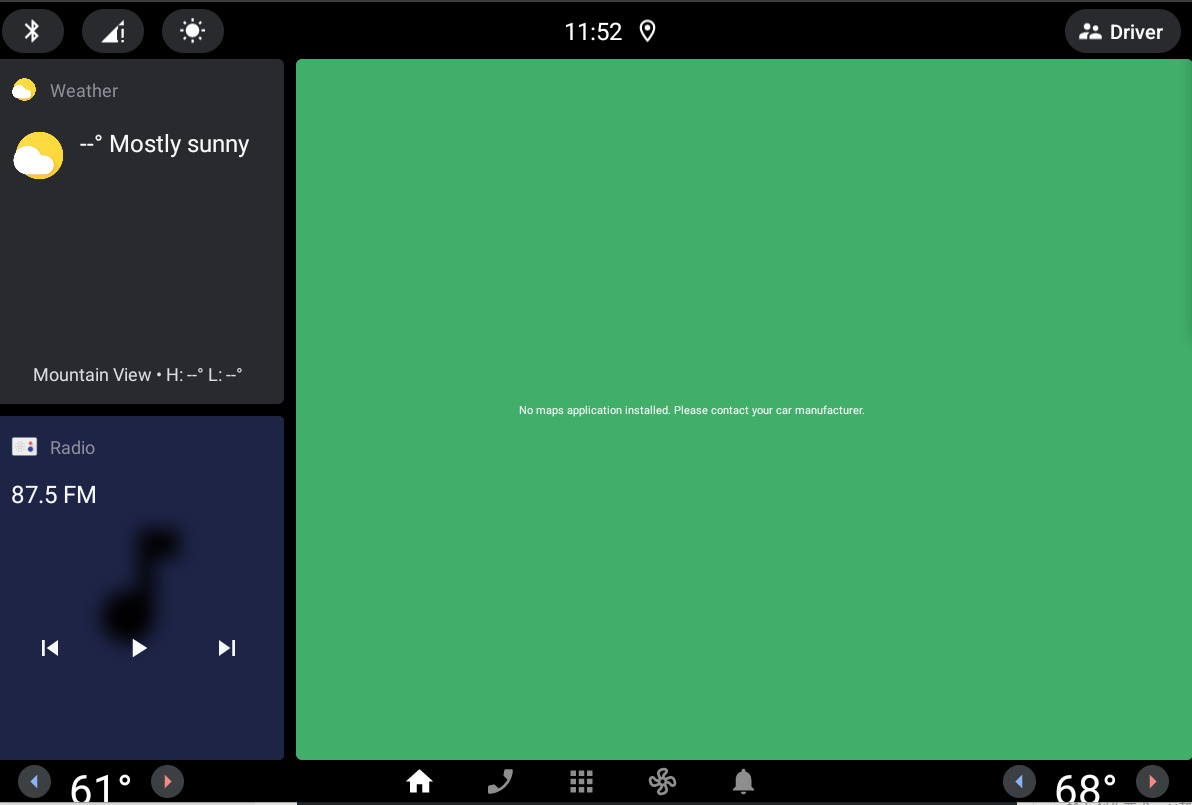
emulator启动车载模拟器和以前手机模拟器有点区别,在以前手机模拟器,只要emulator命令结束重新执行那么整个系统就重新启动,而车载模拟器不是这样哈,只要img没有变化,那么emulator就是立即启动,也就是车载模拟器就没有真正结束哈,如果想要结束让重新运行一下流程,可以考虑使用如下命令:
adb shell reboot
对模拟器进行重启操作既可以。
12.other function download the source:
12.1:
wget -c https://mirrors.tuna.tsinghua.edu.cn/aosp-monthly/aosp-latest.tar # 下载初始化包
tar xf aosp-latest.tar
cd AOSP   # 解压得到的 AOSP 工程目录
# 这时 ls 的话什么也看不到,因为只有一个隐藏的 .repo 目录
repo sync # 正常同步一遍即可得到完整目录
# 或 repo sync -l 仅checkout代码
12.2:
repo sync may has this error:
error: Entry ‘command.py’ not uptodate. Cannot merge.
fatal:xxxxxxxx’'v2.17.3.0
fix:
cd .repo/repo
git pull
更多framework干货请关注“千里马学框架”


 1833
1833

 被折叠的 条评论
为什么被折叠?
被折叠的 条评论
为什么被折叠?
 到【灌水乐园】发言


