整个demo只有一个界面,由一个CheckBox,一个ImageView,一个TextViw组成,CheckBox用来标记是否要进行裁剪,来看一下布局文件:
<?xml version="1.0" encoding="utf-8"?>
<LinearLayout xmlns:android="http://schemas.android.com/apk/res/android"
    xmlns:tools="http://schemas.android.com/tools"
    android:layout_width="match_parent"
    android:layout_height="match_parent"
    android:gravity="center_horizontal"
    android:orientation="vertical"
    tools:context="com.yulin.photodemo.MainActivity">
    <CheckBox
        android:id="@+id/cb"
        android:layout_gravity="right"
        android:layout_width="wrap_content"
        android:layout_height="wrap_content"/>
    <ImageView
        android:id="@+id/img"
        android:layout_marginTop="100dp"
        android:layout_width="80dp"
        android:layout_height="80dp"
        android:src="@mipmap/ic_launcher"/>

    <TextView
        android:id="@+id/path"
        android:layout_marginTop="50dp"
        android:layout_width="wrap_content"
        android:layout_height="wrap_content"
        android:text="The Image's Path"/>


</LinearLayout>
- 1
- 2
- 3
- 4
- 5
- 6
- 7
- 8
- 9
- 10
- 11
- 12
- 13
- 14
- 15
- 16
- 17
- 18
- 19
- 20
- 21
- 22
- 23
- 24
- 25
- 26
- 27
- 28
- 29
- 1
- 2
- 3
- 4
- 5
- 6
- 7
- 8
- 9
- 10
- 11
- 12
- 13
- 14
- 15
- 16
- 17
- 18
- 19
- 20
- 21
- 22
- 23
- 24
- 25
- 26
- 27
- 28
- 29
思路是:用户点击一下中间的图片,弹出一个提示框,来让用户选择是拍照还是选择本地图片,然后进行后续操作,效果图如下:
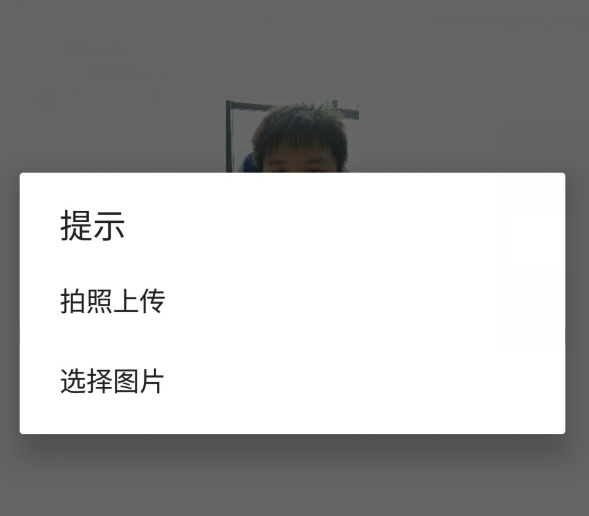
当用户点击拍照,就进行以下操作:
  private void operTakePhoto() {
        isTakePhoto = true;
        isGetPic = false;
        if (ContextCompat.checkSelfPermission(MainActivity.this, Manifest.permission.CAMERA) != PackageManager.PERMISSION_GRANTED) {
            if (ActivityCompat.shouldShowRequestPermissionRationale(MainActivity.this, Manifest.permission.CAMERA))
                showPhotoPerDialog();
            else
                ActivityCompat.requestPermissions(MainActivity.this, new String[]{Manifest.permission.CAMERA}, PERMISSIONS_REQUEST_PHOTO);
        } else takePhoto();
    }
由于拍照在6.0以上系统需要申请拍照权限,因此在这里进行权限动态申请,这里先假设用户同意用app进行拍照操作,代码如下:
private void takePhoto() {
String mUUID = UUID.randomUUID().toString()
Intent intent = new Intent()
intent.setAction(MediaStore.ACTION_IMAGE_CAPTURE)
mPath = FileUtils.getStorageDirectory() + mUUID
File file = new File(mPath + ".jpg")
intent.putExtra(MediaStore.EXTRA_OUTPUT, Uri.fromFile(file))
startActivityForResult(intent, REQUEST_CODE_TAKING_PHOTO)
}
拍照是通过startActivityForResult来实现的,因此当用户执行完拍照操作之后,在onActivityResult中会有回调:
protected void onActivityResult(int requestCode, int resultCode, Intent data) {
super.onActivityResult(requestCode, resultCode, data);
if (resultCode == Activity.RESULT_OK) {
switch (requestCode) {
case REQUEST_CODE_TAKING_PHOTO:
if (mCb.isChecked()) dealTakePhotoThenZoom();
else dealTakePhotoWithoutZoom();
break;
如果用户没有勾选我们界面上的CheckBox,就进行以下操作:
/**
    private void dealTakePhotoWithoutZoom() {
        String finalPath = mPath + ".jpg";
        Bitmap bitmap = BitmapFactory.decodeFile(finalPath);
        if (bitmap != null) {
            boolean b = BitmapUtils.compressBitmap2file(bitmap, IMAGE_SAVE_PATH);
            if (b) {
                mImg.setImageBitmap(BitmapFactory.decodeFile(IMAGE_SAVE_PATH));
                mTxtPath.setText("图片路径:" + IMAGE_SAVE_PATH);
            }
        }
    }
上面的代码是首先获得Bitmap对象,然后通过BitmapUtils的compressBitmap2file方法将Bitmap进行压缩到指定文件,最后在ImageView和TextView上分别显示图片和对应的路径。
如果用户勾选了我们界面上的CheckBox,就还要对拍照所得到的照片进行裁剪,代码如下:
 private void dealTakePhotoThenZoom() {
        startPhotoZoom(Uri.fromFile(new File(mPath + ".jpg")), TARGET_HEAD_SIZE);
    }
private void startPhotoZoom(Uri uri, int size) {
try {
Intent intent = new Intent("com.android.camera.action.CROP")
intent.setDataAndType(uri, "image/*")
// crop为true是设置在开启的intent中设置显示的view可以剪裁
intent.putExtra("crop", "true")
// aspectX aspectY 是宽高的比例
intent.putExtra("aspectX", 1)
intent.putExtra("aspectY", 1)
// outputX,outputY 是剪裁图片的宽高
intent.putExtra("outputX", size)
intent.putExtra("outputY", size)
// intent.putExtra("return-data", true)
mUri = Uri.parse("file:///" + IMAGE_SAVE_PATH)
intent.putExtra(MediaStore.EXTRA_OUTPUT, mUri)
intent.putExtra("outputFormat", Bitmap.CompressFormat.JPEG.toString())
startActivityForResult(intent, REQUEST_CODE_CUT_PHOTO)
} catch (ActivityNotFoundException e) {
String errorMessage = "Your device doesn't support the crop action!"
Toast.makeText(this, errorMessage, Toast.LENGTH_LONG).show()
} catch (Exception e) {
e.printStackTrace()
}
}
- 1
- 2
- 3
- 4
- 5
- 6
- 7
- 8
- 9
- 10
- 11
- 12
- 13
- 14
- 15
- 16
- 17
- 18
- 19
- 20
- 21
- 22
- 23
- 24
- 25
- 1
- 2
- 3
- 4
- 5
- 6
- 7
- 8
- 9
- 10
- 11
- 12
- 13
- 14
- 15
- 16
- 17
- 18
- 19
- 20
- 21
- 22
- 23
- 24
- 25
裁剪也是通过startActivityForResult来实现的,也会在onActivityForResult中有回调,实现如下:
case REQUEST_CODE_CUT_PHOTO:
dealZoomPhoto();
break;
private void dealZoomPhoto() {
        try {
            if (mUri != null) {
                Bitmap bitmap = BitmapFactory.decodeStream(getContentResolver().openInputStream(mUri));
                if (bitmap != null) {
                    mImg.setImageBitmap(bitmap);
                    boolean b = BitmapUtils.compressBitmap2file(bitmap,IMAGE_SAVE_PATH);
                    if(b) mTxtPath.setText("图片地址:" + IMAGE_SAVE_PATH);

                }
            }
        } catch (Exception e) {
            e.printStackTrace();
        }
    }
以上代码相信大家都能看得懂。
选择图片操作如下:
    private void getPictureFromLocal() {
        Intent innerIntent =
                new Intent(Intent.ACTION_GET_CONTENT);
        innerIntent.setType("image/*");
        Intent wrapperIntent = Intent.createChooser(innerIntent, null);
        startActivityForResult(wrapperIntent, REQUEST_CODE_SELECT_PHOTO_FROM_LOCAL);
    }
选择图片同样是通过startActivityForResult来实现的,回调如下:
   case REQUEST_CODE_SELECT_PHOTO_FROM_LOCAL://选择图片的结果
                    if (mCb.isChecked()) dealChoosePhotoThenZoom(data);
                    else dealChoosePhotoWithoutZoom(data);
                    break;
之后的操作与拍照类似,大家下载demo后自己看吧。
原文地址:http://blog.csdn.net/qq_23383563/article/details/52861297?locationNum=5&fps=1


 3040
3040

 被折叠的 条评论
为什么被折叠?
被折叠的 条评论
为什么被折叠?
 到【灌水乐园】发言


