


Android入门第六篇之ListView (一) ,讲的是如何制作一个具有两行文本的 自定义控件 ,作为ListView的Item的使用方法。这篇接下来也是围绕ListView和Item,更加深入地介绍它们的用法。
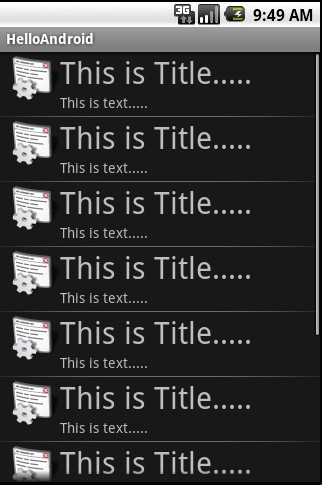
首先,先来看看本文代码运行的结果,本文的Item比上一篇中的Item多出左边的图标:
main.xml的源代码,跟上一篇的一样,这里就不作解释了,直接贴出my_imageitem.xml的代码,就是它实现ImageItem的UI:
- <?xml version="1.0" encoding="utf-8"?>
- <RelativeLayout
- android:id="@+id/RelativeLayout01"
- android:layout_width="fill_parent"
- xmlns:android="http://schemas.android.com/apk/res/android"
- android:layout_height="wrap_content"
- android:paddingBottom="4dip"
- android:paddingLeft="12dip">
- <ImageView
- android:layout_width="wrap_content"
- android:layout_height="wrap_content"
- android:id="@+id/ItemImage">
- </ImageView>
- <TextView
- android:text="TextView01"
- android:layout_height="wrap_content"
- android:textSize="30dip"
- android:layout_width="fill_parent"
- android:layout_toRightOf="@+id/ItemImage"
- android:id="@+id/ItemTitle">
- </TextView>
- <TextView
- android:text="TextView02"
- android:layout_height="wrap_content"
- android:layout_width="fill_parent"
- android:layout_toRightOf="@+id/ItemImage"
- android:layout_below="@+id/ItemTitle"
- android:id="@+id/ItemText">
- </TextView>
- </RelativeLayout>
解释一下 my_imageitem.xml的代码:这里使用了RelativeLayout布局,控件的关键的属性是:
ItemTitle的属性 android:layout_toRightOf="@+id/ItemImage" ,ItemTitle在ItemImage的右边;
ItemText的属性 android:layout_toRightOf="@+id/ItemImage",ItemText在ItemImage的右边, android:layout_below="@+id/ItemTitle", ItemText 在 ItemTitle的下面。
最后,贴出JAVA的源代码,这里的源代码跟上一篇的很类似,只是修改了一部分,引入Item Image:
- @Override
- public void onCreate(Bundle savedInstanceState) {
- super.onCreate(savedInstanceState);
- setContentView(R.layout.main);
- //绑定XML中的ListView,作为Item的容器
- ListView list = (ListView) findViewById(R.id.MyListView);
- //生成动态数组,并且转载数据
- ArrayList<HashMap<String, Object>> lstImageItem = new ArrayList<HashMap<String, Object>>();
- for(int i=0;i<10;i++)
- {
- HashMap<String, Object> map = new HashMap<String, Object>();
- map.put("ItemImage", R.drawable.icon);//添加图像资源的ID
- map.put("ItemTitle", "This is Title.....");
- map.put("ItemText", "This is text.....");
- lstImageItem.add(map);
- }
- //生成适配器的ImageItem <====> 动态数组的元素,两者一一对应
- SimpleAdapter saImageItems = new SimpleAdapter(this, //没什么解释
- lstImageItem,//数据来源
- R.layout.my_imageitem,//ListItem的XML实现
- //动态数组与ImageItem对应的子项
- new String[] {"ItemImage","ItemTitle", "ItemText"},
- //ImageItem的XML文件里面的一个ImageView,两个TextView ID
- new int[] {R.id.ItemImage,R.id.ItemTitle,R.id.ItemText});
- //添加并且显示
- list.setAdapter(saImageItems);


 1662
1662

 被折叠的 条评论
为什么被折叠?
被折叠的 条评论
为什么被折叠?
 到【灌水乐园】发言


