


有的时候Android系统自带的控件并不能满足我们的需求,所以我们就得自己去自定义。
以前看到自定义view都感觉很高大上的样子,感觉技术应该是很牛逼的那种。虽然以前大概了解过自定义view的流程,但是没在工作中用到,也没有深入了解,闲暇之余,还是想多学点东西,毕竟这东西以后能用得到,学习的点点滴滴记录下来,方便以后查找。
一个简单地自定义view。
1.自定义view:首先是写一个类继承view,实现它的构造方法,最少要实现一个构造。
public class CustomView01 extends View{

    public CustomView01(Context context) {
        super(context);
    }
    public CustomView01(Context context, AttributeSet attrs) {
        super(context, attrs);
    }
    public CustomView01(Context context, AttributeSet attrs, int defStyleAttr) {
        super(context, attrs, defStyleAttr);
    }

}
2.在values文件下,新建一个自定义属性的xml,名称必须是attrs。定义自定义view的属性,我这里定义了一个String格式的mTxet和一个color格式的mColor。
<?xml version="1.0" encoding="utf-8"?>
<resources>
    <declare-styleable name="CustomView01">
        <attr name="mTxet" format="string"/>
        <attr name="mColor" format="color"/>
    </declare-styleable>
</resources>
这样我们就可以在布局文件中使用了。使用我们自己定义的属性,必须在父布局文件里面添加命名空间:“xmlns:app=”http://schemas.android.com/apk/res-auto”,其中的app是一个名称,可以随便定义。
<?xml version="1.0" encoding="utf-8"?>
<RelativeLayout xmlns:android="http://schemas.android.com/apk/res/android"
    xmlns:tools="http://schemas.android.com/tools"
    xmlns:app="http://schemas.android.com/apk/res-auto"
    android:layout_width="match_parent"
    android:layout_height="match_parent"
    tools:context="com.app.lwm.myapplication.MainActivity">

    <com.app.lwm.myapplication.CustomView01
        android:layout_width="wrap_content"
        android:layout_height="wrap_content"
        app:mColor="@color/colorAccent"
        app:mTxet="我是自定义的view"
        />
</RelativeLayout>
3.得到自定义属性的值
public CustomView01(Context context, AttributeSet attrs) {
        super(context, attrs);
        TypedArray ta = context.getTheme().obtainStyledAttributes(
                attrs,
                R.styleable.CustomView01,
                0, 0);
        try {
            mTxet=ta.getString(R.styleable.CustomView01_mTxet);
            mColor=ta.getColor(R.styleable.CustomView01_mColor, Color.BLACK);
        }finally {
            ta.recycle();
        }
    }
4.初始化画笔
private void initPaint(){
        mPaint = new Paint(Paint.ANTI_ALIAS_FLAG);
        mPaint.setStyle(Paint.Style.STROKE);
        mPaint.setColor(mColor);
        mPaint.setTextSize(100);
    }
5.在ondraw方法里面画出来
@Override
protected void onDraw(Canvas canvas) {
super.onDraw(canvas);
canvas.drawText(mTxet,100, 100, mPaint);
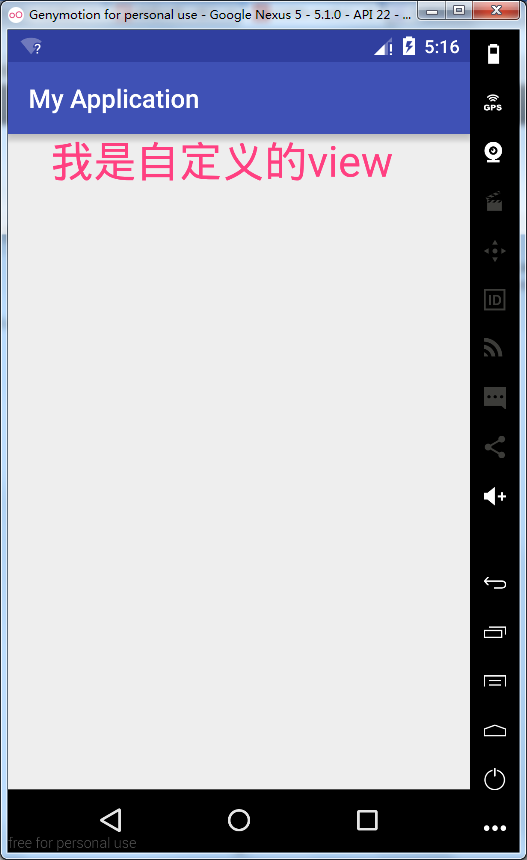
}6.效果图


 44万+
44万+

 被折叠的 条评论
为什么被折叠?
被折叠的 条评论
为什么被折叠?
 到【灌水乐园】发言


