最新设计说明: 使用selenium4的以服务方式连接驱动,使用 selenium4唯一的两种定位方式,并加上智能流畅等待的封装。
最终效果:1、实现页面代码与测试 代码分离,2、封装公共方法,其他页面通过继承调用。3、实现 测试 代码与 测试数据分离 4、实现allure输出加上附加截图等报告。5、实现并发执行。
1、POM介绍
略
2、封装通用方法
# 哪些公共基本操作方法,初始化应该有操作 方法
from selenium.webdriver.support.wait import WebDriverWait


class BaseAction(object):
    # :后面是 数据类型,这个driver就是浏览器
    def __init__(self, driver):
        # 进行浏览器操作,初始化一 定有浏览器
        self.driver = driver

    # 我把发现元素方法封装,加上等待步骤
    def find_element(self, location, timeout=10, poll_frequency=1):
        #  By.ID类型 ,值,加上智能等待
        local_by, local_value = location
        wait = WebDriverWait(self.driver, timeout, poll_frequency)
        return wait.until(lambda driver: self.driver.find_element(local_by, local_value))

    def find_elements(self, location, timeout=10, poll_frequency=1):
        #  By.ID类型 ,值,加上智能等待
        local_by, local_value = location
        wait = WebDriverWait(self.driver, timeout, poll_frequency)
        return wait.until(lambda driver: self.driver.find_elements(local_by, local_value))

    #     再封装一下输入文本方法
    def input(self, location, text):
        # 使用我们 封装方法找到元素
        ele = self.find_element(location)
        # 点击元素
        ele.click()
        # 清除元素内 文本信息
        ele.clear()
        # 输入文本信息
        ele.send_keys(text)

    def click(self, location):
        self.find_element(location).click()
3、页面代码与测试代码分开
编写每个页面的属性和方法(通常一个文件包括一个模块大概4个增删改查功能的页面)以bing为 例,编写搜索页 和 结果页的 属性和 方法。
from selenium.webdriver.common.by import By
from .base_action import BaseAction

# 浏览器bing搜索页 中也要 有 公共的方法可 用
class BingSearchPage(BaseAction):
    # 属性,元素,元素定位,如果定位换了,只换这里就行了,其他代码不用改
    search_text=By.ID,"sb_form_q"
    search_click=By.ID,"search_icon"

    # 方法  在搜索框中输入信息,
    def enter_keyword(self,text):
        self.input(self.search_text,text)

    # 方法  点击搜索图标
    def click_search(self):
        self.click(self.search_click)

# 浏览器bing搜索结果页
class SearchResultPage(BaseAction):
#     没什么属性
#      方法:返回要 验证元素文本
    def get_source(self,txt):
        wait = WebDriverWait(self.driver, 10, 1)
        element = wait.until(EC.visibility_of_element_located((By.PARTIAL_LINK_TEXT,txt)))
        return element.text
4、测试代码第一版本
使用 pytest的fixture,yield等 实现初始化和销毁。还有业务逻辑。
from selenium.webdriver.chrome.service import Service as ChromeService
import pytest,os
import allure
from selenium import webdriver
from .page_bing import BingSearchPage, SearchResultPage

# 测试步骤:
# 初始化:
# 打开浏览器,关闭 浏览器(范围 :module,一个文件只执行一次)
@pytest.fixture(scope="module")
def driver():
    par_path = os.path.abspath(".")
    CHROMEDRIVER_PATH = par_path + "/driver/chromedriver"
    # selenium4的最新写法
    options = webdriver.ChromeOptions()
    options.add_experimental_option("excludeSwitches", ["enable-automation"])
    options.add_experimental_option("useAutomationExtension", False)
    service = ChromeService(executable_path=CHROMEDRIVER_PATH)
    driver = webdriver.Chrome(service=service, options=options)
    driver.implicitly_wait(30)
    # 执行第 一次 返回driver,当测试方法执行完成后再进入时从这句开始执行,直接执行关闭浏览器
    yield driver
    driver.close()


def test_bing_soso(driver):
    # 参数driver是上面的方法名,通过传参的方式,在测试方法 前调用。
    #    输入bing地址
    driver.get("https://cn.bing.com")
    #  初始化bing搜索 页
    bing_search = BingSearchPage(driver)
    # 在搜索框输入关键 字
    bing_search.enter_keyword("selenium")
    # 点击搜索
    bing_search.click_search()
    # 初始化结果页
    result_page = SearchResultPage(driver)
    # 断言搜索结果正确
    assert "selenium" in result_page.get_source("selenium")
5、测试第二版本
加上数据驱动 @pytest.mark.parametrize
@pytest.mark.parametrize("keyword",["fiddler","appium","pytest"])
def test_bing_soso(driver,keyword):
    # 参数driver是上面的方法名,通过传参的方式,在测试方法 前调用。
    #    输入bing地址
    driver.get("https://cn.bing.com")
    #  初始化bing搜索 页
    bing_search = BingSearchPage(driver)
    # 在搜索框输入关键 字
    bing_search.enter_keyword(keyword)
    # 点击搜索
    bing_search.click_search()
    # 初始化结果页
    result_page = SearchResultPage(driver)
    # 断言搜索结果正确
    # time.sleep(3)
    assert keyword in result_page.get_source(keyword)
6、测试第三版本
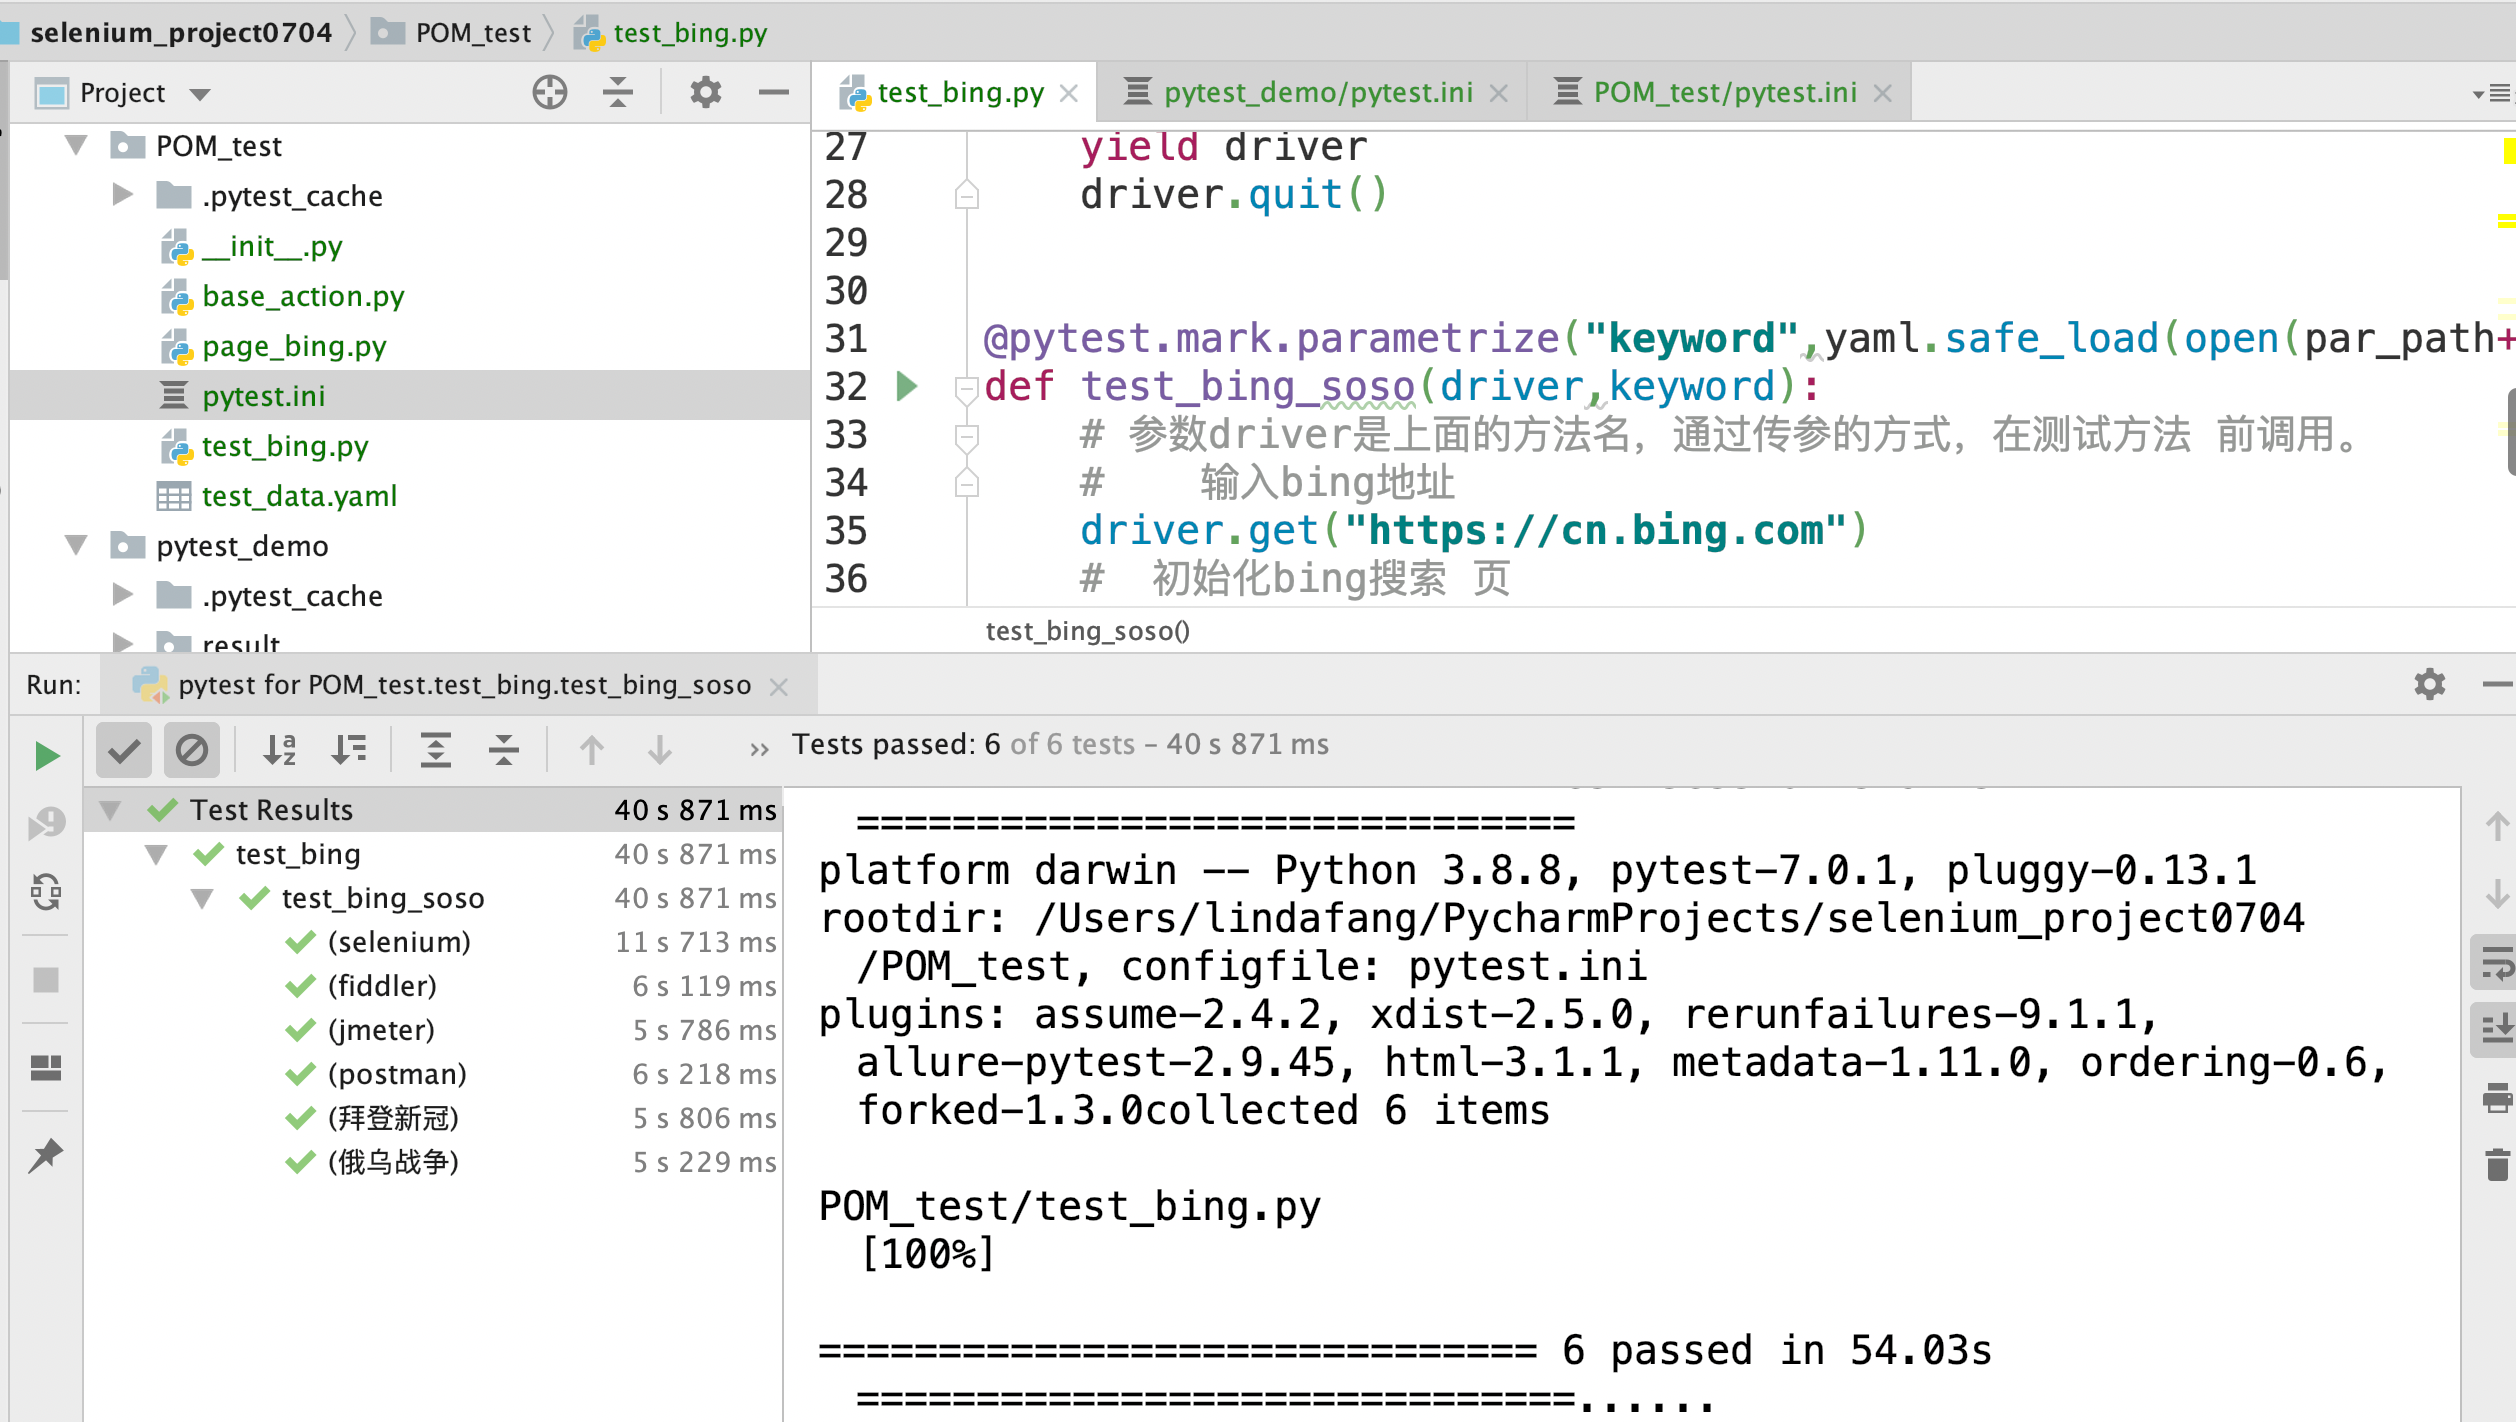
测试代码与数据分开,使用 yaml文件
test_data.yaml
- selenium
- fiddler
- jmeter
- postman
代码:
import yaml
from selenium.webdriver.chrome.service import Service as ChromeService
import pytest,os,time
import allure
from selenium import webdriver
from .page_bing import BingSearchPage, SearchResultPage

# 测试步骤:
# 初始化:
# 打开浏览器,关闭 浏览器(范围 :module,一个文件只执行一次)
par_path = os.path.abspath(".")
@pytest.fixture(scope="module")
def driver():
    CHROMEDRIVER_PATH = par_path + "/driver/chromedriver"
    # selenium4的最新写法
    options = webdriver.ChromeOptions()
    options.add_experimental_option("excludeSwitches", ["enable-automation"])
    options.add_experimental_option("useAutomationExtension", False)
    service = ChromeService(executable_path=CHROMEDRIVER_PATH)
    driver = webdriver.Chrome(service=service, options=options)
    driver.implicitly_wait(30)
    # 执行第 一次 返回driver,当测试方法执行完成后再进入时从这句开始执行,直接执行关闭浏览器
    yield driver
    driver.quit()


@pytest.mark.parametrize("keyword",yaml.safe_load(open(par_path+"/POM_test/test_data.yaml")))
def test_bing_soso(driver,keyword):
    # 参数driver是上面的方法名,通过传参的方式,在测试方法 前调用。
    #    输入bing地址
    driver.get("https://cn.bing.com")
    #  初始化bing搜索 页
    bing_search = BingSearchPage(driver)
    # 在搜索框输入关键 字
    bing_search.enter_keyword(keyword)
    # 点击搜索
    bing_search.click_search()
    # 初始化结果页
    result_page = SearchResultPage(driver)
    # 断言搜索结果正确
    assert keyword in result_page.get_source(keyword)
image.png
如果有汉语,yaml加载文件的open()中参数加 encoding='utf8'
如果显示结果也可看到正常汉语,建立pytest.ini,里面 写 上 这 句就 可以
[pytest]
disable_test_id_escaping_and_forfeit_all_rights_to_community_support=True
7、 加 allure报告 (简单)及 并行 执行
@pytest.mark.parametrize("keyword",yaml.safe_load(open("/Users/lindafang/PycharmProjects/selenium_project0704/POM_test/test_data.yaml",encoding='utf8')))
def test_bing_soso(driver,keyword):
    # 参数driver是上面的方法名,通过传参的方式,在测试方法 前调用。
    #    输入bing地址
    driver.get("https://cn.bing.com")
    #  初始化bing搜索 页
    bing_search = BingSearchPage(driver)
    # 在搜索框输入关键 字
    bing_search.enter_keyword(keyword)
    # 点击搜索
    bing_search.click_search()
    # 初始化结果页
    result_page = SearchResultPage(driver)
    # 断言搜索结果正确
    time.sleep(3)
    driver.save_screenshot(keyword+".png")
    allure.attach.file(keyword+".png","搜索成功截图",attachment_type=allure.attachment_type.PNG)
    assert keyword in result_page.get_source(keyword)
并发运行命令 及结果

image.png

image.png
完美!!


 5357
5357


 被折叠的 条评论
为什么被折叠?


