


第一天
今天是我学习mac应用开发的第一天,我的目标是开发一个可以打印Hello World的mac应用程序。
学习网址:https://www.raywenderlich.com/731-macos-development-for-beginners-part-1
参考:https://blog.csdn.net/lovechris00/article/details/72779076
环境准备:
1.一台运行着mac os的电脑
2.Xcode作为IDE
打开xcode,新建一个xcode项目,选择mac os,选择Cocoa App,点击Next

设置名称,选择语言,点击Next

此时xcode已经为开发者创建了基础模版

运行APP
可以直接通过command + R 运行这个项目,会弹出一个空白窗口

xcode界面简介
主要分了三个区域,导航区,编辑区,功能区

添加UI元素
通过Storyboard进行界面的设置,点击 Main.storyboard 在编辑区查看

第二天
这里有三个区域
- Application Scene: The menu bar and items.
- Window Controller Scene: Configures how the window will behave.
- View Controller Scene: Where your UI elements will go.

从ui库里取出你想要使用的ui元素

配置ui元素,在Utilities panel里面可以去配置ui元素颜色,字体等格式

把ui元素和代码关联起来Connecting the UI to the code
在打开storyboard的时候,Option + 点击代码,可以把代码放到storyboard的旁边
按住control,拖动ui元素,让ui元素和代码建立联系

再把点击动作和函数进行关联

获取帮助
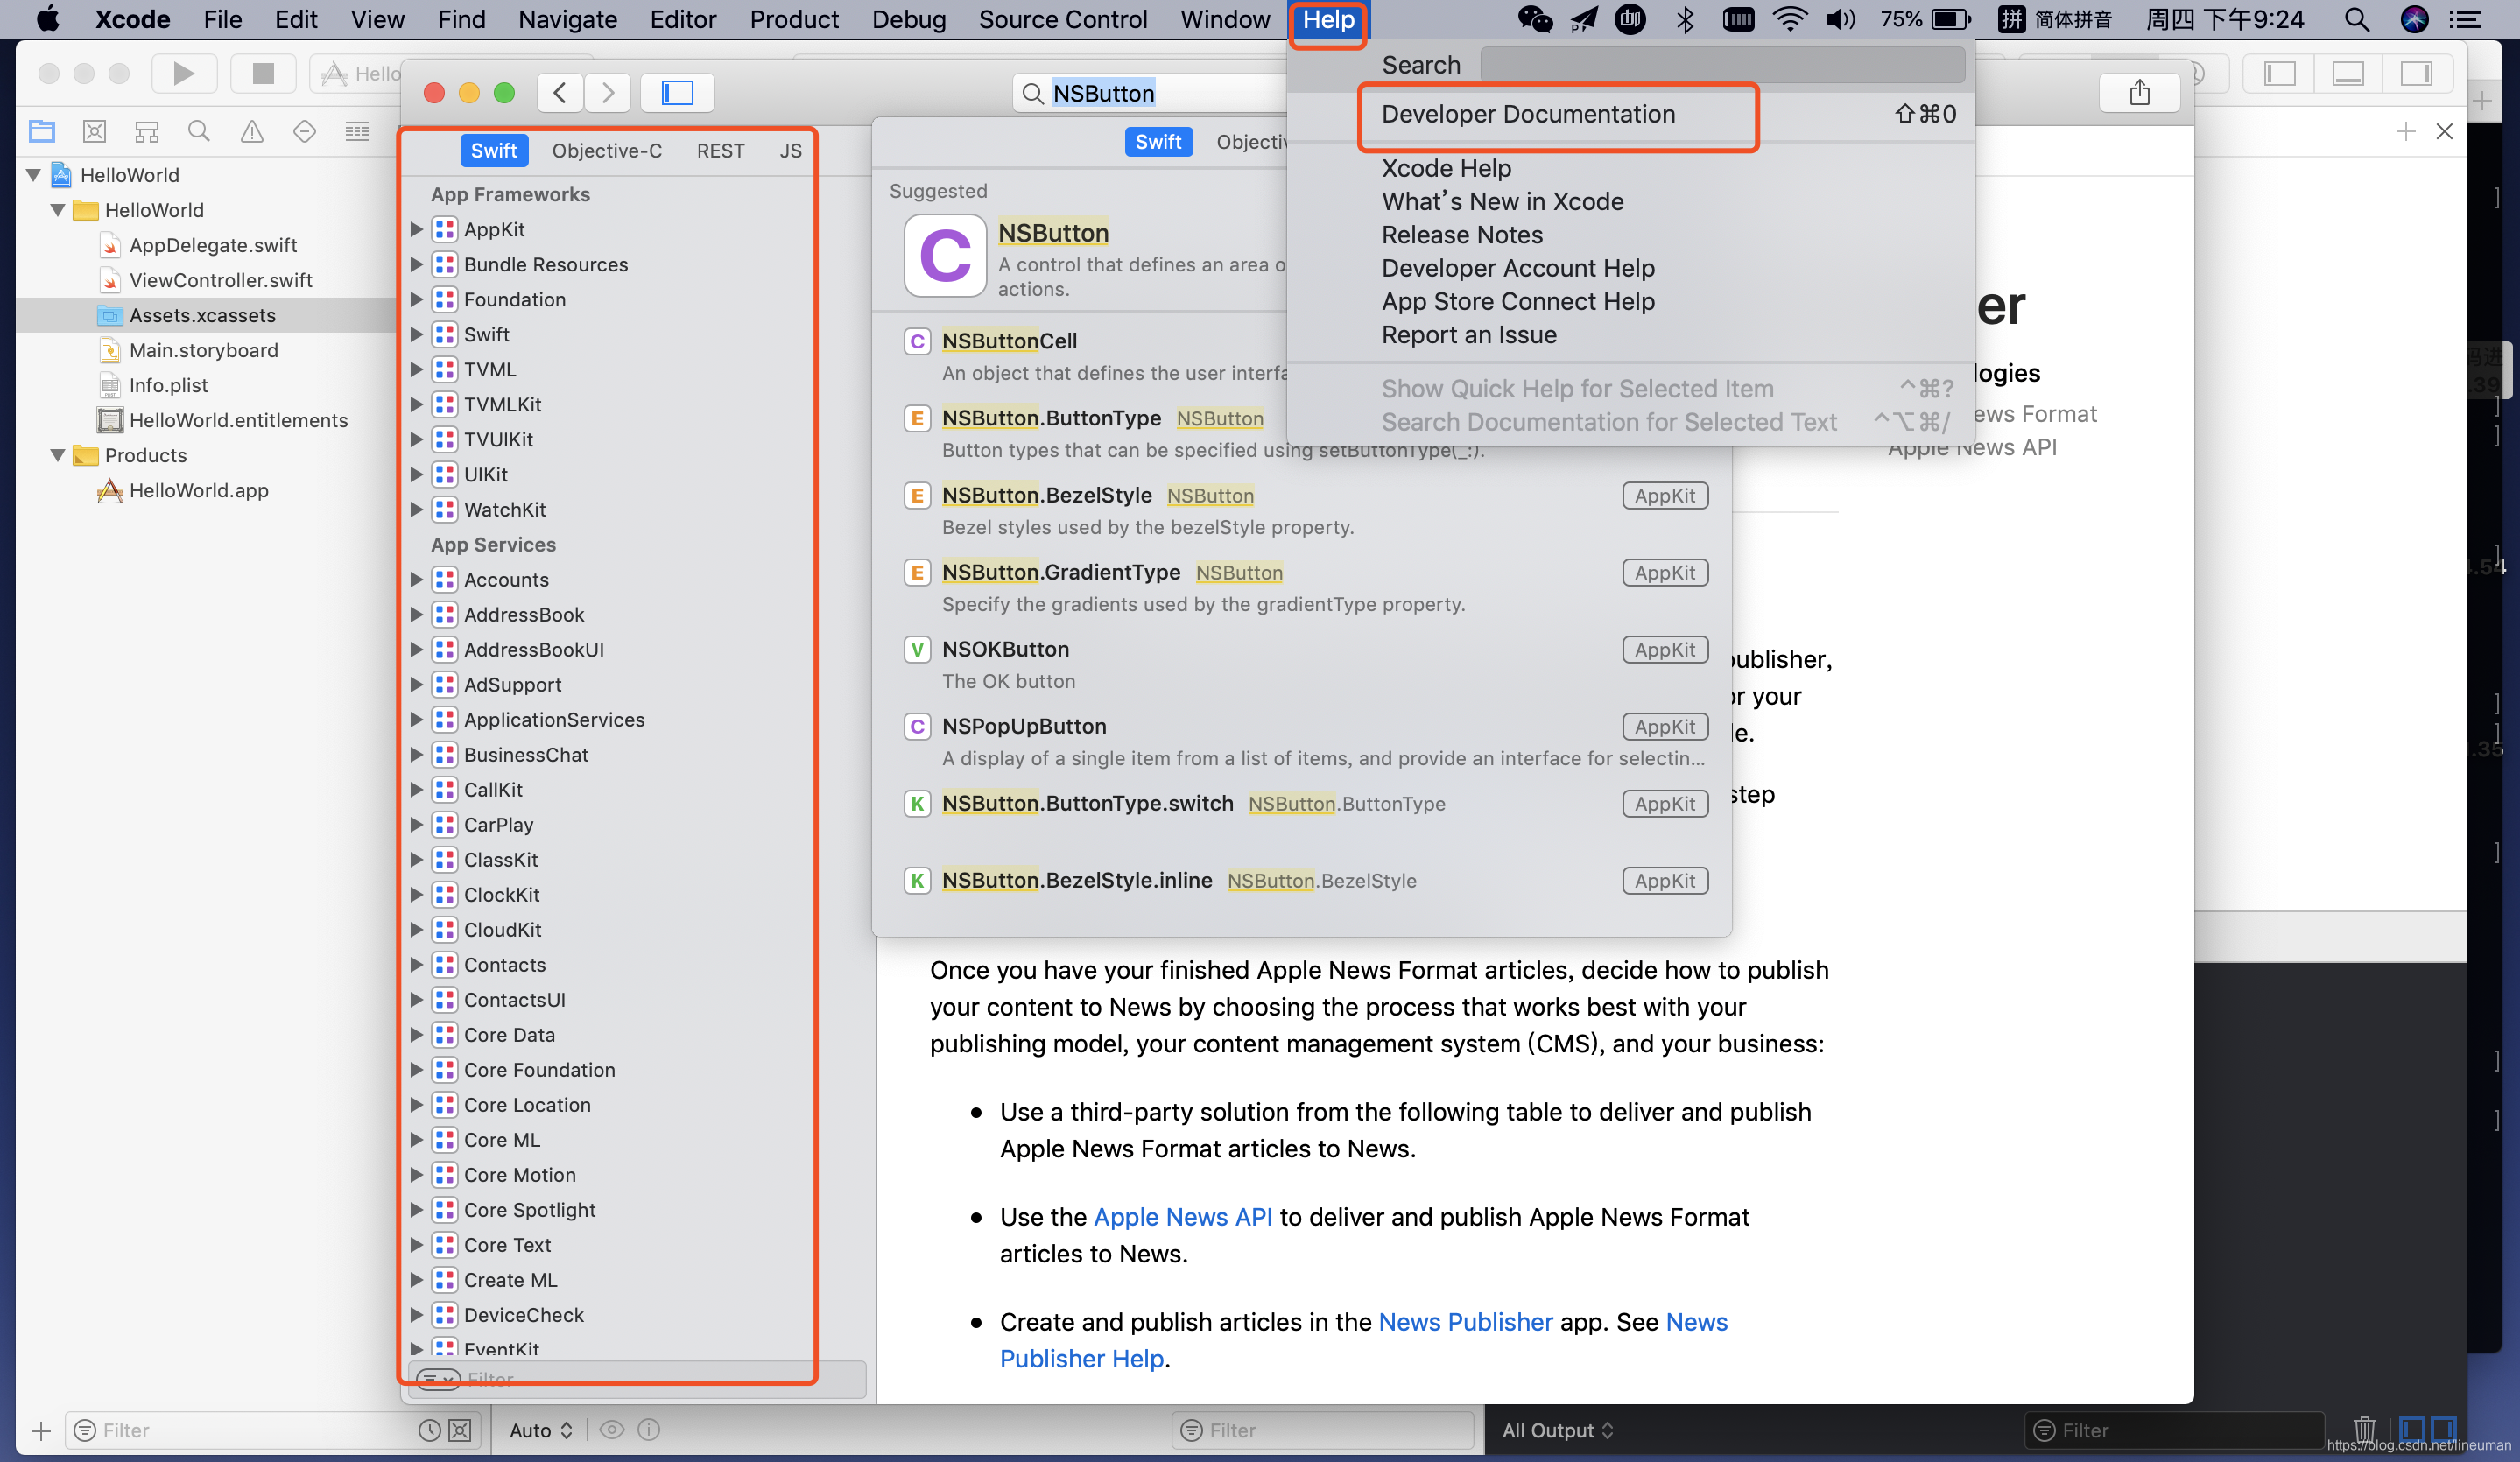
Option-clicking is often a really good way to learn, and you can even add documentation to your own functions so that it shows up in the same way.

开发出的mac应用如下,丑虽然丑了点,不过确实出来了

第三天
第三题已经不是物理上的第三天了,而是逻辑上的第三天
效果图
Connecting the UI to the code【怎么才能把ui和代码连接起来呢】
@IBOutlets and @IBActions to connect your UI to your code.


添加菜单

第四天
这里插入swift函数的概念,比其他我熟悉的语言多了个label的概念
Function Argument Labels and Parameter Names
func someFunction(argumentLabel parameterName: Int) {
    // In the function body, parameterName refers to the argument value
    // for that parameter.
}
参数标签在调用函 数的时候使用;
今天我打算把菜单和菜单的快捷键给搞定

菜单和函数进行关联的方法

First Responder是什么?
添加偏好窗口Preferences Window
添加代码
在打开storyboard的时候,Option + 点击代码,可以把代码放到storyboard的旁边
我卡住了,在把新加的偏好窗口和偏好代码关联的时候遇到了问题,重新试了几下又好了。。。
@IBOutlet
@IBAction
第五天
我打算今天把这部分教程也完成
https://www.raywenderlich.com/729-macos-development-for-beginners-part-3
Sandboxing
A sandboxed app has its own space to work in with separate file storage areas, no access to the files created by other apps and limited access and permissions. For iOS apps, this is the only way to operate. For macOS apps, this is optional; however, if you want to distribute your apps through the Mac App Store, they must be sandboxed. As a general rule, you should sandbox your apps, as this gives your apps less potential to cause problems.
在继续往下学习之前,我想看看swift怎么发送http网路请求?
又卡住了,发送个http请求竟然这么难?需要配置网络请求权限
开启沙盒app的方法,project->target->capabilities->app sandbox 在这里面可以申请想要的权限。如果我先学沙盒再去尝试网络,可能就不需要被卡住那么久了。
网络
硬件:相机,麦克风,USB, 打印机,蓝牙
应用数据:联系人,位置,日历
文件访问

Organizing Your Files
看看你的项目结构,目前并没有任何特别的组织规划,因为这个app很简单,想象一下在大型工程中,一定要组织好你的代码
MVC
mvc模式不仅在服务端使用,在前端同样使用
写到这里我有些困了,睡觉2019年 7月11日 星期四 00时08分27秒 CST


 3万+
3万+

 被折叠的 条评论
为什么被折叠?
被折叠的 条评论
为什么被折叠?
 到【灌水乐园】发言


