


动机
由于现在DockerHub以及国内的大部分Docker镜像仓库都访问不了,所以就想囤镜像了,当然不是囤了卖,而是自己用。
阿里云的容器镜像服务ACR只能储存300个镜像
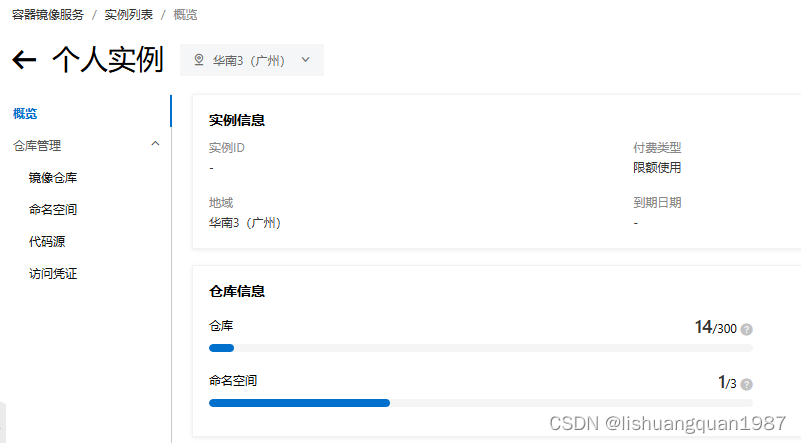
所以,是时候搭建自己的私有容器仓库了。
搭建的前提条件
Linux系统的电脑,要安装Docker和Docker Compose
我这里使用的是阿里云ECS服务器
Harbor官网文档
https://goharbor.io/docs/2.11.0/
截止到我写这个文章的时候,是2.11.0版本
Harbor下载
到Harbor的github release页面下载离线安装包:https://github.com/goharbor/harbor/releases/download/v2.11.0/harbor-offline-installer-v2.11.0.tgz
Harbor安装
将下载好的安装包拷贝的Linux文件目录,我这里是拷贝到/usr/lsq/harbor目录,cd到这个目录
解压
[root@iZ7xvdva5kuiv9nulznfa7Z harbor]# tar zxvf harbor-offline-installer-v2.11.0.tgz
harbor/harbor.v2.11.0.tar.gz
harbor/prepare
harbor/LICENSE
harbor/install.sh
harbor/common.sh
harbor/harbor.yml.tmpl
重命名 harbor.yml.tmpl->harbor.yml
[root@iZ7xvdva5kuiv9nulznfa7Z harbor]# cd harbor/
[root@iZ7xvdva5kuiv9nulznfa7Z harbor]# cp harbor.yml.tmpl harbor.yml
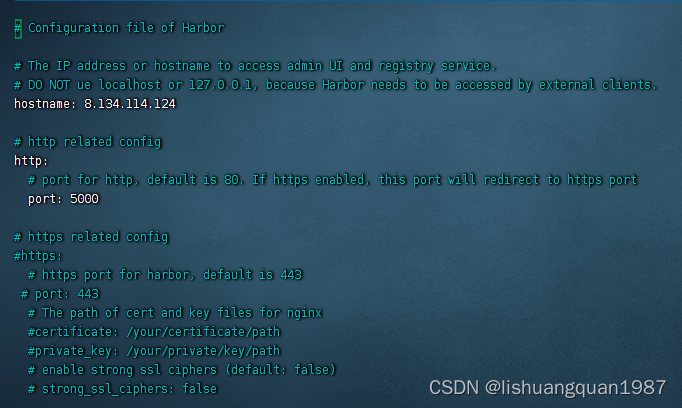
编辑harbor.yml
其他配置可以用默认,有两个地方需要注意下:
1.hostname:没有域名,就填服务器(本电脑)的IP地址
2.http/port:由于我没有打算使用证书,不使用https(使用https比较麻烦,后续也许会研究如何配置https),这里就配置成5000(官方文档也莫名其妙的说使用http用5000端口)
3.https配置块全部注释掉,其余的就按照默认配置
运行install.sh
[root@iZ7xvdva5kuiv9nulznfa7Z harbor]# ./install.sh

[Step 0]: checking if docker is installed ...

Note: docker version: 24.0.7

[Step 1]: checking docker-compose is installed ...

Note: Docker Compose version v2.21.0

[Step 2]: loading Harbor images ...
Loaded image: goharbor/harbor-core:v2.11.0
Loaded image: goharbor/harbor-db:v2.11.0
Loaded image: goharbor/nginx-photon:v2.11.0
Loaded image: goharbor/trivy-adapter-photon:v2.11.0
Loaded image: goharbor/redis-photon:v2.11.0
Loaded image: goharbor/registry-photon:v2.11.0
Loaded image: goharbor/prepare:v2.11.0
Loaded image: goharbor/harbor-portal:v2.11.0
Loaded image: goharbor/harbor-log:v2.11.0
Loaded image: goharbor/harbor-jobservice:v2.11.0
Loaded image: goharbor/harbor-registryctl:v2.11.0
Loaded image: goharbor/harbor-exporter:v2.11.0


[Step 3]: preparing environment ...

[Step 4]: preparing harbor configs ...
prepare base dir is set to /usr/lsq/harbor/harbor
WARNING:root:WARNING: HTTP protocol is insecure. Harbor will deprecate http protocol in the future. Please make sure to upgrade to https
Generated configuration file: /config/portal/nginx.conf
Generated configuration file: /config/log/logrotate.conf
Generated configuration file: /config/log/rsyslog_docker.conf
Generated configuration file: /config/nginx/nginx.conf
Generated configuration file: /config/core/env
Generated configuration file: /config/core/app.conf
Generated configuration file: /config/registry/config.yml
Generated configuration file: /config/registryctl/env
Generated configuration file: /config/registryctl/config.yml
Generated configuration file: /config/db/env
Generated configuration file: /config/jobservice/env
Generated configuration file: /config/jobservice/config.yml
loaded secret from file: /data/secret/keys/secretkey
Generated configuration file: /compose_location/docker-compose.yml
Clean up the input dir


Note: stopping existing Harbor instance ...


[Step 5]: starting Harbor ...
[+] Running 10/10
 ✔ Network harbor_harbor        Created                                                                                                  0.1s
 ✔ Container harbor-log         Started                                                                                                  0.4s
 ✔ Container harbor-db          Started                                                                                                  0.2s
 ✔ Container registryctl        Started                                                                                                  0.3s
 ✔ Container harbor-portal      Started                                                                                                  0.3s
 ✔ Container registry           Started                                                                                                  0.2s
 ✔ Container redis              Started                                                                                                  0.2s
 ✔ Container harbor-core        Started                                                                                                  0.1s
 ✔ Container nginx              Started                                                                                                  0.1s
 ✔ Container harbor-jobservice  Started                                                                                                  0.1s
✔ ----Harbor has been installed and started successfully.----
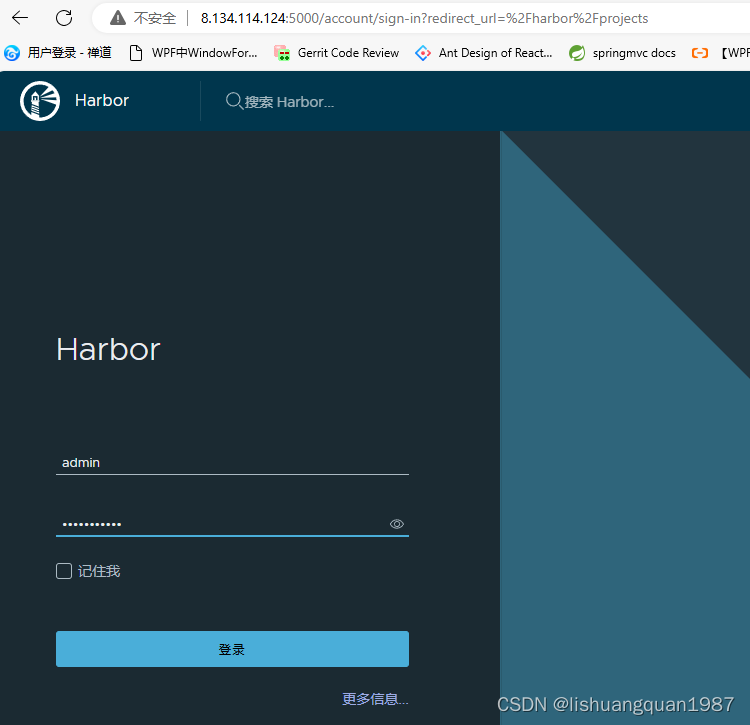
访问
由于上面我填的地址是8.134.114.124,端口是5000,所以就使用这个地址访问:http://8.134.114.124:5000,可以看到能正常访问
登录Harbor创建项目
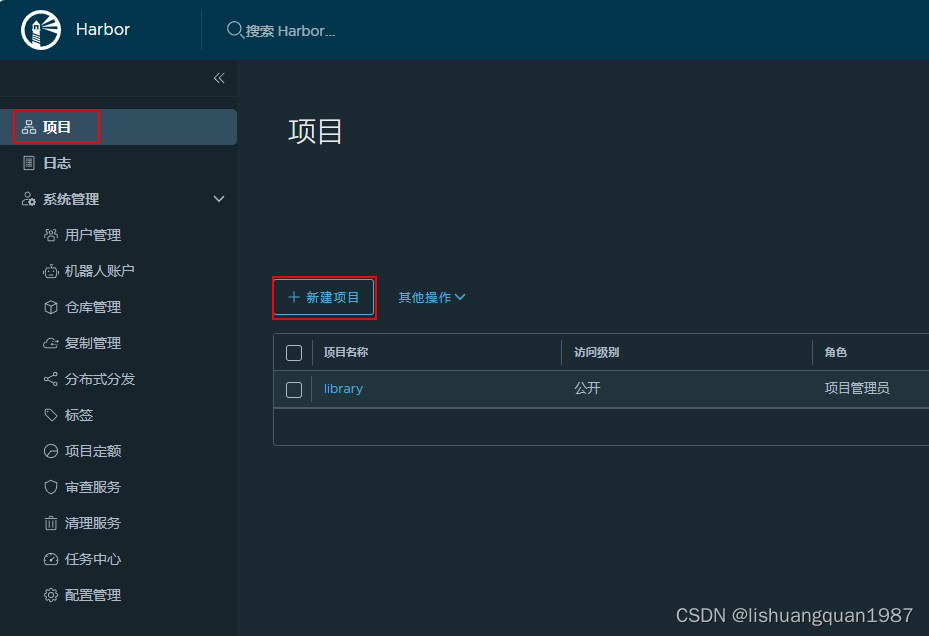
我这里创建一个名字为tony的项目:

使用其他电脑的docker登录到harbor
我这里使用的是windows电脑,电脑上安装了docker desktop
注意:在登录之前需要配置8.134.114.124:5000为docker的http访问

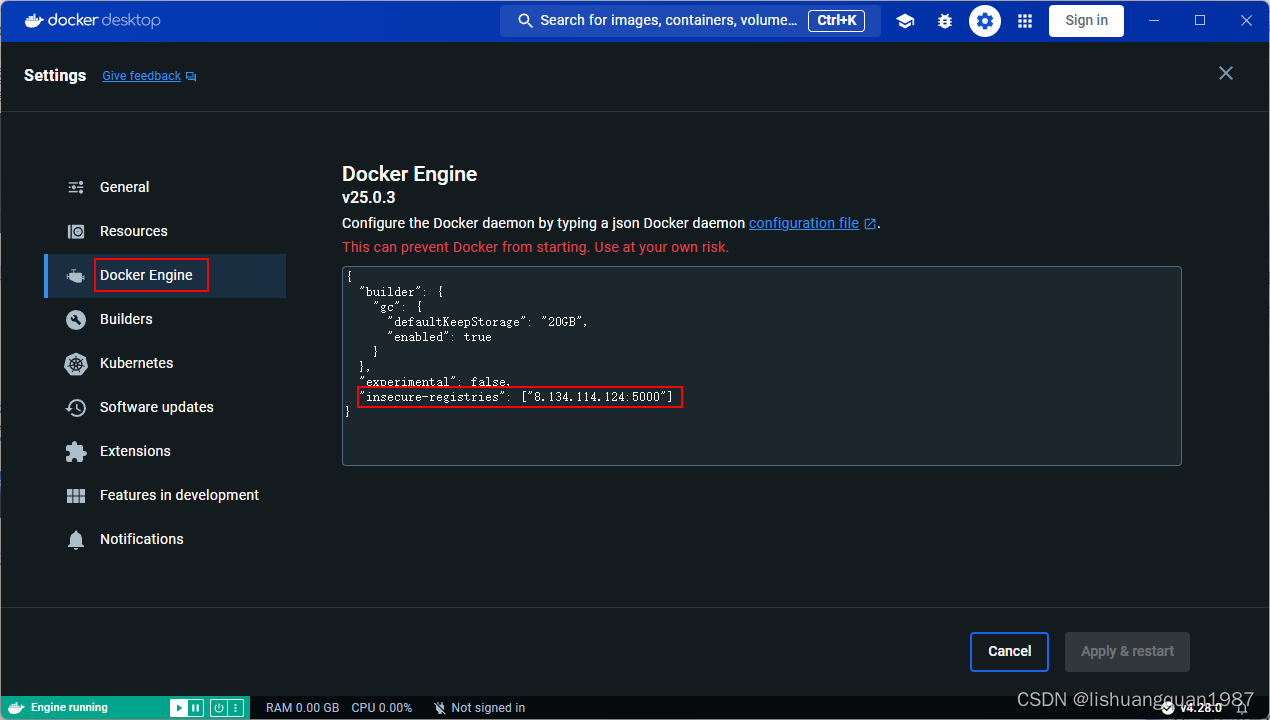
随后打开命令窗口,输入wsl进入到linux系统,使用如下登录命令(docker login 8.134.114.124:5000)进行登录测试:
C:\Users\29438>wsl
root@LAPTOP-4JP0VTLU:/mnt/c/Users/29438# docker login 8.134.114.124:5000
Username: admin
Password:
Login Succeeded
root@LAPTOP-4JP0VTLU:/mnt/c/Users/29438#
出现Login Succeeded就表示登录成功
推送镜像到harbor的tony项目
这里以elasticsearch:7.3.2为例子:
- tag本地镜像
docker tag elasticsearch:7.3.2 8.134.114.124:5000/tony/elasticsearch:7.3.2
- push刚刚tag过的镜像
root@LAPTOP-4JP0VTLU:/mnt/c/Users/29438# docker push 8.134.114.124:5000/tony/elasticsearch:7.3.2
The push refers to repository [8.134.114.124:5000/tony/elasticsearch]
622cb8572c19: Pushed
94d2d8780315: Pushed
8184bb83c500: Pushed
398581fba250: Pushing [==================================================>]  480.7MB
398581fba250: Pushed
258bc761db52: Pushed
877b494a9f30: Pushed
7.3.2: digest: sha256:a4ee0befe1cc41487ecbbdc82e32e296d75366c507be981ec83353c9d97f9425 size: 1784
此时可以去网页界面看看:
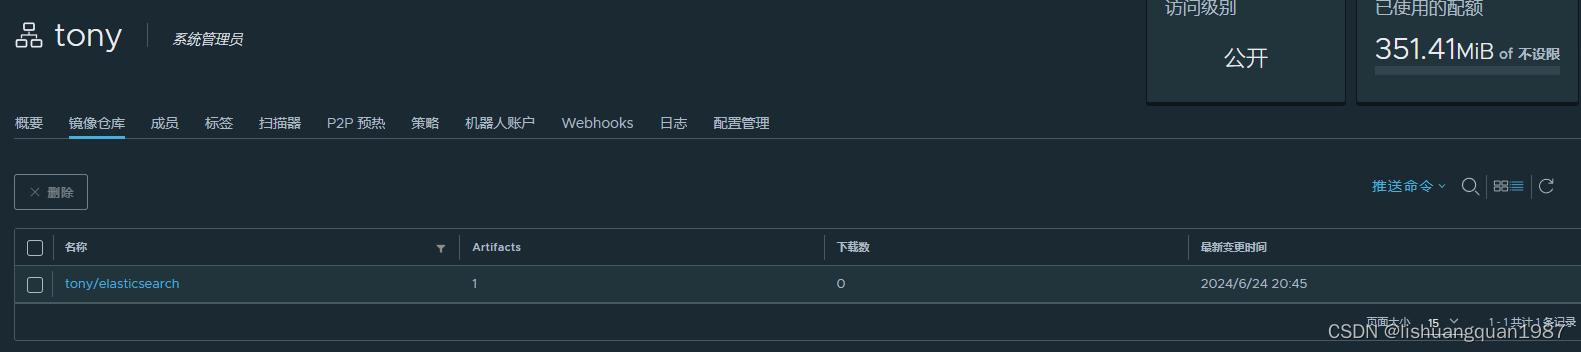
确实推上去了。
从Harbor上拉取镜像
root@LAPTOP-4JP0VTLU:/mnt/c/Users/29438# docker pull 8.134.114.124:5000/tony/elasticsearch:7.3.2
7.3.2: Pulling from tony/elasticsearch
Digest: sha256:a4ee0befe1cc41487ecbbdc82e32e296d75366c507be981ec83353c9d97f9425
Status: Downloaded newer image for 8.134.114.124:5000/tony/elasticsearch:7.3.2
8.134.114.124:5000/tony/elasticsearch:7.3.2

What's Next?
  View a summary of image vulnerabilities and recommendations → docker scout quickview 8.134.114.124:5000/tony/elasticsearch:7.3.2


 303
303

 被折叠的 条评论
为什么被折叠?
被折叠的 条评论
为什么被折叠?
 到【灌水乐园】发言


