


目录
router简介
Vue Router 是 Vue.js 的官方路由。它与 Vue.js 核心深度集成,让用 Vue.js 构建单页应用变得轻而易举。功能包括:
- 嵌套路由映射
- 动态路由选择
- 模块化、基于组件的路由配置
- 路由参数、查询、通配符
- 展示由 Vue.js 的过渡系统提供的过渡效果
- 细致的导航控制
- 自动激活 CSS 类的链接
- HTML5 history 模式或 hash 模式
- 可定制的滚动行为
- URL 的正确编码
安装
npm#
npm install vue-router@4
yarn#
yarn add vue-router@4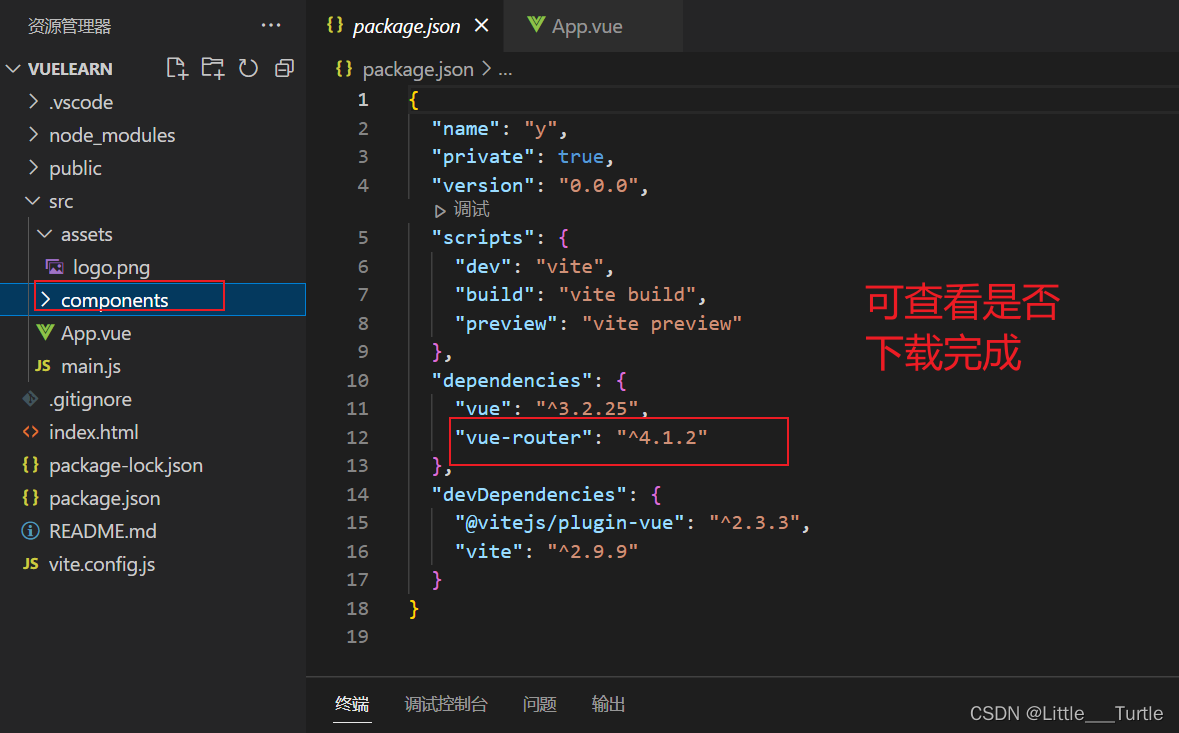
初入 简单使用
router-link请注意,我们没有使用常规的
a标签,而是使用一个自定义组件router-link来创建链接。这使得 Vue Router 可以在不重新加载页面的情况下更改 URL,处理 URL 的生成以及编码。我们将在后面看到如何从这些功能中获益。
router-view
router-view将显示与 url 对应的组件。你可以把它放在任何地方,以适应你的布局。
代码演示
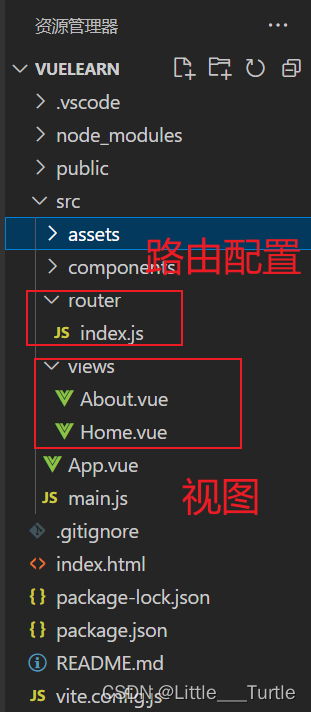
index.js
import { createRouter,createWebHashHistory } from 'vue-router'
// 1. 定义路由组件.
// 也可以从其他文件导入
import About from '../views/About.vue'
import Home from '../views/Home.vue'

// 2. 定义一些路由
// 每个路由都需要映射到一个组件。
const routes = [
  { path: '/', component: Home },
  { path: '/about', component: About },
]

// 3. 创建路由实例并传递 `routes` 配置
// 你可以在这里输入更多的配置,但我们在这里
// 暂时保持简单
const router = createRouter({
  // 4. 内部提供了 history 模式的实现。为了简单起见,我们在这里使用 hash 模式。
  history: createWebHashHistory(),
  routes, // `routes: routes` 的缩写
})
//5.将router导出
export default router
main.js
import { createApp } from 'vue'
import App from './App.vue'
//不用写到index 也可以 会默认指到 鼠标移到会显示出: module "d:/桌面/vue_learn/vueLearn/src/router/index"
import router from './router'

// 6. 创建并挂载根实例
//确保 _use_ 路由实例使
//整个应用支持路由。
const app=createApp(App)
app.use(router)
//应该先导入router 再挂载 有先后顺序 因为 #app要使用到router
app.mount('#app')
App.vue
<script setup>
</script>
<template>
<div id="app">
  <h1>Hello App!</h1>
  <p>
    <!--使用 router-link 组件进行导航 -->
    <!--通过传递 `to` 来指定链接 -->
    <!--`<router-link>` 将呈现一个带有正确 `href` 属性的 `<a>` 标签-->
    <router-link to="/">Go to Home</router-link>
    <router-link to="/about">Go to About</router-link>
  </p>
  <!-- 路由出口 相当于一个占位符-->
  <!-- 路由匹配到的组件将渲染在这里 -->
  <router-view></router-view>
</div>
</template>
<style>
</style>
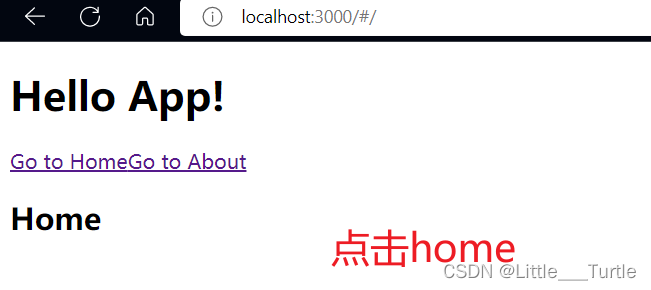
Home.vue
<template>
<h2>Home</h2>
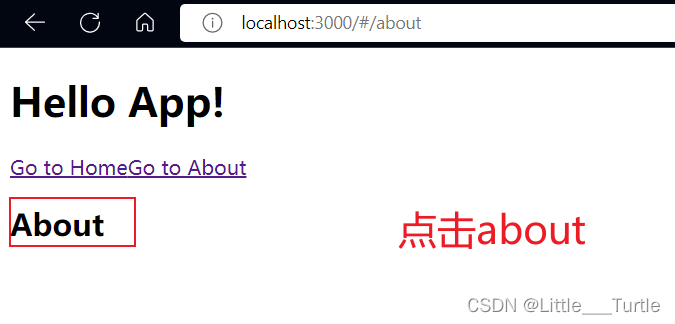
</template>About.vue
<template>
  <h2>About</h2>
</template>
运行结果
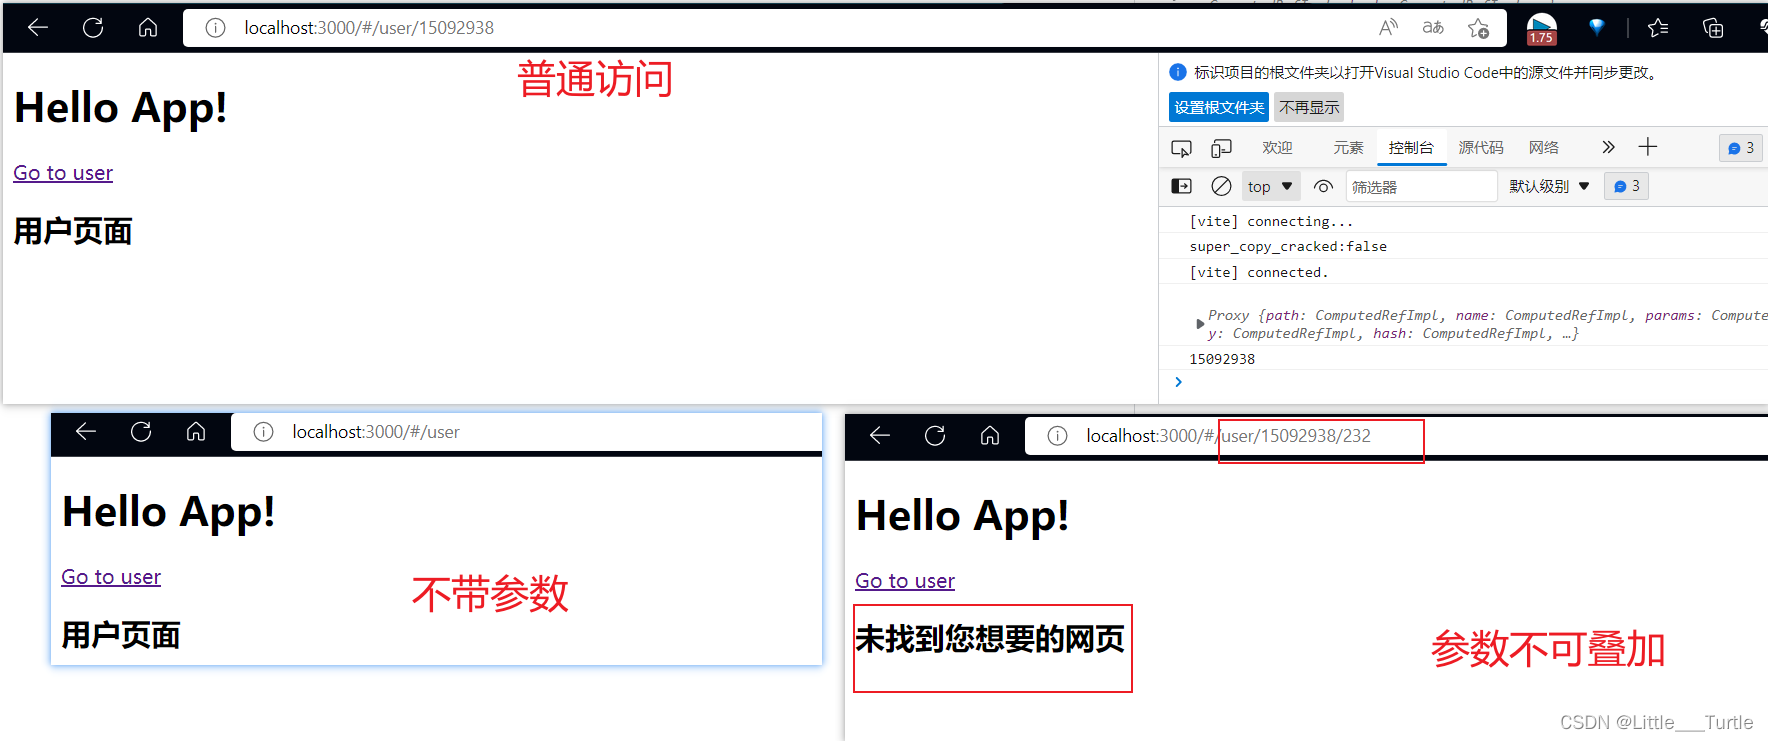
带参数的动态路由匹配
很多时候,我们需要将给定匹配模式的路由映射到同一个组件。
| 匹配模式 | 匹配路径 | $route.params |
|---|---|---|
| /users/:username | /users/eduardo | { username: 'eduardo' } |
| /users/:username/posts/:postId | /users/eduardo/posts/123 | { username: 'eduardo', postId: '123' } |
路径参数 用冒号
:表示。当一个路由被匹配时,它的 params 的值将在每个组件中以this.$route.params的形式暴露出来。
代码演示
index.js
import { createRouter,createWebHashHistory } from 'vue-router'
// 1. 定义路由组件.
// 也可以从其他文件导入
import User from '../views/User.vue'

// 2. 定义一些路由
// 每个路由都需要映射到一个组件。
const routes = [
  { path: '/user/:id', component: User },
]

// 3. 创建路由实例并传递 `routes` 配置
// 你可以在这里输入更多的配置,但我们在这里
// 暂时保持简单
const router = createRouter({
  // 4. 内部提供了 history 模式的实现。为了简单起见,我们在这里使用 hash 模式。
  history: createWebHashHistory(),
  routes, // `routes: routes` 的缩写
})
//5.将router导出
export default router
User.vue
<template>
  <h2>用户页面</h2>
</template>
<!-- 选项式API -->
<script>
export default {
  mounted(){
    //$rounte 表示当前活跃的路由对象
    console.log(this.$route);
    //获取传入过来的参数
    console.log(this.$route.params.id);
  }
}
</script>
<!-- 组合式API -->
<script setup>
import { useRoute } from 'vue-router';

  console.log(useRoute());
  console.log(useRoute().params.id);
</script>

<style>

</style>
App.vue
<script setup>
</script>
<template>
<div id="app">
  <h1>Hello App!</h1>
  <p>
    <!--使用 router-link 组件进行导航 -->
    <!--通过传递 `to` 来指定链接 -->
    <!--`<router-link>` 将呈现一个带有正确 `href` 属性的 `<a>` 标签-->
    <router-link to="/user/15092938">Go to About</router-link>
  </p>
  <!-- 路由出口 相当于一个占位符-->
  <!-- 路由匹配到的组件将渲染在这里 -->
  <router-view></router-view>
</div>
</template>
<style>
</style>
运行效果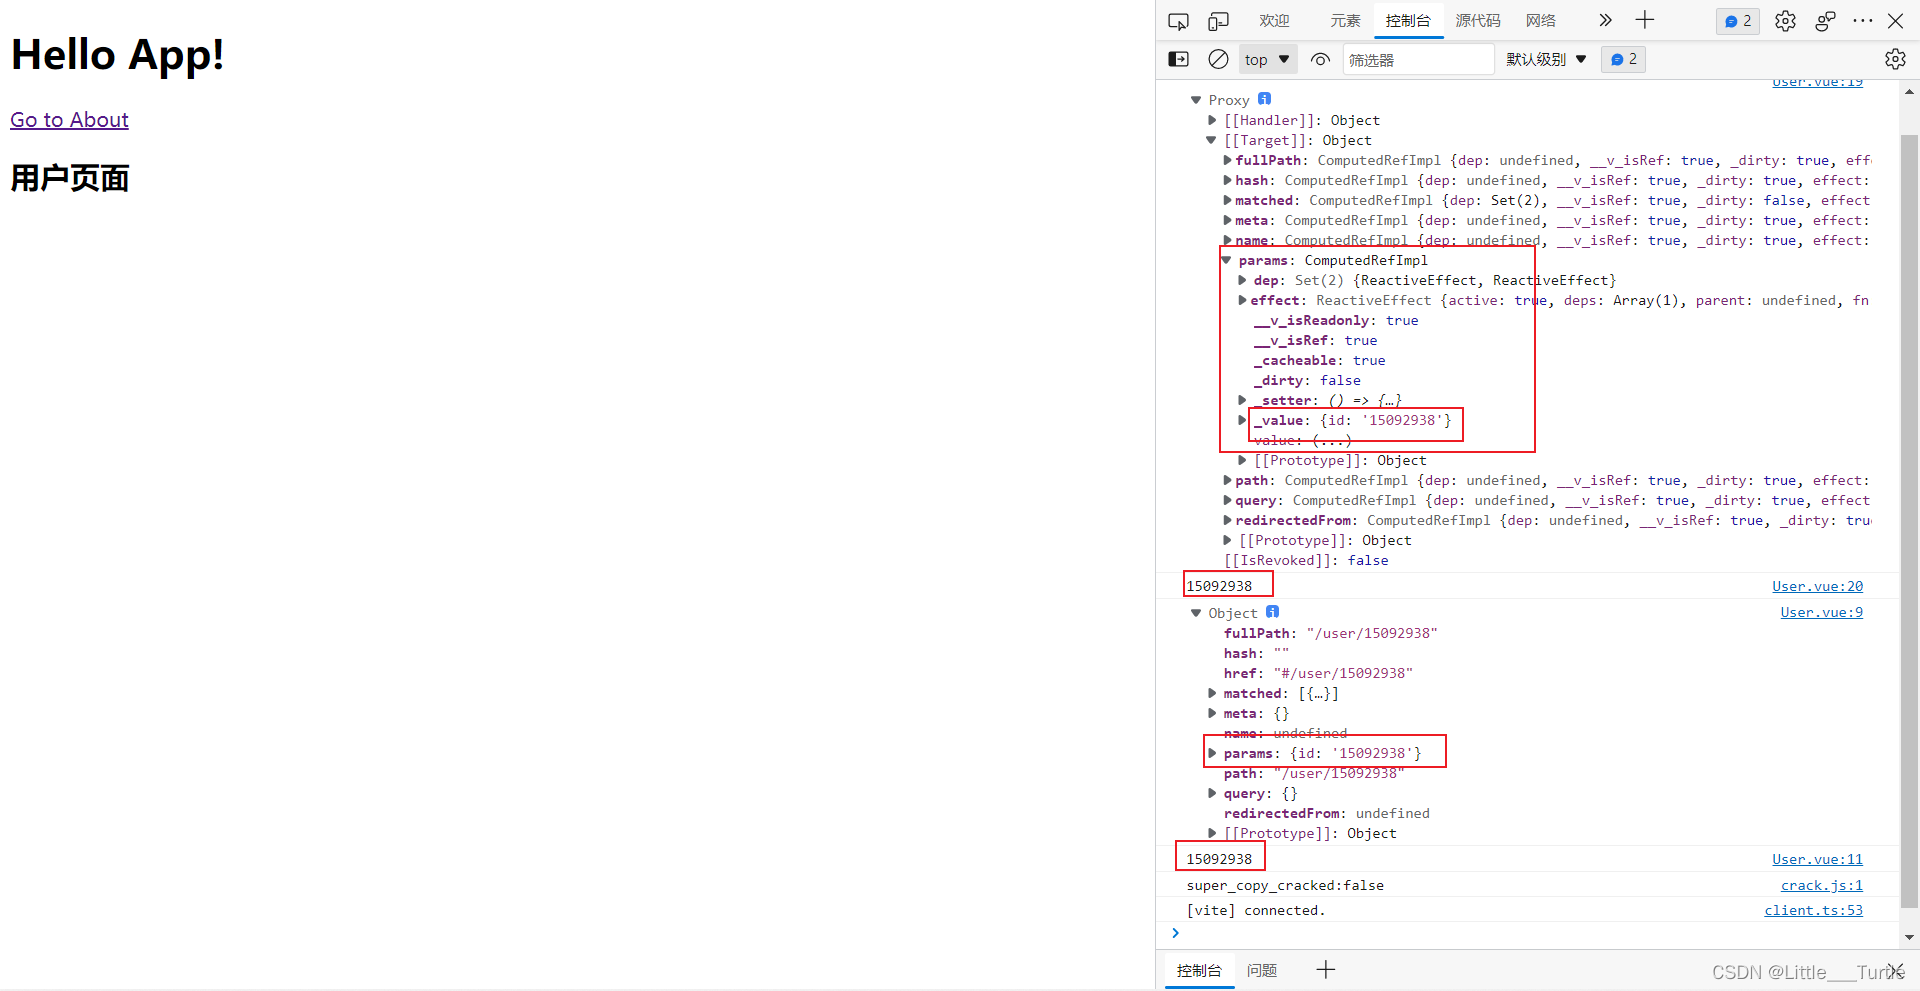
注意点: 如果配置了参数 而实际没有传入参数则会报错

捕获所有路由或 404 Not found 路由
常规参数只匹配 url 片段之间的字符,用
/分隔。如果我们想匹配任意路径,我们可以使用自定义的 路径参数 正则表达式,在 路径参数 后面的括号中加入 正则表达式
代码演示
main.js
import { createRouter,createWebHashHistory } from 'vue-router'
// 1. 定义路由组件.
// 也可以从其他文件导入
import User from '../views/User.vue'
import NotFound from '../views/NotFound.vue'

// 2. 定义一些路由
// 每个路由都需要映射到一个组件。
const routes = [
  { path: '/user/:id', component: User },
  //正则方式 匹配任意
  {path: '/:pathMatch(.*)*', name: 'NotFound', component: NotFound}
]

// 3. 创建路由实例并传递 `routes` 配置
// 你可以在这里输入更多的配置,但我们在这里
// 暂时保持简单
const router = createRouter({
  // 4. 内部提供了 history 模式的实现。为了简单起见,我们在这里使用 hash 模式。
  history: createWebHashHistory(),
  routes, // `routes: routes` 的缩写
})
//5.将router导出
export default router
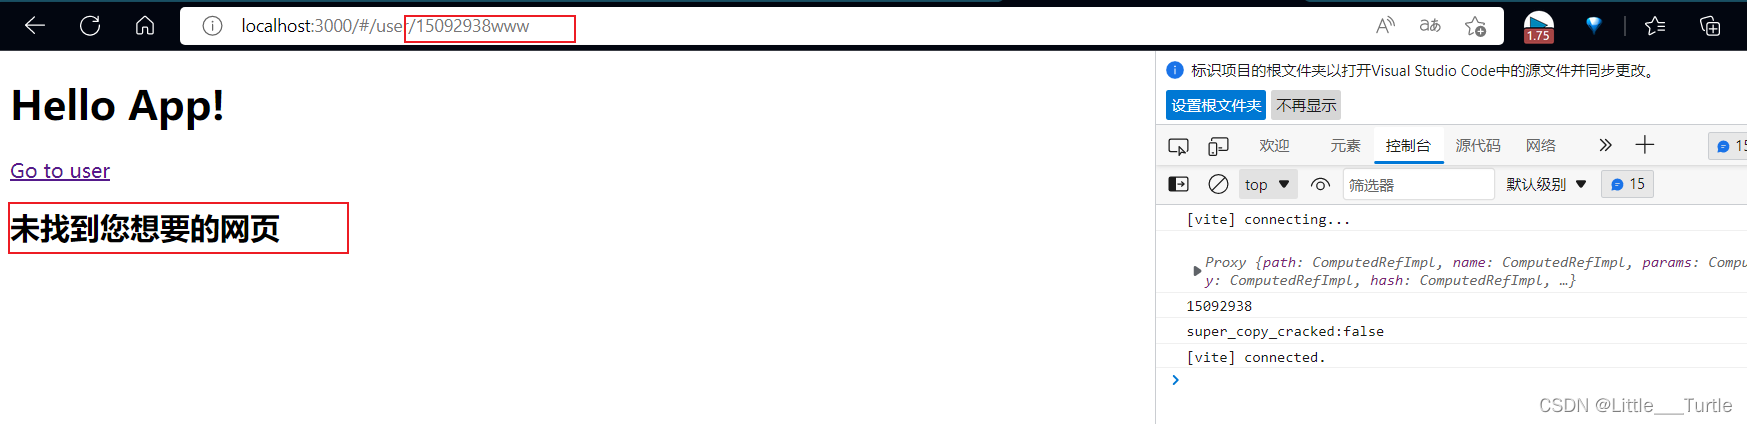
NotFound.vue
<template>
    <h2>未找到您想要的网页</h2>
</template>
运行结果

路由正则 可重复参数
演示代码
user.vue
<template>
  <h2>用户页面</h2>
</template>
<!-- 组合式API -->
<script setup>
import { useRoute } from 'vue-router';

  console.log(useRoute());
  console.log(useRoute().params.id);
</script>

<style>

</style>
NotFount.vue
<template>
    <h2>未找到您想要的网页</h2>
</template>
index.js
import { createRouter,createWebHashHistory } from 'vue-router'
// 1. 定义路由组件.
// 也可以从其他文件导入
import User from '../views/User.vue'
import NotFound from '../views/NotFound.vue'

// 2. 定义一些路由
// 每个路由都需要映射到一个组件。
const routes = [
  //动态路由的参数一定为数字
  // { path: '/user/:id(\\d+)', component: User },
  //可有多个参数
  // { path: '/user/:id+', component: User },
  //参数可有可无 * 参数可以重复叠加
  // { path: '/user/:id*', component: User },
  //参数可有可无 ? 参数不可以重复叠加
  { path: '/user/:id?', component: User },
  //正则方式 匹配任意
  //注意点:该配置应该在最低下 有先后顺序
  {path: '/:pathMatch(.*)*', name: 'NotFound', component: NotFound}
]

// 3. 创建路由实例并传递 `routes` 配置
// 你可以在这里输入更多的配置,但我们在这里
// 暂时保持简单
const router = createRouter({
  // 4. 内部提供了 history 模式的实现。为了简单起见,我们在这里使用 hash 模式。
  history: createWebHashHistory(),
  routes, // `routes: routes` 的缩写
})
//5.将router导出
export default router
运行结果+精简代码
动态路由 参数 限定数字
{ path: '/user/:id(\\d+)', component: User }运行结果
可有多个参数
{ path: '/user/:id+', component: User }运行结果
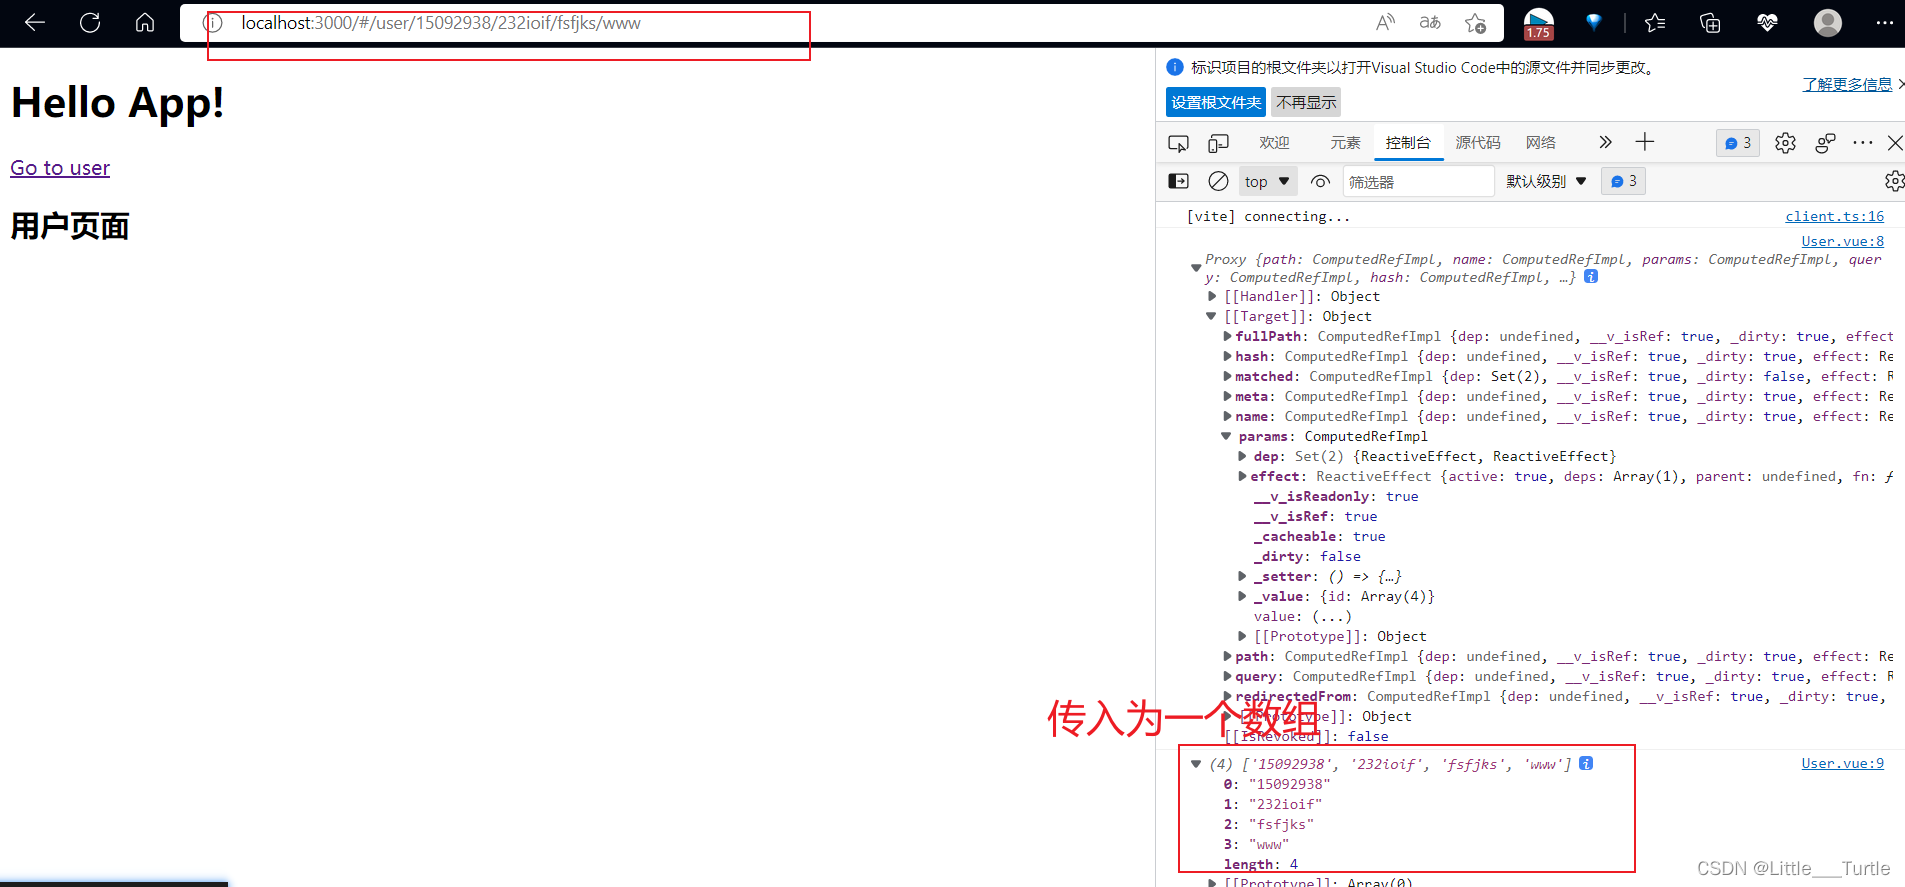
参数可有可无 * 参数可以重复叠加
{ path: '/user/:id*', component: User }运行结果
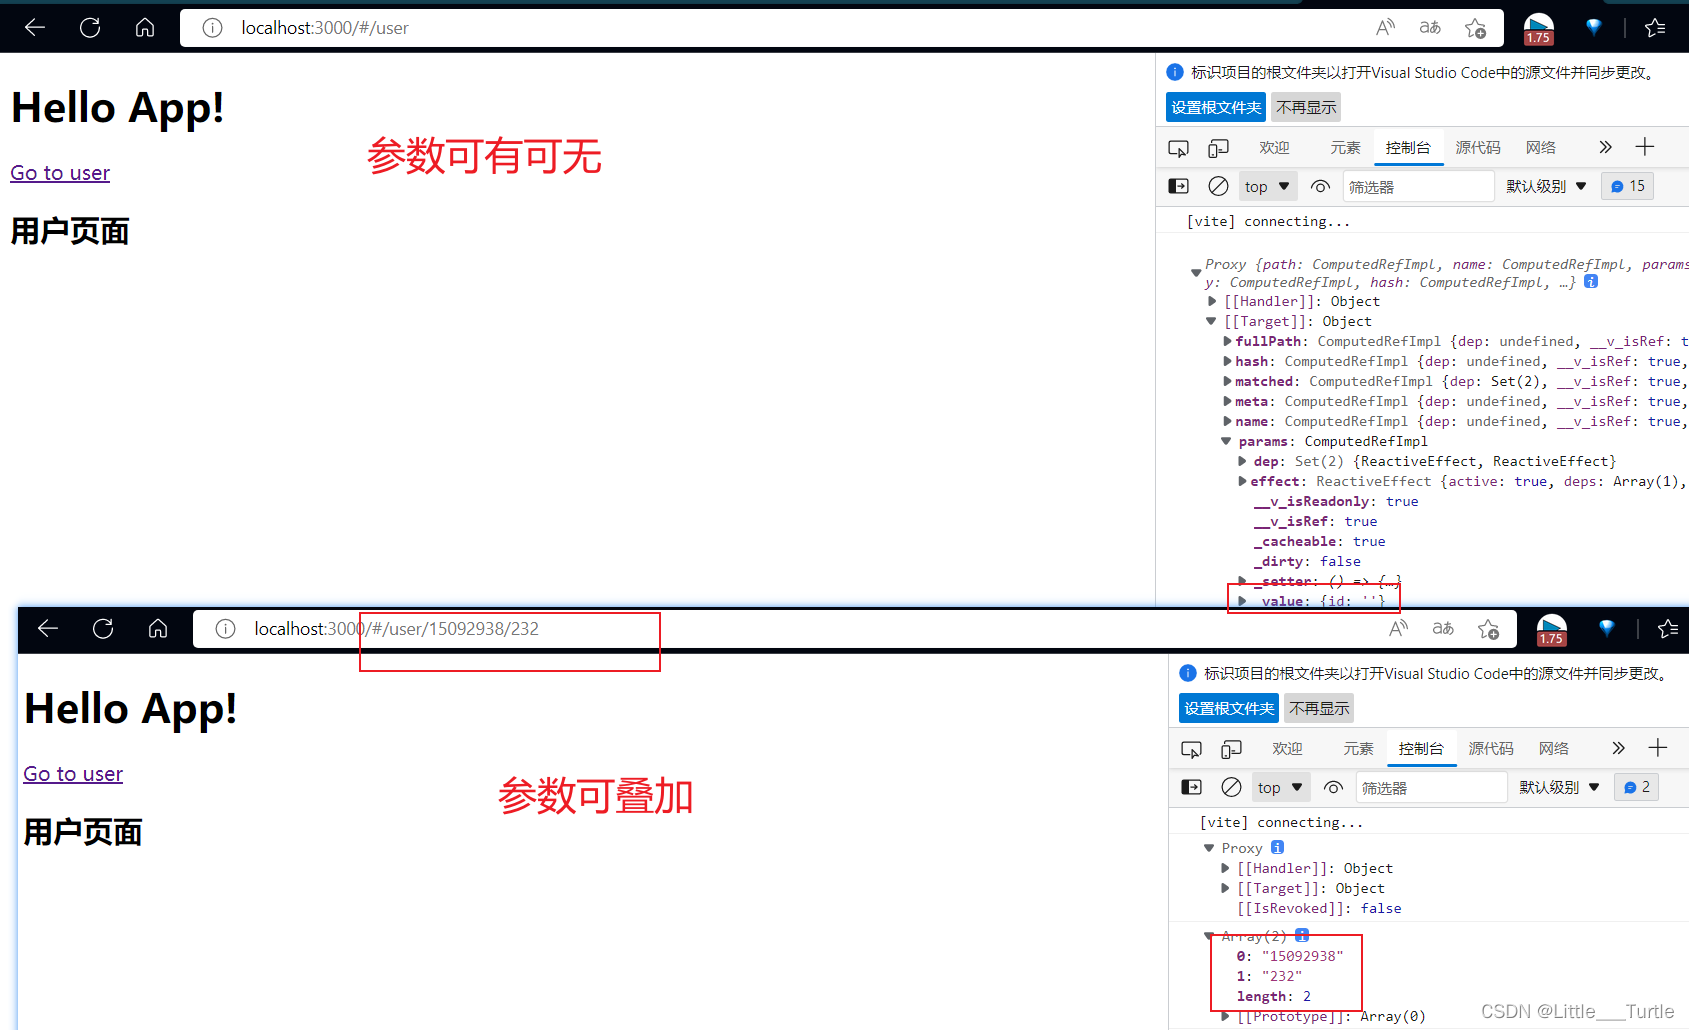
参数可有可无 ? 参数不可以重复叠加
{ path: '/user/:id?', component: User }运行结果
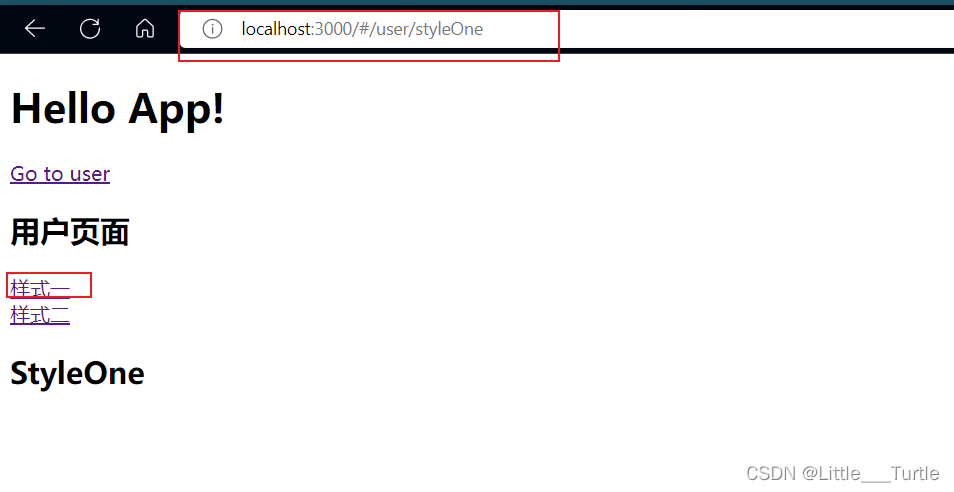
嵌套路由
理解
一些应用程序的 UI 由多层嵌套的组件组成。
相当于 父子组件关系
/user/johnny/profile                     /user/johnny/posts
+------------------+                  +-----------------+
| User             |                  | User            |
| +--------------+ |                  | +-------------+ |
| | Profile      | |  +------------>  | | Posts       | |
| |              | |                  | |             | |
| +--------------+ |                  | +-------------+ |
+------------------+                  +-----------------+
演示代码
index.js
import { createRouter,createWebHashHistory } from 'vue-router'
// 1. 定义路由组件.
// 也可以从其他文件导入
import User from '../views/User.vue'
import StyleOne from '../views/StyleOne.vue'
import StyleTwo from '../views/StyleTwo.vue'

// 2. 定义一些路由
// 每个路由都需要映射到一个组件。
const routes = [
  { path: '/user',
    component: User ,
    //嵌套路由
    children:[
      {
        //不需要/ 以 / 开头的嵌套路径将被视为根路径
        path:"styleOne",
        component:StyleOne
      },
      {
        path:"styleTwo",
        component: StyleTwo
      }
    ]
  }
]

// 3. 创建路由实例并传递 `routes` 配置
// 你可以在这里输入更多的配置,但我们在这里
// 暂时保持简单
const router = createRouter({
  // 4. 内部提供了 history 模式的实现。为了简单起见,我们在这里使用 hash 模式。
  history: createWebHashHistory(),
  routes, // `routes: routes` 的缩写
})
//5.将router导出
export default router
User.vue
<template>
  <h2>用户页面</h2>
  <div>
    <router-link to="/user/styleOne">样式一</router-link>
    <br>
    <router-link to="/user/styleTwo">样式二</router-link>
  </div>
  <router-view></router-view>
</template>
<style>

</style>
StyleOne.vue
<template>
<div>
<h2>
StyleOne
</h2>
</div>
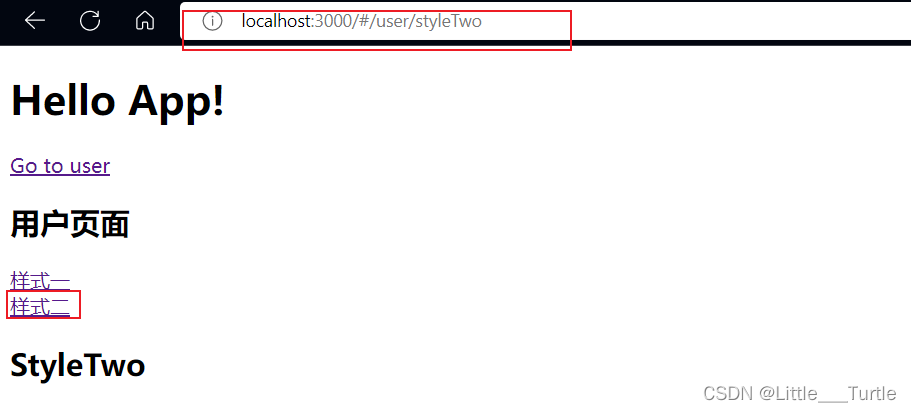
</template>StyleTwo.vue
<template>
    <div>
        <h2>
            StyleTwo
        </h2>
    </div>
</template>
运行结果
点击样式一
点击样式二
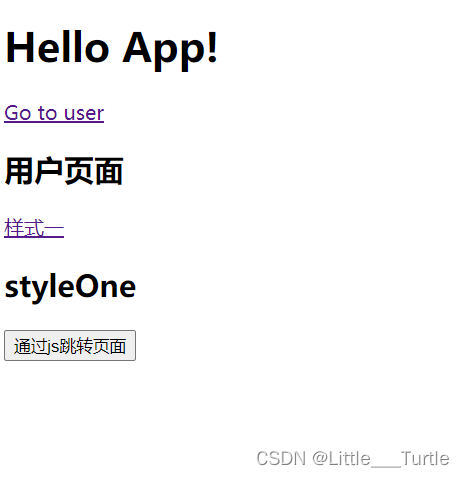
导航到不同的位置
在 Vue 实例中,你可以通过
$router访问路由实例。因此你可以调用this.$router.push。想要导航到不同的 URL,可以使用
router.push方法。这个方法会向 history 栈添加一个新的记录,所以当用户点击浏览器后退按钮时,会回到之前的 URL。当你点击
<router-link>时,内部会调用这个方法,所以点击<router-link :to="...">相当于调用router.push(...)
| 声明式 | 编程式 |
|---|---|
<router-link :to="..."> | router.push(...) |
演示代码
index.vue
import { createRouter, createWebHashHistory } from 'vue-router'
// 1. 定义路由组件.
// 也可以从其他文件导入
import User from '../views/User.vue'
import StyleOne from '../views/StyleOne.vue'

// 2. 定义一些路由
// 每个路由都需要映射到一个组件。
const routes = [
  //动态路由的参数一定为数字
  {
    path: '/user/:id?',
    name: 'user',
    component: User,
    children: [
      {
        //不需要/ 以 / 开头的嵌套路径将被视为根路径
        path: "styleOne",
        component: StyleOne
      }
    ]
  }
]

// 3. 创建路由实例并传递 `routes` 配置
// 你可以在这里输入更多的配置,但我们在这里
// 暂时保持简单
const router = createRouter({
  // 4. 内部提供了 history 模式的实现。为了简单起见,我们在这里使用 hash 模式。
  history: createWebHashHistory(),
  routes, // `routes: routes` 的缩写
})
//5.将router导出
export default router
user.vue
<template>
  <h2>用户页面</h2>
  <div>
    <router-link to="/user/styleOne">样式一</router-link>
    <br>
  </div>
  <router-view></router-view>
</template>
<style>

</style>
styleOne.vue
<template>
<div>
<h2>styleOne</h2>
<button @click="goPage">通过js跳转页面</button>
</div>
</template>
<script>
export default {
methods: {
goPage() {
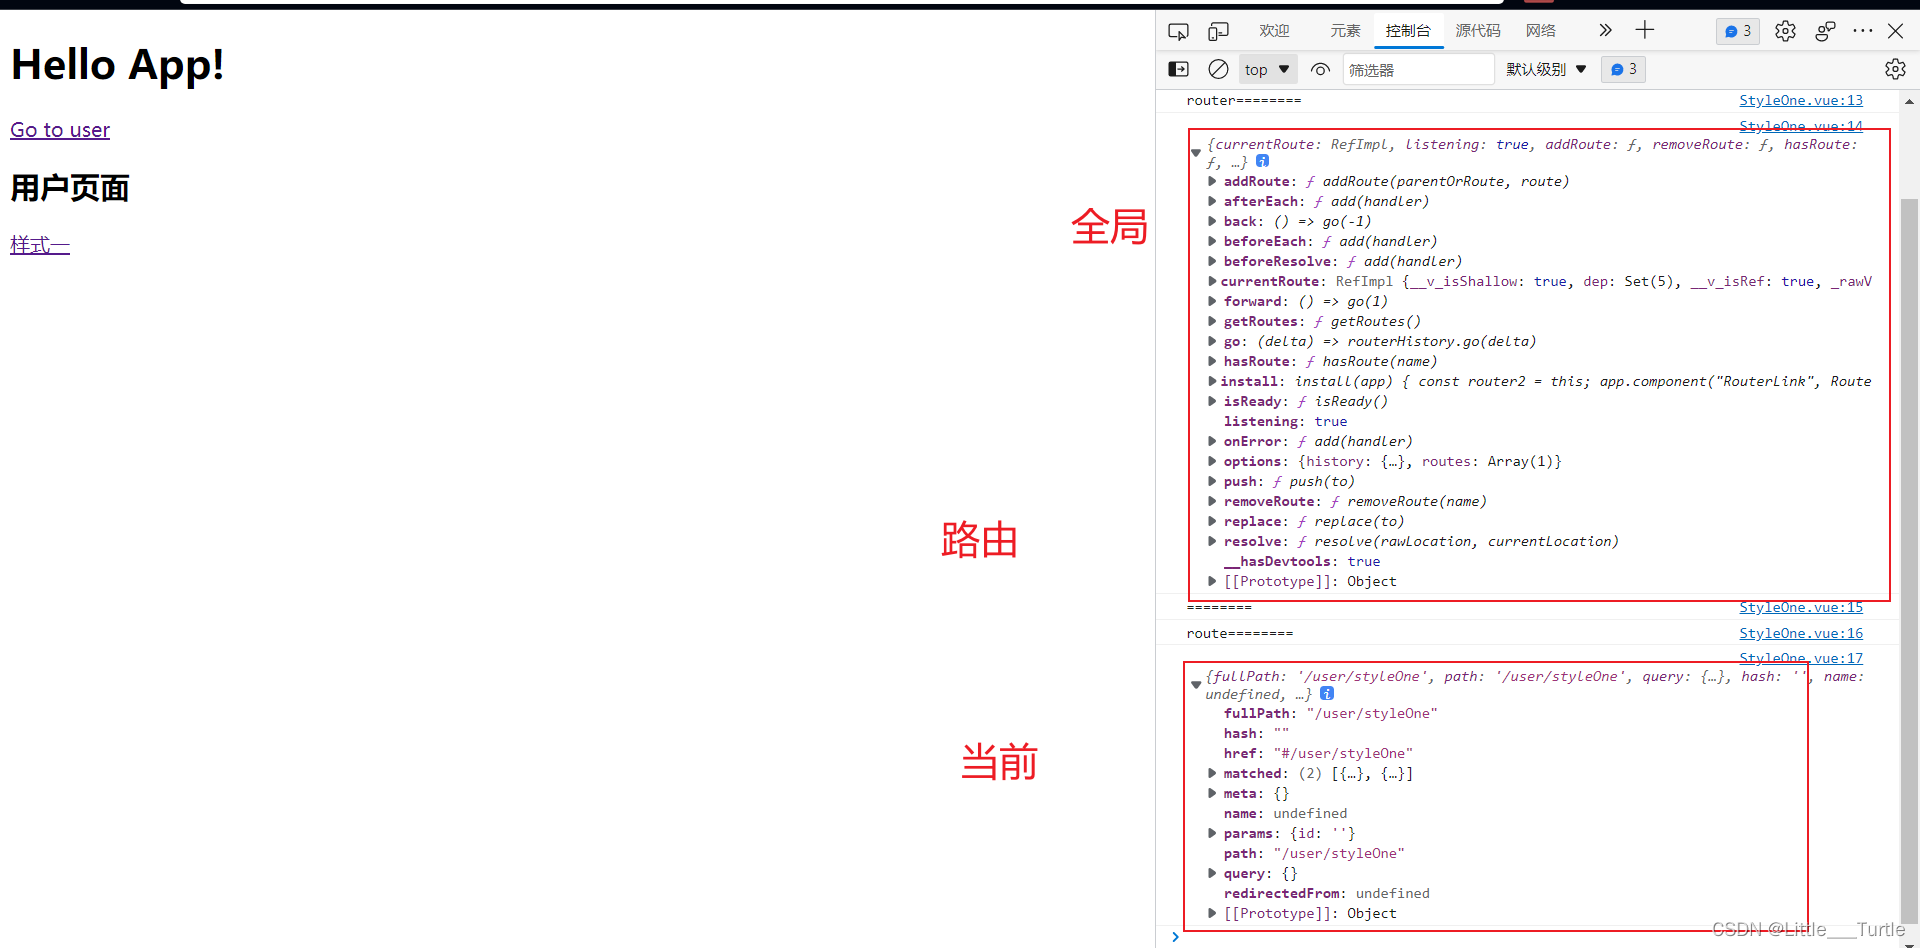
//这里可以通过一下判定去 跳转页面
//router 全局 route当前活跃路由对象
console.log("router========");
console.log(this.$router);
console.log("========");
console.log("route========");
console.log(this.$route);
// 字符串路径
// this.$router.push("/user");
// 带有路径的对象 并加上参数,让路由建立 url
// this.$router.push({ path: "/user/122233"});
// 命名的路由,并加上参数,让路由建立 url
// this.$router.push({ name: "user", params: { id: 12345 } });
// 带查询参数,结果是 /user?id=22233344
this.$router.push({ path: "/user", query: { id: 22233344 } });
},
},
};
</script>
<style>
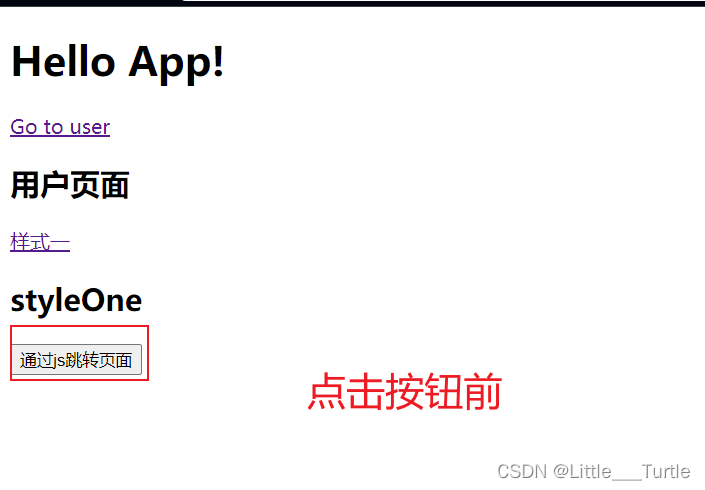
</style>运行结果
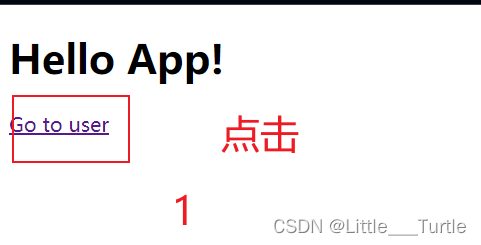
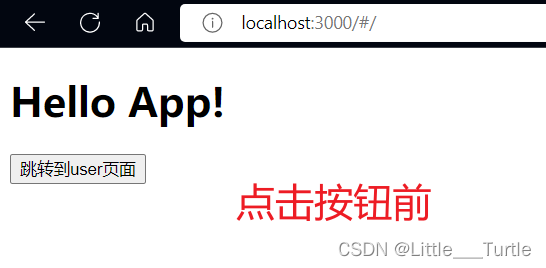
字符串路径
this.$router.push("/user");点击按钮前
点击按钮后
带有路径的对象 并加上参数,让路由建立 url
this.$router.push({ path: "/user/122233"});
命名的路由,并加上参数,让路由建立 url
this.$router.push({ name: "user", params: { id: 12345 } });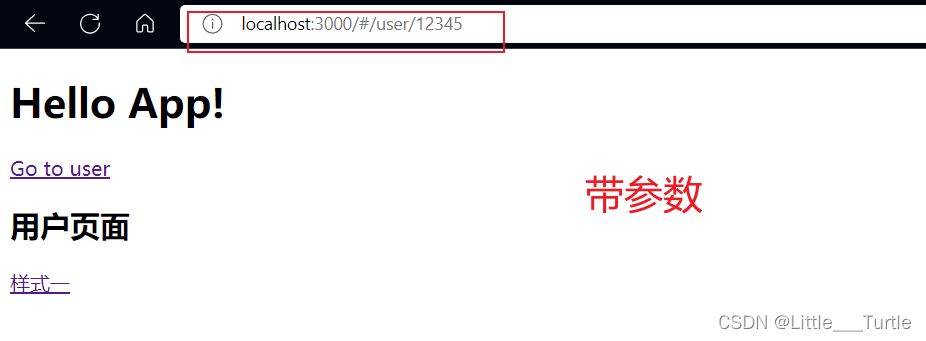
带查询参数
this.$router.push({ path: "/user", query: { id: 22233344 } });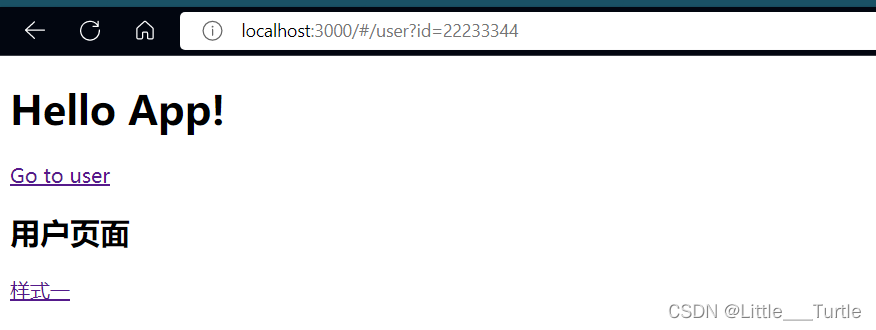
替换当前位置 横跨历史
替换当前位置:它的作用类似于
router.push,唯一不同的是,它在导航时不会向 history 添加新记录,取代了当前的条目。
| 声明式 | 编程式 |
|---|---|
<router-link :to="..." replace> | router.replace(...) |
横跨历史:该方法采用一个整数作为参数,表示在历史堆栈中前进或后退多少步,类似于
window.history.go(n)。
演示代码
index.js
import { createRouter, createWebHashHistory } from 'vue-router'
// 1. 定义路由组件.
// 也可以从其他文件导入
import User from '../views/User.vue'
import StyleOne from '../views/StyleOne.vue'

// 2. 定义一些路由
// 每个路由都需要映射到一个组件。
const routes = [
  //动态路由
  {
    path: '/user/:id?',
    name: 'user',
    component: User,
    children: [
      {
        //不需要/ 以 / 开头的嵌套路径将被视为根路径
        path: "styleOne",
        component: StyleOne
      }
    ]
  }
]

// 3. 创建路由实例并传递 `routes` 配置
// 你可以在这里输入更多的配置,但我们在这里
// 暂时保持简单
const router = createRouter({
  // 4. 内部提供了 history 模式的实现。为了简单起见,我们在这里使用 hash 模式。
  history: createWebHashHistory(),
  routes, // `routes: routes` 的缩写
})
//5.将router导出
export default router
App.vue
<script setup>
</script>
<template>
<div id="app">
  <h1>Hello App!</h1>
  <p>
    <!--使用 router-link 组件进行导航 -->
    <!--通过传递 `to` 来指定链接 -->
    <!--`<router-link>` 将呈现一个带有正确 `href` 属性的 `<a>` 标签-->
    <router-link to="/user">Go to user</router-link>
  </p>
  <!-- 路由出口 相当于一个占位符-->
  <!-- 路由匹配到的组件将渲染在这里 -->
  <router-view></router-view>
</div>
</template>
<style>
</style>
替换当前位置
StyleOne.vue
<template>
  <div>
    <h2>styleOne</h2>
    <button @click="goPage">通过js跳转页面</button>
  </div>
</template>
<script>
export default {
  methods: {
    goPage() {
     this.$router.push({ path: '/user', replace: true })
     // 相当于
     //this.$router.replace({ path: '/user' })
    },
  },
};
</script>

<style>
</style>
User.vue
<template>
<h2>用户页面</h2>
<div>
<router-link to="/user/styleOne">样式一</router-link>
<br>
</div>
<router-view></router-view>
</template>
<style>
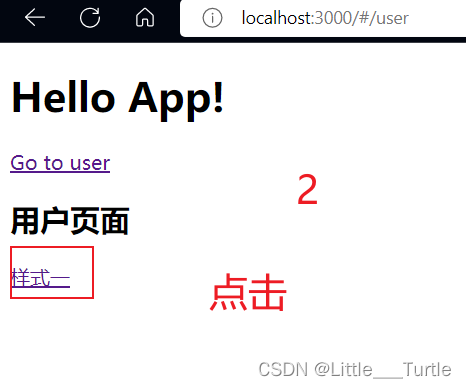
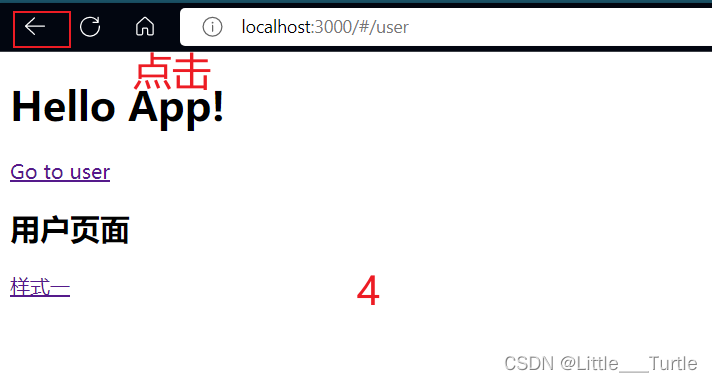
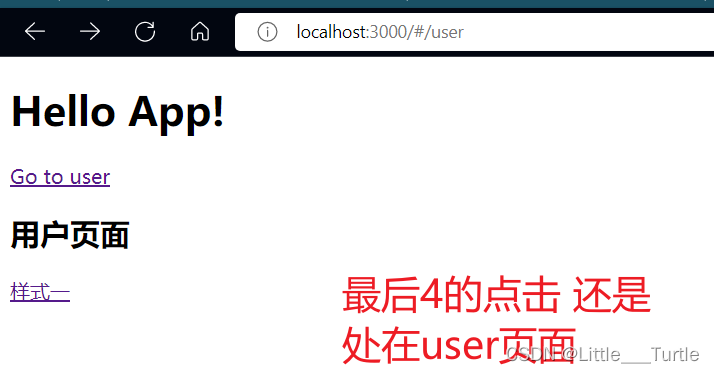
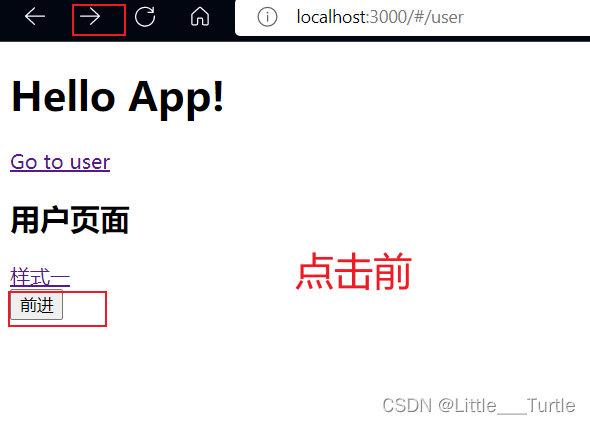
</style>横跨历史
StyleOne.vue
<template>
  <div>
    <h2>styleOne</h2>
    <button @click="goPage">通过js跳转页面</button>
  </div>
</template>
<script>
export default {
  methods: {
    goPage() {
   // 返回一条记录,与 this.$router.back() 相同
    this.$router.go(-1)
    },
  },
};
</script>

<style>
</style>
User.vue
<template>
  <h2>用户页面</h2>
  <div>
    <router-link to="/user/styleOne">样式一</router-link>
    <br>
  </div>
  <button @click="goPage">前进</button>
  <br>
  <router-view></router-view>
</template>
<script>
export default {
  methods: {
    goPage() {
   // 向前移动一条记录,与 router.forward() 相同
    this.$router.go(1)
    },
  },
};
</script>
<style>

</style>
运行结果
替换当前位置

横跨历史
退后
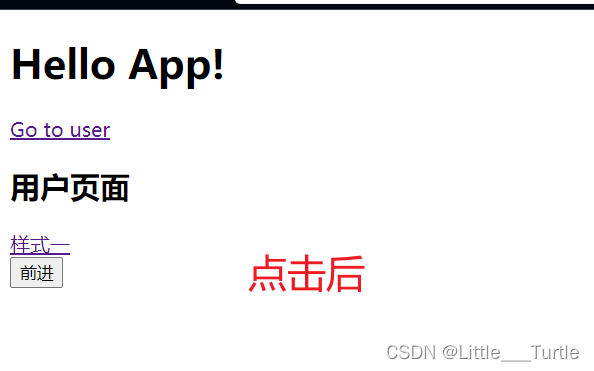
前进

命名路由
可以为任何路由提供
name。这有以下优点:
- 没有硬编码的 URL
params的自动编码/解码。- 防止你在 url 中出现打字错误。
- 绕过路径排序(如显示一个)
代码演示
index.js
import { createRouter, createWebHashHistory } from 'vue-router'
// 1. 定义路由组件.
// 也可以从其他文件导入
import User from '../views/User.vue'
import StyleOne from '../views/StyleOne.vue'

// 2. 定义一些路由
// 每个路由都需要映射到一个组件。
const routes = [
  //动态路由
  {
    path: '/user/:id?',
    name: 'user',
    component: User,
  }
]

// 3. 创建路由实例并传递 `routes` 配置
// 你可以在这里输入更多的配置,但我们在这里
// 暂时保持简单
const router = createRouter({
  // 4. 内部提供了 history 模式的实现。为了简单起见,我们在这里使用 hash 模式。
  history: createWebHashHistory(),
  routes, // `routes: routes` 的缩写
})
//5.将router导出
export default router
App.vue
<script>
export default{
methods:{
toUser(){
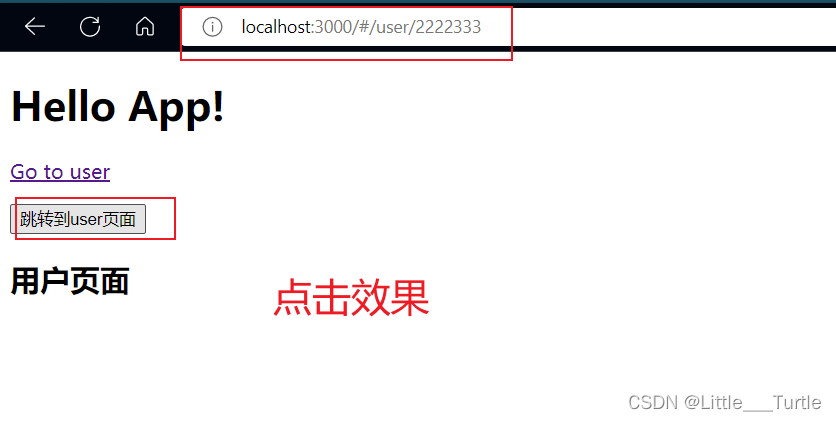
this.$router.push({
name:'user',
params:{
id:2222333
}
})
}
}
}
</script>
<template>
<div id="app">
<h1>Hello App!</h1>
<p>
<!--使用 router-link 组件进行导航 -->
<!--通过传递 `to` 来指定链接 -->
<!--`<router-link>` 将呈现一个带有正确 `href` 属性的 `<a>` 标签-->
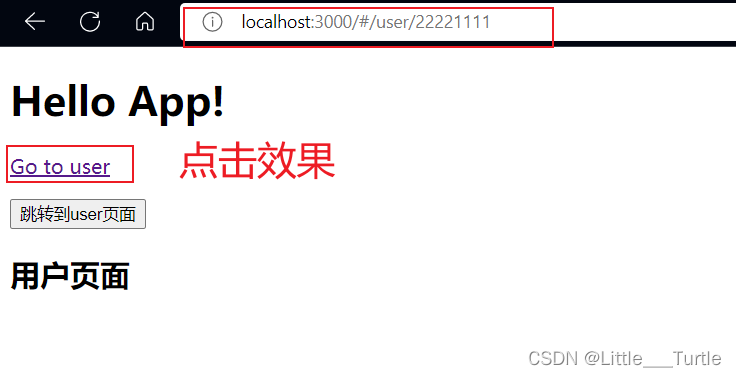
<router-link :to="{ name: 'user', params: { id: '22221111' }}">Go to user</router-link>
</p>
<button @click="toUser">跳转到user页面</button>
<!-- 路由出口 相当于一个占位符-->
<!-- 路由匹配到的组件将渲染在这里 -->
<router-view></router-view>
</div>
</template>
<style>
</style>
User.vue
<template>
  <h2>用户页面</h2>
</template>
运行效果
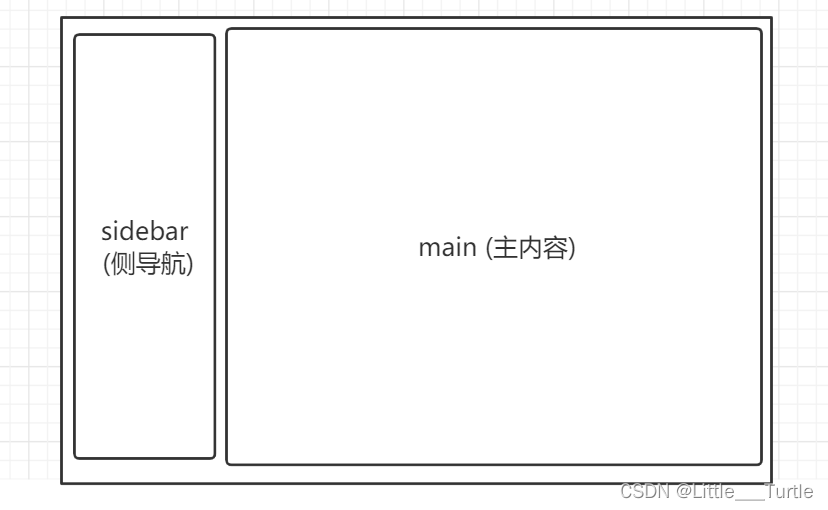
命名视图
有时候想同时 (同级) 展示多个视图,而不是嵌套展示,例如创建一个布局,有
sidebar(侧导航) 和main(主内容) 两个视图如果
router-view没有设置名字,那么默认为default。
代码演示
index.js
import { createRouter, createWebHashHistory } from 'vue-router'
// 1. 定义路由组件.
// 也可以从其他文件导入
import User from '../views/User.vue'
import Main from '../views/Main.vue'
import Sidebar from '../views/Sidebar.vue'
// 2. 定义一些路由
// 每个路由都需要映射到一个组件。
const routes = [
  //动态路由
  {
    path: '/user',
    name: 'user',
    components: {
      default: User,
      //Main: Main 的缩写
      Main,
      // 它们与 `<router-view>` 上的 `name` 属性匹配
      Sidebar
    }
  }
]

// 3. 创建路由实例并传递 `routes` 配置
// 你可以在这里输入更多的配置,但我们在这里
// 暂时保持简单
const router = createRouter({
  // 4. 内部提供了 history 模式的实现。为了简单起见,我们在这里使用 hash 模式。
  history: createWebHashHistory(),
  routes, // `routes: routes` 的缩写
})
//5.将router导出
export default router
App.vue
<script>
 export default{
  methods:{
    toUser(){
      this.$router.push({
        name:'user'
      })
    }
  }
 }
</script>
<template>
<div id="app">
  <h1>Hello App!</h1>
  <button @click="toUser">跳转到user页面</button>
  <!-- 路由出口 相当于一个占位符-->
  <!-- 路由匹配到的组件将渲染在这里 -->
  <router-view></router-view>
  <router-view name="Main"></router-view>
  <router-view name="Sidebar"></router-view>
</div>
</template>
<style>
</style>
User.vue
<template>
  <h2>用户页面</h2>
</template>
Main.vue
<template>
  <h2>主内容</h2>
</template>
Sidebar.vue
<template>
<h2>侧边栏</h2>
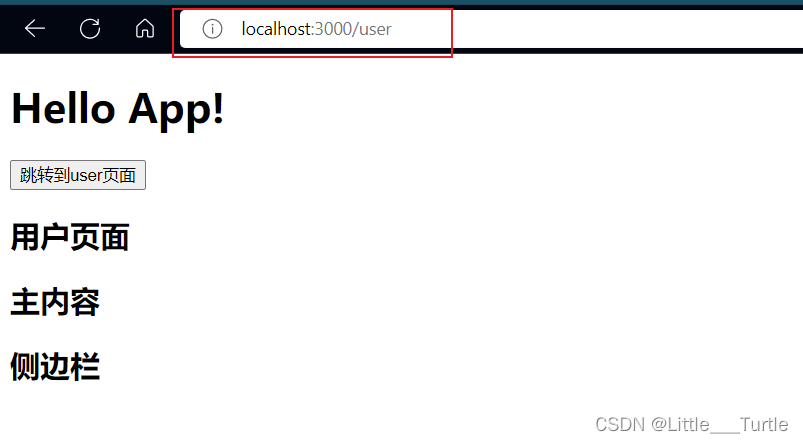
</template>运行效果

重定向和别名
重定向:
输入url跳转到其他url代表的页面
在写
redirect的时候,可以省略component配置,因为它从来没有被直接访问过,所以没有组件要渲染。唯一的例外是嵌套路由:如果一个路由记录有children和redirect属性,它也应该有component属性。
别名:
通过别名,你可以自由地将 UI 结构映射到一个任意的 URL,而不受配置的嵌套结构的限制。使别名以
/开头,以使嵌套路径中的路径成为绝对路径。你甚至可以将两者结合起来,用一个数组提供多个别名
代码演示
App.vue
<script>
 export default{
  methods:{
    toUser(){
      this.$router.push({
        name:'user'
      })
    }
  }
 }
</script>
<template>
<div id="app">
  <h1>Hello App!</h1>
  <button @click="toUser">跳转到user页面</button>
  <router-view></router-view>
</div>
</template>
<style>
</style>
User.vue
<template>
  <h2>用户页面</h2>
</template>
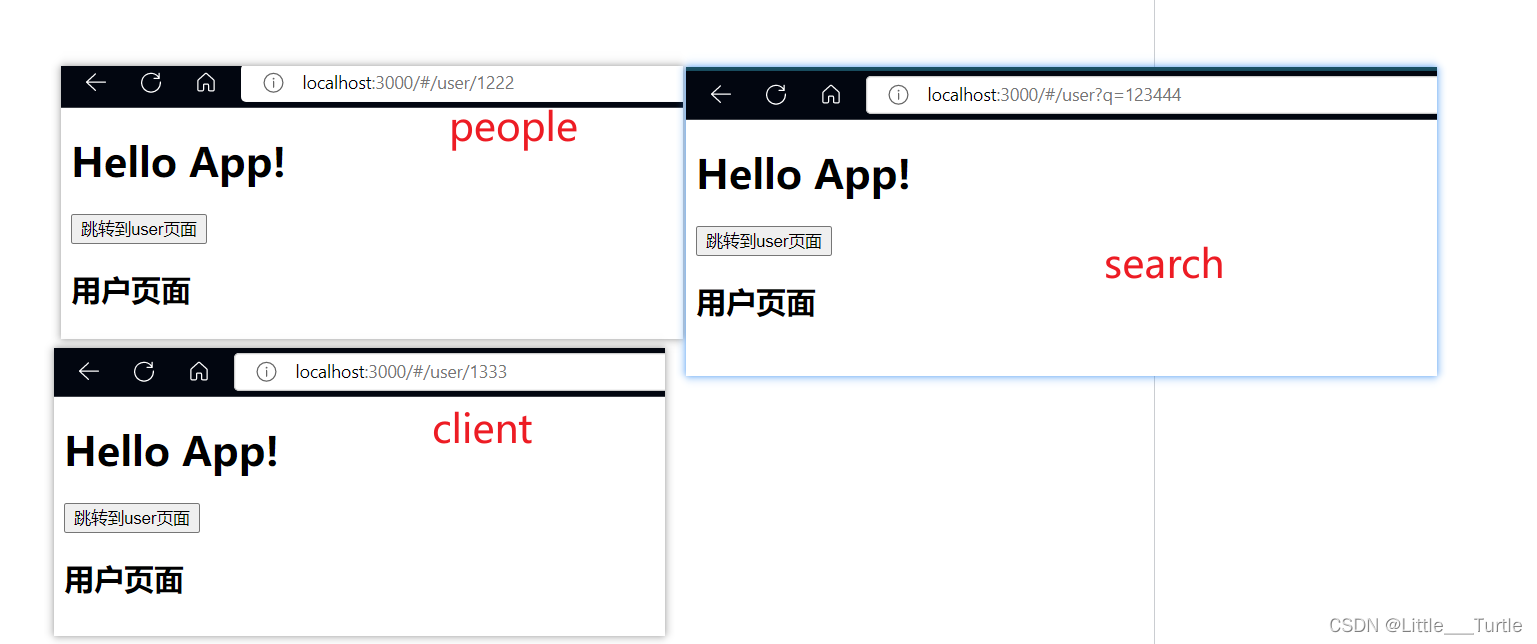
重定向
index.js
import { createRouter, createWebHashHistory } from 'vue-router'
// 1. 定义路由组件.
// 也可以从其他文件导入
import User from '../views/User.vue'
// 2. 定义一些路由
// 每个路由都需要映射到一个组件。
const routes = [
  //重定向
  {
   path: '/people',
   redirect: '/user/1222'
  },
  //重定向的目标也可以是一个命名的路由
  {
   path: '/client',
   redirect: {
    name: 'user',
    params: {
      id:1333
    },
   }
  },
  {
    // /search/screens -> /search?q=screens
    path: '/search/:id',
    redirect: to => {
      // 方法接收目标路由作为参数
      // return 重定向的字符串路径/路径对象
      return { path: '/user', query: { q: to.params.id } }
  }
  },
  //动态路由
  {
    path: '/user/:id?',
    name: 'user',
    component: User
  }
]

// 3. 创建路由实例并传递 `routes` 配置
// 你可以在这里输入更多的配置,但我们在这里
// 暂时保持简单
const router = createRouter({
  // 4. 内部提供了 history 模式的实现。为了简单起见,我们在这里使用 hash 模式。
  history: createWebHashHistory(),
  routes, // `routes: routes` 的缩写
})
//5.将router导出
export default router
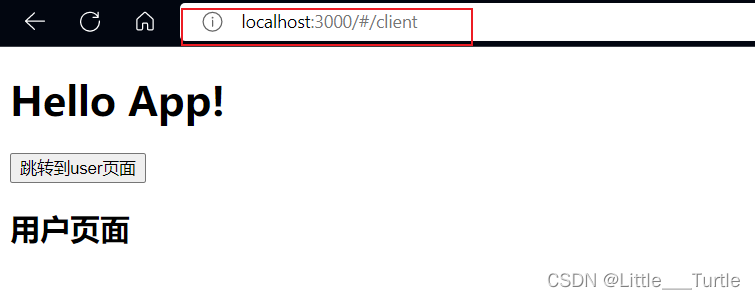
别名
index.js
import { createRouter, createWebHashHistory } from 'vue-router'
// 1. 定义路由组件.
// 也可以从其他文件导入
import User from '../views/User.vue'
import Main from '../views/Main.vue'
import Sidebar from '../views/Sidebar.vue'
// 2. 定义一些路由
// 每个路由都需要映射到一个组件。
const routes = [
  //动态路由
  {
    path: '/user',
    name: 'user',
    //字符串形式
    // alias: '/client',
    //数组形式
    alias:['/client','/people'],
    component: User
  }
]

// 3. 创建路由实例并传递 `routes` 配置
// 你可以在这里输入更多的配置,但我们在这里
// 暂时保持简单
const router = createRouter({
  // 4. 内部提供了 history 模式的实现。为了简单起见,我们在这里使用 hash 模式。
  history: createWebHashHistory(),
  routes, // `routes: routes` 的缩写
})
//5.将router导出
export default router
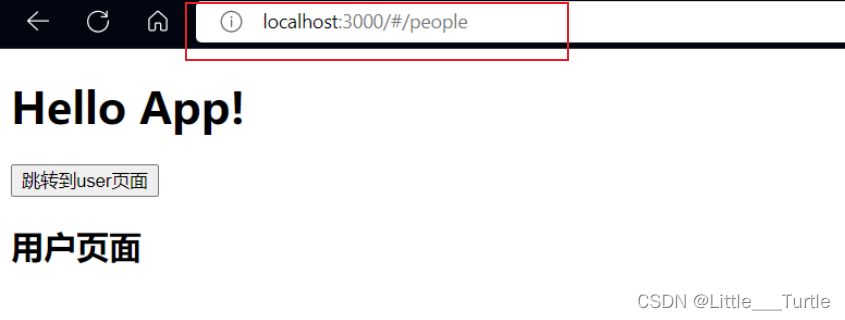
运行结果
重定向
别名
将 props 传递给路由组件 布尔模式
当
props设置为true时,route.params将被设置为组件的 props。
基础 代码演示
index.js
import { createRouter, createWebHashHistory } from 'vue-router'
// 1. 定义路由组件.
// 也可以从其他文件导入
import User from '../views/User.vue'
// 2. 定义一些路由
// 每个路由都需要映射到一个组件。
const routes = [
  //动态路由
  {
    path: '/user/:id?',
    name: 'user',
    component: User,
    props: true
  }
]

// 3. 创建路由实例并传递 `routes` 配置
// 你可以在这里输入更多的配置,但我们在这里
// 暂时保持简单
const router = createRouter({
  // 4. 内部提供了 history 模式的实现。为了简单起见,我们在这里使用 hash 模式。
  history: createWebHashHistory(),
  routes, // `routes: routes` 的缩写
})
//5.将router导出
export default router
user.vue
<template>
  <h2>用户页面</h2>
</template>
<!-- 选项式API -->
<!-- <script>
export default{
  props:[
    'id'
  ],
  mounted(){
  //相同于 console.log(this.$route.params.id)
   console.log(this.id);
  }
}
</script> -->
 <!-- 组合式API -->
 <script setup>
// import { useRoute } from 'vue-router';
// 相同于 useRoute().params.id
  const props=defineProps({
    id:String
  });
  console.log(props);
  console.log("=================");
  console.log(props.id)
</script>
运行效果


命名视图
代码演示
index.js
import { createRouter, createWebHashHistory } from 'vue-router'
// 1. 定义路由组件.
// 也可以从其他文件导入
import User from '../views/User.vue'
import Sidebar from '../views/Sidebar.vue'
import Main from '../views/Main.vue'
// 2. 定义一些路由
// 每个路由都需要映射到一个组件。
const routes = [
  //动态路由
  {
    path: '/user/:id?',
    name: 'user',
    components: {
      default:User,
      Main,
      Sidebar
    },
    //必须为每个命名视图定义 props 配置
    props: {
      default: true,
      Main: false,
      Sidebar: false
    }
  }
]

// 3. 创建路由实例并传递 `routes` 配置
// 你可以在这里输入更多的配置,但我们在这里
// 暂时保持简单
const router = createRouter({
  // 4. 内部提供了 history 模式的实现。为了简单起见,我们在这里使用 hash 模式。
  history: createWebHashHistory(),
  routes, // `routes: routes` 的缩写
})
//5.将router导出
export default router
App.vue
<script>
 export default{
  methods:{
    toUser(){
      this.$router.push({
        name:'user'
      })
    }
  }
 }
</script>
<template>
<div id="app">
  <h1>Hello App!</h1>
  <button @click="toUser">跳转到user页面</button>
  <router-view></router-view>
  <router-view name="Main"></router-view>
  <router-view name="Sidebar"></router-view>
</div>
</template>
<style>
</style>
User.vue
<template>
  <h2>用户页面</h2>
</template>
<!-- 选项式API -->
<!-- <script>
export default{
  props:[
    'id'
  ],
  mounted(){
  //相同于 console.log(this.$route.params.id)
   console.log(this.id);
  }
}
</script> -->
 <!-- 组合式API -->
 <script setup>
// import { useRoute } from 'vue-router';
// 相同于 useRoute().params.id
  const props=defineProps({
    id:String
  });
  console.log(props);
  console.log("=================");
  console.log(props.id)
</script>
Main.vue
<template>
    <h2>主内容</h2>
</template>
Sidebar.vue
<template>
    <h2>侧边栏</h2>
</template>
运行效果

不同的历史模式
Hash 模式
hash 模式是用
createWebHashHistory()创建的它在内部传递的实际 URL 之前使用了一个哈希字符(
#)。由于这部分 URL 从未被发送到服务器,所以它不需要在服务器层面上进行任何特殊处理。不过,它在 SEO 中确实有不好的影响。SEO就是指按照搜索引擎的算法
HTML5 模式
用
createWebHistory()创建 HTML5 模式,推荐使用这个模式URL 会看起来很 "正常",例如
https://example.com/user/id。不过,问题来了。由于我们的应用是一个单页的客户端应用,如果没有适当的服务器配置,用户在浏览器中直接访问
https://example.com/user/id,就会得到一个 404 错误。这就丑了。不用担心:要解决这个问题,你需要做的就是在你的服务器上添加一个简单的回退路由。如果 URL 不匹配任何静态资源,它应提供与你的应用程序中的
index.html相同的页面。漂亮依旧!
代码演示
Hash模式
index.js
import { createRouter, createWebHashHistory } from 'vue-router'
// 1. 定义路由组件.
// 也可以从其他文件导入
import User from '../views/User.vue'
import Sidebar from '../views/Sidebar.vue'
import Main from '../views/Main.vue'
// 2. 定义一些路由
// 每个路由都需要映射到一个组件。
const routes = [
  //动态路由
  {
    path: '/user/:id?',
    name: 'user',
    components: {
      default:User,
      Main,
      Sidebar
    },
    //必须为每个命名视图定义 props 配置
    props: {
      default: true,
      Main: false,
      Sidebar: false
    }
  }
]

// 3. 创建路由实例并传递 `routes` 配置
// 你可以在这里输入更多的配置,但我们在这里
// 暂时保持简单
const router = createRouter({
  // 4. 内部提供了 history 模式的实现。为了简单起见,我们在这里使用 hash 模式。
  history: createWebHashHistory(),
  routes, // `routes: routes` 的缩写
})
//5.将router导出
export default router
运行效果

HTML5模式
index.js
import { createRouter, createWebHistory } from 'vue-router'
// 1. 定义路由组件.
// 也可以从其他文件导入
import User from '../views/User.vue'
import Sidebar from '../views/Sidebar.vue'
import Main from '../views/Main.vue'
// 2. 定义一些路由
// 每个路由都需要映射到一个组件。
const routes = [
  //动态路由
  {
    path: '/user/:id?',
    name: 'user',
    components: {
      default:User,
      Main,
      Sidebar
    },
    //必须为每个命名视图定义 props 配置
    props: {
      default: true,
      Main: false,
      Sidebar: false
    }
  }
]

// 3. 创建路由实例并传递 `routes` 配置
// 你可以在这里输入更多的配置,但我们在这里
// 暂时保持简单
const router = createRouter({
  // 4. 内部提供了 history 模式的实现。为了简单起见,我们在这里使用 HTML5 模式。
  history: createWebHistory(),
  routes, // `routes: routes` 的缩写
})
//5.将router导出
export default router
运行效果
导航守卫
代码演示
App.vue
<script>
 export default{
  methods:{
    toUser(){
      this.$router.push({
        name:'user',
        params:{
          id:123456
        }
      })
    }
  }
 }
</script>
<template>
<div id="app">
  <h1>Hello App!</h1>
  <button @click="toUser">跳转到user页面</button>
  <router-view></router-view>
</div>
</template>
<style>
</style>
全局前置守卫
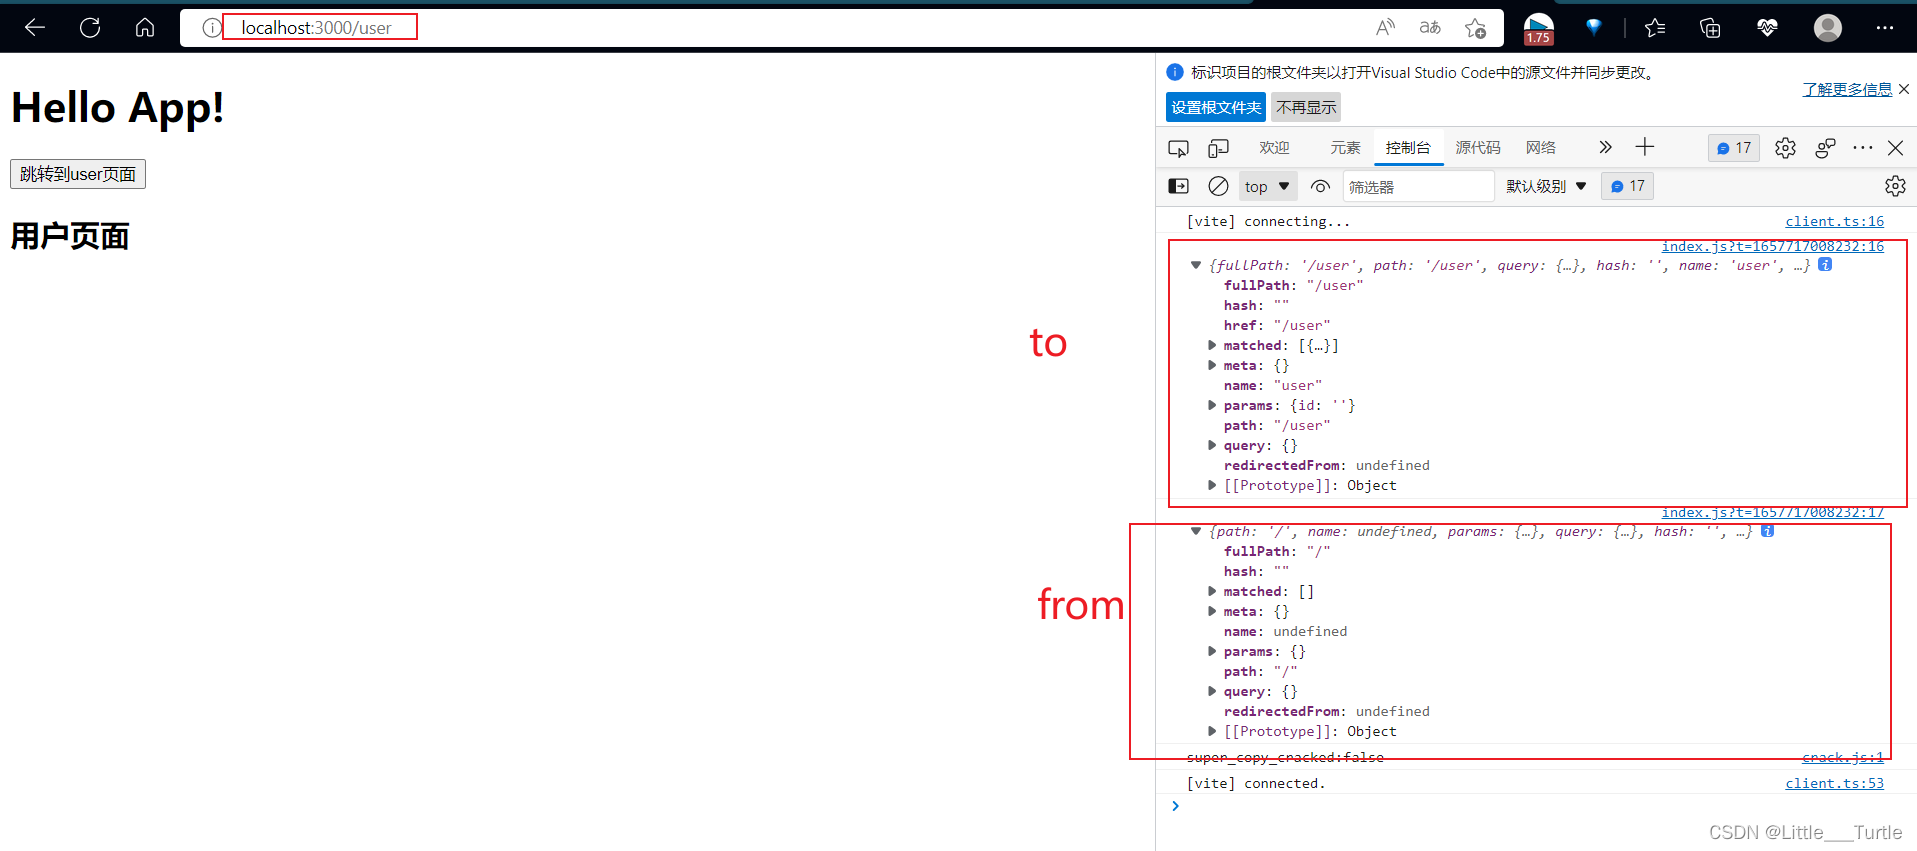
每个守卫方法接收两个参数:
to: 即将要进入的目标from: 当前导航正要离开的路由可以返回的值如下:
false: 取消当前的导航。如果浏览器的 URL 改变了(可能是用户手动或者浏览器后退按钮),那么 URL 地址会重置到from路由对应的地址。- 一个路由地址: 通过一个路由地址跳转到一个不同的地址,就像你调用 router.push() 一样,你可以设置诸如
replace: true或name: 'home'之类的配置。当前的导航被中断,然后进行一个新的导航,就和from一样。
index.js
import { createRouter, createWebHistory } from 'vue-router'
// 1. 定义路由组件.
// 也可以从其他文件导入
import User from '../views/User.vue'
// 2. 定义一些路由
// 每个路由都需要映射到一个组件。
const routes = [
  //动态路由
  {
    path: '/user/:id?',
    name: 'user',
    component: User,
  }
]

// 3. 创建路由实例并传递 `routes` 配置
const router = createRouter({
  // 4. 内部提供了 history 模式的实现。为了简单起见,我们在这里使用 HTML5 模式。
  history: createWebHistory(),
  routes, // `routes: routes` 的缩写
})
//全局前置守卫 第三参数可选
router.beforeEach((to, from,next) => {
   console.log(to);
   console.log(from);
   //通行证
   next();
})
//5.将router导出
export default router
User.vue
<template>
  <h2>用户页面</h2>
</template>
运行效果

路由独享的守卫
index.js
import { createRouter, createWebHistory } from 'vue-router'
// 1. 定义路由组件.
// 也可以从其他文件导入
import User from '../views/User.vue'
// 2. 定义一些路由
// 每个路由都需要映射到一个组件。
const routes = [
  //动态路由
  {
    path: '/user/:id?',
    name: 'user',
    component: User,
    beforeEnter:(to,from,next)=>{
     console.log(to);
     console.log(from);
     //可通过一系列判定 token校验等等 是否通行
     next()
    }
  }
]

// 3. 创建路由实例并传递 `routes` 配置
const router = createRouter({
  // 4. 内部提供了 history 模式的实现。为了简单起见,我们在这里使用 HTML5 模式。
  history: createWebHistory(),
  routes, // `routes: routes` 的缩写
})
//5.将router导出
export default router
User.vue
<template>
  <h2>用户页面</h2>
</template>
运行结果
组件内的守卫
index.js
import { createRouter, createWebHistory } from 'vue-router'
// 1. 定义路由组件.
// 也可以从其他文件导入
import User from '../views/User.vue'
import Main from '../views/Main.vue'
// 2. 定义一些路由
// 每个路由都需要映射到一个组件。
const routes = [
  //动态路由
  {
    path: '/user/:id?',
    name: 'user',
    component: User,
  },
  {
    path: '/',
    name: 'main',
    component: Main,
  }
]

// 3. 创建路由实例并传递 `routes` 配置
const router = createRouter({
  // 4. 内部提供了 history 模式的实现。为了简单起见,我们在这里使用 HTML5 模式。
  history: createWebHistory(),
  routes, // `routes: routes` 的缩写
})
//5.将router导出
export default router
User.vue
<template>
<h2>用户页面</h2>
</template>
<script>
export default{
data(){
return{
name:'张三'
}
},
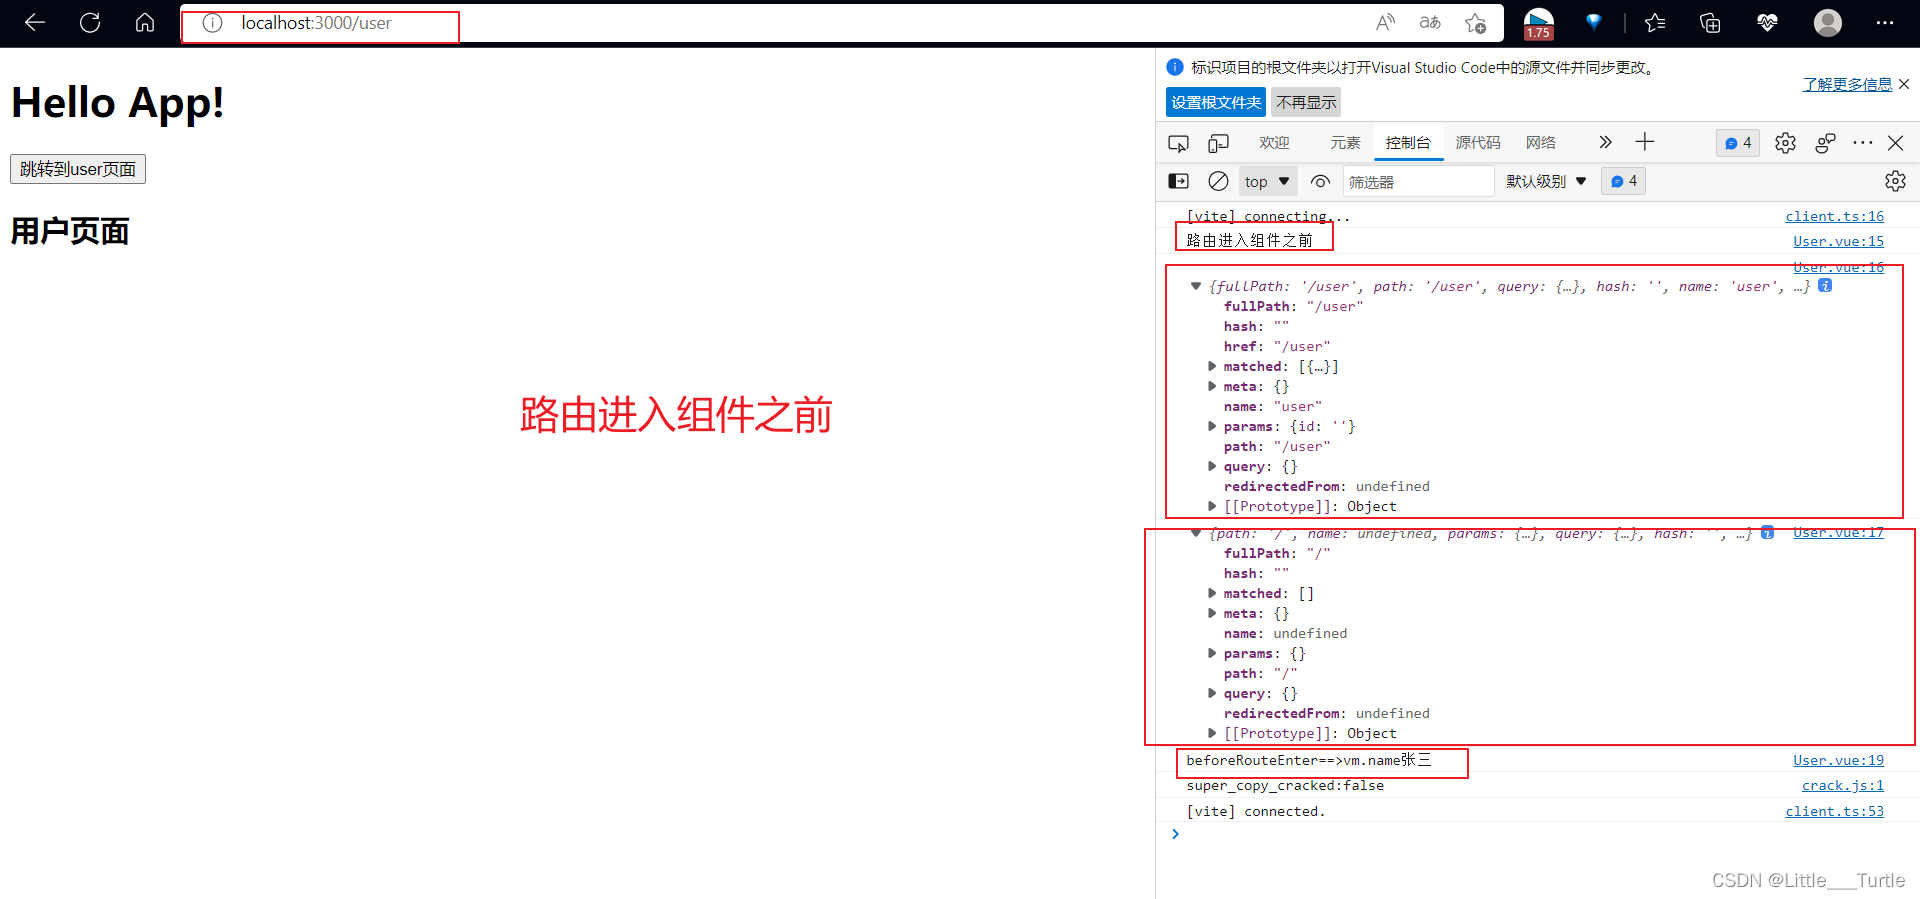
beforeRouteEnter(to, from,next) {
// 在渲染该组件的对应路由被验证前调用
// 不能获取组件实例 `this` !
// 因为当守卫执行时,组件实例还没被创建!
console.log("路由进入组件之前");
console.log(to);
console.log(from);
next((vm)=>{
console.log("beforeRouteEnter==>vm.name"+vm.name);
})
},
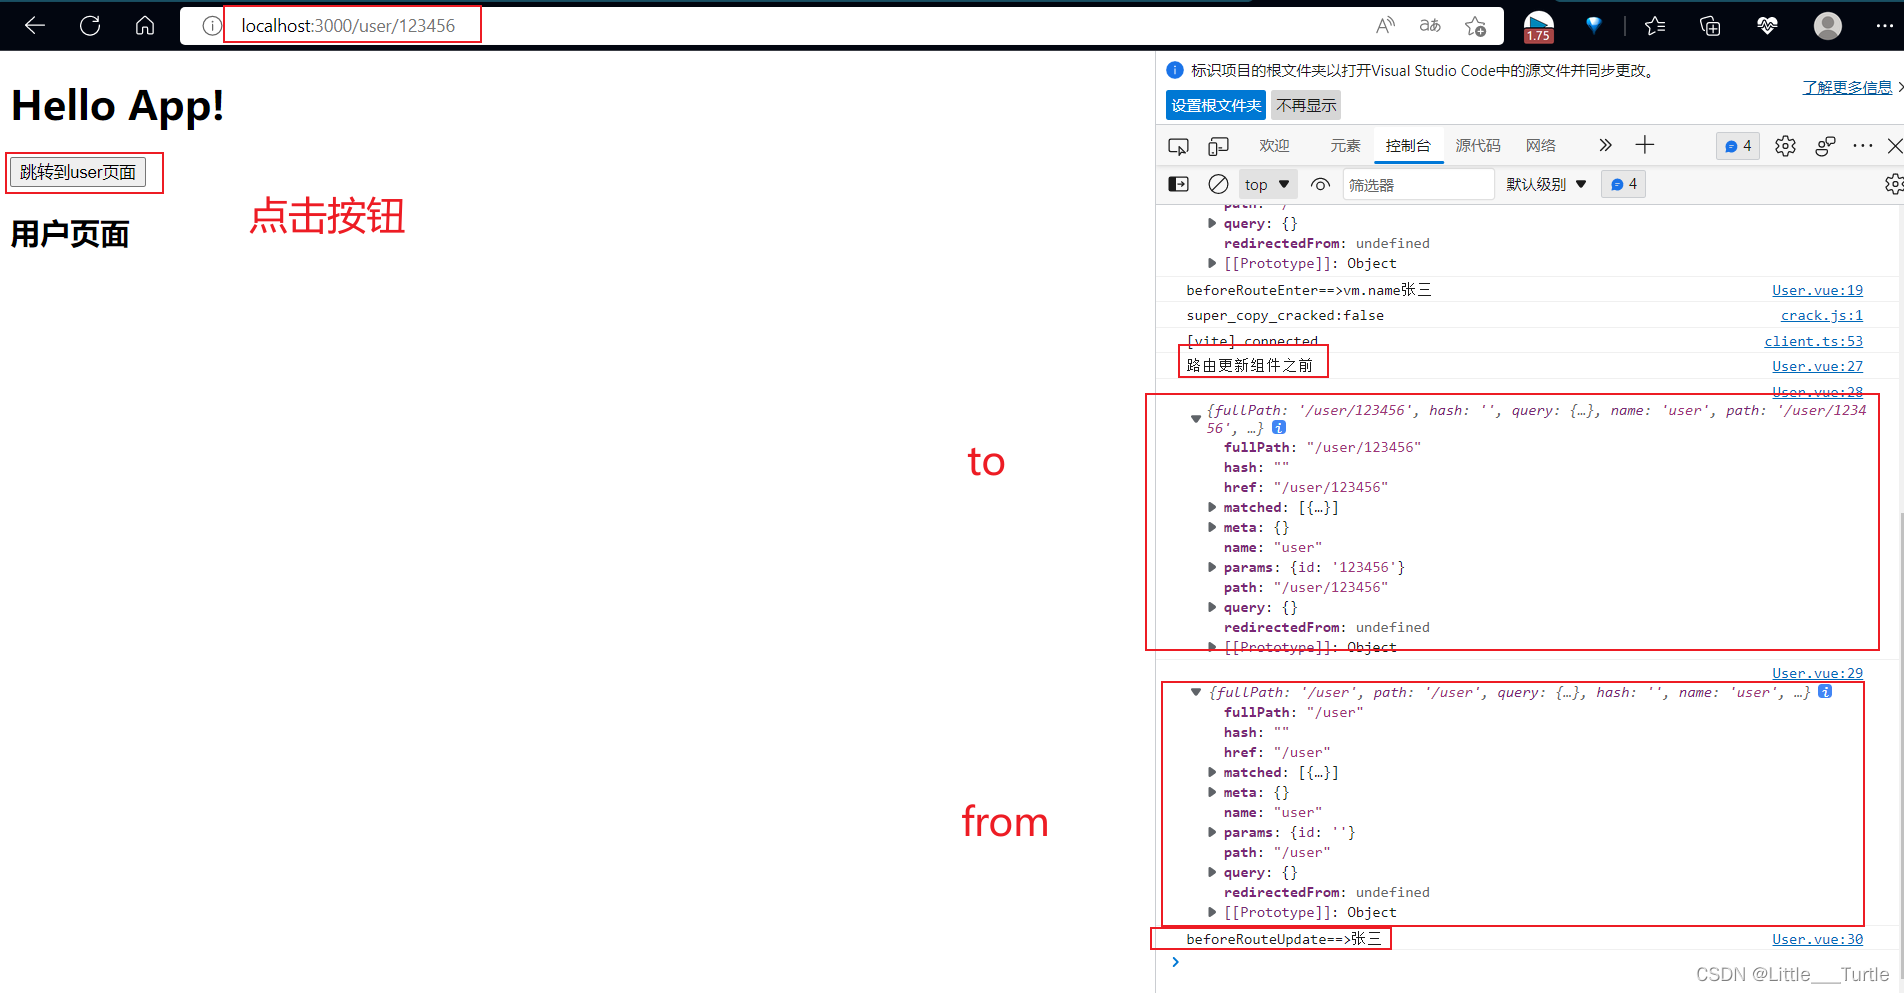
beforeRouteUpdate(to, from) {
// 在当前路由改变,但是该组件被复用时调用
// 举例来说,对于一个带有动态参数的路径 `/users/:id`,在 `/users/1` 和 `/users/2` 之间跳转的时候,
// 由于会渲染同样的 `UserDetails` 组件,因此组件实例会被复用。而这个钩子就会在这个情况下被调用。
// 因为在这种情况发生的时候,组件已经挂载好了,导航守卫可以访问组件实例 `this`
console.log("路由更新组件之前");
console.log(to);
console.log(from);
console.log("beforeRouteUpdate==>"+this.name);
},
beforeRouteLeave(to, from) {
// 在导航离开渲染该组件的对应路由时调用
// 与 `beforeRouteUpdate` 一样,它可以访问组件实例 `this`
console.log("路由离开组件之前");
console.log(to);
console.log(from);
console.log("beforeRouteLeave==>"+this.name);
},
}
</script>
App.vue
<script>
 export default{
  methods:{
    toUser(){
      this.$router.push({
        name:'user',
        params:{
          id:123456
        }
      })
    }
  }
 }
</script>
<template>
<div id="app">
  <h1>Hello App!</h1>
  <button @click="toUser">跳转到user页面</button>
  <router-link to="/">跳转到内容页面</router-link>
  <router-view></router-view>
</div>
</template>
<style>
</style>
Main.vue
<template>
    <h2>主内容</h2>
</template>
运行结果

路由懒加载
为什么用?
当打包构建应用时,JavaScript 包会变得非常大,影响页面加载。如果我们能把不同路由对应的组件分割成不同的代码块,然后当路由被访问的时候才加载对应组件,这样就会更加高效。
效果
component(和components) 配置接收一个返回 Promise 组件的函数,Vue Router 只会在第一次进入页面时才会获取这个函数,然后使用缓存数据。
代码演示
index.js
import { createRouter, createWebHistory } from 'vue-router'
// 1. 定义路由组件.
// 也可以从其他文件导入
// 静态导入
// import User from '../views/User.vue'
//动态导入 使用到再加载
const User= () => import('../views/User.vue')
// 2. 定义一些路由
// 每个路由都需要映射到一个组件。
const routes = [
  //动态路由
  {
    path: '/user/:id?',
    name: 'user',
    component: User,
  },
]

// 3. 创建路由实例并传递 `routes` 配置
const router = createRouter({
  // 4. 内部提供了 history 模式的实现。为了简单起见,我们在这里使用 HTML5 模式。
  history: createWebHistory(),
  routes, // `routes: routes` 的缩写
})
//5.将router导出
export default router
App.vue
<script>
 export default{
  methods:{
    toUser(){
      this.$router.push({
        name:'user',
        params:{
          id:123456
        }
      })
    }
  }
 }
</script>
<template>
<div id="app">
  <h1>Hello App!</h1>
  <button @click="toUser">跳转到user页面</button>
  <router-view></router-view>
</div>
</template>
<style>
</style>
User.vue
<template>
  <h2>用户页面</h2>
</template>
运行效果


 506
506


 被折叠的 条评论
为什么被折叠?
被折叠的 条评论
为什么被折叠?
 到【灌水乐园】发言


