


图片分类
一.配置环境
我们用的环境是win10+anaconda+pycharm
1.安装anaconda
2.安装完成后,创建适用于tensorflow的虚环境,在anaconda prompt中输入以下命令
  	添加映像
 - conda config --add channels https://mirrors.tuna.tsinghua.edu.cn/anaconda/pkgs/free/
 - conda config --set show_channel_urls yes
	创建虚环境(tensorflow不支持Python3.7,我们这里使用python3.5,将该环境命名为fi
 - conda create -n fi python=3.5
	启动虚环境
 - activate fi
	安装tensorflow
 - pip install --upgrade --ignore-installed tensorflow
3.测似是否安装成功
 - 在anaconda prompt中的fi虚环境里启动python(输入python)
 - 测试代码如下
 - import tensorflow as tf
 - hello = tf.constant('Hello, TensorFlow!')
 - sess = tf.Session()
 - print(sess.run(hello))

4.部署pycharm
- pycharm的安装过程不再详述,首先new project-pure python,创建一个python项目
- File-settings-project,将之前设置的虚环境地址配置到pycharm中

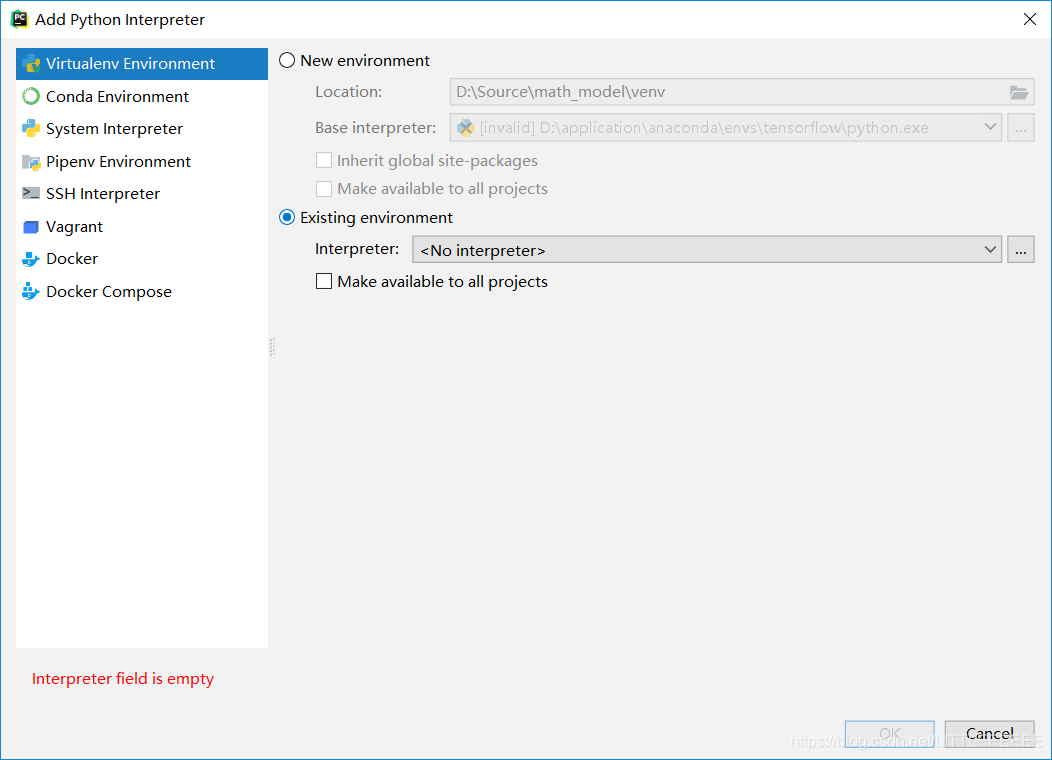
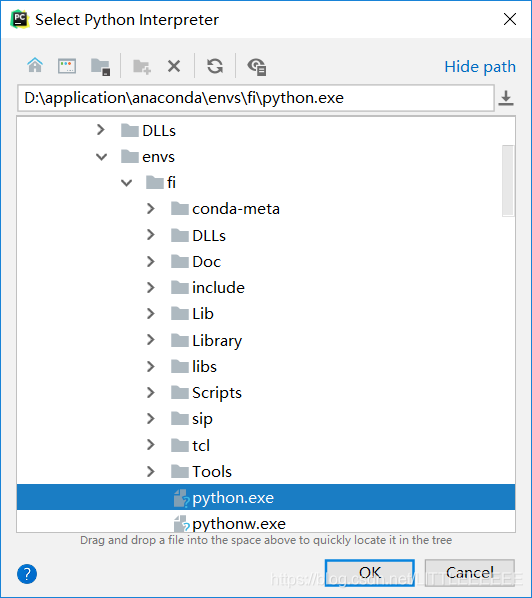
pycharm配置完成
二.项目:
项目要求是分析图片是否经过了颜色修改
数据集来自imagenet
input_data.py
#我们的图片文件夹中是原图片和经过颜色修改过后的图片混在一起,文件名可以区分,我们先把图片分别择出来,添加标签
import tensorflow as tf
import os
import numpy as np


def get_files(file_dir):
    fakes = []
    label_fakes = []
    trues = []
    label_trues = []
    for file in os.listdir(file_dir):
        name = file.split(sep='.')
        if 'rich' in name[0]:
            fakes.append(file_dir + file)
            label_fakes.append(0)
        else:
            trues.append(file_dir + file)
            label_trues.append(1)
        image_list = np.hstack((fakes, trues))
        label_list = np.hstack((label_fakes, label_trues))
    # print('There are %d cats\nThere are %d dogs' %(len(cats), len(dogs)))
    # 多个种类分别的时候需要把多个种类放在一起,打乱顺序,这里不需要

    # 把标签和图片都放倒一个 temp 中 然后打乱顺序,然后取出来
    temp = np.array([image_list, label_list])
    temp = temp.transpose()
    # 打乱顺序
    np.random.shuffle(temp)

    # 取出第一个元素作为 image 第二个元素作为 label
    image_list = list(temp[:, 0])
    label_list = list(temp[:, 1])
    label_list = [int(i) for i in label_list]
    return image_list, label_list


# 测试 get_files
#imgs , label = get_files('D://Source//math_model//train_path//add//')
#for i in imgs:
 #  print("img:",i)
#for i in label:
#	print('label:',i)
# 测试 get
最低0.47元/天 解锁文章


 2118
2118


 被折叠的 条评论
为什么被折叠?
被折叠的 条评论
为什么被折叠?
 到【灌水乐园】发言


