


这里我们以fashion-mnist数据集的图像为例。在附代码之前,我们先展现一下最终要达到的效果图。
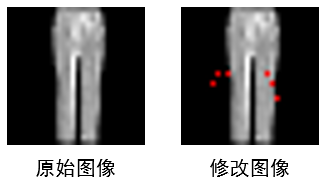
上图中,修改后图像有6个像素点被修改为了红色,修改的像素点的位置可有自己指定。接下来附上代码。
# -*- coding:utf-8 -*-
from PIL import Image
import numpy as np

img = Image.open(r"E:\new_life_202009\ImageConvertStudy\13.png")
img_rgb = img.convert("RGB")
img_array = np.array(img_rgb)
print(img_array.shape)
w = img.size[0]
h = img.size[1]
print(w)
print(h)
img2_array = []
#pos表示修改像素点的位置,嵌套列表中第一个数值表示行号,第二个数值表示列号
pos=[[15,18],[18,19],[13,17],[13,7],[13,9],[15,6]]
for i in range(0, h):
    for j in range(0, w):
        temp = [i,j]
        if temp in pos :
            img_array[i, j] = [255, 0, 0]
            #[255, 0, 0]为红色,[255, 255, 255]为白色,[0, 0, 0]为黑色等
            img2_array.append(img_array[i, j])
        else:
            img2_array.append(img_array[i, j])
img2_array = np.array(img2_array)
print(img2_array.shape)
img2_array = img2_array.reshape(28, 28,3)
img3 = Image.fromarray(img2_array)
img3.show()
img3.save(r"E:\new_life_202009\ImageConvertStudy\ss1.png")
该代码首先是将灰度图像(一通道)转为三通道图像,然后在需改指定位置上的像素值,从而改变颜色。


 6820
6820


 被折叠的 条评论
为什么被折叠?
被折叠的 条评论
为什么被折叠?
 到【灌水乐园】发言


