


119 Grabcut图像分割—背景替换
代码
import cv2 as cv
import numpy as np

src = cv.imread("../images/master.jpg");
background = cv.imread("../images/river.jpg")
h,w,_ = src.shape
src = cv.resize(src,(int(w * 0.8),int(h * 0.8)))
cv.imshow("input", src)
cv.imshow("background", background)

h, w, ch = src.shape
mask = np.zeros(src.shape[:2], dtype=np.uint8)
rect = (53,12,w-100,h-12)
bgdmodel = np.zeros((1,65),np.float64)
fgdmodel = np.zeros((1,65),np.float64)

cv.grabCut(src,mask,rect,bgdmodel,fgdmodel,5,mode=cv.GC_INIT_WITH_RECT)
mask2 = np.where((mask==1) + (mask==3), 255, 0).astype('uint8')
print(mask2.shape)

# 高斯模糊
se = cv.getStructuringElement(cv.MORPH_RECT, (3, 3))
cv.dilate(mask2, se, mask2)
mask2 = cv.GaussianBlur(mask2, (5, 5), 0)
cv.imshow('background-mask',mask2)

# 虚化背景
background = cv.GaussianBlur(background, (0, 0), 15)

# blend image
result = np.zeros((h, w, ch), dtype=np.uint8)
for row in range(h):
    for col in range(w):
        w1 = mask2[row, col] / 255.0
        b, g, r = src[row, col]
        b1,g1,r1 = background[row, col]
        b = (1.0-w1) * b1 + b * w1
        g = (1.0-w1) * g1 + g * w1
        r = (1.0-w1) * r1 + r * w1
        result[row, col] = (b, g, r)

cv.imshow("result", result)
cv.waitKey(0)
cv.destroyAllWindows()
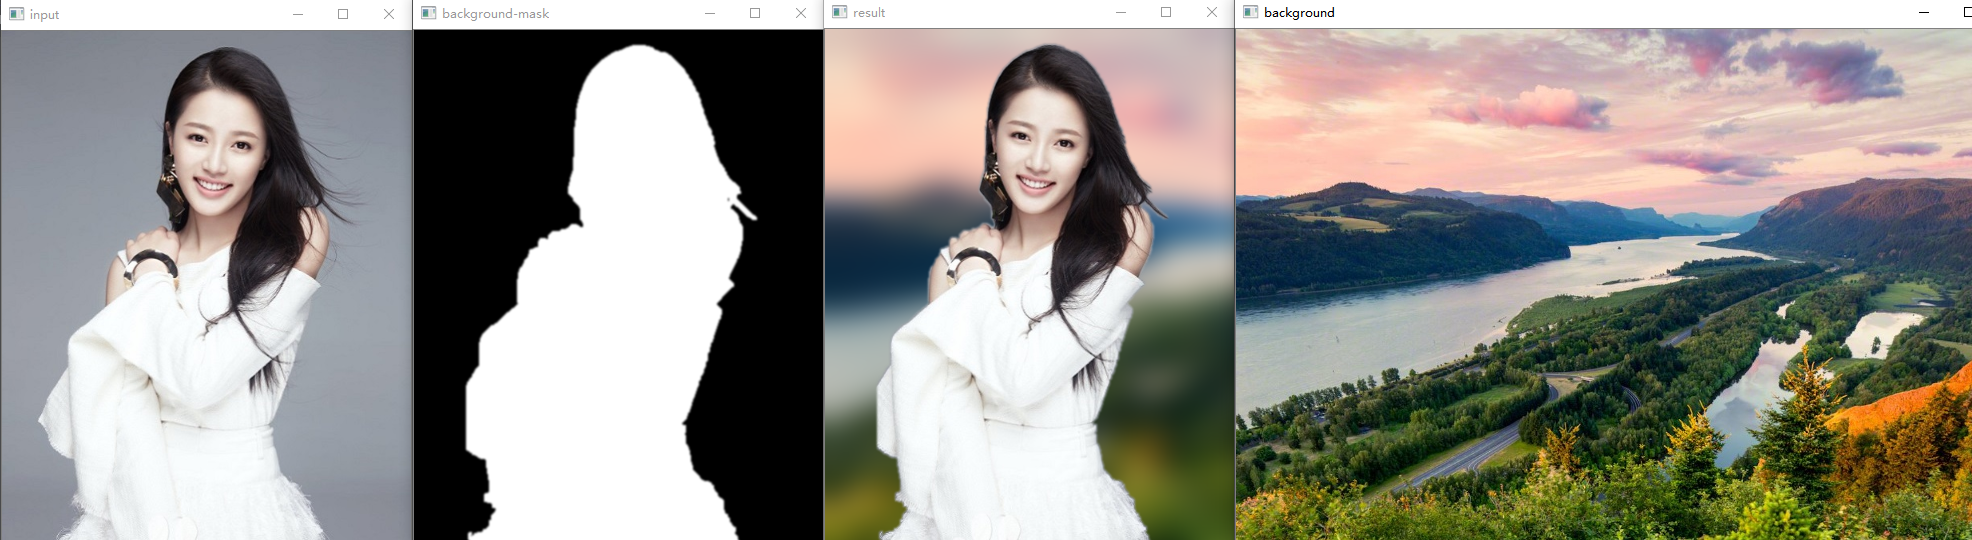
实验结果
解释
使用Grabcut实现图像对象提取,通过背景图像替换,实现图像合成,通过对背景图像高斯模糊实现背景虚化效果,完整的步骤如下:
- ROI区域选择
- Grabcut对象分割
- Mask生成
- 使用mask,实现背景与前景的高斯权重融合
所有内容均来源于贾志刚老师的知识星球——OpenCV研习社,本文为个人整理学习,已获得贾老师授权,有兴趣、有能力的可以加入贾老师的知识星球进行深入学习。


 1944
1944


 被折叠的 条评论
为什么被折叠?
被折叠的 条评论
为什么被折叠?
 到【灌水乐园】发言


