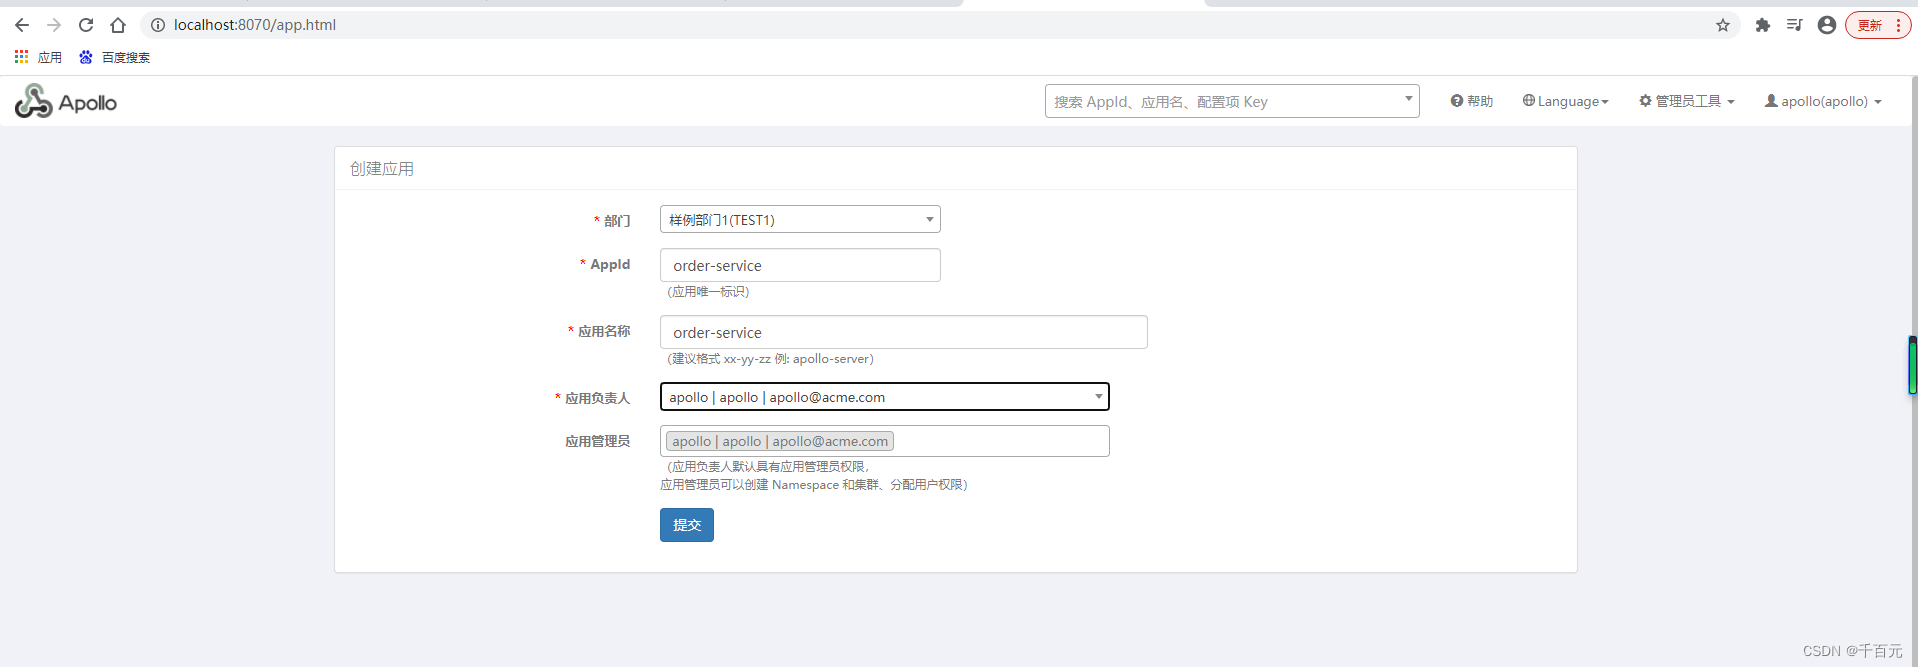
在apollo创建应用
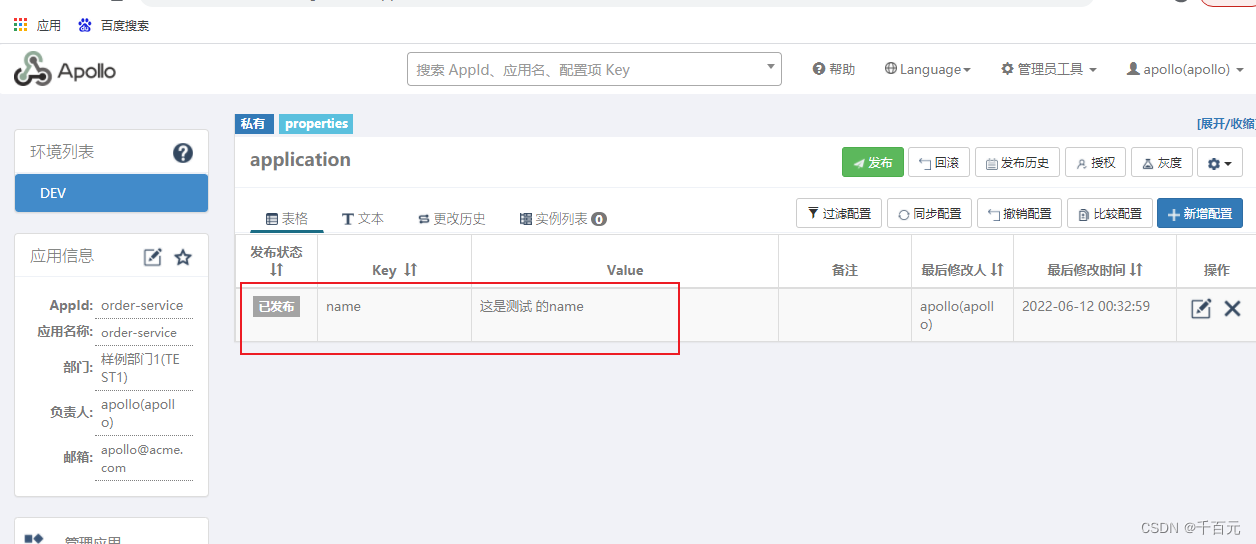
加一个配置
maven.xml
<!-- https://mvnrepository.com/artifact/com.ctrip.framework.apollo/apollo-client -->
<dependency>
    <groupId>com.ctrip.framework.apollo</groupId>
    <artifactId>apollo-client</artifactId>
    <version>2.0.0</version>
</dependency>
yaml配置
# apollo 相关配置

app:
  id: order-service # 与页面apollo 配置中心的 Appid一致

apollo:
  meta: http://localhost:8080 # Apollo中的Eureka注册中心地址
  #cluster:              #指定Apollo集群,相同集群实例使用对应集群的配置
  #cachDir:              #配置缓存目录, 网络不可用时任然可提供配置服务
  bootstrap:
    enabled: true  #启用apollo
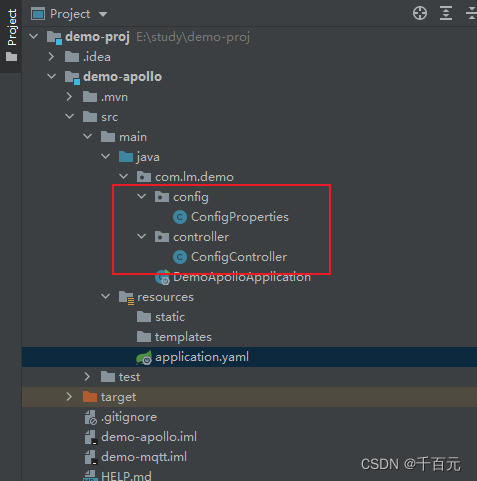
代码
启动类激活Apollo
@EnableApolloConfig
@SpringBootApplication
public class DemoApolloApplication {

    public static void main(String[] args) {
        SpringApplication.run(DemoApolloApplication.class, args);
    }


}
package com.lm.demo.config;


import lombok.AllArgsConstructor;
import lombok.Data;
import lombok.NoArgsConstructor;
import org.springframework.beans.factory.annotation.Value;
import org.springframework.stereotype.Component;

@Component
@Data
@NoArgsConstructor
@AllArgsConstructor
public class ConfigProperties {

    @Value("${name}")
    private String name;
}
package com.lm.demo.controller;

import com.lm.demo.config.ConfigProperties;
import org.springframework.beans.factory.annotation.Autowired;
import org.springframework.web.bind.annotation.GetMapping;
import org.springframework.web.bind.annotation.RestController;

@RestController
public class ConfigController {

    @Autowired
    private ConfigProperties configProperties;

    @GetMapping("/getName")
    public String getName(){

        return  configProperties.getName();
    }

}
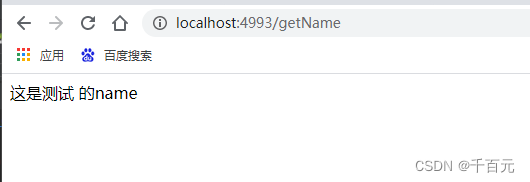
效果


 3696
3696


 被折叠的 条评论
为什么被折叠?
被折叠的 条评论
为什么被折叠?
 到【灌水乐园】发言


