


 本文介绍在Qt中如何将QtDesigner设计的UI文件与自定义的类进行关联,包括生成对应的头文件及源文件的过程。
在MFC中,新建了一个资源对话框后,只需要Ctrl+W后,可以生成与该对话框相关联的类。但是在VS2012+QT5的组合开发中,在添加了一个新的ui文件后,如何生成一个类与之对应呢?
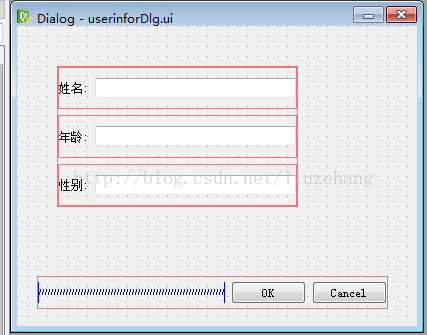
1,在Qt5中的QtDesigner中生成了一个基于QDialog或者QWidget的界面ui中,编译后,就出现了相应的一个ui_文件名.h的文件,以这userinforDlg.ui为例,简单介绍一下:在Qt Designer设计器下生成了这样的一个ui文件。
这个ui生成的头文件为ui_userinforDlg.h
/********************************************************************************
** Form generated from reading UI file 'userinforDlg.ui'
**
** Created by: Qt User Interface Compiler version 5.2.1
**
** WARNING! All changes made in this file will be lost when recompiling UI file!
********************************************************************************/
#ifndef UI_USERINFORDLG_H
#define UI_USERINFORDLG_H
#include <QtCore/QVariant>
#include <QtWidgets/QAction>
#include <QtWidgets/QApplication>
#include <QtWidgets/QButtonGroup>
#include <QtWidgets/QDialog>
#include <QtWidgets/QHBoxLayout>
#include <QtWidgets/QHeaderView>
#include <QtWidgets/QLabel>
#include <QtWidgets/QLineEdit>
#include <QtWidgets/QPushButton>
#include <QtWidgets/QSpacerItem>
#include <QtWidgets/QVBoxLayout>
#include <QtWidgets/QWidget>
QT_BEGIN_NAMESPACE
class Ui_UserInforDialog
{
public:
QWidget *layoutWidget;
QHBoxLayout *hboxLayout;
QSpacerItem *spacerItem;
QPushButton *okButton;
QPushButton *cancelButton;
QWidget *widget;
QVBoxLayout *verticalLayout;
QHBoxLayout *horizontalLayout;
QLabel *label;
QLineEdit *lineEditName;
QHBoxLayout *horizontalLayout_2;
QLabel *label_2;
QLineEdit *lineEditAge;
QHBoxLayout *horizontalLayout_3;
QLabel *label_3;
QLineEdit *lineEditSex;
void setupUi(QDialog *UserInforDialog)
{
if (UserInforDialog->objectName().isEmpty())
UserInforDialog->setObjectName(QStringLiteral("UserInforDialog"));
UserInforDialog->resize(400, 300);
layoutWidget = new QWidget(UserInforDialog);
layoutWidget->setObjectName(QStringLiteral("layoutWidget"));
layoutWidget->setGeometry(QRect(20, 250, 351, 33));
hboxLayout = new QHBoxLayout(layoutWidget);
hboxLayout->setSpacing(6);
hboxLayout->setObjectName(QStringLiteral("hboxLayout"));
hboxLayout->setContentsMargins(0, 0, 0, 0);
spacerItem = new QSpacerItem(131, 31, QSizePolicy::Expanding, QSizePolicy::Minimum);
hboxLayout->addItem(spacerItem);
okButton = new QPushButton(layoutWidget);
okButton->setObjectName(QStringLiteral("okButton"));
hboxLayout->addWidget(okButton);
cancelButton = new QPushButton(layoutWidget);
cancelButton->setObjectName(QStringLiteral("cancelButton"));
hboxLayout->addWidget(cancelButton);
widget = new QWidget(UserInforDialog);
widget->setObjectName(QStringLiteral("widget"));
widget->setGeometry(QRect(40, 40, 241, 141));
verticalLayout = new QVBoxLayout(widget);
verticalLayout->setObjectName(QStringLiteral("verticalLayout"));
verticalLayout->setContentsMargins(0, 0, 0, 0);
horizontalLayout = new QHBoxLayout();
horizontalLayout->setObjectName(QStringLiteral("horizontalLayout"));
label = new QLabel(widget);
label->setObjectName(QStringLiteral("label"));
horizontalLayout->addWidget(label);
lineEditName = new QLineEdit(widget);
lineEditName->setObjectName(QStringLiteral("lineEditName"));
horizontalLayout->addWidget(lineEditName);
verticalLayout->addLayout(horizontalLayout);
horizontalLayout_2 = new QHBoxLayout();
horizontalLayout_2->setObjectName(QStringLiteral("horizontalLayout_2"));
label_2 = new QLabel(widget);
label_2->setObjectName(QStringLiteral("label_2"));
horizontalLayout_2->addWidget(label_2);
lineEditAge = new QLineEdit(widget);
lineEditAge->setObjectName(QStringLiteral("lineEditAge"));
horizontalLayout_2->addWidget(lineEditAge);
verticalLayout->addLayout(horizontalLayout_2);
horizontalLayout_3 = new QHBoxLayout();
horizontalLayout_3->setObjectName(QStringLiteral("horizontalLayout_3"));
label_3 = new QLabel(widget);
label_3->setObjectName(QStringLiteral("label_3"));
horizontalLayout_3->addWidget(label_3);
lineEditSex = new QLineEdit(widget);
lineEditSex->setObjectName(QStringLiteral("lineEditSex"));
horizontalLayout_3->addWidget(lineEditSex);
verticalLayout->addLayout(horizontalLayout_3);
retranslateUi(UserInforDialog);
QObject::connect(okButton, SIGNAL(clicked()), UserInforDialog, SLOT(accept()));
QObject::connect(cancelButton, SIGNAL(clicked()), UserInforDialog, SLOT(reject()));
QMetaObject::connectSlotsByName(UserInforDialog);
} // setupUi
void retranslateUi(QDialog *UserInforDialog)
{
UserInforDialog->setWindowTitle(QApplication::translate("UserInforDialog", "Dialog", 0));
okButton->setText(QApplication::translate("UserInforDialog", "OK", 0));
cancelButton->setText(QApplication::translate("UserInforDialog", "Cancel", 0));
label->setText(QApplication::translate("UserInforDialog", "\345\247\223\345\220\215:", 0));
label_2->setText(QApplication::translate("UserInforDialog", "\345\271\264\351\276\204:", 0));
label_3->setText(QApplication::translate("UserInforDialog", "\346\200\247\345\210\253:", 0));
} // retranslateUi
};
namespace Ui {
class UserInforDialog: public Ui_UserInforDialog {};
} // namespace Ui
QT_END_NAMESPACE
#endif // UI_USERINFORDLG_H
其实这个头文件是Qt Designer自动生成的,我们在设计好了ui后,编译一下,这个文件就生成了。
2.我们需要手动添加一个类与这个ui关联。
#ifndef MYUSERINFORDLG_H
#define MYUSERINFORDLG_H
#include <QDialog>
#include "ui_userinforDlg.h"
namespace Ui
{
class UserInforDialog;
};
class MyUserInforDlg : public QDialog
{
Q_OBJECT
public:
MyUserInforDlg(QWidget *parent);
~MyUserInforDlg();
private:
Ui::UserInforDialog *ui;
};
#endif // MYUSERINFORDLG_H
以上是myuserinfordlg.h文件
#include "myuserinfordlg.h"
MyUserInforDlg::MyUserInforDlg(QWidget *parent)
: QDialog(parent), ui(new Ui::UserInforDialog)
{
ui->setupUi(this);
}
MyUserInforDlg::~MyUserInforDlg()
{
delete ui;
}
以上是myuserinfordlg.cpp文件
这样就把ui与类关联起来了。
当然以上的这个类可以使用继承。


 690
690

 被折叠的 条评论
为什么被折叠?
被折叠的 条评论
为什么被折叠?
 到【灌水乐园】发言


