


这篇文章介绍一下Angular的老牌UI组件库PrimeNG,并演示一下如何使引入PrimeNG到项目之中。
Why PrimeNG
使用PrimeNG有很多原因,比如
- 70多个完善的组件
- 开源
- 提高生产性
- 多种主题
- 高度可定制的模板
- 移动端用户体验的增强
PrimeNG网址
事前准备
安装node
详细可以参照:http://blog.csdn.net/liumiaocn/article/details/78510679
[root@angular ~]# npm -v
5.5.1
[root@angular ~]#
[root@angular ~]# node -v
v9.1.0
[root@angular ~]#
- 1
- 2
- 3
- 4
- 5
- 6
安装angular-cli
安装命令:npm install -g @angular/cli –unsafe-perm
[root@angular ~]# npm install -g @angular/cli --unsafe-perm
/usr/local/npm/node/bin/ng -> /usr/local/npm/node/lib/node_modules/@angular/cli/bin/ng

> node-sass@4.6.1 install /usr/local/npm/node/lib/node_modules/@angular/cli/node_modules/node-sass
> node scripts/install.js

Downloading binary from https://github.com/sass/node-sass/releases/download/v4.6.1/linux-x64-59_binding.node
Download complete  ] - :
Binary saved to /usr/local/npm/node/lib/node_modules/@angular/cli/node_modules/node-sass/vendor/linux-x64-59/binding.node
Caching binary to /root/.npm/node-sass/4.6.1/linux-x64-59_binding.node

> node-sass@4.6.1 postinstall /usr/local/npm/node/lib/node_modules/@angular/cli/node_modules/node-sass
> node scripts/build.js

Binary found at /usr/local/npm/node/lib/node_modules/@angular/cli/node_modules/node-sass/vendor/linux-x64-59/binding.node
Testing binary
Binary is fine
npm WARN optional SKIPPING OPTIONAL DEPENDENCY: fsevents@1.1.3 (node_modules/@angular/cli/node_modules/fsevents):
npm WARN notsup SKIPPING OPTIONAL DEPENDENCY: Unsupported platform for fsevents@1.1.3: wanted {"os":"darwin","arch":"any"} (current: {"os":"linux","arch":"x64"})

+ @angular/cli@1.5.0
added 148 packages and updated 1 package in 122.371s
[root@angular ~]#
- 1
- 2
- 3
- 4
- 5
- 6
- 7
- 8
- 9
- 10
- 11
- 12
- 13
- 14
- 15
- 16
- 17
- 18
- 19
- 20
- 21
- 22
- 23
设定link
[root@angular ~]# ln -s /usr/local/npm/node/lib/node_modules/@angular/cli/bin/ng /usr/local/bin/ng
[root@angular ~]# which ng
/usr/local/bin/ng
[root@angular ~]# ng version

    _                      _                 ____ _     ___
   / \   _ __   __ _ _   _| | __ _ _ __     / ___| |   |_ _|
  / △ \ | '_ \ / _` | | | | |/ _` | '__|   | |   | |    | |
 / ___ \| | | | (_| | |_| | | (_| | |      | |___| |___ | |
/_/   \_\_| |_|\__, |\__,_|_|\__,_|_|       \____|_____|___|
               |___/

Angular CLI: 1.5.0
Node: 9.1.0
OS: linux x64
Angular:
...
[root@angular ~]#
- 1
- 2
- 3
- 4
- 5
- 6
- 7
- 8
- 9
- 10
- 11
- 12
- 13
- 14
- 15
- 16
- 17
- 18
安装typescript
[root@angular ~]# npm install -g typescript
/usr/local/npm/node/bin/tsc -> /usr/local/npm/node/lib/node_modules/typescript/bin/tsc
/usr/local/npm/node/bin/tsserver -> /usr/local/npm/node/lib/node_modules/typescript/bin/tsserver
+ typescript@2.6.1
updated 1 package in 9.327s
[root@angular ~]#
- 1
- 2
- 3
- 4
- 5
- 6
创建cli项目骨架
[root@angular ~]# ng new PrimengProject
  create PrimengProject/README.md (1030 bytes)
  create PrimengProject/.angular-cli.json (1250 bytes)
  create PrimengProject/.editorconfig (245 bytes)
  create PrimengProject/.gitignore (516 bytes)
  create PrimengProject/src/assets/.gitkeep (0 bytes)
  create PrimengProject/src/environments/environment.prod.ts (51 bytes)
  create PrimengProject/src/environments/environment.ts (387 bytes)
  create PrimengProject/src/favicon.ico (5430 bytes)
  create PrimengProject/src/index.html (301 bytes)
  create PrimengProject/src/main.ts (370 bytes)
  create PrimengProject/src/polyfills.ts (2667 bytes)
  create PrimengProject/src/styles.css (80 bytes)
  create PrimengProject/src/test.ts (1085 bytes)
  create PrimengProject/src/tsconfig.app.json (211 bytes)
  create PrimengProject/src/tsconfig.spec.json (304 bytes)
  create PrimengProject/src/typings.d.ts (104 bytes)
  create PrimengProject/e2e/app.e2e-spec.ts (297 bytes)
  create PrimengProject/e2e/app.po.ts (208 bytes)
  create PrimengProject/e2e/tsconfig.e2e.json (235 bytes)
  create PrimengProject/karma.conf.js (923 bytes)
  create PrimengProject/package.json (1320 bytes)
  create PrimengProject/protractor.conf.js (722 bytes)
  create PrimengProject/tsconfig.json (363 bytes)
  create PrimengProject/tslint.json (2985 bytes)
  create PrimengProject/src/app/app.module.ts (316 bytes)
  create PrimengProject/src/app/app.component.css (0 bytes)
  create PrimengProject/src/app/app.component.html (1120 bytes)
  create PrimengProject/src/app/app.component.spec.ts (986 bytes)
  create PrimengProject/src/app/app.component.ts (207 bytes)
Installing packages for tooling via npm.
Installed packages for tooling via npm.
Project 'PrimengProject' successfully created.
[root@angular ~]#
- 1
- 2
- 3
- 4
- 5
- 6
- 7
- 8
- 9
- 10
- 11
- 12
- 13
- 14
- 15
- 16
- 17
- 18
- 19
- 20
- 21
- 22
- 23
- 24
- 25
- 26
- 27
- 28
- 29
- 30
- 31
- 32
- 33
- 34
确认结果
[root@angular ~]# cd PrimengProject/
[root@angular PrimengProject]# ng serve -H 0.0.0.0 --open
** NG Live Development Server is listening on 0.0.0.0:4200, open your browser on http://localhost:4200/ **
...
chunk {vendor} vendor.bundle.js (vendor) 7.02 MB [initial] [rendered]

webpack: Compiled successfully.
- 1
- 2
- 3
- 4
- 5
- 6
- 7
安装primeng
[root@angular PrimengProject]# npm install primeng --save-dev --unsafe-perm

> node-sass@4.6.1 install /root/PrimengProject/node_modules/node-sass
> node scripts/install.js

Cached binary found at /root/.npm/node-sass/4.6.1/linux-x64-59_binding.node

> node-sass@4.6.1 postinstall /root/PrimengProject/node_modules/node-sass
> node scripts/build.js

Binary found at /root/PrimengProject/node_modules/node-sass/vendor/linux-x64-59/binding.node
Testing binary
Binary is fine
npm WARN codelyzer@3.2.2 requires a peer of @angular/compiler@^2.3.1 || >=4.0.0-beta <5.0.0 but none is installed. You must install peer dependencies yourself.
npm WARN codelyzer@3.2.2 requires a peer of @angular/core@^2.3.1 || >=4.0.0-beta <5.0.0 but none is installed. You must install peer dependencies yourself.
npm WARN optional SKIPPING OPTIONAL DEPENDENCY: fsevents@1.1.3 (node_modules/fsevents):
npm WARN notsup SKIPPING OPTIONAL DEPENDENCY: Unsupported platform for fsevents@1.1.3: wanted {"os":"darwin","arch":"any"} (current: {"os":"linux","arch":"x64"})

+ primeng@5.0.0-rc.0
added 148 packages and updated 1 package in 61.238s
[root@angular PrimengProject]#
- 1
- 2
- 3
- 4
- 5
- 6
- 7
- 8
- 9
- 10
- 11
- 12
- 13
- 14
- 15
- 16
- 17
- 18
- 19
- 20
- 21
安装font-awesome
[root@angular PrimengProject]# npm install font-awesome
npm WARN codelyzer@3.2.2 requires a peer of @angular/compiler@^2.3.1 || >=4.0.0-beta <5.0.0 but none is installed. You must install peer dependencies yourself.
npm WARN codelyzer@3.2.2 requires a peer of @angular/core@^2.3.1 || >=4.0.0-beta <5.0.0 but none is installed. You must install peer dependencies yourself.
npm WARN optional SKIPPING OPTIONAL DEPENDENCY: fsevents@1.1.3 (node_modules/fsevents):
npm WARN notsup SKIPPING OPTIONAL DEPENDENCY: Unsupported platform for fsevents@1.1.3: wanted {"os":"darwin","arch":"any"} (current: {"os":"linux","arch":"x64"})

+ font-awesome@4.7.0
added 116 packages in 34.943s
[root@angular PrimengProject]#
- 1
- 2
- 3
- 4
- 5
- 6
- 7
- 8
- 9
设定.angular-cli.json
如下,设定font-awesome和primeng相关的css:
      "styles": [
        "styles.css",
        "../node_modules/primeng/resources/themes/omega/theme.css",
        "../node_modules/primeng/resources/primeng.min.css",
        "../node_modules/font-awesome/css/font-awesome.css"
      ],
- 1
- 2
- 3
- 4
- 5
- 6
修改HTML模板
修改app.component.html
[root@angular app]# cat app.component.html
<!--The content below is only a placeholder and can be replaced.-->
<div style="text-align:center">
  <h1>
    Welcome to {{title}}!
  </h1>
</div>

<h3 class="first">Addons</h3>
<div class="ui-g ui-fluid">
    <div class="ui-g-12 ui-md-4">
        <div class="ui-inputgroup">
            <span class="ui-inputgroup-addon"><i class="fa fa-user"></i></span>
            <input type="text" pInputText placeholder="Username">
        </div>
    </div>

    <div class="ui-g-12 ui-md-4">
        <div class="ui-inputgroup">
            <span class="ui-inputgroup-addon">$</span>
            <input type="text" pInputText placeholder="Price">
            <span class="ui-inputgroup-addon">.00</span>
        </div>
    </div>

    <div class="ui-g-12 ui-md-4">
        <div class="ui-inputgroup">
            <span class="ui-inputgroup-addon">www</span>
            <input type="text" pInputText placeholder="Website">
        </div>
    </div>
</div>

<h3>Multiple Addons</h3>
<div class="ui-g">
    <div class="ui-g-12">
        <div class="ui-inputgroup">
            <span class="ui-inputgroup-addon"><i class="fa fa-credit-card"></i></span>
            <span class="ui-inputgroup-addon"><i class="fa fa-cc-visa"></i></span>
            <input type="text" pInputText placeholder="Price">
            <span class="ui-inputgroup-addon">$</span>
            <span class="ui-inputgroup-addon">.00</span>
        </div>
    </div>
</div>

[root@angular app]#
- 1
- 2
- 3
- 4
- 5
- 6
- 7
- 8
- 9
- 10
- 11
- 12
- 13
- 14
- 15
- 16
- 17
- 18
- 19
- 20
- 21
- 22
- 23
- 24
- 25
- 26
- 27
- 28
- 29
- 30
- 31
- 32
- 33
- 34
- 35
- 36
- 37
- 38
- 39
- 40
- 41
- 42
- 43
- 44
- 45
- 46
- 47
结果确认
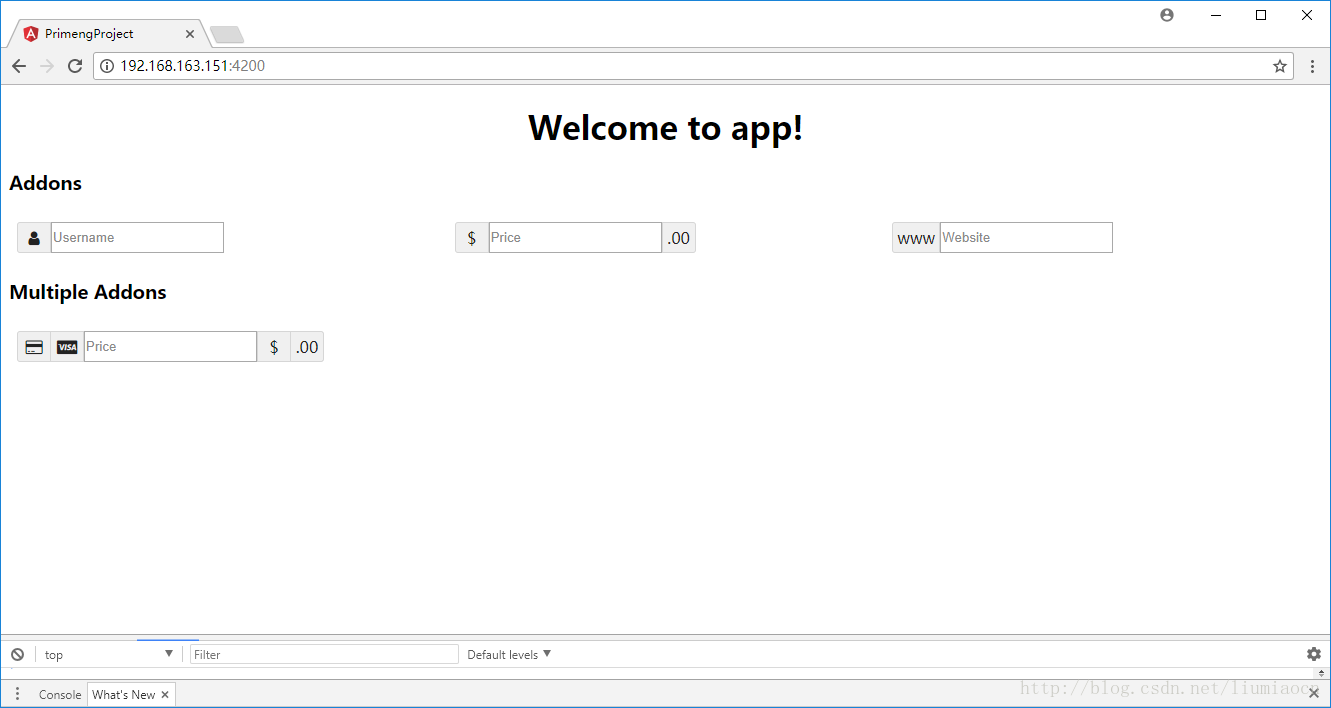
总结
这篇文章介绍了如何在项目中使用PrimeNG。


 3万+
3万+

 被折叠的 条评论
为什么被折叠?
被折叠的 条评论
为什么被折叠?
 到【灌水乐园】发言


