


接着上篇,如果要在子页面上加一个链接,链接到另一个页面。那么是怎么做呢?
新建页面
仿照“FirstPage”新建一个“SecondPage”:
<template>
  <h1>第二个页面</h1>
</template>

<script>
export default {
  name: "SecondPage"
}
</script>

<style scoped>
h1{
  color: blue;
}
</style>
添加路由
这里想的是在FirstPage上的链接过去的页面,所以姑且把他算作FirstPage的子页面,那么他的链接地址是:http://localhost:8080/FirstPage/SecondPage,地址是层层嵌套的,那么路由的配置就多了新的写法:
import Vue from 'vue'
import Router from 'vue-router'
import HelloWorld from '@/components/HelloWorld'
import FirstPage from '@/components/FirstPage'
import SecondPage from "@/components/SecondPage";
Vue.use(Router)

export default new Router({
    routes: [
        {
            path: '/',
            name: 'HelloWorld',
            component: HelloWorld,
        },
        {
            path: '/FirstPage',
            name: 'FirstPage',
            component: FirstPage,
            // 嵌套的路由,把他认为是children
            children: [
                {
                    path: 'SecondPage', //这里不要加/
                    name: 'SecondPage',
                    component: SecondPage,
                }
            ]
        }
    ]
})
这样写呢,嵌套结构的层次更清晰,他的实际访问地址是要加上他父亲的地址的,也就是“/FirstPage/SecondPage”。
添加链接
这个链接是添加到FirstPage的,所以就按照之前的代码,在FirstPage上添加就好了:
    <router-link to="/FirstPage/SecondPage">
      <span>
        显示第二个页面
      </span>
    </router-link>
这里注意to=“/FirstPage/SecondPage”,这里的地址依然要写成完整的,而不像router里可以嵌套。
好了,到这里就运行测试一下:

这里可以看到,点击之后,路径发生了变化,但是却没有把SecondPage的内容显示出来。看来嵌套的时候和普通的不太一样。查资料说是App.vue里的<router-view>只渲染根路径,那这种嵌套的就不渲染了。
继续尝试
尝试了一下,在FirstPage加了<router-view>,可以显示出来了:
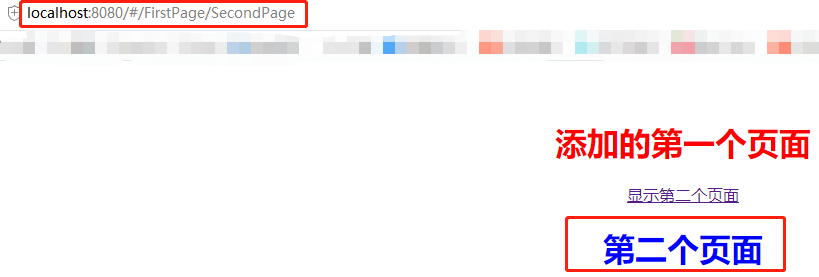
内容是显示出来了,但是不是我想要的效果,我是想他在一个干净的页面显示出来,而不是在FirstPage的后面添加。
基于上面只渲染根路径的页面的思路,我把SecondPage的路由拿出来,不再放在FirstPage下,让他与FirstPage平级,相应的将对应地方的路径给改成了/SecondPage,果然这样是能成功让第二个页面单独显示出来。
这样虽然实现了,但没达到我的目的,我想要的是secondPage是嵌套在FirstPage里面的。仔细想想App.vue里面是怎么实现的,App.vue里面就写了个<router-view>,他就默认把HelloWorld给显示出来了,因为HelloWorld的路径对应的是“/”根路径。那么我是不是也可以让FirstPage实现和App.vue一样的功能呢?于是我在components下新建一个FirstView.vue,代替原来FirstPage页面的内容:
<template>
  <div>
    <h1>添加的第一个页面</h1>
    <router-link to="/FirstPage/SecondPage">
      <span>
        显示第二个页面
      </span>
    </router-link>
  </div>
</template>

<script>
export default {
  name: "FirstView"
}
</script>

<style scoped>
h1{
  color: red;
}
</style>
这些内容原来是FirstPage的,现在搞了他的小弟来给他做这些事,那么FirstPage写如下内容即可:
<template>
  <div id="FirstPage">
    <router-view></router-view>
  </div>
</template>

<script>
export default {
  name: 'FirstPage'
}
</script>

<style scoped>
</style>
是不是跟App.vue很像,啥也不干,就写了个<router-view>,其实就是一样的,作为一个根界面,去渲染子页面。
重点在于router怎么写:
import Vue from 'vue'
import Router from 'vue-router'
import HelloWorld from '@/components/HelloWorld'
import FirstPage from '@/components/FirstPage'
import SecondPage from "@/components/SecondPage";
import FirstView from "@/components/FirstView"
Vue.use(Router)

export default new Router({
    mode: 'history',
    routes: [
        {
            path: '/',
            name: 'HelloWorld',
            component: HelloWorld,
        },
        {
            path: '/FirstPage',
            name: 'FirstPage',
            component: FirstPage,
            children:[
                {
                    path: '',  // path不写,直接空着
                    name: 'FirstView',
                    component: FirstView,
                },
                {
                    path: 'SecondPage',
                    name: 'SecondPage',
                    component: SecondPage,
                }
            ]
        }
    ]
})
看children,FirstView的path直接不写内容,或者就写一个“/”,这样路由的时候就会默认显示它,跟首页进去显示HelloWorld一个道理,而此时再去链接secondPage的时候就干干净净,不会有FirstPage的内容了。
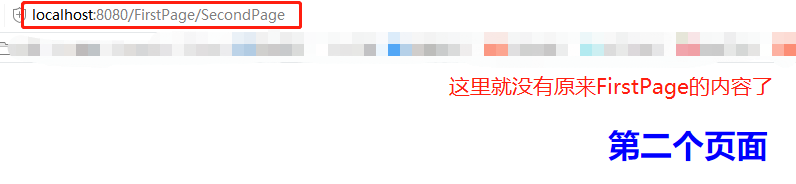
到此达到了目的。但是,从程序架构的角度考虑,这样设计是不合理的,既然secondPage作为FirstPage的子页面,路径也嵌套其中,显示的时候却毫无关系,这样设计没有意义。但是并不代表没有用,比如FirstPage的内容太多了,再显示secondPage就太多了,不利于阅读,而他们确实是父子关系,那么就可以这样实现。


 386
386


 被折叠的 条评论
为什么被折叠?
被折叠的 条评论
为什么被折叠?
 到【灌水乐园】发言


