


章节目录及知识点总览
6.1 Windows打包
将python程序编译成可以在windows上运行的.exe程序。
操作过程中踩过的坑:
1.书上使用的测试文件没找到(使用画板程序测试)
2.通过6.1.2(普通的情况)或6.1.3(有视频的情况)编译后,exe程序运行闪退(操作到最后成功解决)
6.1.1 打包条件
在打包为Windows平台可执行的EXE文件时,需要满足以下几个条件:
使用Windows环境
安装3.1版本以上的PyInstaller,命令为:”pip install pyinstaller“
目前支持的Kivy最高版本仅为1.9.1
6.1.2 打包方法
书上的这个包没找到!
为了演示此打包方式,我们将打包Kivy自带的位于kivy-examples包下的示例项目touchtracer,并嵌入自定义图标。
kivy-examples的安装位置默认为所使用的虚拟环境下的share文件夹,本示例位置为:“F:\pyproject\kv-demo-env\share\kivy_examples\demo\touchtracer”(该位置由官网提供,读者使用时可能会与作者的位置不同),运行该文件夹下的main.py文件即可成功查看该实例:
使用第三章最后一篇文章的python文件进行打包测试,代码自取:《Python+Kivy(App开发)从入门到实践》自学笔记:基本图形绘制——动手实践——画板——清屏_静候光阴的博客-CSDN博客
1.打包的基本方法
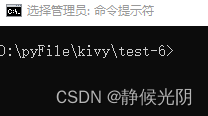
为了打包方便,可以先将该项目文件夹复制出来,随后再打开CMD命令窗口(确保Python命令可用),通过cd命令进入到需要打包项目的同级目录下(上述位置的demo目录),执行以下命令来打包EXE文件:
格式:python -m PyInstaller --name 输出文件名 源代码文件位置
即:
python -m PyInstaller --name painter painter/main.py
执行之前,painter文件夹中放置画板所需的main.py文件及painter.kv文件,与painter文件夹同目录的icon.ico文件

在此目录下执行上述命令:
执行后生成两个文件夹(build及dist)及.spec文件:

2.自定义图标的打包方法
需要给打包后的文件使用自定义图标,将icon.ico文件添加到应用程序文件夹中,以便为可执行文件创建图标。如果没有.ico文件,可以使用网络应用convertio文件转换器将icon.png文件转换为.ico文件,再将icon.ico保存在touchtracer目录中,然后执行以下命令进行打包:
格式:python - m PyInstaller --name 输出文件名 --icon ico格式图片名 源代码位置
即:
python -m PyInstaller --name touchtracer --icon icon.ico touchtracer/main.py
执行完毕,exe图标变成了icon.ico图标样式
更多打包EXE文件的选项,可以参阅官方提供的PyInstaller手册。
3.添加依赖项
执行完上述两条命令中的任何一条命令后,会看到生成了一个扩展名为.spec的配置文件,这时需要编辑spec文件以添加依赖项。使用编辑器打开spec配置文件,并在配置文件开头添加以下代码(假设使用了sdl2包,现在是默认设置):
from kivy_deps import sdl2,glew
4.添加目录数据
然后,找到COLLECT()方法并添加touchtracer目录的数据(touchtracer.kv,particle.png),在该行中添加一个Tree树对象,例如:Tree('touchtracer'),保证spec配置文件与main.py在同级目录中,此树将搜索当前目录下的touchtracer目录中的每个文件并添加到最终的包中。
如果要添加依赖项,请在COLLECT()方法中的第一个关键字参数之前为依赖项的每个路径添加一个Tree对象。例如:*[Tree(p) for p in (sdl2.dep_bins + glew.dep_bins)],最终代码如下:
至此,在生成的.spec源文件基础上,增加了
1.from kivy_deps import sdl2,glew
2.Tree('painter'),
3.*[Tree(p) for p in (sdl2.dep_bins + glew.dep_bins)],
# -*- mode: python ; coding: utf-8 -*-
from kivy_deps import sdl2,glew

block_cipher = None


a = Analysis(
    ['painter\\main.py'],
    pathex=[],
    binaries=[],
    datas=[],
    hiddenimports=[],
    hookspath=[],
    hooksconfig={},
    runtime_hooks=[],
    excludes=[],
    win_no_prefer_redirects=False,
    win_private_assemblies=False,
    cipher=block_cipher,
    noarchive=False,
)
pyz = PYZ(a.pure, a.zipped_data, cipher=block_cipher)

exe = EXE(
    pyz,
    a.scripts,
    [],
    exclude_binaries=True,
    name='painter',
    debug=False,
    bootloader_ignore_signals=False,
    strip=False,
    upx=True,
    console=True,
    disable_windowed_traceback=False,
    argv_emulation=False,
    target_arch=None,
    codesign_identity=None,
    entitlements_file=None,
    icon='icon.ico',
)
coll = COLLECT(
    exe,Tree('painter'),
    a.binaries,
    a.zipfiles,
    a.datas,
    *[Tree(p) for p in (sdl2.dep_bins + glew.dep_bins)],
    strip=False,
    upx=True,
    upx_exclude=[],
    name='painter',
)
现在使用以下命令打包一个EXE文件:
(其中需要重新覆盖掉dist文件夹内的数据,需要手动输入'y'确认操作):
python -m PyInstaller painter.spec
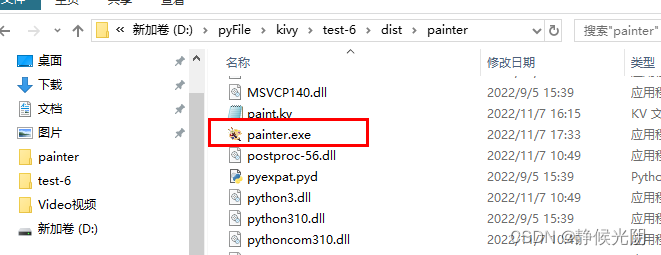
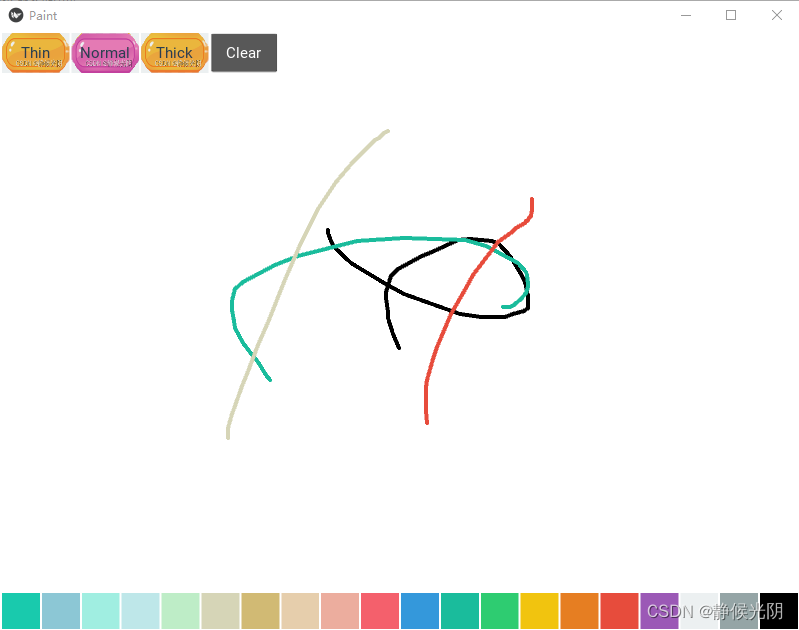
编译完成后的程序包位于\dist\painter中,将整个包复制出来,直接运行painter.exe文件,结果与通过Kivy直接运行的main.py文件一致:
6.1.3 添加依赖
在一般情况下,通过gstreamer框架来打包视频应用程序。将略微修改6.1.2小节实例中的打包方法,实现使用gstreamer将视频应用程序打包
实例:打包前添加依赖
使用高级UX部件——VideoPlayer视频播放示例文件打包,新建一个gstvideo文件夹,里面添加videoplayer.py(测试能够正常运行后再打包)。在CMD命令行窗口中通过cd命令进入到gstvideo外的目录并执行以下命令:
python -m PyInstaller --name gstvideo gstvideo\videoplayer.py
命令执行完成后会生成gstvideo.spec配置文件。编辑该配置文件,添加一个gstreamer依赖项,具体配置如下:
注意:添加gstreamer依赖提示import错误时,使用命令:pip install kivy_deps.gstreamer
至此,gstvideo.spec配置文件内添加内容包括了:
1.from kivy_deps import sdl2,glew,gstreamer
2.Tree('gstvideo'),
3. *[Tree(p) for p in (sdl2.dep_bins + glew.dep_bins + gstreamer.dep_bins)],
# -*- mode: python ; coding: utf-8 -*-
from kivy_deps import sdl2,glew,gstreamer

block_cipher = None

a = Analysis(
    ['gstvideo\\videoplayer.py'],
    pathex=[],
    binaries=[],
    datas=[],
    hiddenimports=[],
    hookspath=[],
    hooksconfig={},
    runtime_hooks=[],
    excludes=[],
    win_no_prefer_redirects=False,
    win_private_assemblies=False,
    cipher=block_cipher,
    noarchive=False,
)
pyz = PYZ(a.pure, a.zipped_data, cipher=block_cipher)

exe = EXE(
    pyz,
    a.scripts,
    [],
    exclude_binaries=True,
    name='gstvideo',
    debug=False,
    bootloader_ignore_signals=False,
    strip=False,
    upx=True,
    console=True,
    disable_windowed_traceback=False,
    argv_emulation=False,
    target_arch=None,
    codesign_identity=None,
    entitlements_file=None,
)
coll = COLLECT(
    exe,Tree('gstvideo'),
    a.binaries,
    a.zipfiles,
    a.datas,
    *[Tree(p) for p in (sdl2.dep_bins + glew.dep_bins + gstreamer.dep_bins)],
    strip=False,
    upx=True,
    upx_exclude=[],
    name='gstvideo',
)
编辑完成.spec配置文件后,使用以下命令打包该项目:(过程中提示是否覆盖dist文件加内数据,选'Y')
python -m PyInstaller gstvideo.spec
编译后,位于dist\gstvideo\gstvideo.exe,可以正常执行,效果跟.py文件执行效果一致,具体如下图: 
注意:由于Kivy的#1638BUG尚未解决,那么如果使用了Pygame包,则必须在spec配置文件中导入后,再添加以下代码:【未验证】
def getResource(identtifer,*args,**kwargs):
    if identifier == 'Pygame_icon.tiff':
        raise IOError()
    return _original_getResource(identifier,*args,**kwargs)

import pygame.pkgdata

_original_getRecource = pygame.pkgdata.getResource
pygame.pkgdata.getResource = getResource
6.1.4 自定义安装
在使用PyInstalle模块打包时,除了安装所需的依赖外,默认情况下还会添加Kivy使用的所有核心模块,例如音频、视频、拼写等。此时打包出来的应用程序时非常大的,为了减小应用程序大小,可以排除其中的一部分模块,例如音频、视频等,所以Kivy提供了hookspath()方法。
在使用hookspath()方法时,不会包含任何Kivy提供的程序,如果要添加它们,必须使用get_deps_minimal()或者get_deps_all()方法。但实际上,get_deps_all()方法同使用默认的方法一样,会添加所有Kivy提供的程序,而get_deps_minmal()方法仅添加在运行应用时加载的程序。但无论使用哪种方法,Kivy都提供了添加(即需要打包进来的)的列表和排除的列表,一般会在spec文件的Analysis包中配置。
实例:设置打包自定义安装
复制6.1.3小节的项目,并生成spec配置文件,将实例中的代码修改成如下所示:
1.添加from kivy.tools.packaging.pyinstaller_hooks import get_deps_minimal,get_deps_all,hookspath,runtime_hooks
2.将hookspath=[]改为hookspath=hookspath()
# -*- mode: python ; coding: utf-8 -*-
from kivy_deps import sdl2,glew,gstreamer
from kivy.tools.packaging.pyinstaller_hooks import get_deps_minimal,get_deps_all,hookspath,runtime_hooks

block_cipher = None


a = Analysis(
    ['gstvideo\\videoplayer.py'],
    pathex=[],
    binaries=[],
    datas=[],
    hiddenimports=[],
    hookspath=hookspath(),
    hooksconfig={},
    runtime_hooks=[],
    excludes=[],
    win_no_prefer_redirects=False,
    win_private_assemblies=False,
    cipher=block_cipher,
    noarchive=False,
)
pyz = PYZ(a.pure, a.zipped_data, cipher=block_cipher)

exe = EXE(
    pyz,
    a.scripts,
    [],
    exclude_binaries=True,
    name='gstvideo',
    debug=False,
    bootloader_ignore_signals=False,
    strip=False,
    upx=True,
    console=True,
    disable_windowed_traceback=False,
    argv_emulation=False,
    target_arch=None,
    codesign_identity=None,
    entitlements_file=None,
)
coll = COLLECT(
    exe,Tree('gstvideo'),
    a.binaries,
    a.zipfiles,
    a.datas,
    *[Tree(p) for p in (sdl2.dep_bins + glew.dep_bins + gstreamer.dep_bins)],
    strip=False,
    upx=True,
    upx_exclude=[],
    name='gstvideo',
)
在spec配置文件中依然添加导入语句,再修改Analysis包,并使用**get_dep_minimal()或**get_deps_all()方法制定添加或排除的程序包。
下一篇:OS X 打包


 2096
2096


 被折叠的 条评论
为什么被折叠?
被折叠的 条评论
为什么被折叠?
 到【灌水乐园】发言


