


目录
准备
我们需要下载nodejs
下载完毕后,在vscode的集成终端环境下下载vue-cli
npm install -g vue-cli (-g是在全局下载,这样只用下载一次)
我们可以用 npm root -g查看下载的文件在哪个位置
下载完成后,输入以下命令,开始创建工程
vue init webpack work
创建完成
启动项目
npm run dev
打开http://localhost:8080地址
显示此页面则成功


创建项目的文件

重要的文件介绍
1.main.js:表示入口文件
2.App.vue:表示根组件,在脚手架中,以.vue结尾的都是组件
<template>
  <!-- 书写html代码 -->

</template>

<script>
//书写js代码

}
</script>

<style>
/* 书写css代码 */

}
</style>
3.index.html:不用修改
4.config文件夹中index.js文件
作用
1.配置前端ip地址
2.配置前端端口号
3.配置是否自动打开浏览器
4.配置访问后端的地址
修改dev中autoOpenBrowser的值为true,这样启动项目时,页面自动加载出来


.vue组件文件说明
<template>
书写html标签,只能写一个跟标签<div></div>
</template><script>
//书写js代码}
</script><style>
/* 书写css代码 */}
</style>
测试
<template>
  <!-- 书写html代码 -->
  <div id="app">
    <!-- 脚手架logo照片 -->
    <!-- <img src="./assets/logo.png"> -->
    <!-- 组件输出位置,欢迎页面输出的文字 -->
    <!-- <router-view/> -->
    <h1>{{msg}}</h1>
  </div>
</template>

<script>
//书写js代码
export default {
  // name: 'App'
  data(){
    return{
      msg:"vue脚手架"
    }
  }
}
</script>

<style>
/* 书写css代码 */
/* #app {
  font-family: 'Avenir', Helvetica, Arial, sans-serif;
  -webkit-font-smoothing: antialiased;
  -moz-osx-font-smoothing: grayscale;
  text-align: center;
  color: #2c3e50;
  margin-top: 60px; */
/* } */
</style>

路由
概念:访问路径和组件的映射关系


刚开始访问浏览器时是"#/",而"/"在router路由中存在,接着就会去访问path为"/"的component.

练习
我们在App.vue中书写代码
<template>
  <!-- 书写html代码 -->
  <div id="app">
    <!--脚手架logo照片 -->
    <img src="./assets/logo.png">

    <!-- 访问vue -->
    <a href="#/">访问vue</a>
    <a href="#/friend">访问朋友</a>
    <!-- 组件输出位置,欢迎页面输出的文字 -->
     <router-view/>
    <!-- <h1>{{msg}}</h1> -->
  </div>
</template>

<script>
//书写js代码
export default {
  // name: 'App'
  // data(){
  //   return{
  //     msg:"vue脚手架"
  //   }
  // }
}
</script>

<style>
/* 书写css代码 */
#app {
  font-family: 'Avenir', Helvetica, Arial, sans-serif;
  -webkit-font-smoothing: antialiased;
  -moz-osx-font-smoothing: grayscale;
  text-align: center;
  color: #2c3e50;
  margin-top: 60px;
 }
</style>
页面
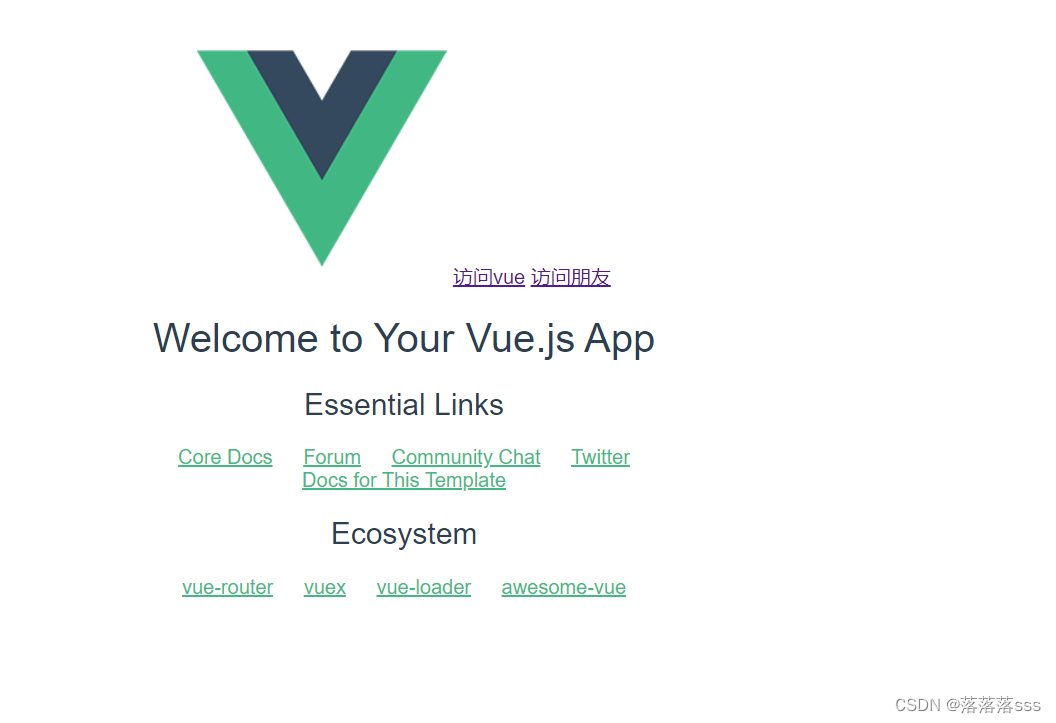
我们点击访问朋友


可以看到地址变成了#/friend,但是当前页面没有内容,所以我们可以到router路由中先配置该路径
import Vue from 'vue'
import Router from 'vue-router'
import HelloWorld from '@/components/HelloWorld'
//@表示src目录
import friend from '@/views/friend'

Vue.use(Router)

export default new Router({
  routes: [
    {
      path: '/',
      name: 'HelloWorld',
      component: HelloWorld
    },
    {
      path:'/friend',  配置/friend地址
      name:'hhh',
      component:friend
    }
  ]
})

然后在src目录下创建views文件夹
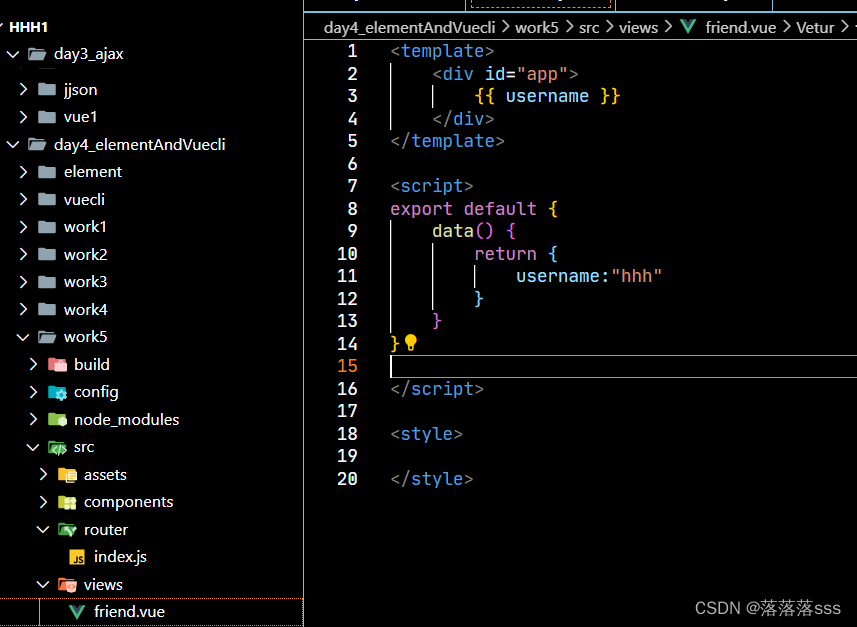
然后在views创建friend.vue文件
<template>
    <div id="app">
        {{ username }}
    </div>
</template>

<script>
export default {
    data() {
        return {
            username:"hhh"
        }
    }
}

</script>

<style>

</style>
结果

总结
1.在根组件App.vue中添加超链接
2.在路由中配置访问的路径和组件的关系
3.编写组件内容
导入Element
在继承终端环境下执行命令
npm i element-ui -S
在package.json中

然后再main.js入口文件中
import Vue from 'vue';
import ElementUI from 'element-ui';
import 'element-ui/lib/theme-chalk/index.css';
import App from './App.vue';

//让vue对象使用Element
Vue.use(ElementUI);

new Vue({
  el: '#app',
  render: h => h(App)
});


 3万+
3万+


 被折叠的 条评论
为什么被折叠?
被折叠的 条评论
为什么被折叠?
 到【灌水乐园】发言


