


0.前言
自去年开始做车载环视项目至今,接触和使用OpenGL已经一年多了。项目中个人更多参与的是环视中算法模块的开发(参数标定、图像校正与拼接、颜色校正、车体透明等),对OpenGL工作环境的创建没有仔细梳理学习,自觉不应如此。现在开始仔细梳理下相关的知识并记录为博客加深理解,so莱茨狗!
1.OpenGL介绍
官网:https://www.khronos.org/opengl/wiki/Main_Page,全称Open Graphics Library,用于渲染2D、3D矢量图形的跨语言、跨平台的应用程序编程接口。注意这里OpenGL只是一众厂商经过商讨指定的统一规范接口,但在不同平台不同硬件上的具体实现由厂商自己负责。这有利有弊,好处是统一了编程规范;坏处就是因为硬件繁杂且OpenGL规范还在不断迭代,一些硬件并不能完全支持所有接口,或者一些硬件比较领先超前支持了一些扩展接口,而这些相对“细微”的差异往往会导致相同的程序在不同平台上运行效率乃至结果的巨大差异,这一点在环视项目中深有体会。
2.OpenGL起步
主页:https://www.khronos.org/opengl/wiki/Getting_Started
之所以把这部分拎出来,是因为之前在入门OpenGL时,教程一上来就给了可运行的工程,未做太多相关讲解。什么freeglut、glew,这和opengl有什么关系?这个问题随着之后的学习被抛之脑外,实际上这是OpenGL运行环境搭建中的组成部分。
官网中这样描述OpenGL应用程序的搭建
Writing an OpenGL Application
The first step is to pick your language. Bindings for OpenGL exist in many languages, from C# and Java to Python and Lua. Some languages have multiple sets of OpenGL bindings, none of them being official. All of them are ultimately based on the C/C++ bindings.
If you are not using C/C++, you must download and install a package or library for your chosen language that includes the OpenGL bindings. Some come pre-installed, but others have separate downloads.
If you are using C/C++, then you must first set up a build environment (Visual Studio project, GNU makefile, CMake file, etc) that can link to OpenGL. Under Windows, you need to statically link to a library called OpenGL32.lib (note that you still link to OpenGL32.lib if you're building a 64-bit executable. The "32" part is meaningless). Visual Studio, and most Windows compilers, come with this library.
On Linux, you need to link to libGL. This is done with a command-line parameter of "-lGL".
Initialization
Before you can actually use OpenGL in a program, you must first initialize it. Because OpenGL is platform-independent, there is not a standard way to initialize OpenGL; each platform handles it differently. Non-C/C++ language bindings can also handle these differently.
There are two phases of OpenGL initialization. The first phase is the creation of an OpenGL Context; the second phase is to load all of the necessary functions to use OpenGL. Some non-C/C++ language bindings merge these into one.
OpenGL Context Creation
An OpenGL context represents all of OpenGL. Creating one is very platform-specific, as well as language-binding specific.
If you are using the C/C++ language binding for OpenGL, then you are strongly advised to use a window toolkit for managing this task. These libraries create a window, attach an OpenGL context to this window, and manage basic input for that window. Once you are comfortable with OpenGL, you can then start learning how to do this manually.
Most non-C/C++ language bindings will provide you with a language-specific mechanism for creating a context.
Getting Functions
If you are using a non-C/C++ language binding, then the maintainer of that binding will already handle this as part of context creation. If you are using C/C++, read on.
In order to use OpenGL, you must get OpenGL API functions. For most libraries you are familiar with, you simply #include a header file, make sure a library is linked into your project or makefile, and it all works. OpenGL doesn't work that way.
For reasons that are ultimately irrelevant to this discussion, you must manually load functions via a platform-specific API call. This boilerplate work is done with various OpenGL loading libraries; these make this process smooth. You are strongly advised to use one.
If you want to do it manually however, there is a guide as to how to load functions manually. You still should use an extension loader.
自己的开发环境是Windows,开发语言是C++,从上述描述中抠出如下几点重要信息:
1)无论使用x64/x86编译选项,都需要链接opengl32.lib
2)需要搭建OpenGL的运行环境后才能真正使用OpenGL(废话),OpenGL的库是平台相关的,因此没有标准的搭建方法。搭建流程中分为两阶段,第一阶段是创建OpenGL上下文,第二阶段是加载指定平台上可用的函数。
3)对于第一阶段,其操作与平台相关,譬如窗口的创建、事件的响应等,可以自己实现,但流程繁琐且难以移植;官网推荐使用开发工具包实现,包括glut、freeglut、glfw等等
4)对于第二阶段,则更为复杂,因为不同平台支持的规范版本、接口都有差异。OpenGL推荐使用加载库工具实现,包括glew、glad等等
怪不得之前的教程一上来就先把freeglut、glew包含进去。。。
3.OpenGL工具包
接下来简要介绍下自己接触到的OpenGL工具包。
1)glut
主页:https://www.opengl.org/resources/libraries/glut/glut_downloads.php#3.6
虽然OpenGL可以实现跨平台的渲染,但程序运行时需要为其创建工作环境,我们需要创建窗口、响应输入事件(鼠标、键盘),这部分操作需要调用运行平台提供的接口实现,OpenGL并不关注。为了避免这带来的学习成本,GLUT出现了。
GLUT是Mark Kilgard为第二版OpenGL红宝书中的例程编写的实用工具库,它的目的是为了方便学习者学习OpenGL,因此致力于处理与系统相关的繁杂操作,包括创建窗口,初始化OpenGL上下文,处理输入事件等;它是跨平台且可移植的,最新版本是1998年8月份的3.7版本。。
2)freeglut
主页:http://freeglut.sourceforge.net/
freeglut是免费开源的GLUT替代者,因为GLUT似乎已经放弃更新和license原因,freeglut出现了。freeglut基本上兼容了glut的接口,且增加了一些新的特性,包括鼠标滚轮事件处理,多触摸输入,和更多的平台支持。自己目前在Windows平台上运行OpenGL例程时使用了这个库。
freeglut在windows上的编译参考https://blog.csdn.net/yapingxin/article/details/51678279,我使用了V3.2.1;有一点需要注意的是如果想使用编译得到的静态库,需要在包含freeglut.h之前加入FREEGLUT_STATIC的宏定义
3)glfw
主页:https://www.glfw.org/index.html
一些OpenGL例程中偶尔会看到这个工具库,简单了解了下。其功能类似于freeglut,glut因为太老被freeglut替代,不过据说freeglut中bug比较多且稳定性不好?GLFW应运而生。个人没有使用过,不做评价。
4)glew
主页:http://glew.sourceforge.net/
Windows中加入了对OpenGL的支持,但是只支持OpenGL1.1版本,包括头文件gl.h、glu.h,库文件opengl32.lib和opengl32.dll;这里个人理解为库中支持的OpenGL版本高于头文件定义的版本,但是由于头文件中未加入相关接口定义,因此应用程序中无法使用。想要使用更高版本接口,需要从库中判断接口是否存在并找到接口地址,glew就是做这个事。
官网上可以直接下载得到Windows平台上使用的头文件和库文件。
4.工程搭建
1)引入freeglut
假若我们使用OpenGL1.1版本搭建工程,一般需要加入对OpenGL库和头文件的引用;为方便开发我们加入freeglut的使用,第一个OpenGL固定管道渲染程序出炉了。。。
#define FREEGLUT_STATIC
#include <GL/freeglut.h>

void Initialization()
{
	glClearColor(1.0f, 1.0f, 1.0f, 1.0f);

	GLfloat lightSpecular[] = { 1.0, 1.0, 1.0, 1.0 };
	GLfloat lightPosition[] = { 0.5, 0.5, 4.0, 0.0 };

	glBlendFunc(GL_SRC_ALPHA, GL_ONE_MINUS_SRC_ALPHA); //指定混合函数
	glShadeModel(GL_SMOOTH);

	glMaterialfv(GL_FRONT, GL_SPECULAR, lightSpecular);
	glMaterialf(GL_FRONT, GL_SHININESS, 100.0);
	glLightfv(GL_LIGHT0, GL_POSITION, lightPosition);

	glEnable(GL_BLEND);        //启用混合状态
	glEnable(GL_LIGHTING);        //启用光照
	glEnable(GL_LIGHT0);        //打开光源0
	glEnable(GL_DEPTH_TEST);    //启用深度检测
	glEnable(GL_COLOR_MATERIAL);//材质跟踪当前绘图色

}

void OnDisplay(void)
{
	glClear(GL_COLOR_BUFFER_BIT | GL_DEPTH_BUFFER_BIT);  //双缓冲机制

	glMatrixMode(GL_MODELVIEW);
	glLoadIdentity();

	glPushMatrix();   //装载
	{
		glTranslatef(0.0f, 0.0f, -3.0f);
		glColor4f(1.0f, 0.0f, 0.0f, 1.0f);
		glutSolidTorus(1.0f, 2.0f, 30.0f, 30.0f);//绘制圆环
	}
	glPopMatrix();  //装出


	glPushMatrix();
	{
		glTranslatef(1.0f, 1.0f, 3.0f);
		glColor4f(0.0f, 1.0f, 0.0f, 0.5);
		glutSolidSphere(2.0f, 30.0f, 30.0f);//绘制球体
	}
	glPopMatrix();

	glPushMatrix();
	glTranslatef(-1, -1, 4);
	glColor4f(0.0f, 0.0f, 1.0f, 0.5);
	glBegin(GL_QUADS);  //绘制四边形
	glVertex3f(0, 0, 0);
	glVertex3f(5, 0, 0);
	glVertex3f(5, 5, 0);
	glVertex3f(0, 5, 0);
	glEnd();
	glPopMatrix();

	glPushMatrix();
	glColor4f(0.0f, 1.0f, 1.0f, 0.5);
	glTranslatef(-1, -1, 5);
	glRotatef(60, 0, 0, 1);
	glBegin(GL_QUADS);
	glVertex3f(0, 0, 0);
	glVertex3f(5, 0, 0);
	glVertex3f(5, 5, 0);
	glVertex3f(0, 5, 0);
	glEnd();
	glPopMatrix();

	glutSwapBuffers();
}

void OnReShape(int w, int h)
{
	glViewport(0, 0, w, h);

	glMatrixMode(GL_PROJECTION); //将当前矩阵指定为投影模式
	glLoadIdentity();

	if (h != 0)
	{
		GLfloat aspect = GLfloat(w) / GLfloat(h);

		if (w < h)
		{
			glOrtho(-6.0f, 6.0f, -6.0f * aspect, 6.0f * aspect, -6.0f, 6.0f);//三维正交投影
		}
		else
		{
			glOrtho(-6.0f / aspect, 6.0f / aspect, -6.0f, 6.0f, -6.0f, 6.0f);
		}
	}
	glMatrixMode(GL_MODELVIEW);
}


void main(int argc, char* argv[])
{
	glutInit(&argc, argv);
	glutInitDisplayMode(GLUT_DOUBLE | GLUT_RGB | GLUT_DEPTH);
	glutInitWindowSize(600, 480);
	glutCreateWindow("OpenGL透明");

	glutReshapeFunc(OnReShape);
	glutDisplayFunc(OnDisplay);

	Initialization();
	glutMainLoop();  //主程序循环
}
渲染结果如下图所示。
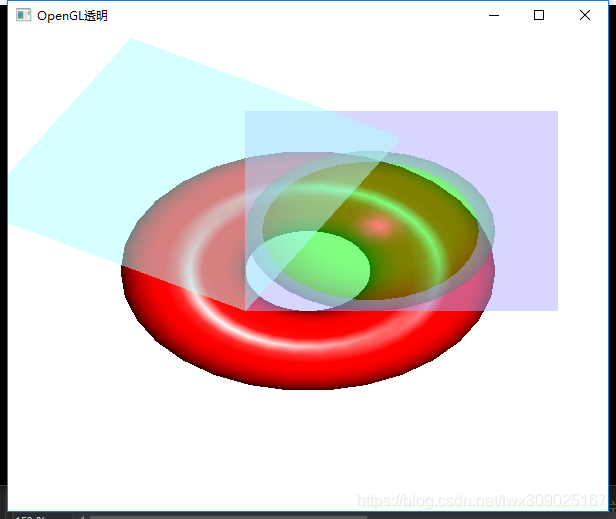
注意:1)程序中只调用了OpenGL1.1支持的接口,所以并未引入glew/glad;2)程序中并未包含gl.h,工程设置中也未引入opengl32.lib,工程中虽然指定了freeglut库路径,但并未设置附加库名称freeglut.lib或freeglut_static.lib,但是程序却能正常运行,why?通过查看freeglut_std.h发现,头文件中包含了gl.h和glu.h,且通过pragma comment引入了Windows系统中包含的OpenGL库文件,和freeglut库文件;3)由于引入了freeglut.h,程序中不能再包含gl.h/glu.h,否则编译报错。
#   if FREEGLUT_LIB_PRAGMAS
#       pragma comment (lib, "glu32.lib")    /* link OpenGL Utility lib     */
#       pragma comment (lib, "opengl32.lib") /* link Microsoft OpenGL lib   */
#       pragma comment (lib, "gdi32.lib")    /* link Windows GDI lib        */
#       pragma comment (lib, "winmm.lib")    /* link Windows MultiMedia lib */
#       pragma comment (lib, "user32.lib")   /* link Windows user lib       */
#   endif


/* Windows static library */
#   ifdef FREEGLUT_STATIC

#       define FGAPI
#       define FGAPIENTRY

        /* Link with Win32 static freeglut lib */
#       if FREEGLUT_LIB_PRAGMAS
#           ifdef NDEBUG
#              pragma comment (lib, "freeglut_static.lib")
#           else
#              pragma comment (lib, "freeglut_staticd.lib")
#           endif
#       endif

/* Windows shared library (DLL) */
#   else

#       define FGAPIENTRY __stdcall
#       if defined(FREEGLUT_EXPORTS)
#           define FGAPI __declspec(dllexport)
#       else
#           define FGAPI __declspec(dllimport)

            /* Link with Win32 shared freeglut lib */
#           if FREEGLUT_LIB_PRAGMAS
#               ifdef NDEBUG
#                   pragma comment (lib, "freeglut.lib")
#               else
#                   pragma comment (lib, "freeglutd.lib")
#               endif
#           endif

#       endif

#   endif
隐藏的够深。
2)引入glew
既然需要用到可编程管道渲染,必须使用更高版本的OpenGL接口函数,Windows中的gl.h/glu.h无法支持,顺势引入glew工具库。代码如下,注意其中为了使用glew的静态库,在包含glew.h之前加入了GLEW_STATIC的宏定义
#include <stdio.h>
#define GLEW_STATIC
#include <GL/glew.h>
#define FREEGLUT_STATIC
#include <GL/freeglut.h>

GLuint VBO;

static void RenderSceneCB()
{
	glClear(GL_COLOR_BUFFER_BIT);

	glEnableVertexAttribArray(0);
	glBindBuffer(GL_ARRAY_BUFFER, VBO);
	glVertexAttribPointer(0, 3, GL_FLOAT, GL_FALSE, 0, 0);

	glDrawArrays(GL_TRIANGLES, 0, 3);

	glDisableVertexAttribArray(0);

	glutSwapBuffers();
}


static void InitializeGlutCallbacks()
{
	glutDisplayFunc(RenderSceneCB);
}

static void CreateVertexBuffer()
{
	float Vertices[9];

	Vertices[0] = -1;
	Vertices[1] = -1;
	Vertices[2] = -1;

	Vertices[3] = 1;
	Vertices[4] = -1;
	Vertices[5] = -1;

	Vertices[6] = 0;
	Vertices[7] = 1;
	Vertices[8] = -1;

	glGenBuffers(1, &VBO);
	glBindBuffer(GL_ARRAY_BUFFER, VBO);
	glBufferData(GL_ARRAY_BUFFER, sizeof(Vertices), Vertices, GL_STATIC_DRAW);
}


int main(int argc, char** argv)
{
	glutInit(&argc, argv);
	glutInitDisplayMode(GLUT_DOUBLE | GLUT_RGBA);
	glutInitWindowSize(1024, 768);
	glutInitWindowPosition(100, 100);
	glutCreateWindow("Tutorial 03");

	InitializeGlutCallbacks();

	// Must be done after glut is initialized!
	GLenum res = glewInit();
	if (res != GLEW_OK) {
		fprintf(stderr, "Error: '%s'\n", glewGetErrorString(res));
		return 1;
	}

	glClearColor(0.0f, 0.0f, 0.0f, 0.0f);

	CreateVertexBuffer();
	glFrontFace(GL_CCW);
	glCullFace(GL_BACK);
	glEnable(GL_CULL_FACE);

	glutMainLoop();

	return 0;
}
代码执行效果如下图。

之后的项目开发中,Windows平台上就使用了freeglut+glew搭建OpenGL运行环境,本篇到此结束,下一篇开始整理OpenGLES运行环境的搭建。


 被折叠的 条评论
为什么被折叠?
被折叠的 条评论
为什么被折叠?
 到【灌水乐园】发言


