


一、网络控制节点(192.168.26.240)
1.创建Neutron数据库、用户认证
create database neutron;
grant all privileges on neutron.* to 'neutron'@'localhost' identified by 'neutron';
grant all privileges on neutron.* to 'neutron'@'%' identified by 'neutron';openstack service create --name neutron --description "OpenStack Networking" network
openstack endpoint create --region RegionOne network public http://controller:9696
openstack endpoint create --region RegionOne network internal http://controller:9696
openstack endpoint create --region RegionOne network admin http://controller:9696yum install -y openstack-neutron openstack-neutron-ml2 openstack-neutron-linuxbridge python-neutronclient ebtables ipset4.配置文件
网络服务初始化脚本需要一个超链接 /etc/neutron/plugin.ini``指向ML2插件配置文件/etc/neutron/plugins/ml2/ml2_conf.ini``。如果超链接不存在,使用下面的命令创建它,不连接创建网路端口状态down
ln -s /etc/neutron/plugins/ml2/ml2_conf.ini /etc/neutron/plugin.ini# vi /etc/neutron/metadata_agent.ini
[DEFAULT]
nova_metadata_ip = controller
metadata_proxy_shared_secret = metadata#为计算节点配置网络服务
# vi /etc/nova/nova.conf
[neutron]
url = http://controller:9696
auth_url = http://controller:35357
auth_type = password
project_domain_name = default
user_domain_name = default
region_name = RegionOne
project_name = service
username = neutron
password = neutron
service_metadata_proxy = true
metadata_proxy_shared_secret = metadata
# vi /etc/neutron/plugins/ml2/ml2_conf.ini

[ml2]
tenant_network_types =
type_drivers = vlan,flat
mechanism_drivers = linuxbridge
extension_drivers = port_security
[ml2_type_flat]
flat_networks = provider
[securitygroup]
enable_ipset = True
#vi /etc/neutron/plugins/ml2/linuxbridge_agent.ini
[linux_bridge]
physical_interface_mappings = provider:enp5s0 #修改网卡名
[vxlan]
enable_vxlan = false
[agent]
prevent_arp_spoofing = True
[securitygroup]
firewall_driver = neutron.agent.linux.iptables_firewall.IptablesFirewallDriver
enable_security_group = True#vi /etc/neutron/dhcp_agent.ini
[DEFAULT]
interface_driver = linuxbridge
dhcp_driver = neutron.agent.linux.dhcp.Dnsmasq
enable_isolated_metadata = true# vi /etc/neutron/neutron.conf
[DEFAULT]
core_plugin = ml2
service_plugins = router
allow_overlapping_ips = true
transport_url = rabbit://openstack:openstack@controller
auth_strategy = keystone
notify_nova_on_port_status_changes = true
notify_nova_on_port_data_changes = true
[keystone_authtoken]
auth_uri = http://controller:5000
auth_url = http://controller:35357
memcached_servers = controller:11211
auth_type = password
project_domain_name = default
user_domain_name = default
project_name = service
username = neutron
password = neutron
[nova]
auth_url = http://controller:35357
auth_type = password
project_domain_id = default
user_domain_id = default
region_name = RegionOne
project_name = service
username = nova
password = nova
[database]
connection = mysql://neutron:neutron@controller:3306/neutron
[oslo_concurrency]
lock_path = /var/lib/neutron/tmp#vi /etc/neutron/l3_agent.ini
[DEFAULT]
interface_driver = linuxbridgesu -s /bin/sh -c "neutron-db-manage --config-file /etc/neutron/neutron.conf --config-file /etc/neutron/plugins/ml2/ml2_conf.ini upgrade head" neutronsystemctl restart openstack-nova-api.service
systemctl enable neutron-server.service \
neutron-linuxbridge-agent.service neutron-dhcp-agent.service \
neutron-metadata-agent.service
systemctl start neutron-server.service \
neutron-linuxbridge-agent.service neutron-dhcp-agent.service \
neutron-metadata-agent.service
1.安装组件
yum install -y openstack-neutron-linuxbridge ebtables ipset#vi /etc/neutron/neutron.conf
[DEFAULT]
auth_strategy = keystone
transport_url = rabbit://openstack:openstack@controller
[keystone_authtoken]
auth_uri = http://controller:5000
auth_url = http://controller:35357
memcached_servers = controller:11211
auth_plugin = password
project_domain_id = default
user_domain_id = default
project_name = service
username = neutron
password = neutron
[oslo_concurrency]
lock_path = /var/lib/neutron/tmp#vi /etc/nova/nova.conf 计算服务追加网络配置
[neutron]
url = http://controller:9696
auth_url = http://controller:35357
auth_type = password
project_domain_name = default
user_domain_name = default
region_name = RegionOne
project_name = service
username = neutron
password = neutronvi /etc/neutron/plugins/ml2/linuxbridge_agent.ini
[linux_bridge]
physical_interface_mappings = provider:enp6s0 #修改网卡名
[securitygroup]
enable_security_group = true
firewall_driver = neutron.agent.linux.iptables_firewall.IptablesFirewallDriver
[vxlan]
enable_vxlan = falsesystemctl restart openstack-nova-compute.service
#启动neutron
systemctl enable neutron-linuxbridge-agent.service
systemctl start neutron-linuxbridge-agent.service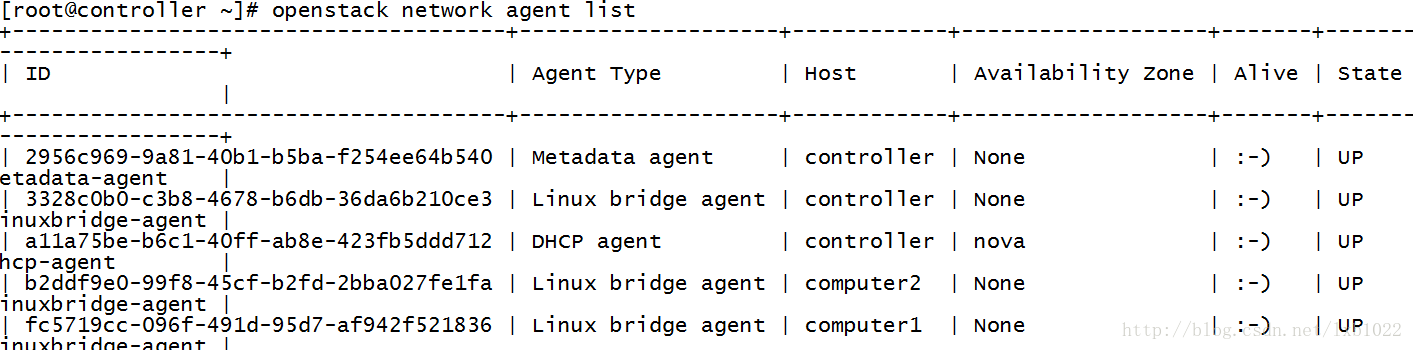

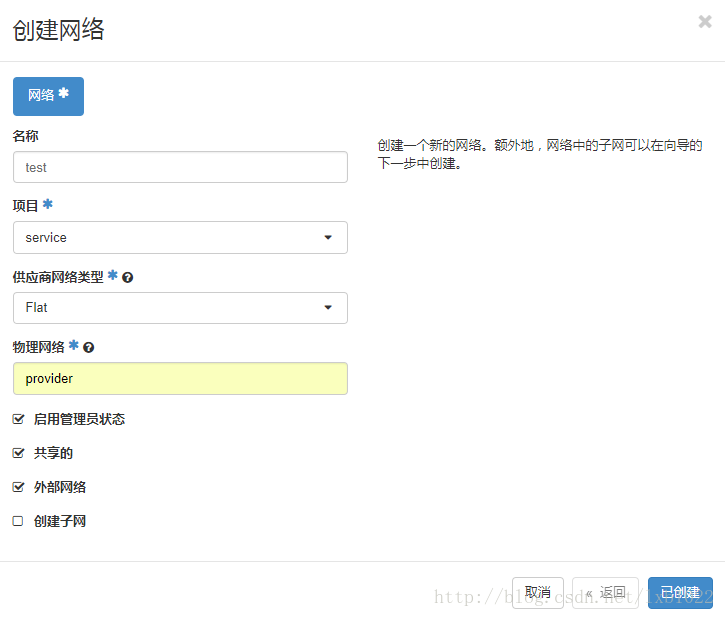
5.创建网络
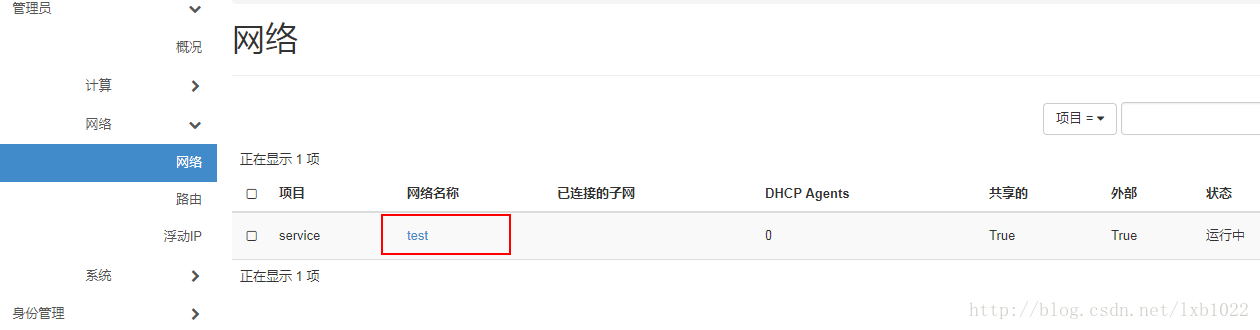
点击网络名称test,创建子网。

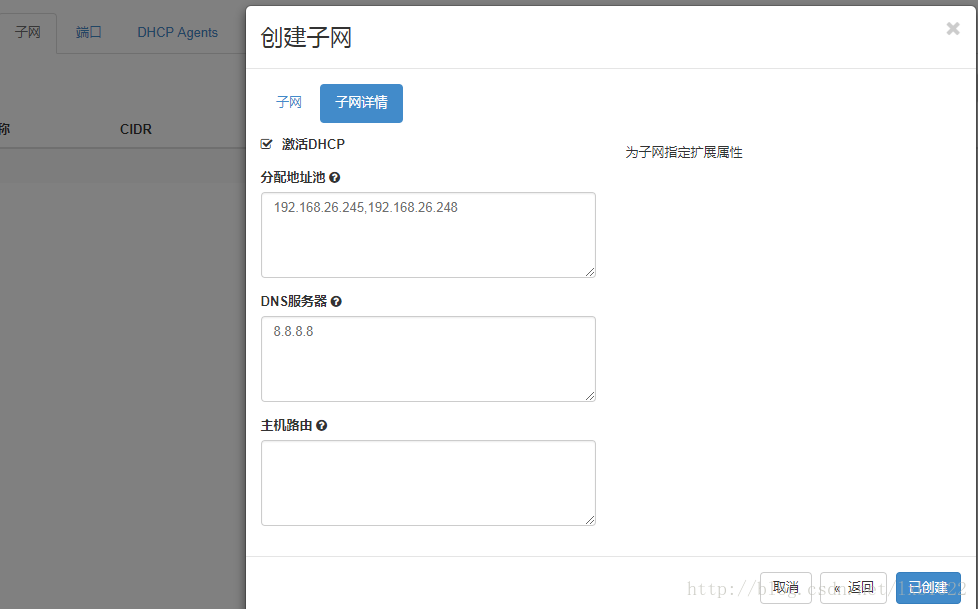
下一步,创建DHCP

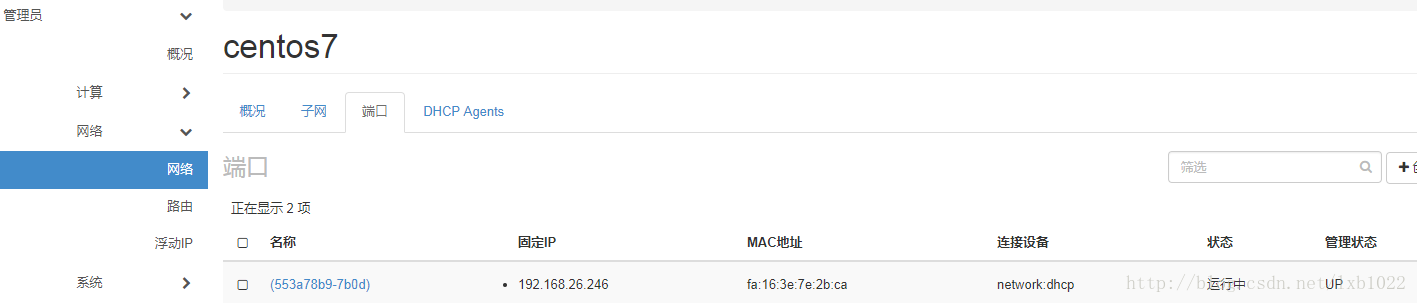
网络创建完毕,接下来可以创建实例了。


 745
745


 被折叠的 条评论
为什么被折叠?
被折叠的 条评论
为什么被折叠?
 到【灌水乐园】发言


