


Apisix版本: 3.0.1
Apisix-dashboard版本: 3.0.1
etcd版本: 3.4.9
注:
Apisix配置的路由信息存储在etcd中。
Apisix与apisix-dashboard版本要对应。
一、ETCD安装
二、Apisix安装
1、安装yum源
yum install -y https://repos.apiseven.com/packages/centos/apache-apisix-repo-1.0-1.noarch.rpm
yum install gcc gcc-c++ wget git lua-devel wget
2、安装Apisix
# 查看仓库中最新的 apisix 软件包的信息
yum info -y apisix

# 显示仓库中现有的 apisix 软件包
yum --showduplicates list apisix

# 安装最新的 apisix 软件包
yum install apisix

# 安装指定版本(本例中为2.12.0版本)的 apisix 软件包
yum install apisix-3.0.1-0.el7

Apisix安装后的目录位于:/usr/local/apisix/
3、修改apisix配置文件
[root@centos_mn ~]# vim /usr/local/apisix/conf/config-default.yaml
# 修改etcd链接参数
etcd:
    host:
      - http://10.2.20.77:2379
4、启动Apisix
apisix init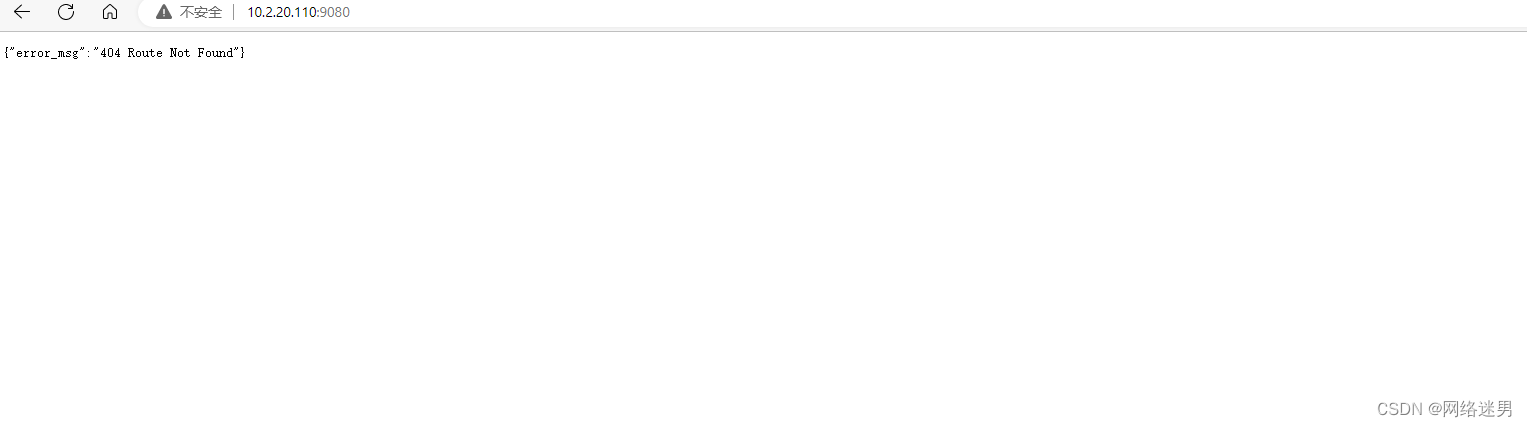
systemctl start apisix5、访问apisix服务http://IP:9080
三、Apisix后台安装
1、下载安装包
apisix-dashboard-3.0.1-0.el7.x86-64资源-CSDN文库
2、安装dashboard服务
yum localinstall apisix-dashboard-3.0.1-0.el7.x86_64.rpm dashboard服务安装目录:/usr/local/apisix/dashboard/
3、修改dashboard配置文件
[root@localhost ]# vim  /usr/local/apisix/dashboard/conf/conf.yaml

#1、修改监听地址
conf:
  listen:
     host: 0.0.0.0     # the address on which the `Manager API` should listen.
                          # The default value is 0.0.0.0, if want to specify, please enable it.
                          # This value accepts IPv4, IPv6, and hostname.
    port: 9000            # The port on which the `Manager API` should listen.

#2、设置允许访问的地址段
  allow_list:             # If we don't set any IP list, then any IP access is allowed by default.
    - 0.0.0.0          # The rules are checked in sequence until the first match is found.
    - ::1


#3、修改etcd连接信息
  etcd:
    endpoints:
      - 10.2.20.77:2379 #Apisix与Apisix-dashboard要使用同一个etcd

#4、修改dashboard登录账户及密码
authentication:
  secret:
    secret              # secret for jwt token generation.
                        # NOTE: Highly recommended to modify this value to protect `manager api`.
                        # if it's default value, when `manager api` start, it will generate a random string to replace it.
  expire_time: 3600     # jwt token expire time, in second
  users:                # yamllint enable rule:comments-indentation
    - username: admin   # username and password for login `manager api`
      password: 123456
#    - username: user
#      password: user
4、启动服务
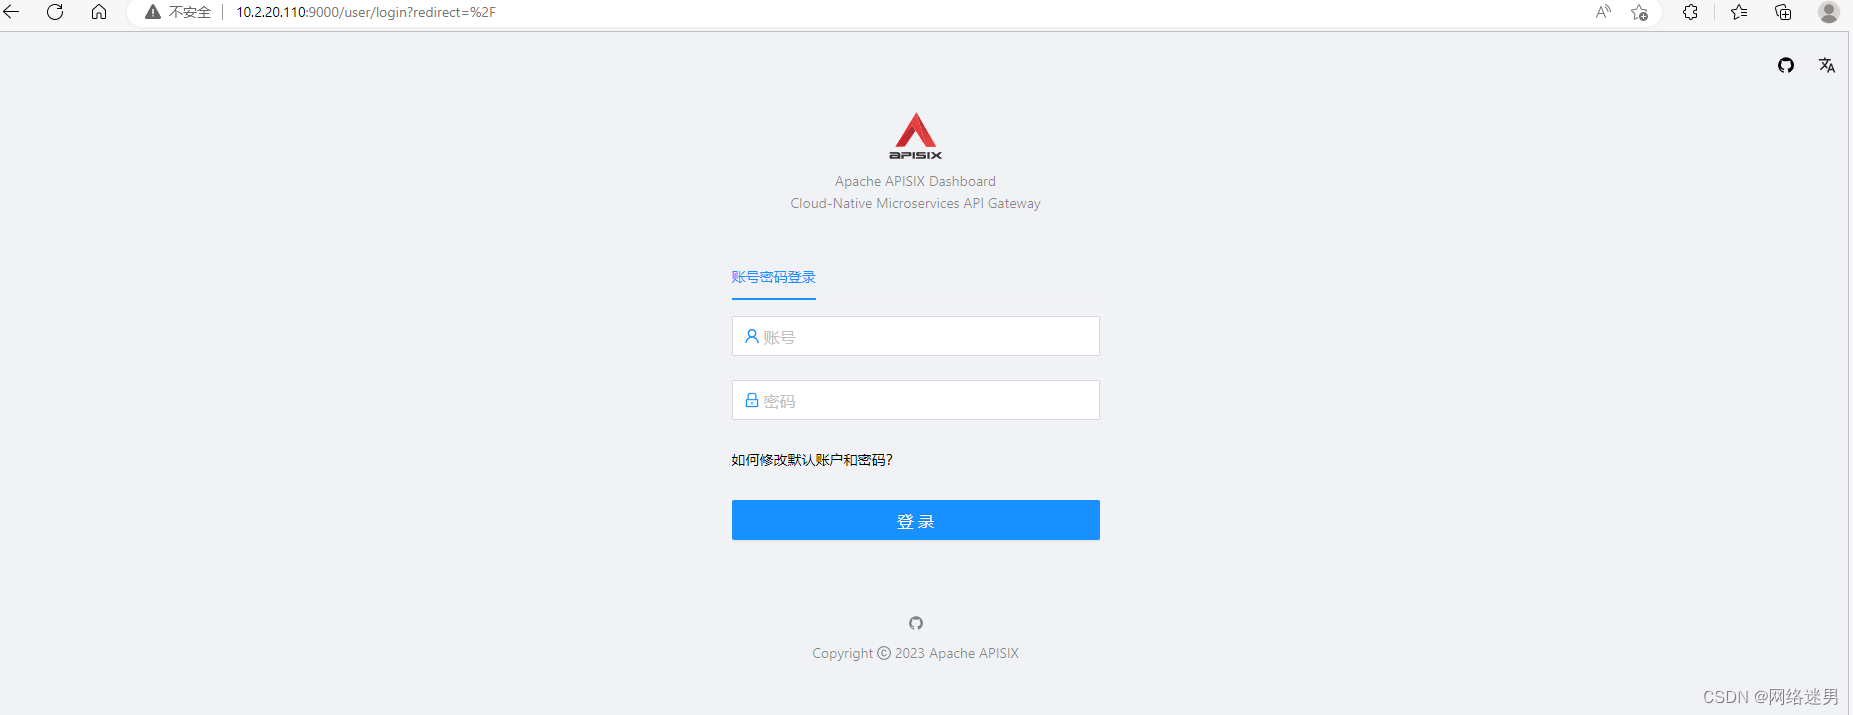
systemctl start apisix-dashboard5、访问后台http://IP:9000/


 937
937


 被折叠的 条评论
为什么被折叠?
被折叠的 条评论
为什么被折叠?
 到【灌水乐园】发言


