


目录
前言
使用MyBatis框架可以方便完成持久化的“增删改查”操作,其主要内容包括MyBatis框架的搭建、MyBatis框架的系统全局配置文件、MyBatis框架的SQL映射文件,以及使用MyBatis框架完成数据库单表的简单查询操作。
一、MyBatis框架的环境搭建
1.1下载jar文件
MyBatis的官方网站为:http://mybatis.org。
二、MyBatis框架的入门程序
2.1编写MyBatis框架的核心配置文件
MyBatis框架的核心配置文件主要用于配置数据库连接和MyBatis运行时所需的各种特性,包含设置和影响MyBatis行为的属性。
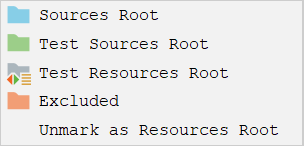
为了方便管理,=以后各种框架集成所需的配置文件,故需在项目工程中新建resources root目录,并在其目录下创建database.properties文件存储数据库连接配置信息,内容如下:

database.properties
driver=com.mysql.cj.jdbc.Driver
url=jdbc:mysql://127.0.0.1:3306/dsscm?serverTimezone=UTC&useUnicode=true?characterEncoding=utf-8
user=root
password=123456
由于MyBatis默认使用log4j输出日志信息,所以要查看控制台的输出SQL语句,就需要在classpath路径下配置其日志文件。在项目resources目录下创建log4j.properties文件,编辑后的内容如下所示。
log4j.properties

log4j.rootLogger=DEBUG,CONSOLE,file
log4j.logger.cn.dsscm.dao=debug
log4j.logger.com.ibatis=debug
log4j.logger.com.ibatis.common.jdbc.SimpleDataSource=debug
log4j.logger.com.ibatis.common.jdbc.ScriptRunner=debug
log4j.logger.com.ibatis.sqlmap.engine.impl.SqlMapClientDelegate=debug
log4j.logger.java.sql.Connection=debug
log4j.logger.java.sql.Statement=debug
log4j.logger.java.sql.PreparedStatement=debug
log4j.logger.java.sql.ResultSet=debug
log4j.logger.org.tuckey.web.filters.urlrewrite.UrlRewriteFilter=debug

log4j.appender.CONSOLE=org.apache.log4j.ConsoleAppender
log4j.appender.Threshold=error
log4j.appender.CONSOLE.Target=System.out
log4j.appender.CONSOLE.layout=org.apache.log4j.PatternLayout
log4j.appender.CONSOLE.layout.ConversionPattern= [%p] %d %c - %m%n

log4j.appender.file=org.apache.log4j.DailyRollingFileAppender
log4j.appender.file.DatePattern=yyyy-MM-dd
log4j.appender.file.File=log.log
log4j.appender.file.Append=true
log4j.appender.file.Threshold=error
log4j.appender.file.layout=org.apache.log4j.PatternLayout
log4j.appender.file.layout.ConversionPattern=%d{yyyy-M-d HH:mm:ss}%x[%5p](%F:%L) %m%n

log4j.logger.com.opensymphony.xwork2=error
在resources目录中添加MyBatis框架的核心配置文件,默认文件名为"configuration.xml"。为了方便在框架集成时更好的区分各个配置文件,一般会将此文件命名为“mybatis-config.xml”.该文件需要配置数据库连接信息和MyBatis的参数,如下。
mybatis-config.xml
<?xml version="1.0" encoding="UTF-8" ?>
<!DOCTYPE configuration
        PUBLIC "-//mybatis.org//DTD Config 3.0//EN"
        "http://mybatis.org/dtd/mybatis-3-config.dtd">
<!--通过这个配置文件完成MyBatis与数据库的连接-->
<configuration>
    <!--引入database.properties文件-->
    <properties resource="database.properties"/>
    <settings>
        <!--配置MyBatis的log实现为log4j-->
        <setting name="logImpl" value="log4j"/>
    </settings>
    <environments default="development">
        <environment id="development">
            <!--配置事务管理,采用JDBC的事务管理-->
            <transactionManager type="JDBC"/>
            <!--POOLED:MyBatis自带的数据源,-->
            <dataSource type="POOLED">
                <property name="driver" value="${driver}"/>
                <property name="url" value="${url}"/>
                <property name="username" value="${user}"/>
                <property name="password" value="${password}"/>
            </dataSource>
        </environment>
    </environments>
    <!--将mapper加入配置文件中-->
    <mappers>
        <mapper resource="cn/dsscm/dao/UserMapper.xml"/>
    </mappers>
</configuration>
2.2创建持久化类(POJO)和SQL映射文件
持久化类是指其实例状态需要被MyBatis持久化到数据库中的类。
下面以用户表(tb_user)为例,定义用户POJO类,User.java的代码如下。
package cn.dsscm.pojo;

import java.util.Date;

public class User {
    private Integer id;
    private String userCode;
    private String userName;
    private String userPassword;
    private Integer gender;
    private Date birthday;
    private String email;
    private String phone;
    private String address;
    private String userDesc;
    private Integer userRole;
    private String imgPath;
    private Integer createBy;
    private Date creationDate;
    private Integer modifyBy;
    private Date modifyDate;

    private Integer age;
    private String userRoleName;

    public User() {
    }

    public User(Integer id, String userCode, String userName, String userPassword, Integer gender, Date birthday, String email, String phone, String address, String userDesc, Integer userRole, String imgPath, Integer createBy, Date creationDate, Integer modifyBy, Date modifyDate, Integer age, String userRoleName) {
        this.id = id;
        this.userCode = userCode;
        this.userName = userName;
        this.userPassword = userPassword;
        this.gender = gender;
        this.birthday = birthday;
        this.email = email;
        this.phone = phone;
        this.address = address;
        this.userDesc = userDesc;
        this.userRole = userRole;
        this.imgPath = imgPath;
        this.createBy = createBy;
        this.creationDate = creationDate;
        this.modifyBy = modifyBy;
        this.modifyDate = modifyDate;
        this.age = age;
        this.userRoleName = userRoleName;
    }

    public Integer getAge() {
        Date date = new Date();
        if (null != birthday) {
            Integer age = date.getYear() - birthday.getYear();
            return age;
        } else {
            return null;
        }
    }

    @Override
    public String toString() {
        return "User{" +
                "id=" + id +
                ", userCode='" + userCode + '\'' +
                ", userName='" + userName + '\'' +
                ", userPassword='" + userPassword + '\'' +
                ", gender=" + gender +
                ", birthday=" + birthday +
                ", email='" + email + '\'' +
                ", phone='" + phone + '\'' +
                ", address='" + address + '\'' +
                ", userDesc='" + userDesc + '\'' +
                ", userRole=" + userRole +
                ", imgPath='" + imgPath + '\'' +
                ", createBy=" + createBy +
                ", creationDate=" + creationDate +
                ", modifyBy=" + modifyBy +
                ", modifyDate=" + modifyDate +
                ", age=" + age +
                ", userRoleName='" + userRoleName + '\'' +
                '}';
    }

    public Integer getId() {
        return id;
    }

    public void setId(Integer id) {
        this.id = id;
    }

    public String getUserCode() {
        return userCode;
    }

    public void setUserCode(String userCode) {
        this.userCode = userCode;
    }

    public String getUserName() {
        return userName;
    }

    public void setUserName(String userName) {
        this.userName = userName;
    }

    public String getUserPassword() {
        return userPassword;
    }

    public void setUserPassword(String userPassword) {
        this.userPassword = userPassword;
    }

    public Integer getGender() {
        return gender;
    }

    public void setGender(Integer gender) {
        this.gender = gender;
    }

    public Date getBirthday() {
        return birthday;
    }

    public void setBirthday(Date birthday) {
        this.birthday = birthday;
    }

    public String getEmail() {
        return email;
    }

    public void setEmail(String email) {
        this.email = email;
    }

    public String getPhone() {
        return phone;
    }

    public void setPhone(String phone) {
        this.phone = phone;
    }

    public String getAddress() {
        return address;
    }

    public void setAddress(String address) {
        this.address = address;
    }

    public String getUserDesc() {
        return userDesc;
    }

    public void setUserDesc(String userDesc) {
        this.userDesc = userDesc;
    }

    public Integer getUserRole() {
        return userRole;
    }

    public void setUserRole(Integer userRole) {
        this.userRole = userRole;
    }

    public String getImgPath() {
        return imgPath;
    }

    public void setImgPath(String imgPath) {
        this.imgPath = imgPath;
    }

    public Integer getCreateBy() {
        return createBy;
    }

    public void setCreateBy(Integer createBy) {
        this.createBy = createBy;
    }

    public Date getCreationDate() {
        return creationDate;
    }

    public void setCreationDate(Date creationDate) {
        this.creationDate = creationDate;
    }

    public Integer getModifyBy() {
        return modifyBy;
    }

    public void setModifyBy(Integer modifyBy) {
        this.modifyBy = modifyBy;
    }

    public Date getModifyDate() {
        return modifyDate;
    }

    public void setModifyDate(Date modifyDate) {
        this.modifyDate = modifyDate;
    }

    public void setAge(Integer age) {
        this.age = age;
    }

    public String getUserRoleName() {
        return userRoleName;
    }

    public void setUserRoleName(String userRoleName) {
        this.userRoleName = userRoleName;
    }
}
注意:一般情况下,保证POJO对象的属性与数据库表的字段名一致。
继续进行SQL映射文件的创建,完成与POJO(实体类)的映射,该文件也是一个xml文件,命名为UserMapper.xml,代码如下。
<?xml version="1.0" encoding="UTF-8" ?>
<!DOCTYPE mapper
        PUBLIC "-//mybatis.org//DTD Mapper 3.0//EN"
        "http://mybatis.org/dtd/mybatis-3-mapper.dtd">

<mapper namespace="cn.dsscm.pojo.User">
    <!--查询用户表记录数-->
    <select id="count" resultType="int">
        select count(*) from tb_user
    </select>
</mapper>
注意:SQL映射文件都会对应于相应的POJO,所以一般采用POJO的名称+mapper的命名规则来进行命名。例如:UserMapper.xml.
2.3创建测试类
(1)读取全局配置文件:mybatis-config.xml,代码为:
String resource = "mybatis-config.xml";
//获取mybatis-config.xml的输入流
InputStream is = Resources.getResourceAsStream(resource);
(2)创建SqlSessionFactory对象,此对象可以完成对配置文件的读取,代码为:
SqlSessionFactory factory = new SqlSessionFactoryBuilder().build(is);(3)创建SqlSession对象,此对象的作用是调用mapper文件进行数据操作,需要注意的是,必须先把mapper文件引入到mybatis-config.xml中才能起效,代码为:
int count = 0;
SqlSession sqlSession = null;
//创建SqlSession对象
sqlSession = factory.openSession();
//调用mapper文件对数据进行操作,必须先把mapper文件引入到mybatis-config.xml中
count = sqlSession.selectOne("cn.dsscm.pojo.User.count");
logger.debug("UserMapperTest count--->" + count);
(4)关闭SqlSession对象,代码为:
sqlSession.close();完整的测试类文件如下:
public class UserMapperTest {

    private String resource = "mybatis-config.xml";
    private Logger logger = Logger.getLogger(UserMapperTest.class);
    @Test
    public void test1() {
        SqlSession sqlSession = null;
        try {
            InputStream is = Resources.getResourceAsStream(resource);
            SqlSessionFactory factory = new SqlSessionFactoryBuilder().build(is);
            sqlSession = factory.openSession();
            int count = 0;
            count = sqlSession.selectOne("cn.dsscm.pojo.User.count");
            logger.debug("UserMapperTest count--->" + count);
        } catch (IOException e) {
            e.printStackTrace();
        }finally {
            sqlSession.close();
        }
    }

}
运行UserMapperTest类的test1()方法,控制台显示为:

总结
至此,我们对MyBatis框架有了一定的了解,MyBatis框架的基本要素包括核心对象、核心配置文件和SQL映射文件。


 984
984


 被折叠的 条评论
为什么被折叠?
被折叠的 条评论
为什么被折叠?
 到【灌水乐园】发言


