


TabBar实现:
①不用组件 基础的写法:
step1.创建一个vuecli项目:
app.vue:
<template>
  <div id="app">
     <router-link to="/home" replace></router-link>
    <div id="tab-bar">
      <div class="tab-bar-item">首页</div>
      <div class="tab-bar-item">分类</div>
      <div class="tab-bar-item">购物车</div>
      <div class="tab-bar-item">我的</div>
    </div>
  </div>
</template>

<script>
export default {
  name: 'App',
  components: {

  }
}
</script>

<style>
/* 引入CSS */
@import url('./assets/css/base.css');


</style>
css:
body{
  margin: 0;
  padding: 0;
}
#tab-bar{
  display: flex;
  background-color: #f6f6f6;

  position: fixed;
  left: 0;
  right: 0;
  bottom: 0;
  box-shadow: 0px -1px 1px rgba(100, 100, 100, 0.2);

}
.tab-bar-item{
 flex: 1;
 text-align: center;
 height: 49px;
}
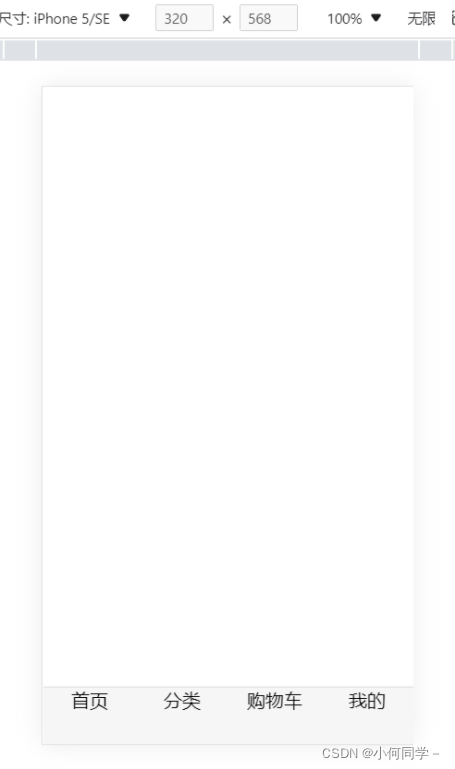
效果:
②组件化开发(基本封装):
在components文件夹中新建->tabbar->TabBar.vue和TabBarItem.vue
在img文件夹放需要的icon
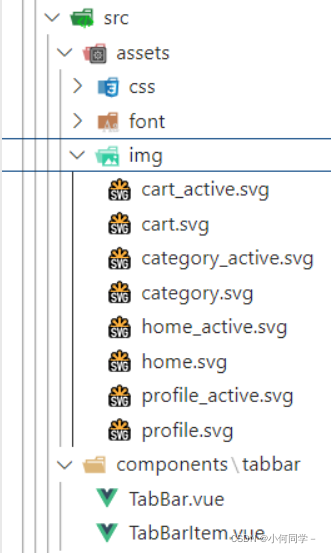
TabBar.vue:
写了TabBar背景的样式 还预留了一个插槽
<template>
  <div id="tab-bar">
    <slot>
    </slot>
  </div>
</template>

<script>
 export default {
  name: 'TabBar' ,
}

</script>
<style scoped>
#tab-bar{
  display: flex;
  background-color: #f6f6f6;

  position: fixed;
  left: 0;
  right: 0;
  bottom: 0;
  box-shadow: 0px -1px 1px rgba(100, 100, 100, 0.2);

}

</style>
TabBarItem.vue:
预留了两个具名插槽
<template>
 <div  class="tab-bar-item">
   <slot name="item-icon"></slot>
   <slot name="item-text"></slot>
 </div>
</template>

<script>
 export default {
  name: 'TabBarItem' ,
 data () {
 return {
  }
 }
}

</script>
<style scoped>
  .tab-bar-item{
    flex: 1;
    text-align: center;
    height: 49px;
    font-size: 14px;
}
  .tab-bar-item img{
    width: 24px;
    height: 24px;
    margin-top: 3px;
    vertical-align: middle;
    margin-bottom: 2px;
  }
</style>
App.vue
里面使用了两层子组件:teb-bar和tab-bar-item
<template>
  <div id="app">
     <tab-bar>
      <tab-bar-item>
         <img src="./assets/img/home.svg" alt="" slot="item-icon">
         <div slot="item-text">首页</div>
      </tab-bar-item>
      <tab-bar-item>
        <img src="./assets/img/category.svg" alt="" slot="item-icon">
        <div slot="item-text">分类</div>
      </tab-bar-item>
      <tab-bar-item>
        <img src="./assets/img/cart.svg" alt="" slot="item-icon">
        <div slot="item-text">购物车</div>
      </tab-bar-item>
      <tab-bar-item>
        <img src="./assets/img/profile.svg" alt="" slot="item-icon">
        <div slot="item-text">我的</div>
      </tab-bar-item>
     </tab-bar>
  </div>
</template>

<script>
import TabBar from './components/tabbar/TabBar'
import TabBarItem from './components/tabbar/TabBarItem'

export default {
  name: 'App',
  components: {
      TabBar,
      TabBarItem
  }
}
</script>

<style>

@import url('./assets/css/base.css');

</style>
base.css:
body{
  margin: 0;
  padding: 0;
}
最终效果:

③结合active和router的写法:
step1.
在一般的项目开发中Components里面只放一些公共通用的组件,而一些特有的小组件一般放在views的文件夹下:
所以在assets文件夹下创建views文件夹 并创建对应的页面对应的组件:

<template>
<div>
  <h2>首页</h2>
</div>
</template>

<script>
 export default {
  name: 'Home',
 data () {
 return {
  }
 }
}
</script>
<style>
</style>
step2.
配置路由:
import Vue from 'vue'
import Router from 'vue-router'

const Home = () => import('../views/home/Home')
const Cart = () => import('../views/cart/Cart')
const Category = () => import('../views/category/Category')
const Profile = () => import('../views/profile/Profile')


// 1.安装插件
Vue.use(Router)

// 2.创建路由对象
const router = new Router({
  routes: [
    {
      path: '/',
      redirect: '/home'
    },
    {
      path: '/home',
      component: Home,
      meta: {
        title: '首页'
      }
    },
    {
      path: '/category',
      component: Category,
      meta: {
        title: '分类'
      }
    },
    {
      path: '/cart',
      component: Cart,
      meta: {
        title: '购物车'
      }
    },
    {
      path: '/profile',
      component: Profile,
      meta: {
        title: '个人'
      }
    }
  ],
  mode:'history',
})
router.beforeEach((to,from,next) => {
  // 从from跳转到to
  document.title = to.meta.title
  // 这里必须调一下next()
  next()
})
export default router
step3.
添加点击事件 跳转路由
添加v-if 改变活跃状态
<template>
<!-- 这里的点击事件添加在这里避免在app.vue里添加四个 -->
 <div  class="tab-bar-item" @click="itemClick">
   <div  v-if="!isActive"><slot name="item-icon"></slot></div>
   <div v-else> <slot name="item-icon-active"></slot></div>
   <div :class="{active:isActive}"><slot name="item-text"></slot></div>
 </div>
</template>
<script>
 export default {
  name: 'TabBarItem' ,
  // 通过父传子传递路由
  props: {
     path: String
   },
 data () {
 return {
   isActive:true,
  }
 },
 methods: {
   itemClick() {
    this.$router.replace(this.path).catch(err=>{})
   }
 }
}
</script>
<style scoped>
  .tab-bar-item{
    flex: 1;
    text-align: center;
    height: 49px;
    font-size: 14px;
}
  .tab-bar-item img{
    width: 24px;
    height: 24px;
    margin-top: 3px;
    vertical-align: middle;
    margin-bottom: 2px;
  }
  .active{
    color: #ff5777;
  }
</style>
这里的v-if、v-else尽量用div写在插槽的外面,因为插槽替换时是整个替换,很有可能使写在插槽里的判断条件失效。
step4.
在App.vue里传递路由:
<template>
  <div id="app">
    <router-view></router-view>
     <tab-bar>
       <!-- 这里传递路由 因为是一个固定值 不用动态绑定 -->
      <tab-bar-item path="/home">
         <img src="./assets/img/home.svg" slot="item-icon">
         <img src="./assets/img/home_active.svg" slot="item-icon-active">
         <div slot="item-text">首页</div>
      </tab-bar-item>
      <tab-bar-item path="/category">
        <img src="./assets/img/category.svg" slot="item-icon">
        <img src="./assets/img/category_active.svg" slot="item-icon-active">
        <div slot="item-text">分类</div>
      </tab-bar-item>
      <tab-bar-item path="/cart">
        <img src="./assets/img/cart.svg" slot="item-icon">
        <img src="./assets/img/cart_active.svg" slot="item-icon-active">
        <div slot="item-text">购物车</div>
      </tab-bar-item>
      <tab-bar-item path="/profile">
        <img src="./assets/img/profile.svg" slot="item-icon">
        <img src="./assets/img/profile_active.svg" slot="item-icon-active">
        <div slot="item-text">我的</div>
      </tab-bar-item>
     </tab-bar>
  </div>
</template>

<script>
import TabBar from './components/tabbar/TabBar'
import TabBarItem from './components/tabbar/TabBarItem'

export default {
  name: 'App',
  components: {
      TabBar,
      TabBarItem
  }
}
</script>

<style>

@import url('./assets/css/base.css');


</style>
最终效果:

④:加入颜色动态控制:
首次,我们通过判断当前活跃路由来决定isActive的值:
这里我们写一个计算属性:
computed:{
   isActive() {
    //  判断当前活跃的路由里面有没有这个路径
     return this.$route.path.indexOf(this.path) !==-1
   }
}
   <div  v-if="!isActive"><slot name="item-icon"></slot></div>
   <div v-else> <slot name="item-icon-active"></slot></div>
   <div :class="{active:isActive}"><slot name="item-text"></slot></div>
这样就能动态控制当前路由变色:

但是颜色也不能写死,所以这里要删掉active class,因为父传子的变量不能用于css,所以这里只能动态绑定style而不是class。
再写一个计算属性:
computed:{
   isActive() {
    //  判断当前活跃的路由里面有没有这个路径
     return this.$route.path.indexOf(this.path) !==-1
   },
   activeStyle() {
     return this.isActive ? {color: this.activeColor} : {}
   }
 },
<div :style="activeStyle"><slot name="item-text"></slot></div>
然后就可以动态传进颜色:
<tab-bar-item path="/home" activeColor="#ff5777">
	<img src="./assets/img/home.svg" slot="item-icon">
	<img src="./assets/img/home_active.svg" slot="item-icon-active">
	<div slot="item-text">首页</div>
 </tab-bar-item>
最后 对app.vue里面的代码再做一次抽取:
在components里面新建一个maintabbar->MainTabBar.vue
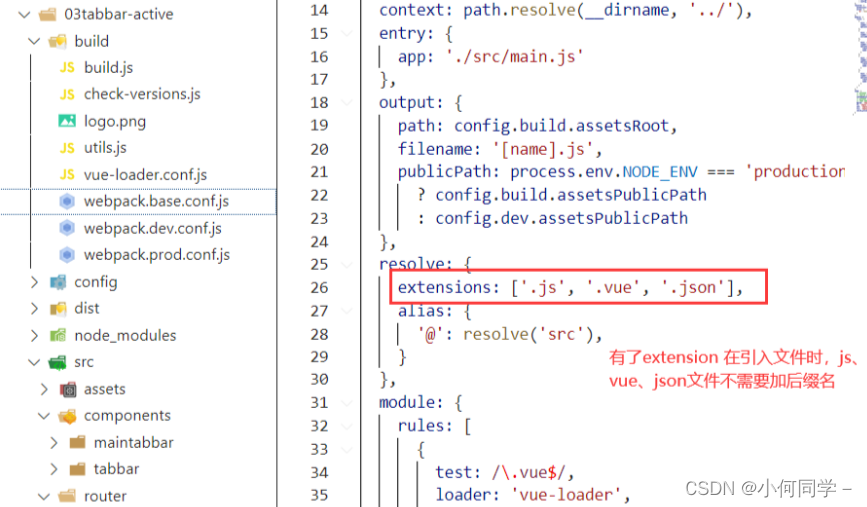
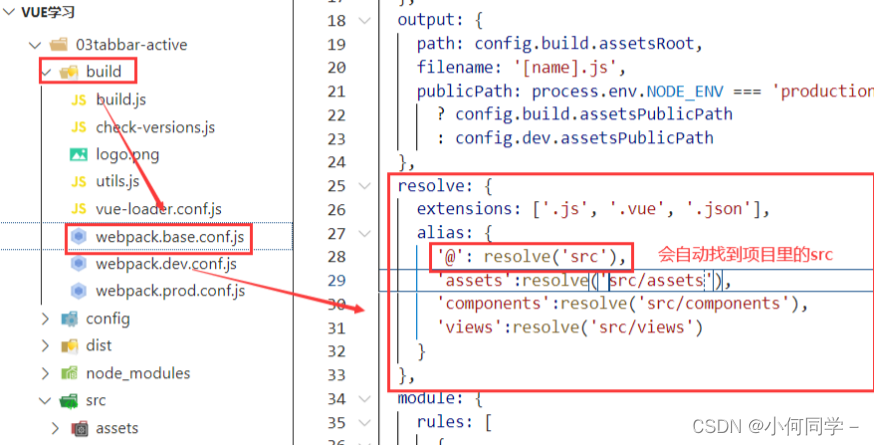
但是在抽取之前需要考虑一个问题:抽取之后文件的路径又要全部改一遍
我们可以在创建项目的时候就在webpack.base.conf.js文件里给文件夹取别名:
MainTabBar.vue:
<template>
 <tab-bar>
       <!-- 这里传递路由 因为是一个固定值 不用动态绑定 -->
      <tab-bar-item path="/home" activeColor="#ff5777">
         <img src="assets/img/home.svg" slot="item-icon">
         <img src="assets/img/home_active.svg" slot="item-icon-active">
         <div slot="item-text">首页</div>
      </tab-bar-item>
      <tab-bar-item path="/category" activeColor="#ff5777">
        <img src="assets/img/category.svg" slot="item-icon">
        <img src="assets/img/category_active.svg" slot="item-icon-active">
        <div slot="item-text">分类</div>
      </tab-bar-item>
      <tab-bar-item path="/cart" activeColor="#ff5777">
        <img src="assets/img/cart.svg" slot="item-icon">
        <img src="assets/img/cart_active.svg" slot="item-icon-active">
        <div slot="item-text">购物车</div>
      </tab-bar-item>
      <tab-bar-item path="/profile" activeColor="#ff5777">
        <img src="assets/img/profile.svg" slot="item-icon">
        <img src="assets/img/profile_active.svg" slot="item-icon-active">
        <div slot="item-text">我的</div>
      </tab-bar-item>
    </tab-bar>
</template>

<script>
import TabBar from '@/components/tabbar/TabBar'
import TabBarItem from '@/components/tabbar/TabBarItem'
 export default {
  name: '' ,
  components: {
    TabBar,
    TabBarItem
  },
 data () {
 return {
  }
 }
}

</script>
<style>
</style>
抽取之后的app.vue:
<template>
  <div id="app">
    <router-view></router-view>
    <main-tab-bar/>
  </div>
</template>

<script>
import MainTabBar from '@/components/maintabbar/MainTabBar'

export default {
  name: 'App',
  components: {
    MainTabBar
  }
}
</script>

<style>

@import url('./assets/css/base.css');

</style>


 871
871


 被折叠的 条评论
为什么被折叠?
被折叠的 条评论
为什么被折叠?
 到【灌水乐园】发言


