


Nacos服务安装
官方提供了Nacos的服务端供我们下载使用,我们启动Nacos后将我们的微服务注册进入Nacos即可。
下载地址:https://github.com/alibaba/nacos/releases
启动Nacos:解压后,
windows执行bin目录下的startup命令 :startup.cmd -m standalone
linux 执行 :sh startup.sh -m standalone
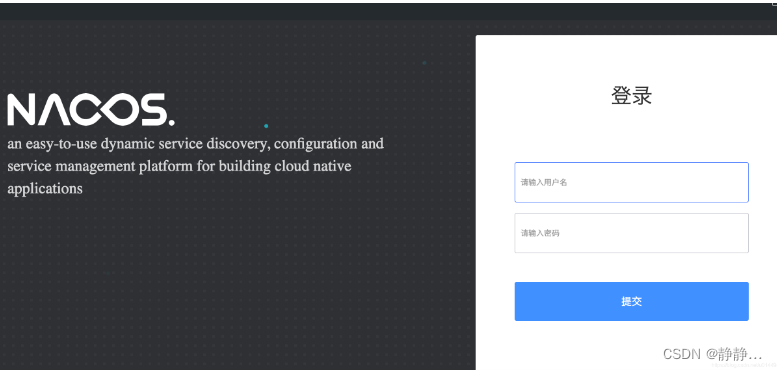
访问Nacos,端口8848:http://127.0.0.1:8848/nacos/index.html ,用户名和密码都是:nacos
注册中心服务搭建
父项目
<!--公共的一些配置-->
<properties>
  <project.build.sourceEncoding>UTF-8</project.build.sourceEncoding>
  <project.reporting.outputEncoding>UTF-8</project.reporting.outputEncoding>
  <java.version>1.8</java.version>
</properties>
<!--SpringBoot-->
<parent>
  <groupId> org.springframework.boot</groupId>
  <artifactId>spring-boot-starter-parent</artifactId>
  <version>2.2.5.RELEASE</version>
</parent>
<!--SpringCloud-->
<dependencyManagement>
  <dependencies>
    <dependency>
      <groupId>com.alibaba.cloud</groupId>
      <artifactId>spring-cloud-alibaba-dependencies</artifactId>
      <version>2.2.1.RELEASE</version>
      <type>pom</type>
      <scope>import</scope>
    </dependency>
    <dependency>
      <groupId>org.springframework.cloud</groupId>
      <artifactId>spring-cloud-dependencies</artifactId>
      <version>Hoxton.SR3</version>
      <type>pom</type>
      <scope>import</scope>
    </dependency>
  </dependencies>
</dependencyManagement>
<dependencies>
  <dependency>
    <groupId>junit</groupId>
    <artifactId>junit</artifactId>
    <version>4.12</version>
  </dependency>
</dependencies>
</project>
子模块
common
依赖
<dependency>
  <groupId>org.projectlombok</groupId>
  <artifactId>lombok</artifactId>
</dependency>
entry
@Data
@AllArgsConstructor
@NoArgsConstructor
public class User {
    private long id;
    private String name;
    private Integer age;
    private String info;
}
user-server-10001
依赖
 <dependency>
            <groupId>org.springframework.boot</groupId>
            <artifactId>spring-boot-starter-web</artifactId>
        </dependency>
        <!-- nacaos 注册发现客户端 -->
        <dependency>
            <groupId>com.alibaba.cloud</groupId>
            <artifactId>spring-cloud-starter-alibaba-nacos-discovery</artifactId>
        </dependency>
启动类注解@EnableDiscoveryClient
@EnableDiscoveryClient
yml配置
server:
  port: 1001
spring:
  application:
    name: user-server

  cloud:
    nacos:
      discovery:  ##    注册中心的地址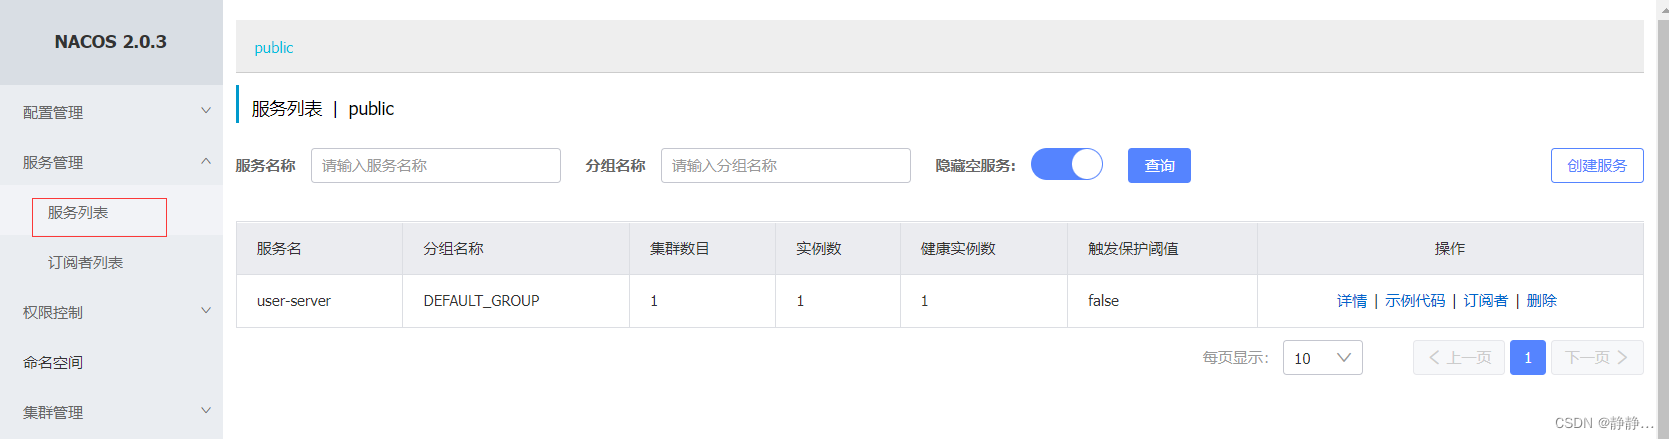
server-addr: 127.0.0.1;8848访问Nacos,端口8848:http://127.0.0.1:8848/nacos/index.html ,用户名和密码都是:nacos
@RestController
@RequestMapping("/user")
public class UserController {
    @Value("${server.port}")
    private int port;
    @RequestMapping("/getuser/{id}")
    public User getUser(@PathVariable("id") Long id) {
        // int i = 1/0;
        return new User(id, "亮亮", 28, "爱吃肉肉:" + port);
    }
}
order-server-10002
依赖 ,与user-server一样
注解
yml配置
OrderController
@RestController
@RequestMapping("/order")
@Slf4j
public class OrderController {
    @RequestMapping("/getuser/{id}")
    public User getUser(@PathVariable("id") Long id){
        // 调用UserServer的API -- Http
        User user = feignClient.getUser(id);
        return user ;
    }
}
feign的调用
导入依赖
<dependency>
        <groupId>org.springframework.cloud</groupId>
        <artifactId>spring-cloud-starter-openfeign</artifactId>
</dependency>
创建feign的接口,启动类添加@EnableFeignClients注解
创建UserFeignClientFallBackFactory类,重写create方法
@FeignClient(value = "user-server",fallbackFactory = UserFeignClientFallBackFactory.class)
public interface IUserFeignClient {
    @RequestMapping("/user/getuser/{id}")
    public User getUser(@PathVariable("id")Long id);
}
@Component
public class UserFeignClientFallBackFactory implements FallbackFactory<IUserFeignClient> {
    @Override
    public IUserFeign create(Throwable throwable) {
        throwable.printStackTrace();
        return new IUserFeign() {
            @Override
            public User getUser(Long id) {
                return new User(-1L, "兜底数据", 18, "我被熔断了我");
            }
        };
    }
}
controller调用
@RestController
@RequestMapping("/order")
@Slf4j
public class OrderController {
    // --------------------------------
    @Autowired
    private IUserFeignClient iUserFeignClient;
    // ---------------------------------
    @RequestMapping("/getuser/{id}")
    public User getUser(@PathVariable("id") Long id){
        // 调用UserServer的API -- Http
        User user = iUserFeignClient.getUser(id);
        return user ;
    }
}
测试
http://localhost:1002/order/getuser/1

{
    "id": 1,
    "name": "菜鸟",
    "age": 18,
    "info": "惆怅中---:1001"
}
配置中心
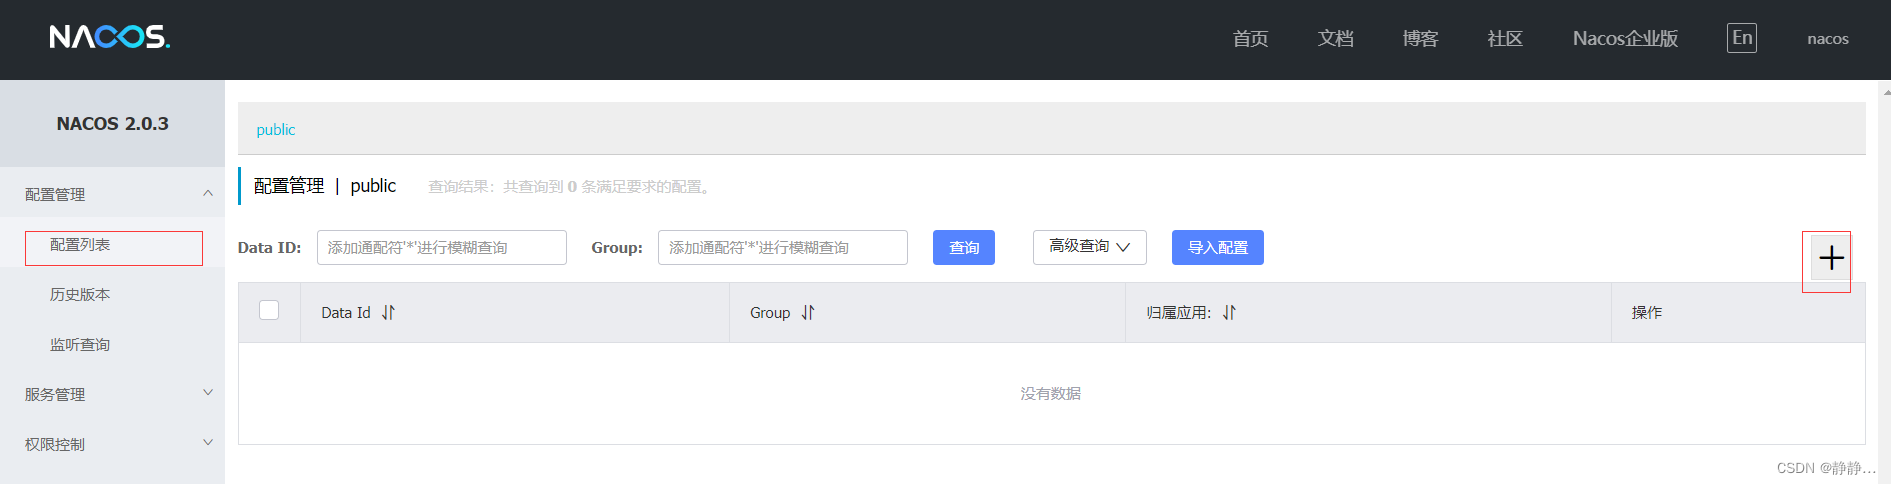
nacos新建配置
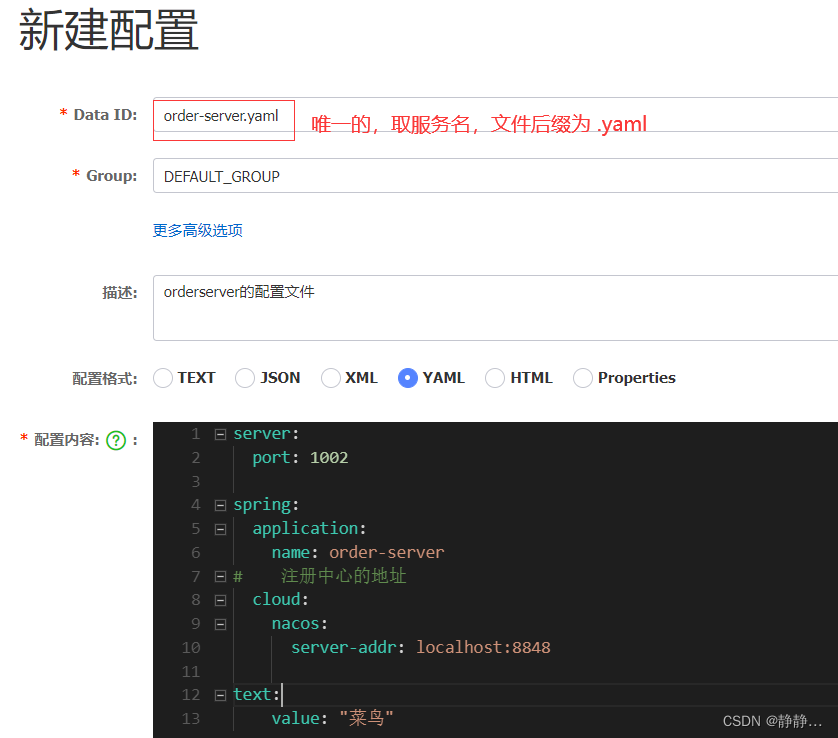
server:
 port: 1002

spring:
 application:
   name: order-server
#    注册中心的地址
 cloud:
   nacos:
     server-addr: localhost:8848
text:
  value: "菜鸟--"
将服务的配置放置在nacos上之后,服务如何获取到呢
集成nacos客户端
导入依赖
  <!--nacos 配置客户端的包 -->
    <dependency>
        <groupId>com.alibaba.cloud</groupId>
        <artifactId>spring-cloud-starter-alibaba-nacos-config</artifactId>
    </dependency>
启动类加注解 @RefreshScope,实现配置文件的自动更新,即当nacos中配置文件发生变化时,不用重新启动服务。
配置yml,获取nacos上面order-server.yaml的配置
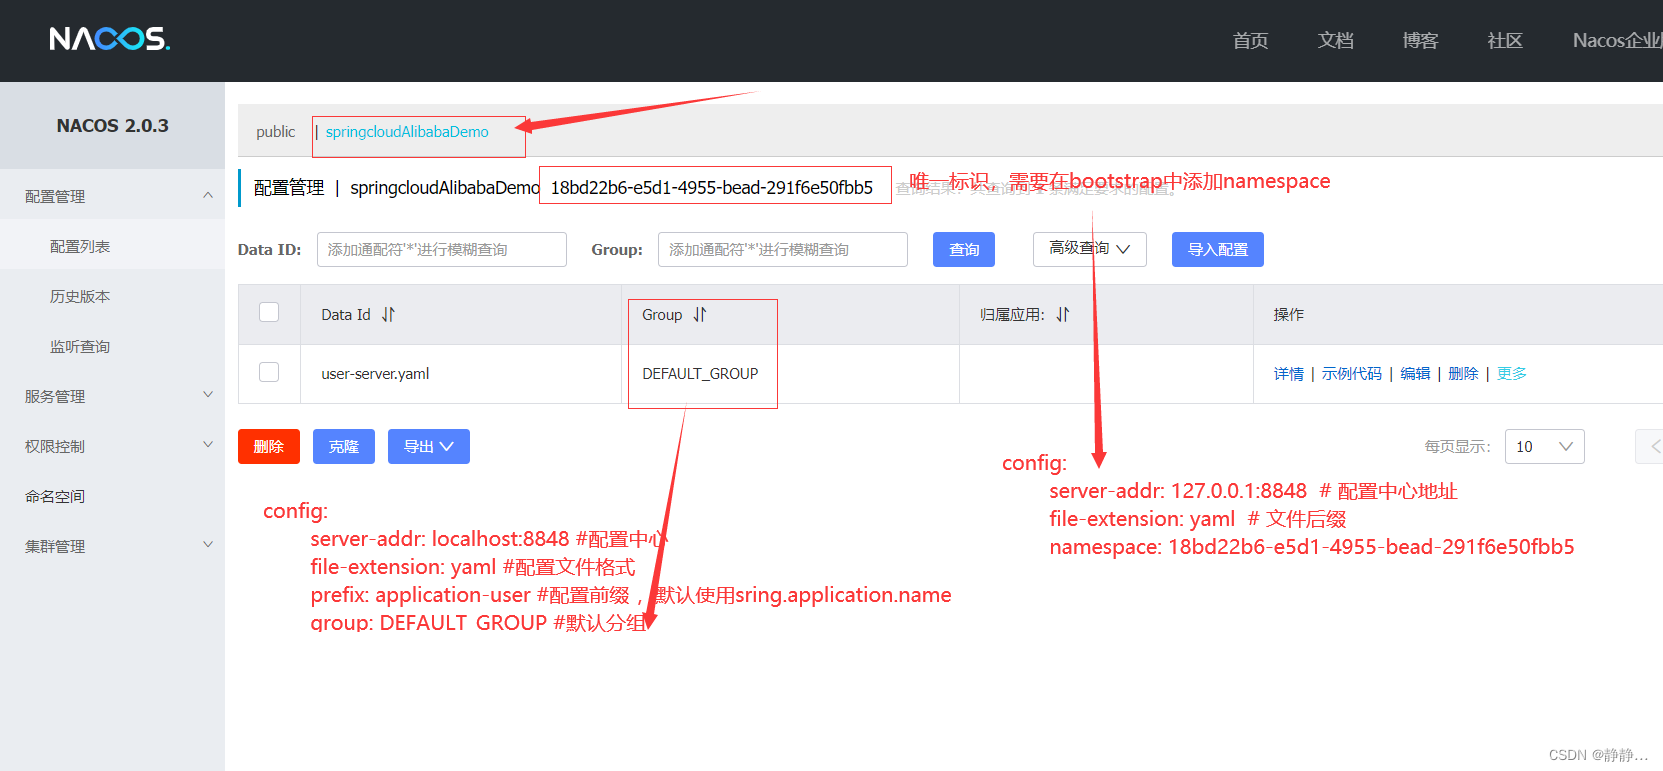
配置中心的路径、开发版本、后缀名
#server:
#  port: 1002
spring:
  application:
    name: order-server
  cloud:
    nacos:
      discovery:  #   注册中心的地址
        server-addr: 127.0.0.1:8848
#        ---------------------------------
      config:
        server-addr: 127.0.0.1:8848  # 配置中心地址
        file-extension: yaml  # 文件后缀
  profiles:
    active: dev  # 开发版本
测试
改写OrderController
@RestController
@RequestMapping("/order")
@Slf4j
public class OrderController {
@Resource
private IUserFeignClient iUserFeignClient;
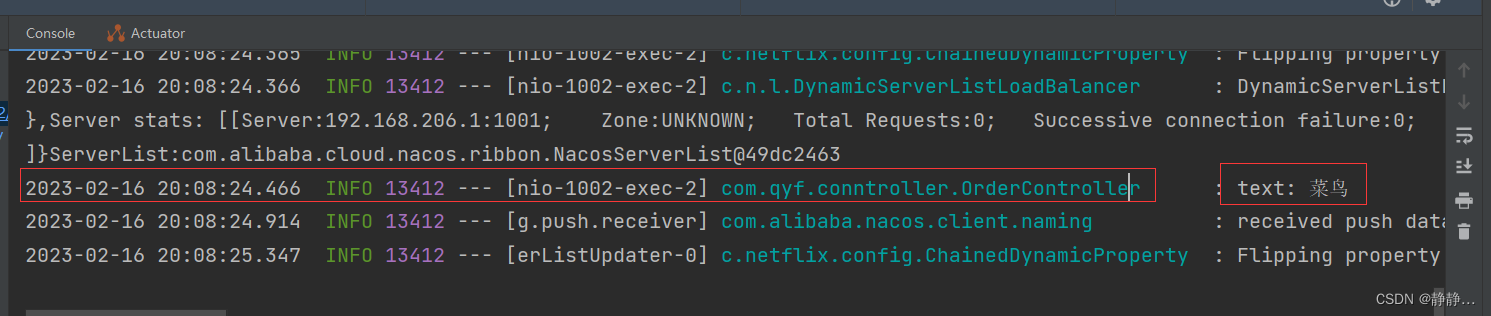
// ----------------------------------------测试是否在访问时能打印nacos配置文件中的内容“菜鸟”
@Value("${text.value}")
private String text;
// ----------------------------------------------
@RequestMapping("/getuser/{id}")
public User getUser(@PathVariable("id") Long id){
// 调用UserServer的API -- Http
User user = iUserFeignClient.getUser(id);
log.info("text: "+text);
return user ;
}
}重启order-server服务,访问 http://localhost:1002/order/getuser/1
nacos命名空间的使用
sentinel限流
下载与启动
Sentinel Server服务端
地址:https://github.com/alibaba/Sentinel/releases/download/1.6.0/sentinel-dashboard-1.6.0.jar
启动:java -jar -Dserver.port=1111 sentinel-dashboard-1.6.0.jar
可以新建xxx.bat文件,把上述启动命令放进去,双击即可
访问:http://127.0.0.1:1111 进入控制台,账号/密码 sentinel/sentinel登录。
使用sentinel
英/ ˈsentɪn(ə)l /
导入依赖
<!-- Sentinel 客户端 -->
<dependency>
  <groupId>com.alibaba.cloud</groupId>
  <artifactId>spring-cloud-starter-alibaba-sentinel</artifactId>
</dependency>注解@SentinelResource 用于标识资源是速率受限、降级,加在controller中,
@RestController
    @RequestMapping("/user")
    public class UserController {
        @Value("${server.port}")
        private int port;

        @RequestMapping("/getuser/{id}")
        @SentinelResource(value = "user-getUser",blockHandler = "getUserBlockHandler")
        public User getUser(@PathVariable("id") Long id) {

            return new User(id, "菜鸟", 18, "惆怅中---:" + port);
        }
        public User getUserBlockHandler(@PathVariable("id") Long id, BlockException e){
            e.printStackTrace();
            return new User(-1L,"菜鸟",500,"限流量");
        }
    }
yml配置
spring:
  cloud:
    sentinel:   # sentinel 仪表盘配置
      transport:
dashboard: 127.0.0.1:1111访问http://127.0.0.1:1111 Sentinel 控制台
访问 http://localhost:1001/user/getuser/1
user-server才会出现在sentinel控制台
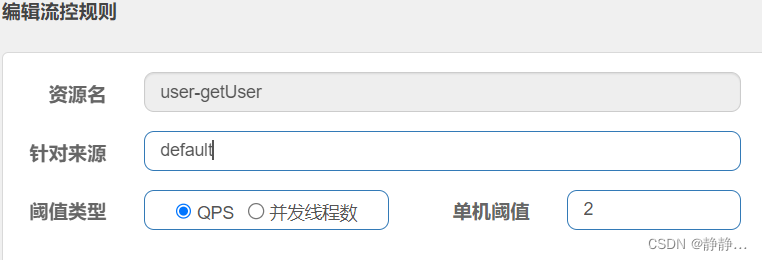
限流操作
@RestController
@RequestMapping("/user")
public class UserController {
    @Value("${server.port}")
    private int port;

    @RequestMapping("/getuser/{id}")
    @SentinelResource(value = "user-getUser",
                      blockHandler = "getUserBlockHandler",
                         blockHandlerClass = UserBlockHandler.class)
    public User getUser(@PathVariable("id") Long id) {
        return new User(id, "菜鸟", 18, "惆怅中---:" + port);
    }

    public User getUserBlockHandler(@PathVariable("id") Long id, BlockException e){
        e.printStackTrace();
        return new User(-1L,"菜鸟",500,"限流量");
    }
}
blockHandler = "getUserBlockHandler" 是通过调用本类中的getUserBlockHandler方法,返回兜底数据。 blockHandlerClass = UserBlockHandler.class是通过创建一个类,重写限流方法,返回兜底数据。
public class UserBlockHandler {
    // 必须是static方法
    public static User getUserBlockHandler(Long id, BlockException e){
        e.printStackTrace();
        return new User(-1L,"菜鸟",500,"限流量");
    }
}
限流(Gateway使用Sentinel限流)
创建getaway-server子工程
导入依赖
    <!-- nacaos 注册发现客户端 -->
    <dependency>
        <groupId>com.alibaba.cloud</groupId>
        <artifactId>spring-cloud-starter-alibaba-nacos-discovery</artifactId>
    </dependency>
    <!--nacos 配置客户端的包 -->
    <dependency>
        <groupId>com.alibaba.cloud</groupId>
        <artifactId>spring-cloud-starter-alibaba-nacos-config</artifactId>
    </dependency>
    <!-- Sentinel 客户端 -->
    <dependency>
        <groupId>com.alibaba.cloud</groupId>
        <artifactId>spring-cloud-starter-alibaba-sentinel</artifactId>
    </dependency>
         <!--gateway 的依赖-->
    <dependency>
        <groupId>org.springframework.cloud</groupId>
        <artifactId>spring-cloud-starter-gateway</artifactId>
    </dependency>
    <!--    限流和gataway使用-->
    <dependency>
        <groupId>com.alibaba.cloud</groupId>
        <artifactId>spring-cloud-alibaba-sentinel-gateway</artifactId>
    </dependency>
    <dependency>
        <groupId>com.alibaba.cloud</groupId>
        <artifactId>spring-cloud-starter-alibaba-sentinel</artifactId>
    </dependency>
配置yml
server:
  port: 1003

spring:
  application:
    name: gateway-server
#    注册中心的地址
  cloud:
    nacos:
      discovery:
        server-addr: localhost:8848

    sentinel:   # sentinel 仪表盘配置
      transport:
        dashboard: 127.0.0.1:1111

    gateway:
      discovery:
        locator:
          enabled: false #开放服务名访问方式
          lower-case-service-id: true #服务名小写
      routes:
        - id: application-geteway #指定服务名
          uri: lb://user-server #去注册中心找这个服务名
          predicates: #断言,匹配访问的路径
            - Path=/apis/user/**    #服务访问路径
          filters:
            - StripPrefix=2    #请求转发的时候会去掉 /user访问路径
sentinel 持久化
导入依赖
<!--Sentinel和Nacos做持久的-->
        <dependency>
            <groupId>com.alibaba.csp</groupId>
            <artifactId>sentinel-datasource-nacos</artifactId>
            <version>1.5.2</version>
        </dependency>
nacos 创建JSON文件,放置仪表盘配置的参数
[
    {
        "resource": "/user-getUser",
        "limitApp": "default",
        "grade": 1,
        "count": 2,
        "strategy": 0,
        "controlBehavior": 0,
        "clusterMode": false
    }
]
yml配置
#server:
#  port: 1001
#
#spring:
#  application:
#    name: user-server
##    注册中心的地址
#  cloud:
#    nacos:
#      server-addr: localhost:8848

spring:
  cloud:
    sentinel:   # sentinel 仪表盘配置
      transport:
        dashboard: 127.0.0.1:1111
          #====================持久化配置=================================
      datasource:
        flow:
          nacos: #限流持久配置
            server-addr: localhost:8848    #使用nacos的持久
            dataId: user-sentinel    #获取限流的数据源的dataId
            groupId: DEFAULT_GROUP
            rule-type: flow #类型:限流
            namespace: 18bd22b6-e5d1-4955-bead-291f6e50fbb5
sentinel 熔断
sentinel感知到熔断会抛出异常DegradeException
@RestController
@RequestMapping("/user")
public class UserController {
    @Value("${server.port}")
    private int port;

    @RequestMapping("/getuser/{id}")
    @SentinelResource(value = "user-getUser"
           // 限流
           blockHandler = "getUserBlockHandler",
           blockHandlerClass = UserBlockHandler.class,
//            熔断降级
           fallbackClass = UserFallback.class,
           fallback = "getUserFabbback"
    )
    public User getUser(@PathVariable("id") Long id) {
        int i= ThreadLocalRandom.current().nextInt(6);
        System.out.println(i%2);
         if (i%3==0){
             int x = 1/0;
         }
        return new User(id, "菜鸟", 18, "惆怅中---:" + port);
    }
public class UserFallback {
    public static User getUserFabbback( Long id, Throwable e){
        e.printStackTrace();
        return new User(-1L,"菜鸟",500,"熔断降级了");
    }
}
feign整合sentinel
导入依赖sentinel-starter
<!-- sentinel-->
        <dependency>
            <groupId>com.alibaba.cloud</groupId>
            <artifactId>spring-cloud-starter-alibaba-sentinel</artifactId>
        </dependency>
开启
feign:
  sentinel:
    enabled: true #熔断


 264
264

 被折叠的 条评论
为什么被折叠?
被折叠的 条评论
为什么被折叠?
 到【灌水乐园】发言


