


本文内容
- 创建应用程序项目
- 向项目添加新的用户控件
- 向主窗口添加用户控件
- 在用户控件中实现拖动源事件
- 向用户提供反馈
- 在用户控件中实现拖放目标事件
- 使面板能够接收放置的数据
在本演练中,将创建一个表示圆形的自定义 WPF UserControl。 你将在该控件上实现可通过拖放进行数据传输的功能。 例如,如果从一个圆形控件拖到另一个圆形控件,则会将填充颜色数据从源圆形复制到目标圆形。 如果从一个圆形控件拖到 TextBox,则填充颜色的字符串表示形式将复制到 TextBox。 你还将创建一个小应用程序,该应用程序包含两个面板控件和一个 TextBox,用以测试拖放功能。 你将编写可使面板处理放置的圆形数据的代码,这样就可以将圆形从一个面板的 Children 集合移动或复制到其他面板。
本演练阐释了以下任务:
-
创建自定义用户控件。
-
使用户控件成为拖动源。
-
使用户控件成为拖放目标。
-
使面板能够接收用户控件中放置的数据。
1、创建应用程序项目
在本节中,你将创建应用程序基础结构,其中包括一个具有两个面板和一个 TextBox 的主页。
-
使用 Visual Basic 或 Visual C# 创建名为
DragDropExample的新 WPF 应用程序项目。 -
打开 MainWindow.xaml。
-
在开始和结束 Grid 标记间添加以下标记。
此标记将创建用于测试应用程序的用户界面。
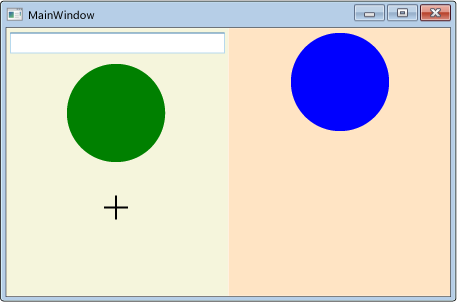
<Grid.ColumnDefinitions>
    <ColumnDefinition />
    <ColumnDefinition />
</Grid.ColumnDefinitions>
<StackPanel Grid.Column="0"
            Background="Beige">
    <TextBox Width="Auto" Margin="2"
             Text="green"/>
</StackPanel>
<StackPanel Grid.Column="1"
            Background="Bisque">
</StackPanel>
2、向项目添加新的用户控件
本节将介绍如何向项目添加新的用户控件。
-
在“项目”菜单中,选择“添加用户控件”。
-
在“添加新项”对话框中,将名称更改为
Circle.xaml,然后单击“添加”。Circle.xaml 及其代码隐藏内容将添加到项目中。
-
打开 Circle.xaml。
此文件将包含用户控件的用户界面元素。
-
将以下标记添加到根 Grid,以创建将蓝色圆形作为其 UI 的简单用户控件。
<Ellipse x:Name="circleUI" Height="100" Width="100" Fill="Blue" /> -
打开 Circle.xaml.cs 或 Circle.xaml.vb。
-
在 C# 中,在无参数构造函数后面添加以下代码以创建复制构造函数。 在 Visual Basic 中,添加以下代码以同时创建无参数构造函数和复制构造函数。
若要允许复制用户控件,需在代码隐藏文件中添加复制构造函数方法。 在简化的圆形用户控件中,将只复制该用户控件的填充和大小。
public Circle(Circle c)
{
    InitializeComponent();
    this.circleUI.Height = c.circleUI.Height;
    this.circleUI.Width = c.circleUI.Height;
    this.circleUI.Fill = c.circleUI.Fill;
}
3、向主窗口添加用户控件
-
打开 MainWindow.xaml。
-
将以下 XAML 添加到开始 Window 标记以创建对当前应用程序的 XML 命名空间引用。
xmlns:local="clr-namespace:DragDropExample" -
在第一个 StackPanel 中,添加以下 XAML,以在第一个面板中创建圆形用户控件的两个实例。
<local:Circle Margin="2" />
<local:Circle Margin="2" />
此面板的完整 XAML 如下所示。
<StackPanel Grid.Column="0"
            Background="Beige">
    <TextBox Width="Auto" Margin="2"
             Text="green"/>
    <local:Circle Margin="2" />
    <local:Circle Margin="2" />
</StackPanel>
<StackPanel Grid.Column="1"
            Background="Bisque">
</StackPanel>
4、在用户控件中实现拖动源事件
在本节中,将替代 OnMouseMove 方法并启动拖放操作。
如果已开始拖动(按下鼠标按钮并移动鼠标),则会将要传输的数据打包到 DataObject 中。 在这种情况下,圆形控件将打包三个数据项:其填充颜色的字符串表示形式、其高度的双精度表示形式以及其自身的副本。
启动拖放操作
-
打开 Circle.xaml.cs 或 Circle.xaml.vb。
-
添加以下 OnMouseMove 替代,以便为 MouseMove 事件提供类处理。
protected override void OnMouseMove(MouseEventArgs e)
{
    base.OnMouseMove(e);
    if (e.LeftButton == MouseButtonState.Pressed)
    {
        // Package the data.
        DataObject data = new DataObject();
        data.SetData(DataFormats.StringFormat, circleUI.Fill.ToString());
        data.SetData("Double", circleUI.Height);
        data.SetData("Object", this);

        // Initiate the drag-and-drop operation.
        DragDrop.DoDragDrop(this, data, DragDropEffects.Copy | DragDropEffects.Move);
    }
}
此 OnMouseMove 替代执行下列任务:
-
检查移动鼠标时是否按下了鼠标左键。
-
将圆形数据打包到 DataObject。 在这种情况下,圆形控件将打包三个数据项:其填充颜色的字符串表示形式、其高度的双精度表示形式以及其自身的副本。
-
调用静态 DragDrop.DoDragDrop 方法启动拖放操作。 向 DoDragDrop 方法传递以下三个参数:
-
dragSource– 对此控件的引用。 -
data- 上一个示例中创建的 DataObject。
-
-
-
按 F5 生成并运行应用程序。
-
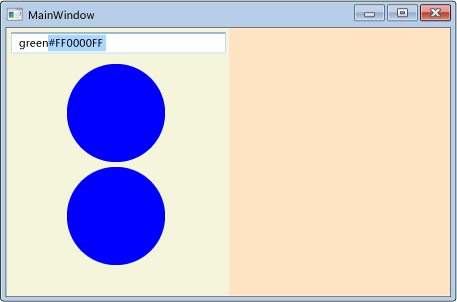
单击一个圆形控件并将其拖到面板、另一个圆形和 TextBox 上。 拖到 TextBox 上时,光标会更改,以指示移动。
-
将圆形拖到 TextBox 上时,按 Ctrl 键。 请注意光标是如何更改以指示复制的。
-
将圆形拖放到 TextBox 上。 该圆形填充颜色的字符串表示形式会追加到 TextBox。
默认情况下,光标会在拖放操作过程中更改,以指示放置数据会产生的效果。 可通过处理 GiveFeedback 事件并设置不同光标来自定义向用户提供的反馈。
5、向用户提供反馈
-
打开 Circle.xaml.cs 或 Circle.xaml.vb。
-
添加以下 OnGiveFeedback 替代,以便为 GiveFeedback 事件提供类处理。
protected override void OnGiveFeedback(GiveFeedbackEventArgs e)
{
    base.OnGiveFeedback(e);
    // These Effects values are set in the drop target's
    // DragOver event handler.
    if (e.Effects.HasFlag(DragDropEffects.Copy))
    {
        Mouse.SetCursor(Cursors.Cross);
    }
    else if (e.Effects.HasFlag(DragDropEffects.Move))
    {
        Mouse.SetCursor(Cursors.Pen);
    }
    else
    {
        Mouse.SetCursor(Cursors.No);
    }
    e.Handled = true;
}
此 OnGiveFeedback 替代执行下列任务:
-
按 F5 生成并运行应用程序。
-
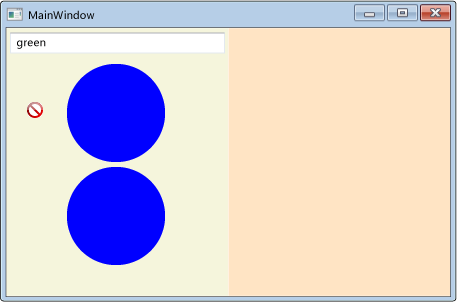
将一个圆形控件拖到面板、另一个圆形和 TextBox 上。 请注意,现在的光标是在 OnGiveFeedback 替代中指定的自定义光标。
-
从 TextBox 中选择文本
green。 -
将
green文本拖到一个圆形控件上。 请注意,将显示默认光标以指示拖放操作效果。 反馈光标始终由拖动源设置。
6、在用户控件中实现拖放目标事件
在本节中,你将指定用户控件为拖放目标,替代可使用户控件成为拖放目标的方法,并处理用户控件上放置的数据。
6.1 使用户控件成为拖放目标
-
打开 Circle.xaml。
-
在开始 UserControl 标记中,添加 AllowDrop 属性并将其设置为
true.<UserControl x:Class="DragDropWalkthrough.Circle" xmlns="http://schemas.microsoft.com/winfx/2006/xaml/presentation" xmlns:x="http://schemas.microsoft.com/winfx/2006/xaml" xmlns:mc="http://schemas.openxmlformats.org/markup-compatibility/2006" xmlns:d="http://schemas.microsoft.com/expression/blend/2008" mc:Ignorable="d" d:DesignHeight="300" d:DesignWidth="300" AllowDrop="True">
当 AllowDrop 属性设为 true 并且拖动源的数据放置在圆形用户控件上时,就会调用 OnDrop 方法。 在这种方法中,将处理已放置的数据,并将这些数据应用于圆形。
6.2 处理已放置的数据
-
打开 Circle.xaml.cs 或 Circle.xaml.vb。
-
添加以下 OnDrop 替代,以便为 Drop 事件提供类处理。
protected override void OnDrop(DragEventArgs e)
{
    base.OnDrop(e);

    // If the DataObject contains string data, extract it.
    if (e.Data.GetDataPresent(DataFormats.StringFormat))
    {
        string dataString = (string)e.Data.GetData(DataFormats.StringFormat);

        // If the string can be converted into a Brush,
        // convert it and apply it to the ellipse.
        BrushConverter converter = new BrushConverter();
        if (converter.IsValid(dataString))
        {
            Brush newFill = (Brush)converter.ConvertFromString(dataString);
            circleUI.Fill = newFill;

            // Set Effects to notify the drag source what effect
            // the drag-and-drop operation had.
            // (Copy if CTRL is pressed; otherwise, move.)
            if (e.KeyStates.HasFlag(DragDropKeyStates.ControlKey))
            {
                e.Effects = DragDropEffects.Copy;
            }
            else
            {
                e.Effects = DragDropEffects.Move;
            }
        }
    }
    e.Handled = true;
}
此 OnDrop 替代执行下列任务:
-
使用 GetDataPresent 方法检查拖动的数据是否包含字符串对象。
-
如果存在,请使用 GetData 方法提取字符串数据。
-
使用 BrushConverter 尝试将字符串转换为 Brush。
-
将 Drop 事件标记为已处理。 应将放置事件标记为已处理,这样接收此事件的其他元素才会知道圆形用户控件已处理了该事件。
-
-
按 F5 生成并运行应用程序。
-
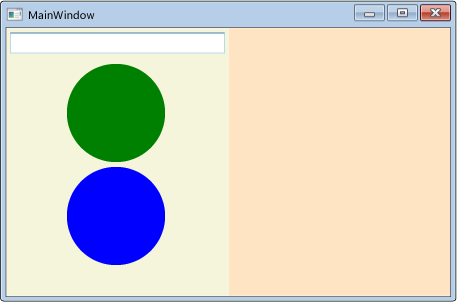
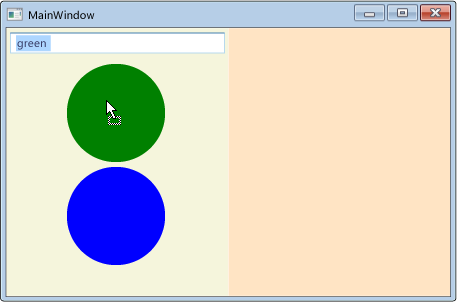
在 TextBox 中选择文本
green。 -
将文本拖放到一个圆形控件上。 该圆形会从蓝色变为绿色。
-
在
green中键入文本 TextBox。 -
在 TextBox 中选择文本
gre。 -
将其拖放到一个圆形控件上。 请注意,光标会更改以指示允许放置,但圆形的颜色不会更改,因为
gre不是有效颜色。 -
从绿色圆形控件拖放到蓝色圆形控件。 该圆形会从蓝色变为绿色。 请注意,显示的光标取决于是 TextBox 还是圆形作为拖动源。
若要使某个元素成为拖放目标,只需将 AllowDrop 属性设置为 true 并处理放置的数据。 但是,若要提供更佳的用户体验,还应处理 DragEnter、DragLeave 和 DragOver 事件。 在这些事件中,你可以在放置数据前执行检查并向用户提供其他反馈。
将数据拖动到圆形用户控件上时,该控件应通知拖动源它是否可以处理所拖动的数据。 如果该控件不知如何处理这些数据,则它应拒绝放置。 为此,你将处理 DragOver 事件并设置 Effects 属性。
6.3 验证是否允许数据放置
-
打开 Circle.xaml.cs 或 Circle.xaml.vb。
-
添加以下 OnDragOver 替代,以便为 DragOver 事件提供类处理。
protected override void OnDragOver(DragEventArgs e)
{
    base.OnDragOver(e);
    e.Effects = DragDropEffects.None;

    // If the DataObject contains string data, extract it.
    if (e.Data.GetDataPresent(DataFormats.StringFormat))
    {
        string dataString = (string)e.Data.GetData(DataFormats.StringFormat);

        // If the string can be converted into a Brush, allow copying or moving.
        BrushConverter converter = new BrushConverter();
        if (converter.IsValid(dataString))
        {
            // Set Effects to notify the drag source what effect
            // the drag-and-drop operation will have. These values are
            // used by the drag source's GiveFeedback event handler.
            // (Copy if CTRL is pressed; otherwise, move.)
            if (e.KeyStates.HasFlag(DragDropKeyStates.ControlKey))
            {
                e.Effects = DragDropEffects.Copy;
            }
            else
            {
                e.Effects = DragDropEffects.Move;
            }
        }
    }
    e.Handled = true;
}
此 OnDragOver 替代执行下列任务:
-
按 F5 生成并运行应用程序。
-
在 TextBox 中选择文本
gre。 -
将文本拖到一个圆形控件上。 请注意,光标此时会更改以指示不允许放置,因为
gre不是有效颜色。
可通过应用拖放操作预览进一步增强用户体验。 对于圆形用户控件,将替代 OnDragEnter 和 OnDragLeave 方法。 将数据拖动到该控件上时,当前背景 Fill 会保存在一个占位符变量中。 随后字符串会转换为画笔并应用于提供圆形 UI 的 Ellipse。 如果将数据拖动出该圆形而没有放置,则原始 Fill 值将重新应用于该圆形。
6.4 预览拖放操作的效果
-
打开 Circle.xaml.cs 或 Circle.xaml.vb。
-
在圆形类中,可声明一个名为
_previousFill的私有 Brush 变量,并将其初始化为null。public partial class Circle : UserControl { private Brush _previousFill = null; -
添加以下 OnDragEnter 替代,以便为 DragEnter 事件提供类处理。
protected override void OnDragEnter(DragEventArgs e)
{
    base.OnDragEnter(e);
    // Save the current Fill brush so that you can revert back to this value in DragLeave.
    _previousFill = circleUI.Fill;

    // If the DataObject contains string data, extract it.
    if (e.Data.GetDataPresent(DataFormats.StringFormat))
    {
        string dataString = (string)e.Data.GetData(DataFormats.StringFormat);

        // If the string can be converted into a Brush, convert it.
        BrushConverter converter = new BrushConverter();
        if (converter.IsValid(dataString))
        {
            Brush newFill = (Brush)converter.ConvertFromString(dataString.ToString());
            circleUI.Fill = newFill;
        }
    }
}
此 OnDragEnter 替代执行下列任务:
-
添加以下 OnDragLeave 替代,以便为 DragLeave 事件提供类处理。
protected override void OnDragLeave(DragEventArgs e)
{
    base.OnDragLeave(e);
    // Undo the preview that was applied in OnDragEnter.
    circleUI.Fill = _previousFill;
}
此 OnDragLeave 替代执行下列任务:
-
按 F5 生成并运行应用程序。
-
在 TextBox 中选择文本
green。 -
将该文本拖到一个圆形控件上而不放置。 该圆形会从蓝色变为绿色。
-
将文本拖离该圆形控件。 该圆形会从绿色变回蓝色。
7、使面板能够接收放置的数据
在本节中,让承载圆形用户控件的面板充当已拖动圆形数据的拖放目标。 将实现的代码使你可以将圆形从一个面板移动到另一个面板,或通过在拖放圆形时按住 Ctrl 键来复制圆形控件。
-
打开 MainWindow.xaml。
-
如以下 XAML 所示,在每个 StackPanel 控件中,为 DragOver 和 Drop 事件添加处理程序。 将 DragOver 事件处理程序命名为
panel_DragOver,并将 Drop 事件处理程序命名为panel_Drop。默认情况下,面板不是放置目标。 若要启用它们,请将 AllowDrop 属性添加到两个面板,并将值设置为
true。<StackPanel Grid.Column="0" Background="Beige" AllowDrop="True" DragOver="panel_DragOver" Drop="panel_Drop"> <TextBox Width="Auto" Margin="2" Text="green"/> <local:Circle Margin="2" /> <local:Circle Margin="2" /> </StackPanel> <StackPanel Grid.Column="1" Background="Bisque" AllowDrop="True" DragOver="panel_DragOver" Drop="panel_Drop"> </StackPanel> -
打开 MainWindows.xaml.cs 或 MainWindow.xaml.vb。
-
为 DragOver 事件处理程序添加以下代码。
private void panel_DragOver(object sender, DragEventArgs e)
{
    if (e.Data.GetDataPresent("Object"))
    {
        // These Effects values are used in the drag source's
        // GiveFeedback event handler to determine which cursor to display.
        if (e.KeyStates == DragDropKeyStates.ControlKey)
        {
            e.Effects = DragDropEffects.Copy;
        }
        else
        {
            e.Effects = DragDropEffects.Move;
        }
    }
}
此 DragOver 事件处理程序执行以下任务:
-
检查拖动的数据是否包含由圆形用户控件打包在 DataObject 中并且在 DoDragDrop 调用中传递的“对象”数据。
-
如果存在“对象”数据,请检查是否按下了 Ctrl 键。
-
-
为 Drop 事件处理程序添加以下代码。
private void panel_Drop(object sender, DragEventArgs e)
{
    // If an element in the panel has already handled the drop,
    // the panel should not also handle it.
    if (e.Handled == false)
    {
        Panel _panel = (Panel)sender;
        UIElement _element = (UIElement)e.Data.GetData("Object");

        if (_panel != null && _element != null)
        {
            // Get the panel that the element currently belongs to,
            // then remove it from that panel and add it the Children of
            // the panel that its been dropped on.
            Panel _parent = (Panel)VisualTreeHelper.GetParent(_element);

            if (_parent != null)
            {
                if (e.KeyStates == DragDropKeyStates.ControlKey &&
                    e.AllowedEffects.HasFlag(DragDropEffects.Copy))
                {
                    Circle _circle = new Circle((Circle)_element);
                    _panel.Children.Add(_circle);
                    // set the value to return to the DoDragDrop call
                    e.Effects = DragDropEffects.Copy;
                }
                else if (e.AllowedEffects.HasFlag(DragDropEffects.Move))
                {
                    _parent.Children.Remove(_element);
                    _panel.Children.Add(_element);
                    // set the value to return to the DoDragDrop call
                    e.Effects = DragDropEffects.Move;
                }
            }
        }
    }
}
此 Drop 事件处理程序执行以下任务:
-
检查是否已处理 Drop 事件。 例如,如果将一个圆形放置在处理 Drop 事件的另一个圆形上,则无需让包含该圆形的面板也处理该事件。
-
如果未处理 Drop 事件,请检查是否按下了 Ctrl 键。
-
如果在发生 Drop 时按下了 Ctrl 键,则会创建圆形控件的副本并将其添加到 StackPanel 的 Children 集合。
-
如果未按下 Ctrl 键,则将圆形从其父面板的 Children 集合移动到放置该圆形的面板的 Children 集合。
-
设置 Effects 属性以通知 DoDragDrop 方法是执行了移动还是复制操作。
-
-
按 F5 生成并运行应用程序。
-
从 TextBox 中选择文本
green。 -
将文本拖放到一个圆形控件上。
-
将一个圆形控件从左面板拖放到右面板。 该圆形将从左面板的 Children 集合中移除,并添加到右面板的 Children 集合中。
-
在按下 Ctrl 键的同时,将一个圆形控件从其所在的面板拖放到其他面板。 将复制该圆形并将副本添加到接收面板的 Children 集合中。


 1056
1056


 被折叠的 条评论
为什么被折叠?
被折叠的 条评论
为什么被折叠?
 到【灌水乐园】发言


