


HAPROXY
1.haproxy功能
TCP 和 HTTP反向代理
SSL/TSL服务器
可以针对HTTP请求添加cookie,进行路由后端服务器
可平衡负载至后端服务器,并支持持久连接
支持所有主服务器故障切换至备用服务器
支持专用端口实现监控服务
支持停止接受新连接请求,而不影响现有连接
可以在双向添加,修改或删除HTTP报文首部
响应报文压缩
支持基于pattern实现连接请求的访问控制
通过特定的URI为授权用户提供详细的状态信息
支持http反向代理
支持动态程序的反向代理
支持基于数据库的反向代理

不具备的功能:
正向代理--squid,nginx
缓存代理--varnish
web服务--nginx、tengine、apache、php、tomcat
UDP--目前不支持UDP协议
单机性能--相比LVS性能较差
2.haproxy安装
编译安装
#安装基础命令及编译依赖环境
[root@hap2 ~]# yum install gcc readline-devel -y
[root@hap2 ~]# ls
anaconda-ks.cfg lua-5.3.5.tar.gz
[root@hap2 ~]# tar xvf lua-5.3.5.tar.gz -C /usr/local/src
[root@hap2 ~]# cd /usr/local/src/lua-5.3.5/
[root@hap2 lua-5.3.5]# make linux test
#查看编译安装的版本
[root@hap2 lua-5.3.5]# src/lua -v
Lua 5.3.5 Copyright (C) 1994-2018 Lua.org, PUC-Rio
#haproxy2.0以上版本编译参数
[root@hap2 ~]# yum -y install gcc openssl-devel pcre-devel systemd-devel
[root@hap2 ~]# ls
anaconda-ks.cfg haproxy-2.1.3.tar.gz lua-5.3.5.tar.gz
[root@hap2 ~]# tar xvf haproxy-2.1.3.tar.gz -C /usr/local/src
[root@hap2 haproxy-2.1.3]# cd
[root@hap2 ~]# cd /usr/local/src/haproxy-2.1.3/
#查看安装方法
[root@hap2 haproxy-2.1.3]# ll Makefile
[root@hap2 haproxy-2.1.3]# cat README
[root@hap2 haproxy-2.1.3]# cat INSTALL
#参考INSTALL文件进行编译安装
[root@hap2 haproxy-2.1.3]# make ARCH=x86_64 TARGET=linux-glibc USE_PCRE=1 USE_OPENSSL=1 USE_ZLIB=1 USE_SYSTEMD=1 USE_LUA=1 LUA_INC=/usr/local/src/lua-5.3.5/src/ LUA_LIB=/usr/local/src/lua-5.3.5/src/
[root@hap2 haproxy-2.1.3]# make install PREFIX=/apps/haproxy
[root@hap2 haproxy-2.1.3]# ln -s /apps/haproxy/sbin/haproxy /usr/bin/
[root@hap2 haproxy-2.1.3]# tree /apps/haproxy/
#验证版本
[root@hap2 ~]# which haproxy
/usr/bin/haproxy
[root@hap2 ~]# haproxy -v
HA-Proxy version 2.1.3 2020/02/12 - https://haproxy.org/
Status: stable branch - will stop receiving fixes around Q1 2021.
Known bugs: http://www.haproxy.org/bugs/bugs-2.1.3.html
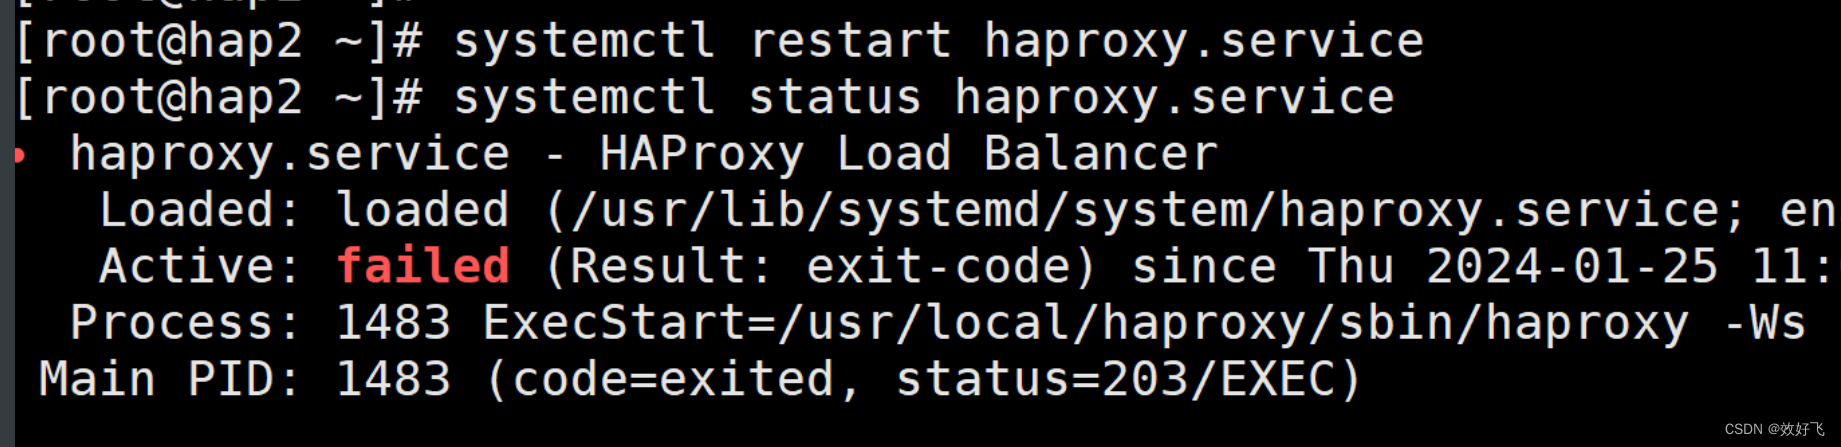
#准备haproxy启动文件
#默认缺少配置文件,无法启动
[root@hap2 ~]# systemctl daemon-reload
[root@hap2 ~]# systemctl start haproxy
Failed to start haproxy.service: Unit haproxy.service not found.
[root@hap2 ~]# systemctl start haproxy
Failed to start haproxy.service: Unit haproxy.service not found.
[root@hap2 ~]# tail /var/log/messages
Jan 25 10:03:11 test125 systemd[1]: cgroup compatibility translation between legacy and unified hierarchy settings activated. See cgroup-compat debug messages for details.
Jan 25 10:03:11 test125 systemd[1]: Starting man-db-cache-update.service...
Jan 25 10:03:11 test125 systemd[1]: Started /usr/bin/systemctl start man-db-cache-update.
Jan 25 10:03:11 test125 systemd[1]: Reloading.
Jan 25 10:03:25 test125 systemd[1]: man-db-cache-update.service: Succeeded.
Jan 25 10:03:25 test125 systemd[1]: Started man-db-cache-update.service.
Jan 25 10:03:25 test125 systemd[1]: run-r6c9d65cd5a2c4d43917eed7266f69368.service: Succeeded.
Jan 25 10:03:25 test125 systemd[1]: run-r986ee688f0b144adac00904430d4329a.service: Succeeded.
Jan 25 10:07:56 test125 rz[30735]: [root] haproxy-2.1.3.tar.gz/ZMODEM: 2675529 Bytes, 6575444 BPS
Jan 25 10:18:48 test125 systemd[1]: Reloading.
#创建service文件
[root@hap2 ~]# vim /usr/lib/systemd/system/haproxy.service
[Unit]
Description=HAProxy Load Balancer
After=syslog.target network.target
[Service]
ExecStart=/apps/haproxy/sbin/haproxy -Ws -f /etc/haproxy/haproxy.cfg -p var/lib/haproxy/haproxy.pid
ExecReload=/bin/kill -USR2 $MAINPID
KillMode=mixed
[Install]
WantedBy=multi-user.target
#配置文件
#查看配置文件范例
[root@hap2 ~]# tree /usr/local/src/haproxy-2.1.3/examples/
/usr/local/src/haproxy-2.1.3/examples/
├── acl-content-sw.cfg
├── content-sw-sample.cfg
├── errorfiles
│ ├── 400.http
│ ├── 403.http
│ ├── 408.http
│ ├── 500.http
│ ├── 502.http
│ ├── 503.http
│ ├── 504.http
│ └── README
├── haproxy.init
├── option-http_proxy.cfg
├── socks4.cfg
├── transparent_proxy.cfg
└── wurfl-example.cfg
1 directory, 15 files
[root@hap2 ~]# mkdir /etc/haproxy
[root@hap2 ~]# vim /etc/haproxy/haproxy.cfg
root@hap2 ~]# vim /etc/haproxy/haproxy.cfg
global
maxconn 100000
chroot /apps/haproxy
stats socket /var/lib/haproxy/haproxy.sock mode 600 level admin
user haproxy
group haproxy
daemon
pidfile /var/lib/haproxy/haproxy.pid
log 127.0.0.1 local2 info
defaults
option http-keep-alive
option forwardfor
maxconn 100000
mode http
timeout connect 300000ms
timeout client 300000ms
timeout server 300000ms
listen stats
mode http
bind 0.0.0.0:9999
stats enable
log global
stats uri /haproxy-status
stats auth haadmin:123456
listen web_port
bind 10.1.1.125:80
mode http
log global
server web1 127.0.0.1:8080 check inter 3000 fall 2 rise 5
#准备socket文件目录
[root@hap2 ~]# mkdir /var/lib/haproxy
#设置用户和目录权限
[root@hap2 ~]# useradd -r -s /sbin/nologin -d /var/lib/haproxy haproxy
[root@hap2 ~]# systemctl enable --now haproxy
[root@hap2 ~]# pstree -p |grep haproxy
|-haproxy(1550)---haproxy(1551)-+-{haproxy}(1552)
| |-{haproxy}(1553)
| `-{haproxy}(1554)
编译过程中的错误
查看日志

查找文件

验证

3.haproxy基础配置
global:全局配置
进程及安全配置相关的参数
性能调整相关参数
Debug参数
proxies:代理配置端
defaults:为frontend, backend, listen提供默认配置
frontend:前端,相当于nginx中的server {}
backend:后端,相当于nginx中的upstream {}
listen:同时拥有前端和后端配置,配置简单,生产推荐使用
3.1global配置
chroot #锁定运行目录
deamon #以守护进程运行
stats socket /var/lib/haproxy/haproxy.sock mode 600 level admin process 1
#socket文件,并可以通过此文件管理
user, group, uid, gid  #运行haproxy的用户身份
#cpu-map 1 0   #绑定haproxy worker 进程至指定CPU,将第1个worker进程绑定至0号CPU
#cpu-map 2 1     #绑定haproxy worker 进程至指定CPU,将第2个worker进程绑定至1号CPU
axconn n   #每个haproxy进程的最大并发连接数
maxsslconn n   #每个haproxy进程ssl最大连接数,用于haproxy配置了证书的场景下
maxconnrate n   #每个进程每秒创建的最大连接数量
spread-checks n #后端server状态check随机提前或延迟百分比时间,建议2-5(20%-50%)之间,默认
值0
pidfile #指定pid文件路径
log 127.0.0.1 local2 info #定义全局的syslog服务器;日志服务器需要开启UDP协议,最多可以定
义两个
haproxy日志配置
HAproxy本身不记录客户端的访问日志.此外为减少服务器负载,一般生产中HAProxy不记录日志. 也可以配置HAProxy利用rsyslog服务记录日志到指定日志文件中
haproxy配置
#在global配置项定义:
log 127.0.0.1 local3 info#基于syslog记录日志到指定设备,级别有(err、warning、info、debug)
listen web_port
 bind 127.0.0.1:80
 mode http
 log global #开启当前web_port的日志功能,默认不记录日志
 server web1  127.0.0.1:8080 check inter 3000 fall 2 rise 5
# systemctl restart haproxy
rsyslog配置
[root@hap2 ~]# vim /etc/rsyslog.conf  #haproxy中local3要与rsyslog.conf中local3.*一致
$ModLoad imudp
$UDPServerRun 514
local3.*                                                /var/log/haproxy.log
[root@hap2 ~]# systemctl restart rsyslo
验证haproxy日志
[root@hap2 ~]# tail -f /var/log/haproxy.log
2024-01-25T19:47:03+08:00 localhost haproxy[2551]: Proxy web_server started.
2024-01-25T19:52:29+08:00 localhost haproxy[2552]: 10.1.1.124:60692 [25/Jan/2024:19:52:29.216] web_server web_server/web1 0/0/1/2/3 200 214 - - ---- 1/1/0/0/0 0/0 {curl/7.61.1|10.1.1.125} "GET / HTTP/1.1"
3.2proxies配置
defaults [<name>] #默认配置项,针对以下的frontend、backend和listen生效,可以多个name也可
以没有name
frontend <name>   #前端servername,类似于Nginx的一个虚拟主机 server和LVS服务集群。
backend <name>   #后端服务器组,等于nginx的upstream和LVS中的RS服务器
listen   <name>   #将frontend和backend合并在一起配置,相对于frontend和backend配置更简
洁,生产常用
注意:注意:name字段只能使用大小写字母,数字,‘-’(dash),‘_‘(underscore),’.’ (dot)和 ‘:’(colon),并且严 格区分大小写
defaults配置参数
option redispatch     #当server Id对应的服务器挂掉后,强制定向到其他健康的服务器,重新派
发
option abortonclose   #当服务器负载很高时,自动结束掉当前队列处理比较久的连接,针对业务情
况选择开启
option http-keep-alive #开启与客户端的会话保持
option forwardfor     #透传客户端真实IP至后端web服务器
mode http|tcp #设置默认工作类型,使用TCP服务器性能更好,减少压力
timeout http-keep-alive 120s #session 会话保持超时时间,此时间段内会转发到相同的后端服务
器
timeout connect 120s #客户端请求从haproxy到后端server最长连接等待时间(TCP连接之前),
默认单位ms
timeout server 600s #客户端请求从haproxy到后端服务端的请求处理超时时长(TCP连接之后),
默认单位ms,如果超时,会出现502错误,此值建议设置较大些,防止出现502错误
timeout client 600s #设置haproxy与客户端的最长非活动时间,默认单位ms,建议和timeout
server相同
timeout check   5s   #对后端服务器的默认检测超时时间
default-server inter 1000 weight 3   #指定后端服务器的默认设置
listen简化配置
#官网业务访问入口
listen WEB_PORT_80
   bind 192.168.10.100:80
   mode http
   option forwardfor
   server web1   10.0.0.17:8080   check inter 3000 fall 3 rise 5
   server web2   10.0.0.27:8080   check inter 3000 fall 3 rise 5
#检查语法
[root@ubuntu2004 ~]#haproxy -c -f /etc/haproxy/haproxy.cfg
Configuration file is valid
frontend配置
bind: #指定HAProxy的监听地址,可以是IPV4或IPV6,可以同时监听多个IP或端口,可同时用于
listen字段中
#格式:
bind [<address>]:<port_range> [, ...] [param*]
#注意:如果需要绑定在非本机的IP,需要开启内核参数:net.ipv4.ip_nonlocal_bind=1
backlog <backlog> #针对所有server配置,当前端服务器的连接数达到上限后的后援队列长度,注
意:不支持backend
范例:
rontend http_proxy #监听http的多个IP的多个端口和sock文件
   bind :80,:443,:8801-8810
   bind 10.0.0.1:10080,10.0.0.1:10443
   bind /var/run/ssl-frontend.sock user root mode 600 accept-proxy
frontend http_https_proxy #https监听
   bind :80
   bind :443 ssl crt /etc/haproxy/site.pem #公钥和私钥公共文件
frontend http_https_proxy_explicit #监听ipv6、ipv4和unix sock文件
   bind ipv6@:80
   bind ipv4@public_ssl:443 ssl crt /etc/haproxy/site.pem
   bind unix@ssl-frontend.sock user root mode 600 accept-proxy
listen external_bind_app1 #监听file descriptor
   bind "fd@${FD_APP1}"
#生产示例
frontend wang_web_port #建议采用后面形式命名:业务-服务-端口号
   bind :80,:8080
   bind 10.0.0.7:10080,:8801-8810,10.0.0.17:9001-9010
   mode http|tcp     #指定负载协议类型
   use_backend <backend_name>  #调用的后端服务器组名称
backend配置
定义一组后端服务器,backend服务器将被frontend进行调用。 注意: backend 的名称必须唯一,并且必须在listen或frontend中事先定义才可以使用,否则服务无法启动
注意:option后面加 httpchk,smtpchk,mysql-check,pgsql-check,ssl-hello-chk方法,可用于实现更 多应用层检测功能。
mode http|tcp     #指定负载协议类型,和对应的frontend必须一致
option #配置选项
server   #定义后端real server,必须指定IP和端口
server配置
#针对一个server配置
check #对指定real进行健康状态检查,如果不加此设置,默认不开启检查,只有check后面没
有其它配置也可以启用检查功能
 #默认对相应的后端服务器IP和端口,利用TCP连接进行周期性健康性检查,注意必须指定
端口才能实现健康性检查
 addr <IP>   #可指定的健康状态监测IP,可以是专门的数据网段,减少业务网络的流量
 port <num> #指定的健康状态监测端口
 inter <num> #健康状态检查间隔时间,默认2000 ms
fall <num>   #后端服务器从线上转为线下的检查的连续失效次数,默认为3
 rise <num>   #后端服务器从下线恢复上线的检查的连续有效次数,默认为2
weight <weight> #默认为1,最大值为256,0(状态为蓝色)表示不参与负载均衡,但仍接受持久连接
backup #将后端服务器标记为备份状态,只在所有非备份主机down机时提供服务,类似
Sorry Server
disabled #将后端服务器标记为不可用状态,即维护状态,除了持久模式,将不再接受连接,
状态为深黄色,优雅下线,不再接受新用户的请求
maxconn <maxconn> #当前后端server的最大并发连接数,放在,放在server 指令后面
redir http://www.baidu.com       #将请求临时(302)重定向至其它URL,只适用于http模式,放在server 指令后面
redirect配置
#注意:此指令和redir功能相似,但不属于server指令后面,是独立存放在listen,frontend,backend语
句块
redirect prefix http://www.baidu.com/ #将请求临时(302)重定向至其它URL,只适用于http模式
frontend+backend配置实例
frontend wang-test-http
 bind :80,:8080
 mode tcp
 use_backend wang-test-http-nodes

backend wang-test-http-nodes
 mode tcp
 default-server inter 1000 weight 6
 server web1 10.0.0.17:80 weight 2 check addr 10.0.0.117 port 8080
 server web1 10.0.0.27:80 check
范例2:
#官网业务访问入口
frontend WEB_PORT_80
   bind 10.0.0.7:80
   mode http
   use_backend web_prot_http_nodes
backend web_prot_http_nodes
   mode http
   option forwardfor
   server 10.0.0.17 10.0.0.17:8080   check inter 3000 fall 3 rise 5
   server 10.0.0.27 10.0.0.27:8080   check inter 3000 fall 3 rise 5
3.3子配置文件保存配置
当业务众多时,将所有配置都放在一个配置文件中,会造成维护困难。可以考虑按业务分类,将配置信 息拆分,放在不同的子配置文件中,从而达到方便维护的目的。
#创建子配置目录
[root@centos7 ~]#mkdir /etc/haproxy/conf.d/
#添加子配置目录到unit文件中
[root@centos7 ~]#vim /lib/systemd/system/haproxy.service
[Unit]
Description=HAProxy Load Balancer
After=syslog.target network.target
[Service]
#修改下面两行
ExecStartPre=/usr/sbin/haproxy -f /etc/haproxy/haproxy.cfg -f
/etc/haproxy/conf.d/ -c -q
ExecStart=/usr/sbin/haproxy -Ws -f /etc/haproxy/haproxy.cfg -f
/etc/haproxy/conf.d/  -p /var/lib/haproxy/haproxy.pid
ExecReload=/bin/kill -USR2 $MAINPID
[Install]
WantedBy=multi-user.target
#创建子配置文件,注意:必须为cfg后缀非.开头的配置文件
[root@centos7 ~]#vim   /etc/haproxy/conf.d/test.cfg
listen WEB_PORT_80
 bind 10.0.0.7:80
 mode http
 balance roundrobin
 server web1  10.0.0.17:80 check inter 3000 fall 2 rise 5
 server web2  10.0.0.27:80 check inter 3000 fall 2 rise 5
[root@centos7 ~]#systemctl daemon-reload
[root@centos7 ~]#systemctl restart haproxy
[Unit]
Description=HAProxy Load Balancer
After=syslog.target network.target
[Service]
ExecStartPre=/apps/haproxy/sbin/haproxy -f /etc/haproxy/haproxy.cfg -f /etc/haproxy/conf.d/ -c -q
ExecStart=/apps/haproxy/sbin/haproxy -Ws -f /etc/haproxy/haproxy.cfg -f /etc/haproxy/conf.d/ -p /var/lib/haproxy/haproxy.pid
ExecReload=/bin/kill -USR2 $MAINPID
[Install]
WantedBy=multi-user.target
4.haproxy调度算法
HAProxy通过固定参数 balance 指明对后端服务器的调度算法,该参数可以配置在listen或backend选 项中。
HAProxy的调度算法分为静态和动态调度算法,但是有些算法可以根据参数在静态和动态算法中相互转 换。
4.1静态算法
静态算法:按照事先定义好的规则轮询进行调度,不关心后端服务器的当前负载、连接数和响应速度 等,且无法实时动态修改权重(只能为0和1,不支持其它值)或者修改后不生效,如果需要修改只能靠重启 HAProxy生效。
4.2动态算法
动态算法:基于后端服务器状态进行调度适当调整,新请求将优先调度至当前负载较低的服务器,且权 重可以在haproxy运行时动态调整无需重启。
4.3算法总结
#静态

static-rr--------->tcp/http
first------------->tcp/http

#动态

roundrobin-------->tcp/http
leastconn--------->tcp/http
random------------>tcp/http
5.haproxy高级功能
5.1基于cookie的会话保持
5.2haproxy状态页
状态页配置项
stats enable   #基于默认的参数启用stats page
stats hide-version   #将状态页中haproxy版本隐藏
stats refresh <delay> #设定自动刷新时间间隔,默认不自动刷新,以秒为单位
stats uri <prefix> #自定义stats page uri,默认值:/haproxy?stats
stats realm <realm> #账户认证时的提示信息,示例:stats realm   HAProxy\
Statistics
stats auth <user>:<passwd> #认证时的账号和密码,可定义多个用户,每行指定一个用户.默认:no
authentication
stats admin { if | unless } <cond> #启用stats page中的管理功能
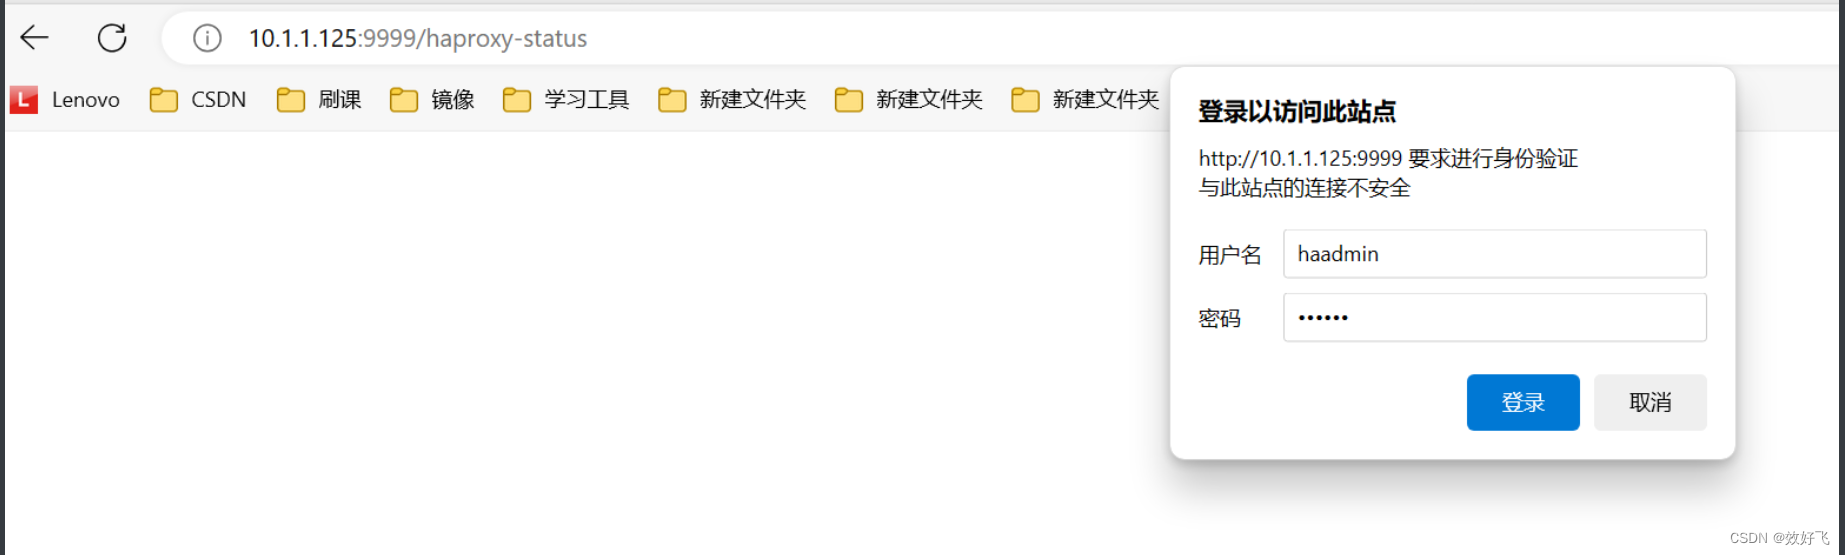
启用状态页实例
listen haproxy-status
 bind :9999
 stats enable
 #stats hide-version
 stats uri /haproxy-status           #自定义stats page uri
 stats realm HAProxy\ Stats\ Page     #账户认证时的提示信息
 stats auth haadmin:123456   #支持多个用户
 stats auth admin:123456
  #stats refresh 30
 stats admin if TRUE   #开启管理功能,基于安全原因,不建议开启
登录状态页说明
pid = 27134 (process #1, nbproc = 1, nbthread = 1) #pid为当前pid号,process为当前进
程号,nbproc和nbthread为一共多少进程和每个进程多少个线程
uptime = 0d 0h00m04s #启动了多长时间
system limits: memmax = unlimited; ulimit-n = 200029 #系统资源限制:内存/最大打开文件数/
maxsock = 200029; maxconn = 100000; maxpipes = 0 #最大socket连接数/单进程最大连接数/
最大管道数maxpipes
current conns = 2; current pipes = 0/0; conn rate = 2/sec; bit rate = 0.000 kbps
#当前连接数/当前管道数/当前连接速率
Running tasks: 1/14; idle = 100 % #运行的任务/当前空闲率
active UP: #在线服务器
backup UP: #标记为backup的服务器
active UP, going down: #监测未通过正在进入down过程
backup UP, going down: #备份服务器正在进入down过程
active DOWN, going up: #down的服务器正在进入up过程
backup DOWN, going up: #备份服务器正在进入up过程
active or backup DOWN: #在线的服务器或者是backup的服务器已经转换成了down状态
not checked: #标记为不监测的服务器
active or backup DOWN for maintenance (MAINT) #active或者backup服务器人为下线的
active or backup SOFT STOPPED for maintenance #active或者backup被人为软下线(人为将weight改成0)
利用状态页实现haproxy服务器的健康性检查
[root@hap2 ~]# curl -I -m 1 http://haadmin:123456@10.1.1.125:9999/haproxy-status
HTTP/1.1 200 OK
cache-control: no-cache
content-type: text/html
[root@hap2 ~]# curl -I -u haadmin:123456 http://10.1.1.125:9999/haproxy-status
HTTP/1.1 200 OK
cache-control: no-cache
content-type: text/html
[root@hap2 ~]# systemctl stop haproxy.service
[root@hap2 ~]# curl -I -m 1 http://haadmin:123456@10.1.1.125:9999/haproxy-status
curl: (7) Failed to connect to 10.1.1.125 port 9999: 拒绝连接
[root@hap2 ~]# echo $?
7
5.3IP透传
web服务器中需要记录客户端的真实IP地址,用于做访问统计、安全防护、行为分析、区域排行等场 景。
四层:IP+PORT转发
七层:协议+内容交换
四层负载
在LVS传统的四层负载设备中,在LVS 传统的四层负载设备中,把client发送的报文目标地址(原来是负载均衡设备的IP地址),根据均衡
设备设置的选择web服务器的规则选择对应的web服务器IP地址,这样client就可以直接跟此服务器建立
TCP连接并发送数据,而四层负载自身不参与建立连接而和LVS不同,haproxy是伪四层负载均衡,因为haproxy 需要分别和前端客户端及后端服务器建立连接
七层代理
七层负载均衡服务器起了一个反向代理服务器的作用,服务器建立一次TCP连接要三次握手,而client要
访问Web Server要先与七层负载设备进行三次握手后建立TCP连接,把要访问的报文信息发送给七层负
载均衡;然后七层负载均衡再根据设置的均衡规则选择特定的 Web Server,然后通过三次握手与此台
Web Server建立TCP连接,然后Web Server把需要的数据发送给七层负载均衡设备,负载均衡设备再把
数据发送给client;所以,七层负载均衡设备起到了代理服务器的作用,七层代理需要和Client和后端服
务器分别建立连接
范例:四层ip透传
#haproxy配置
[root@hap2 ~]# vim /etc/haproxy/haproxy.cfg
listen web_http_nodes
    bind 10.1.1.125:80  #用80端口,
    mode tcp #不支持http协议
    balance roundrobin
    server web1 10.1.1.126:80 send-proxy check inter 3000 fall 3 rise 3 #添加send-proxy
#nginx配置:在访问日志中通过变量$proxy_protocol_addr 记录透传过来的客户端IP
http {
 log_format main  '$remote_addr - $remote_user [$time_local] "$request"
"$proxy_protocol_addr"'
  server {
       listen       80 proxy_protocol; #启用此项,将无法直接访问此网站,只能通过四层代理访问
       server_name 10.1.1.126;
}
#nginx在开启proxy_protocol后,可以看到客户端真实源ip
[root@nignx ~]# tail -f /var/log/nginx/access.log
10.1.1.125 - - [25/Jan/2024:14:01:27 +0800] "GET / HTTP/1.1" "10.1.1.124"
10.1.1.125 - - [25/Jan/2024:14:05:29 +0800] "GET / HTTP/1.1" "10.1.1.124"
10.1.1.125 - - [25/Jan/2024:14:09:48 +0800] "GET / HTTP/1.1" "10.1.1.121"
10.1.1.125 - - [25/Jan/2024:14:10:00 +0800] "GET / HTTP/1.1" "10.1.1.121"
10.1.1.125 - - [25/Jan/2024:14:13:50 +0800] "GET / HTTP/1.1" "10.1.1.124"
10.1.1.125 - - [25/Jan/2024:14:13:51 +0800] "GET / HTTP/1.1" "10.1.1.124"
范例:七层IP透传
haproxy配置
在由haproxy发往后端主机的请求报文中添加“X-Forwarded-For"首部,其值为前端客户端的地址;用于 向后端主发送真实的客户端IP
option forwardfor [ except <network> ] [ header <name> ] [ if-none ]
[ except <network> ]:请求报请来自此处指定的网络时不予添加此首部,如haproxy自身所在网络
[ header <name> ]:使用自定义的首部名称,而非“X-Forwarded-For",示例:X-client
[ if-none ] 如果没有首部才添加首部,如果有使用默认值
范例
defaults
#此为默认值,首部字段默认为:X-Forwarded-For
option forwardfor
#或者自定义首部,如:X-client
option forwardfor except 127.0.0.0/8 header X-client
#listen配置

isten web_server
        bind 10.1.1.125:80
        mode http #一定是http模式,tcp模式不会传递客户端ip
        option forwardfor
        server web1 10.1.1.126:80 check inter 3s fall 3 rise 5
后端web服务器日志格式配置
配置web服务器,记录负载均衡透传的客户端ip地址
#apache 配置:需要修改才支持
LogFormat "%{X-Forwarded-For}i %a %l %u %t \"%r\" %>s %b \"%{Referer}i\" \"%
{User-Agent}i\"" combined
#nginx 日志格式:默认就支持
$proxy_add_x_forwarded_for:包括客户端IP和中间经过的所有代理的IP
$http_x_forwarded_For:只有客户端IP
log_format main '"$proxy_add_x_forwarded_for" - $remote_user [$time_local]
"$request" '
'$status $body_bytes_sent "$http_referer" '
'"$http_user_agent" $http_x_forwarded_For';
[root@centos8 ~]#tail /var/log/nginx/access.log
"172.16.0.200, 10.0.0.7" 10.0.0.7 - - [09/Apr/2020:19:10:16 +0800] "GET /
HTTP/1.1" 200 4057 "-" "curl/7.19.7 (x86_64-redhat-linux-gnu) libcurl/7.19.7
NSS/3.27.1 zlib/1.2.3 libidn/1.18 libssh2/1.4.2" "172.16.0.200"
#tomcat 配置:conf目录下的server.xml
<Valve className="org.apache.catalina.valves.AccessLogValve" directory="logs"
prefix="localhost_access_log" suffix=".txt"
pattern="%{X-Forwarded-For}i %h %l %u %t "%r" %s %b" />
nginx配置
http {
   log_format main '"$proxy_add_x_forwarded_for" - $remote_user [$time_local] "$request" ''
                      '$status $body_bytes_sent "$http_referer" '
                      '"$http_user_agent" "$http_x_forwarded_for"';
       server {
        listen       80 ;
        server_name  10.1.1.126;
        root         /usr/share/nginx/html;

                      }
验证客户端ip地址
[root@test126 ~]# tail -f /var/log/nginx/access.log
"10.1.1.124" - - [25/Jan/2024:15:38:09 +0800] "GET / HTTP/1.1" 200 11 "-" "curl/7.61.1" "-"
"10.1.1.124, 10.1.1.125" - - [25/Jan/2024:15:38:25 +0800] "GET / HTTP/1.1" 200 11 "-" "curl/7.61.1" "10.1.1.124"
"10.1.1.121, 10.1.1.125" - - [25/Jan/2024:15:46:02 +0800] "GET / HTTP/1.1" 200 11 "-" "curl/7.61.1" "10.1.1.121"
"10.1.1.121, 10.1.1.125" - - [25/Jan/2024:15:46:06 +0800] "GET / HTTP/1.1" 200 11 "-" "curl/7.61.1" "10.1.1.121"
"10.1.1.121, 10.1.1.125" - - [25/Jan/2024:15:46:06 +0800] "GET / HTTP/1.1" 200 11 "-" "curl/7.61.1" "10.1.1.121"
5.5自定义日志格式
log global 开启日志功能,默认只会在记录下面格式的日志
listen web_server
        bind 10.1.1.125:80
        log global   #开启日志功能
        option httplog   #开启httplog日志选项
        capture request header User-Agent len 512  #记录日志信息,记录User-Agent首部值的
        capture request header Host len 256  #记录日志信息,记录host首部值
        mode http
        option forwardfor
        server web1 10.1.1.126:80 check inter 3s fall 3 rise 5
验证日志格式
[root@hap2 ~]# tail -f /var/log/haproxy.log
2024-01-25T19:47:03+08:00 localhost haproxy[2551]: Proxy web_server started.
2024-01-25T19:52:29+08:00 localhost haproxy[2552]: 10.1.1.124:60692 [25/Jan/2024:19:52:29.216] web_server web_server/web1 0/0/1/2/3 200 214 - - ---- 1/1/0/0/0 0/0 {curl/7.61.1|10.1.1.125} "GET / HTTP/1.1"
2024-01-25T19:54:44+08:00 localhost haproxy[2612]: Proxy web_server started.
2024-01-25T19:54:53+08:00 localhost haproxy[2614]: 10.1.1.124:33182 [25/Jan/2024:19:54:53.298] web_server web_server/web1 0/0/1/1/2 200 214 - - ---- 1/1/0/0/0 0/0 {curl/7.61.1|10.1.1.125} "GET / HTTP/1.1"
2024-01-25T19:54:53+08:00 localhost haproxy[2614]: 10.1.1.124:33194 [25/Jan/2024:19:54:53.990] web_server web_server/web1 0/0/1/1/2 200 214 - - ---- 1/1/0/0/0 0/0 {curl/7.61.1|10.1.1.125} "GET / HTTP/1.1"
2024-01-25T19:54:54+08:00 localhost haproxy[2614]: 10.1.1.124:33196 [25/Jan/2024:19:54:54.812] web_server web_server/web1 0/0/1/1/2 200 214 - - ---- 1/1/0/0/0 0/0 {curl/7.61.1|10.1.1.125} "GET / HTTP/1.1"
5.6压缩功能
对响应给客户端的报文进行压缩,以节省网络带宽,但是会占用部分CPU性能,建议在后端服务器开启压缩功能,而非在HAProxy上开启压缩
配置选项
ompression algo <algorithm> ... #启用http协议中的压缩机制,常用算法有
gzip,deflate
#压缩算法<algorithm>支持下面类型:
 identity #debug调试使用的压缩方式
 gzip #常用的压缩方式,与各浏览器兼容较好
 deflate #有些浏览器不支持
 raw-deflate #新式的压缩方式
compression type <mime type> ... #要压缩的文件类型
示例:
compression algo gzip deflate
compression type text/html text/css text/plain
配置示例
listen web_server
        bind 10.1.1.125:80
        log global
        option httplog
        capture request header User-Agent len 512
        capture request header Host len 256
        compression algo gzip deflate  #启用压缩算法和指定算法
        compression type text/plain test/html  #指定压缩文件类型
        mode http
        option forwardfor
        server web1 10.1.1.126:80 check inter 3s fall 3 rise 5
#后端服务器准备一个文本文件
[root@nginx ~]# mv 1.txt /usr/share/nginx/html/
[root@nginx ~]# cd /usr/share/nginx/html/
[root@nginx html]# ll
总用量 4
-rw-r--r-- 1 root root  0 1月  25 20:10 1.txt
-rw-r--r-- 1 root root 11 1月  25 15:36 index.html
drwxr-xr-x 2 root root 99 1月  25 15:36 test
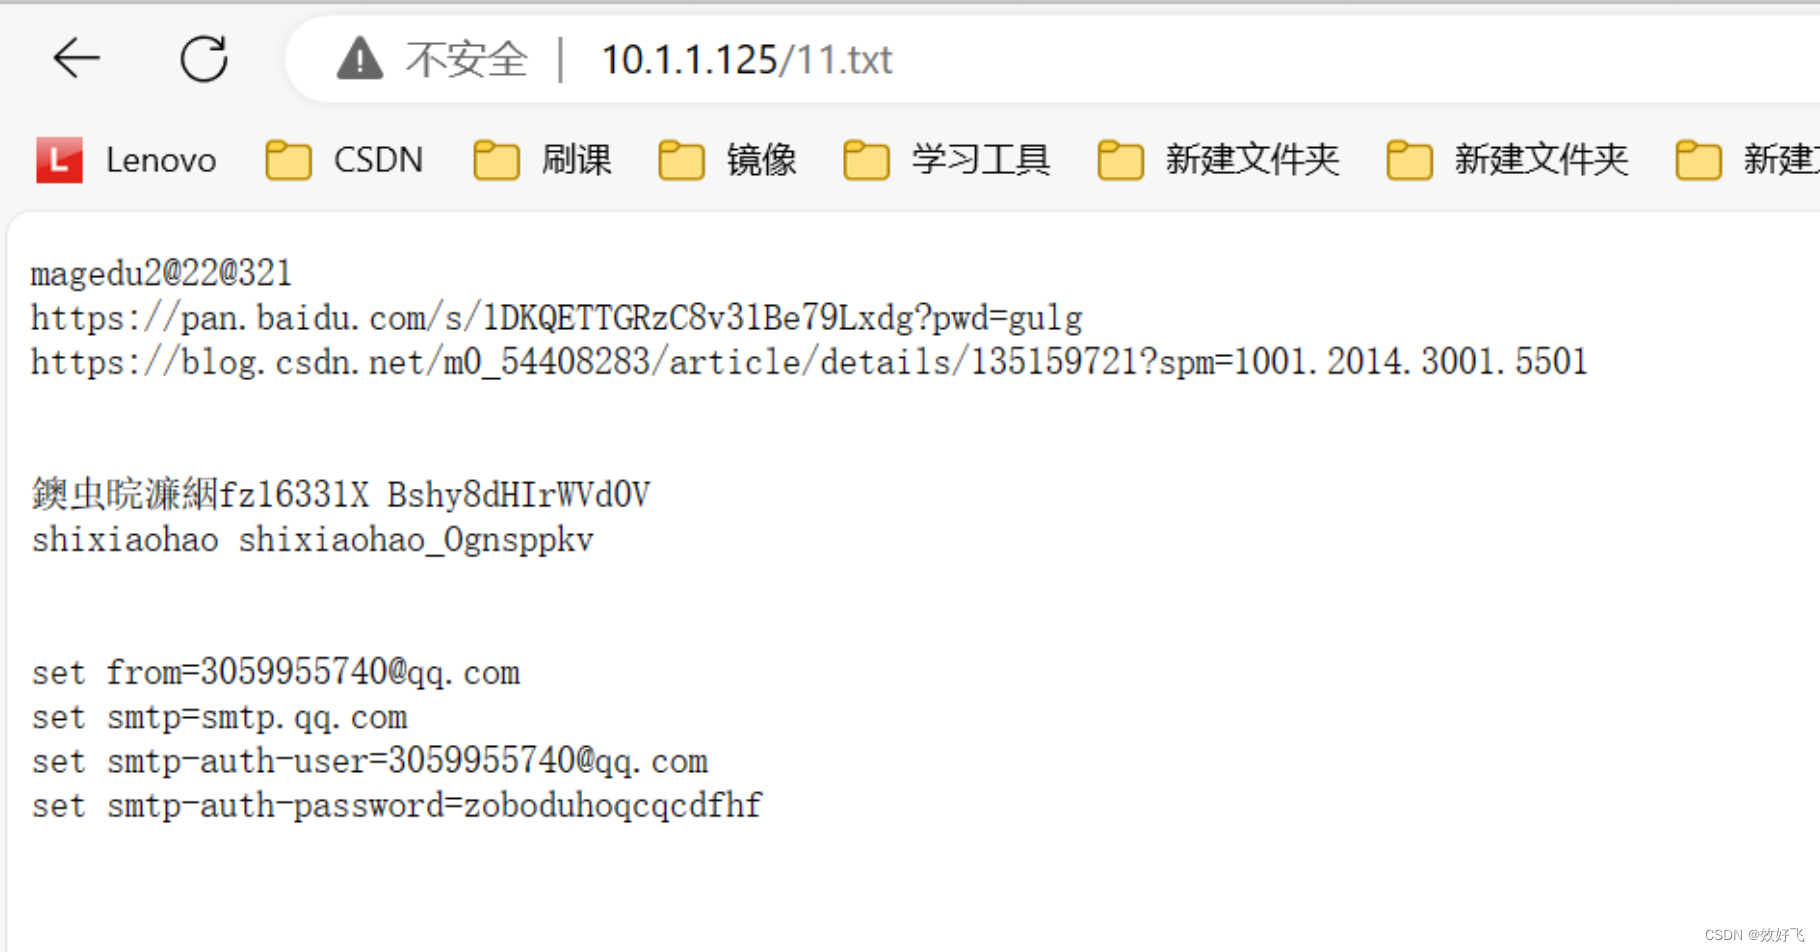
验证压缩功能
[root@hap1 ~]# curl -is --compressed 10.1.1.125/11.txt
[root@hap1 ~]# curl -is --compressed 10.1.1.125/11.txt
HTTP/1.1 200 OK
server: nginx/1.14.1
date: Thu, 25 Jan 2024 12:17:38 GMT
content-type: text/plain
last-modified: Thu, 18 Jan 2024 08:05:48 GMT
etag: W/"65a8dbdc-169"
accept-ranges: bytes
content-encoding: deflate
transfer-encoding: chunked
vary: Accept-Encoding
magedu2@22@321
https://pan.baidu.com/s/1DKQETTGRzC8v31Be79Lxdg?pwd=gulg
https://blog.csdn.net/m0_54408283/article/details/135159721?spm=1001.2014.3001.5501
石效好sfz16331X Bshy8dHIrWVd0V
shixiaohao shixiaohao_Ognsppkv
5.7后端服务器健康性检测
基于四层的传输端口做状态监测,此为默认方式
基于指定 URI 做状态监测,需要访问整个页面资源,占用更多带宽
基于指定 URI 的 request 请求头部内容做状态监测,占用较少带宽,建议使用此方式
基于应用层http协议,采用不同的监测方式,对后端real server进行状态监测 注意: 此方式会导致在后端服务器生成很多的HAProxy发起的访问日志
option httpchk   #启用七层健康性检测,对tcp 和 http 模式都支持,默认为:OPTIONS /
HTTP/1.0
option httpchk <uri>
option httpchk <method> <uri>
option httpchk <method> <uri> <version>
#期望以上检查得到的响应码
http-check expect [!] <match> <pattern>
#示例:
http-check expect status 200
http-check expect ! rstatus ^5 #支持正则表达式
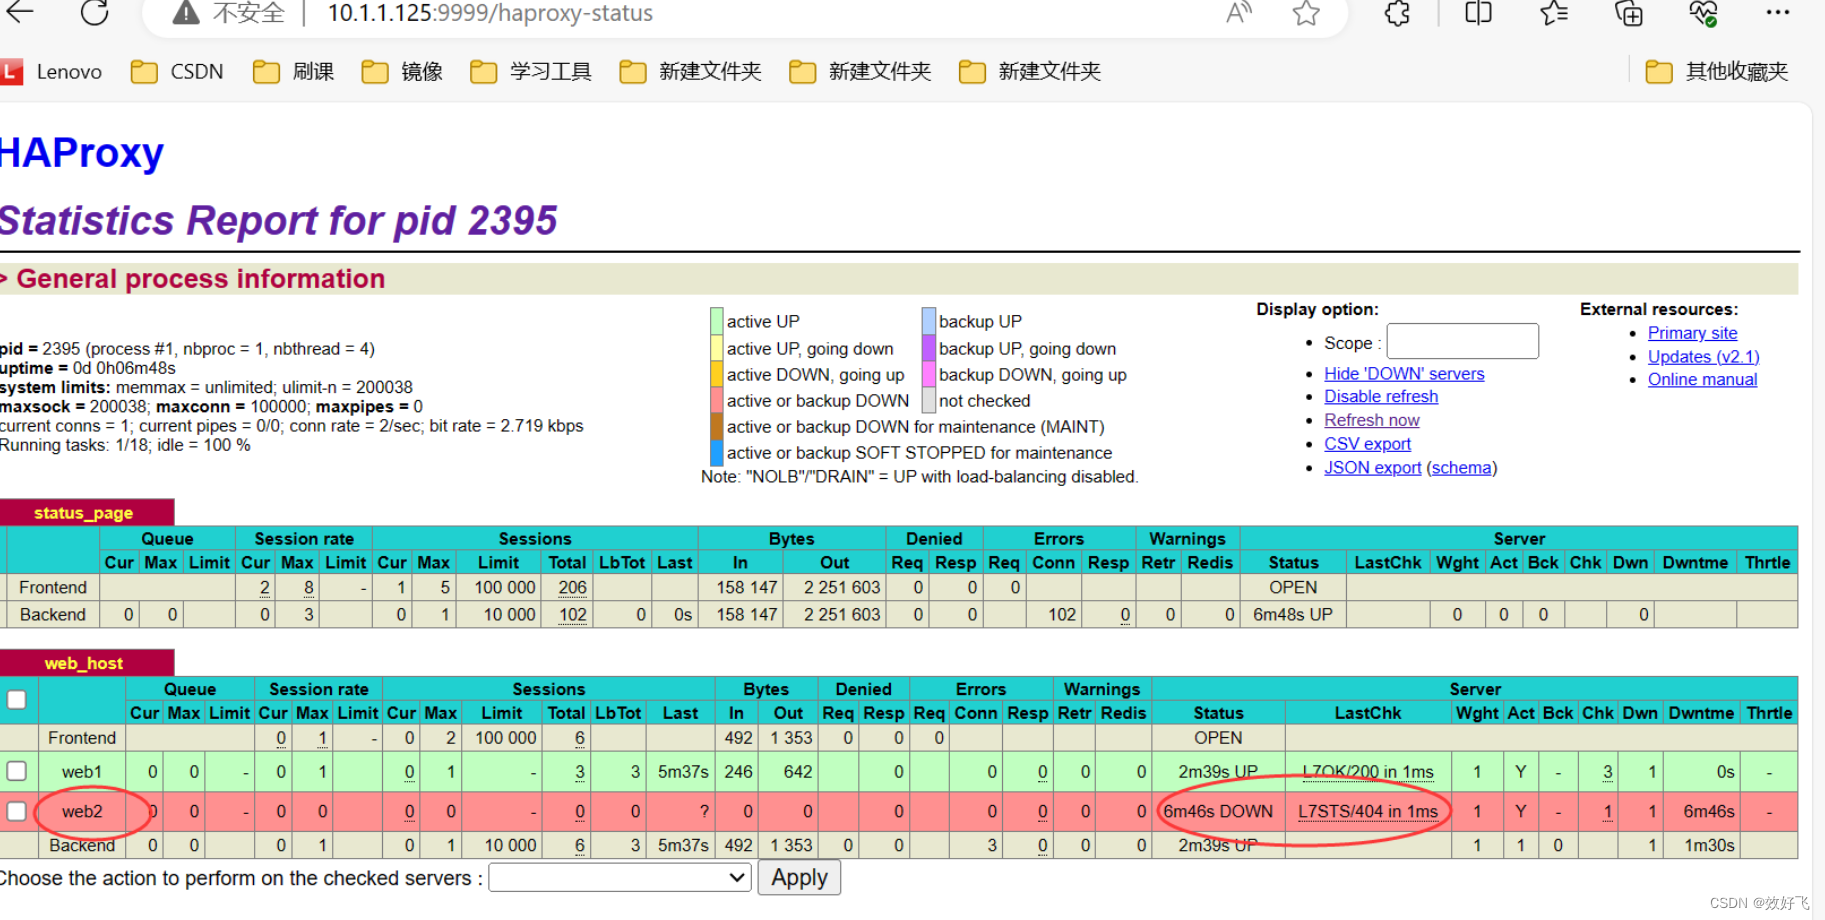
配置示例
[root@hap2 ~]# vim /etc/haproxy/conf.d/test.cfg
listen web_host
  bind 10.1.1.125:80
  mode http
  balance roundrobin
  option httpchk HEAD /monitor/check.html HTTP/1.1\r\nHost:\ 10.1.1.125   #使用HEAD减少网络流量
  cookie SERVER-COOKIE insert indirect nocache
  server web1 10.1.1.126:80 cookie web1 check inter 3000 fall 3 rise 5
  server web2 10.1.1.123:80 cookie web2 check inter 3000 fall 3 rise 5
#在所有后端服务建立检测页面
/usr/share/nginx/html/monitor
[root@nginx-web1 ~]# echo monitor > /usr/share/nginx/html/monitor/check.html
[root@nginx-web2 ~]# mkdir /usr/share/nginx/html/monitor -p
[root@nginx-web2 ~]# echo monitor > /usr/share/nginx/html/monitor/check.html
[root@nginx-web2 ~]# systemctl restart nginx
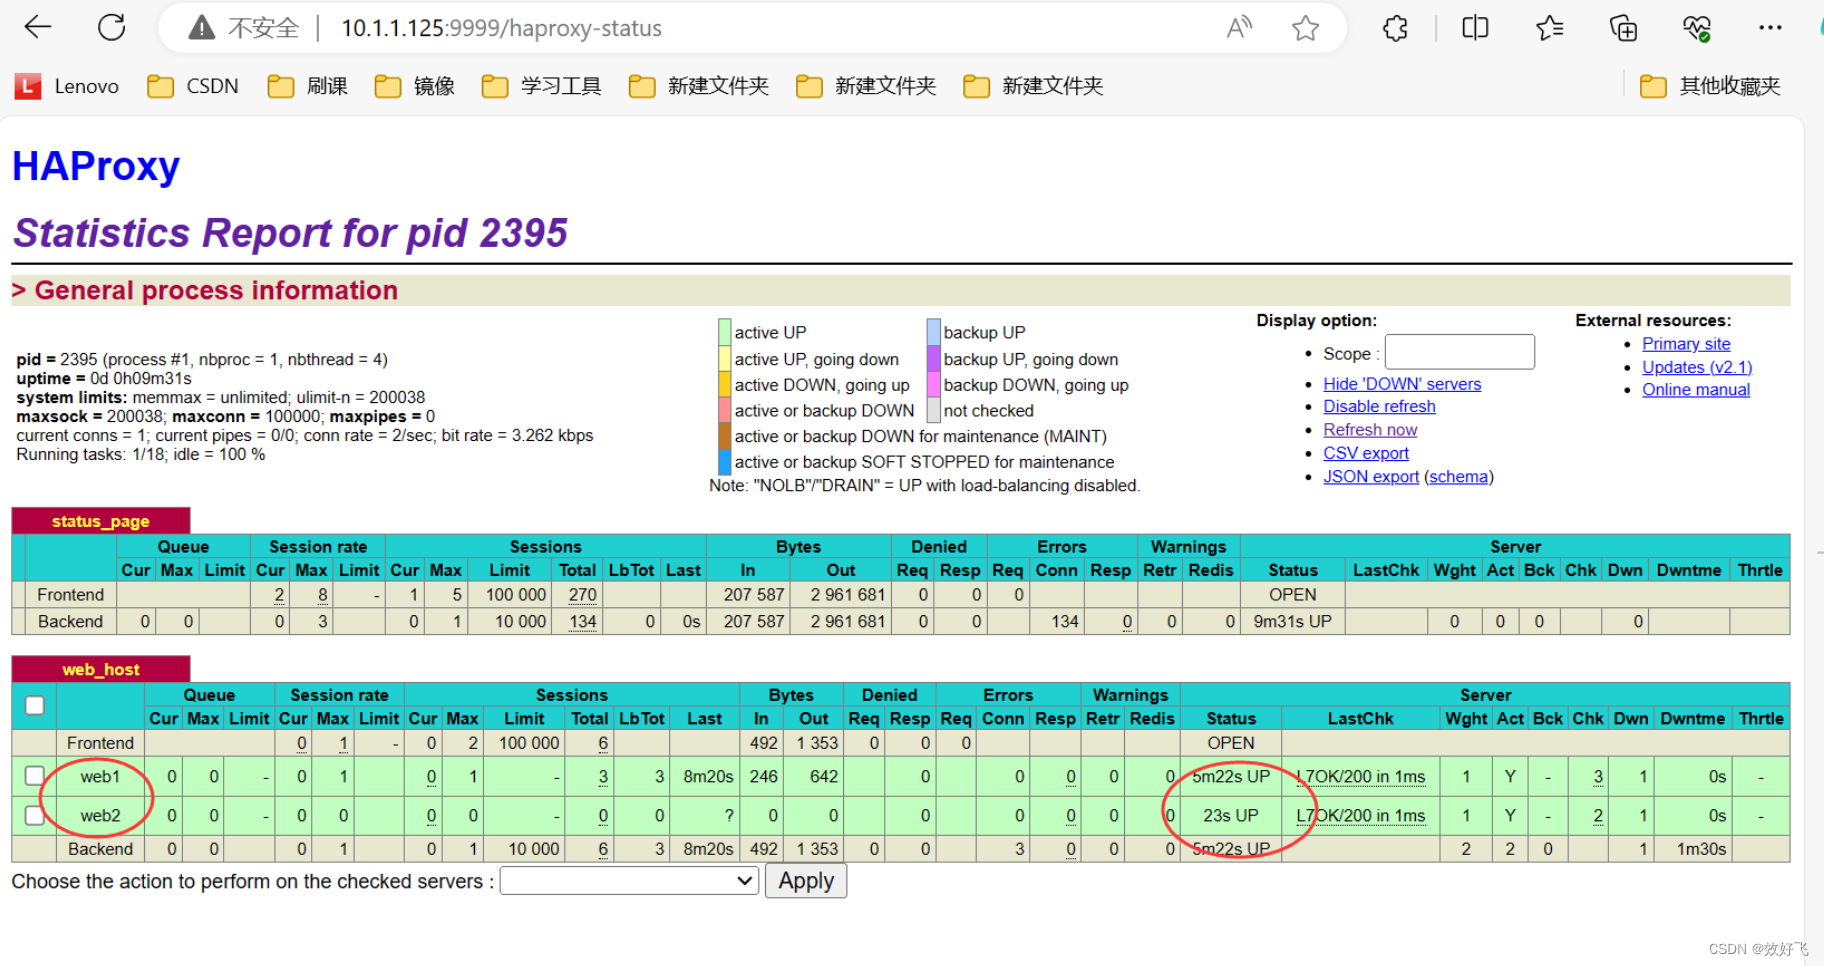
验证http检测:
查看到状态页,可以看到启用了七层检测功能:LastChk字段L7
#后端服务器查看访问日志
[root@nginx-web1 ~]# tail -f /var/log/nginx/access.log
"10.1.1.125" - - [26/Jan/2024:18:13:58 +0800] "HEAD /monitor/check.html HTTP/1.1" 200 0 "-" "-" "-"
"10.1.1.125" - - [26/Jan/2024:18:14:01 +0800] "HEAD /monitor/check.html HTTP/1.1" 200 0 "-" "-" "-"
"10.1.1.125" - - [26/Jan/2024:18:14:04 +0800] "HEAD /monitor/check.html HTTP/1.1" 200 0 "-" "-" "-"
"10.1.1.125" - - [26/Jan/2024:18:14:07 +0800] "HEAD /monitor/check.html HTTP/1.1" 200 0 "-" "-" "-"
[root@nginx-web2 ~]# tail -f /var/log/nginx/access.log
"10.1.1.125" - - [26/Jan/2024:18:27:07 +0800] "HEAD /monitor/check.html HTTP/1.1" 200 0 "-" "-" "-"
"10.1.1.125" - - [26/Jan/2024:18:27:10 +0800] "HEAD /monitor/check.html HTTP/1.1" 200 0 "-" "-" "-"
"10.1.1.125" - - [26/Jan/2024:18:27:13 +0800] "HEAD /monitor/check.html HTTP/1.1" 200 0 "-" "-" "-"
"10.1.1.125" - - [26/Jan/2024:18:27:16 +0800] "HEAD /monitor/check.html HTTP/1.1" 200 0 "-" "-" "-"
5.8ACL
访问控制列表(ACL,Access Control Lists)是一种基于包过滤的访问控制技术,它可以根据设定的条 件对经过服务器传输的数据包进行过滤(条件匹配),即对接收到的报文进行匹配和过滤,基于请求报文头 部中的源地址、源端口、目标地址、目标端口、请求方法、URL、文件后缀等信息内容进行匹配并执行 进一步操作,比如允许其通过或丢弃。
1.定义ACL配置选项
acl   <aclname> <criterion>   [flags]     [operator]   [<value>]
acl     名称     匹配规范     匹配模式     具体操作符     操作对象类型
2.ACL-Name
acl   image_service hdr_dom(host)   -i   img.wang.com
#ACL名称,可以使用大字母A-Z、小写字母a-z、数字0-9、冒号:、点.、中横线和下划线,并且严格区分大
小写,比如:my_acl和My_Acl就是两个完全不同的acl
3.ACL-criterion
定义ACL匹配规范,即:判断条件
hdr string,提取在一个HTTP请求报文的首部
hdr(<string>) 用于测试请求头部首部指定内容
hdr_dom(host) 请求的host名称,如 www.wang.com,m.wang.com
hdr_beg(host) 请求的host开头,如 www.   img.   video.   download.   ftp.
hdr_end(host) 请求的host结尾,如 .com   .net   .cn
#示例:
acl bad_agent hdr_sub(User-Agent) -i curl wget
block if bad_agent
hdr(host) ==>www.wang.org:8080
hdr_domain(host) ==> www.wang.org
#有些功能是类似的,比如以下几个都是匹配用户请求报文中host的开头是不是www
acl short_form hdr_beg(host)       www.
acl alternate1 hdr_beg(host) -m beg www.
acl alternate2 hdr_dom(host) -m beg www.
acl alternate3 hdr(host)     -m beg www.
base : string
#返回第一个主机头和请求的路径部分的连接,该请求从主机名开始,并在问号之前结束,对虚拟主机有用,下
面的例子中是两个#中间的内容,实际#是没有的
<scheme>://<user>:<password>@#<host>:<port>/<path>;<params>#?<query>#<frag>
 base     : exact string match
 base_beg : prefix match
 base_dir : subdir match
 base_dom : domain match
 base_end : suffix match
 base_len : length match
 base_reg : regex match
 base_sub : substring match
path : string
#提取请求的URL路径,该路径从第一个斜杠开始,并在问号之前结束(无主机部分)
<scheme>://<user>:<password>@<host>:<port>#/<path>;<params>#?<query>#<frag>
 path     : exact string match
 path_beg : prefix match  #请求的URL开头,如/static、/images、/img、/css
 path_end : suffix match  #请求的URL中资源的结尾,如 .gif .png .css .js .jpg
.jpeg
 path_dom : domain match
 path_dir : subdir match
 path_len : length match
 path_reg : regex match
 path_sub : substring match
#示例:
 path_beg -i /haproxy-status/
 path_end .jpg .jpeg .png .gif
4.ACL-flagsACL匹配模式
-i 不区分大小写
-m 使用指定的pattern匹配方法
-n 不做DNS解析
-u 禁止acl重名,否则多个同名ACL匹配或关系
5.ACL操作符
整数比较:eq、ge、gt、le、lt
字符比较:
- exact match     (-m str) :字符串必须完全匹配模式
- substring match (-m sub) :在提取的字符串中查找模式,如果其中任何一个被发现,ACL将匹配
- prefix match   (-m beg) :在提取的字符串首部中查找模式,如果其中任何一个被发现,ACL将匹配
- suffix match   (-m end) :将模式与提取字符串的尾部进行比较,如果其中任何一个匹配,则ACL进
行匹配
- subdir match   (-m dir) :查看提取出来的用斜线分隔(“/")的字符串,如其中任一个匹配,则
ACL进行匹配
- domain match   (-m dom) :查找提取的用点(“.")分隔字符串,如果其中任何一个匹配,则ACL进
行匹配
6.ACL-value的类型
The ACL engine can match these types against patterns of the following types :
- Boolean #布尔值
- integer or integer range #整数或整数范围,比如用于匹配端口范围
- IP address / network #IP地址或IP范围, 192.168.0.1 ,192.168.0.1/24
- string--> www.wang.com
 exact #精确比较
 substring #子串
 suffix #后缀比较
 prefix #前缀比较
 subdir #路径, /wp-includes/js/jquery/jquery.js
 domain #域名,www.wang.com
- regular expression #正则表达式
- hex block #16进制
5.8.1域名匹配
[root@hap2 ~]# vim /etc/haproxy/haproxy.cfg
global
    maxconn 100000
    chroot  /apps/haproxy
    stats  socket /var/lib/haproxy/haproxy.sock mode 600 level admin
    user haproxy
    group haproxy
    daemon
    pidfile /var/lib/haproxy/haproxy.pid
    log 127.0.0.1 local3 info
defaults
    option http-keep-alive
    option  forwardfor
    maxconn 100000
    mode http
    timeout connect 300000ms
    timeout client  300000ms
    timeout server  300000ms
listen status_page
    bind 10.1.1.125:9999
    stats enable
    stats uri /haproxy-status
    stats auth    admin:admin
    stats realm "Welcome to the haproxy load balancer status page of sxh"
    stats hide-version
    stats admin if TRUE
    stats refresh 5s
[root@hap2 ~]# vim /etc/haproxy/conf.d/test.cfg
frontend http-80
    bind 10.1.1.125:80
    mode http
    acl pc_domain  hdr_dom(host) -i pc.sxh.com
    acl mobile_domain hdr_dom(host) -i mobile.sxh.com
    use_backend pc_hosts if pc_domain
    use_backend mobile_hosts if mobile_domain
backend pc_hosts
    server 10.1.1.126 10.1.1.126:80 check
backend mobile_hosts
    server 10.1.1.123 10.1.1.123:80 check
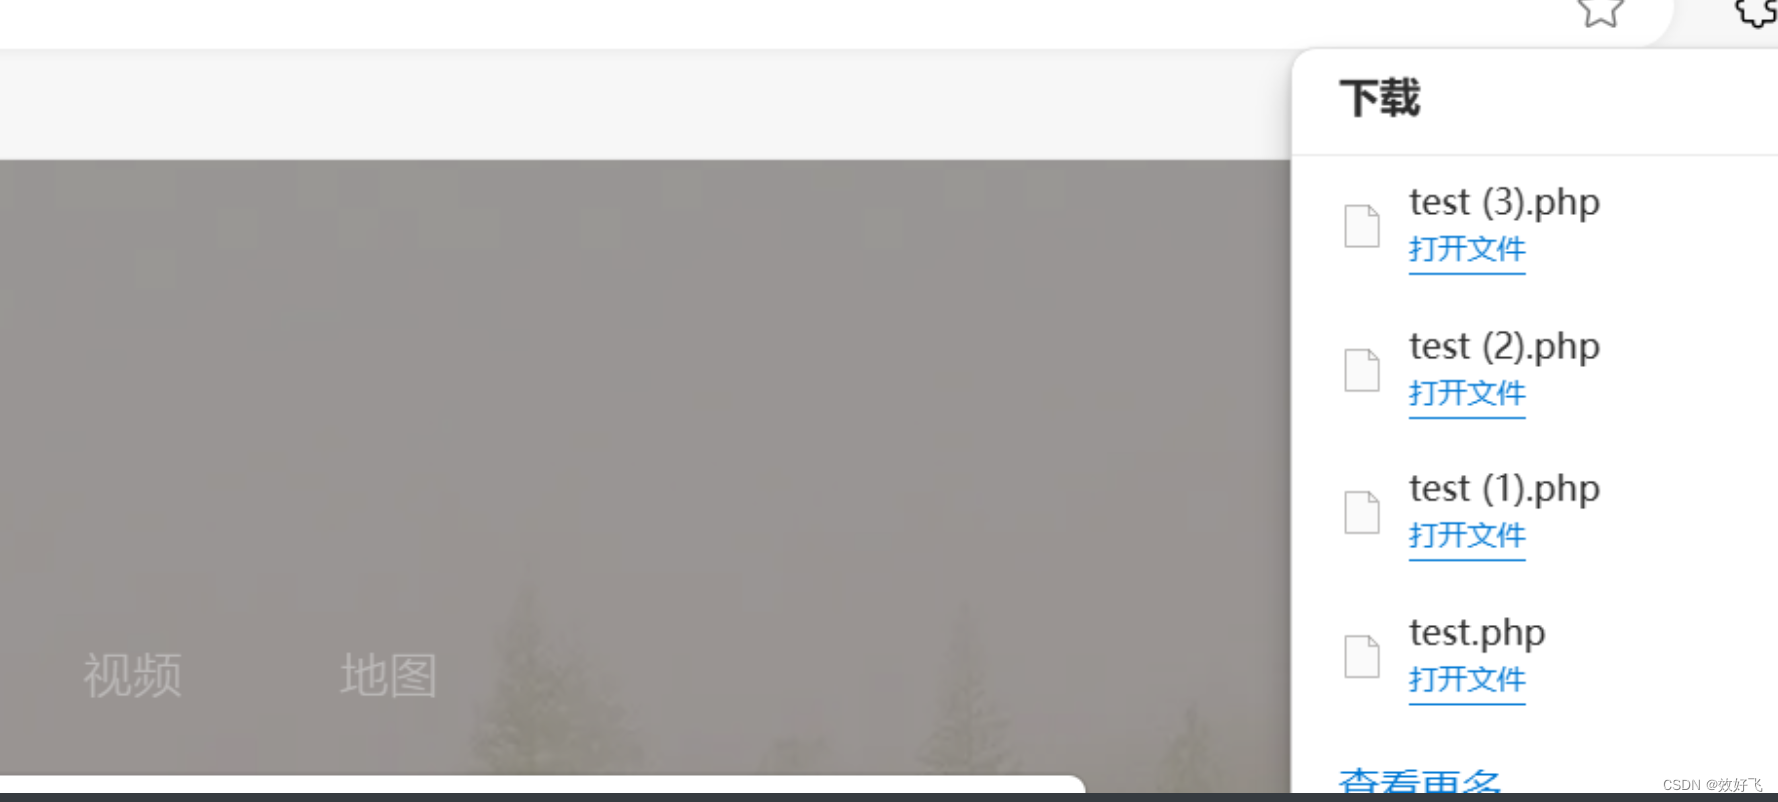
5.8.2文件后缀动静分离
[root@hap2 ~]# vim /etc/haproxy/conf.d/test.cfg
frontend http-80
    bind 10.1.1.125:80
    mode http
    acl acl_static path_end -i .jpg .jpeg .png .gif .html
    acl acl_php    path_end -i .php
    use_backend pc_hosts if acl_static
    use_backend app_hosts if acl_php
backend pc_hosts
    server 10.1.1.126 10.1.1.126:80 check
backend app_hosts
    server 10.1.1.123 10.1.1.123:80 check
[root@nginx-web1 html]# ls
11.txt  1.txt  index.html  monitor  sxh1.jpg  test
[root@nginx-web2 ~]# cd /usr/share/nginx/html/
[root@nginx-web2 html]# vim test.php
[root@nginx-web2 html]# cat test.php
<?php
echo "<h1>http://10.1.1.123/test.php<h1>\n";
?>

5.8.3访问路径实现动静分离
[root@hap2 ~]# vim /etc/haproxy/conf.d/test.cfg
frontend http-80
    bind 10.1.1.125:80
    mode http
    acl acl_static path_beg -i /static /images /javascript  #基于路径
    acl acl_static path_end -i .jpg .jpeg .png .gif .css .html  #ACL同名为或关系
    acl acl_app    path_beg -i /api
    use_backend static_hosts if acl_static
    use_backend app_hosts if acl_app
backend static_hosts
    server 10.1.1.126 10.1.1.126:80 check
backend app_hosts
    server 10.1.1.123 10.1.1.123:80 check
#创建相关文件
[root@nginx-web1 html]# mkdir static
[root@nginx-web1 html]# cd
[root@nginx-web1 ~]# echo 10.1.1.126 > /usr/share/nginx/html/static/test.html
#测试访问
[root@hap1 ~]# curl 10.1.1.125/static/test.html
10.1.1.126
path_beg : prefix match  #请求的URL开头,如/static、/images、/img、/css
path_end : suffix match  #请求的URL中资源的结尾
5.9自定义错误页面
对指定的报错进行重定向,进行优雅的显示错误页面 使用errorfile和errorloc指令的两种方法,可以实现自定义各种错误页面
1.基于自定义的错误页面文件
#自定义错误页
errorfile <code> <file>
<code> #HTTP status code.支持200, 400, 403, 405, 408, 425, 429, 500, 502,503,504
<file> #包含完整HTTP响应头的错误页文件的绝对路径。 建议后缀为".http",以和一般的html文件相区
分
#示例:
errorfile 400 /etc/haproxy/errorfiles/400badreq.http
errorfile 403 /etc/haproxy/errorfiles/403forbid.http
errorfile 503 /etc/haproxy/errorfiles/503sorry.http
defaults
#option forwardfor
#no option http-use-htx 支持html文件,此设置和版本有关,2.1不支持
#......
#加下面行
errorfile 500 /usr/local/haproxy/html/500.http
errorfile 502 /usr/local/haproxy/html/502.http
errorfile 503 /usr/local/haproxy/html/503.http
范例:
[root@hap2 ~]# cd /apps/
[root@hap2 apps]# cd haproxy/
[root@hap2 haproxy]# mkdir html
[root@hap2 haproxy]# cd html/
[root@hap2 html]# vim 503.http
实验报错
[root@hap2 ~]# haproxy -c -f /etc/haproxy/haproxy.cfg
[ALERT] 025/191854 (2493) : parsing [/etc/haproxy/haproxy.cfg:19] : unable to convert message in HTX for HTTP return code 503.
[ALERT] 025/191854 (2493) : Error(s) found in configuration file : /etc/haproxy/haproxy.cfg
[ALERT] 025/191854 (2493) : Fatal errors found in configuration.
5.10haproxy四层负载
针对除HTTP以外的TCP协议应用服务访问的应用场景
MySQL
Redis
Memcached
RabbitMQ
5.10.1四层负载示例
注意:如果使用frontend和backend,一定在 frontend 和 backend 段中都指定mode tcp
listen redis-port
   bind 10.0.0.7:6379
   mode tcp
   balance leastconn
   server server1 10.0.0.17:6379 check
   server server2 10.0.0.27:6379 check backup
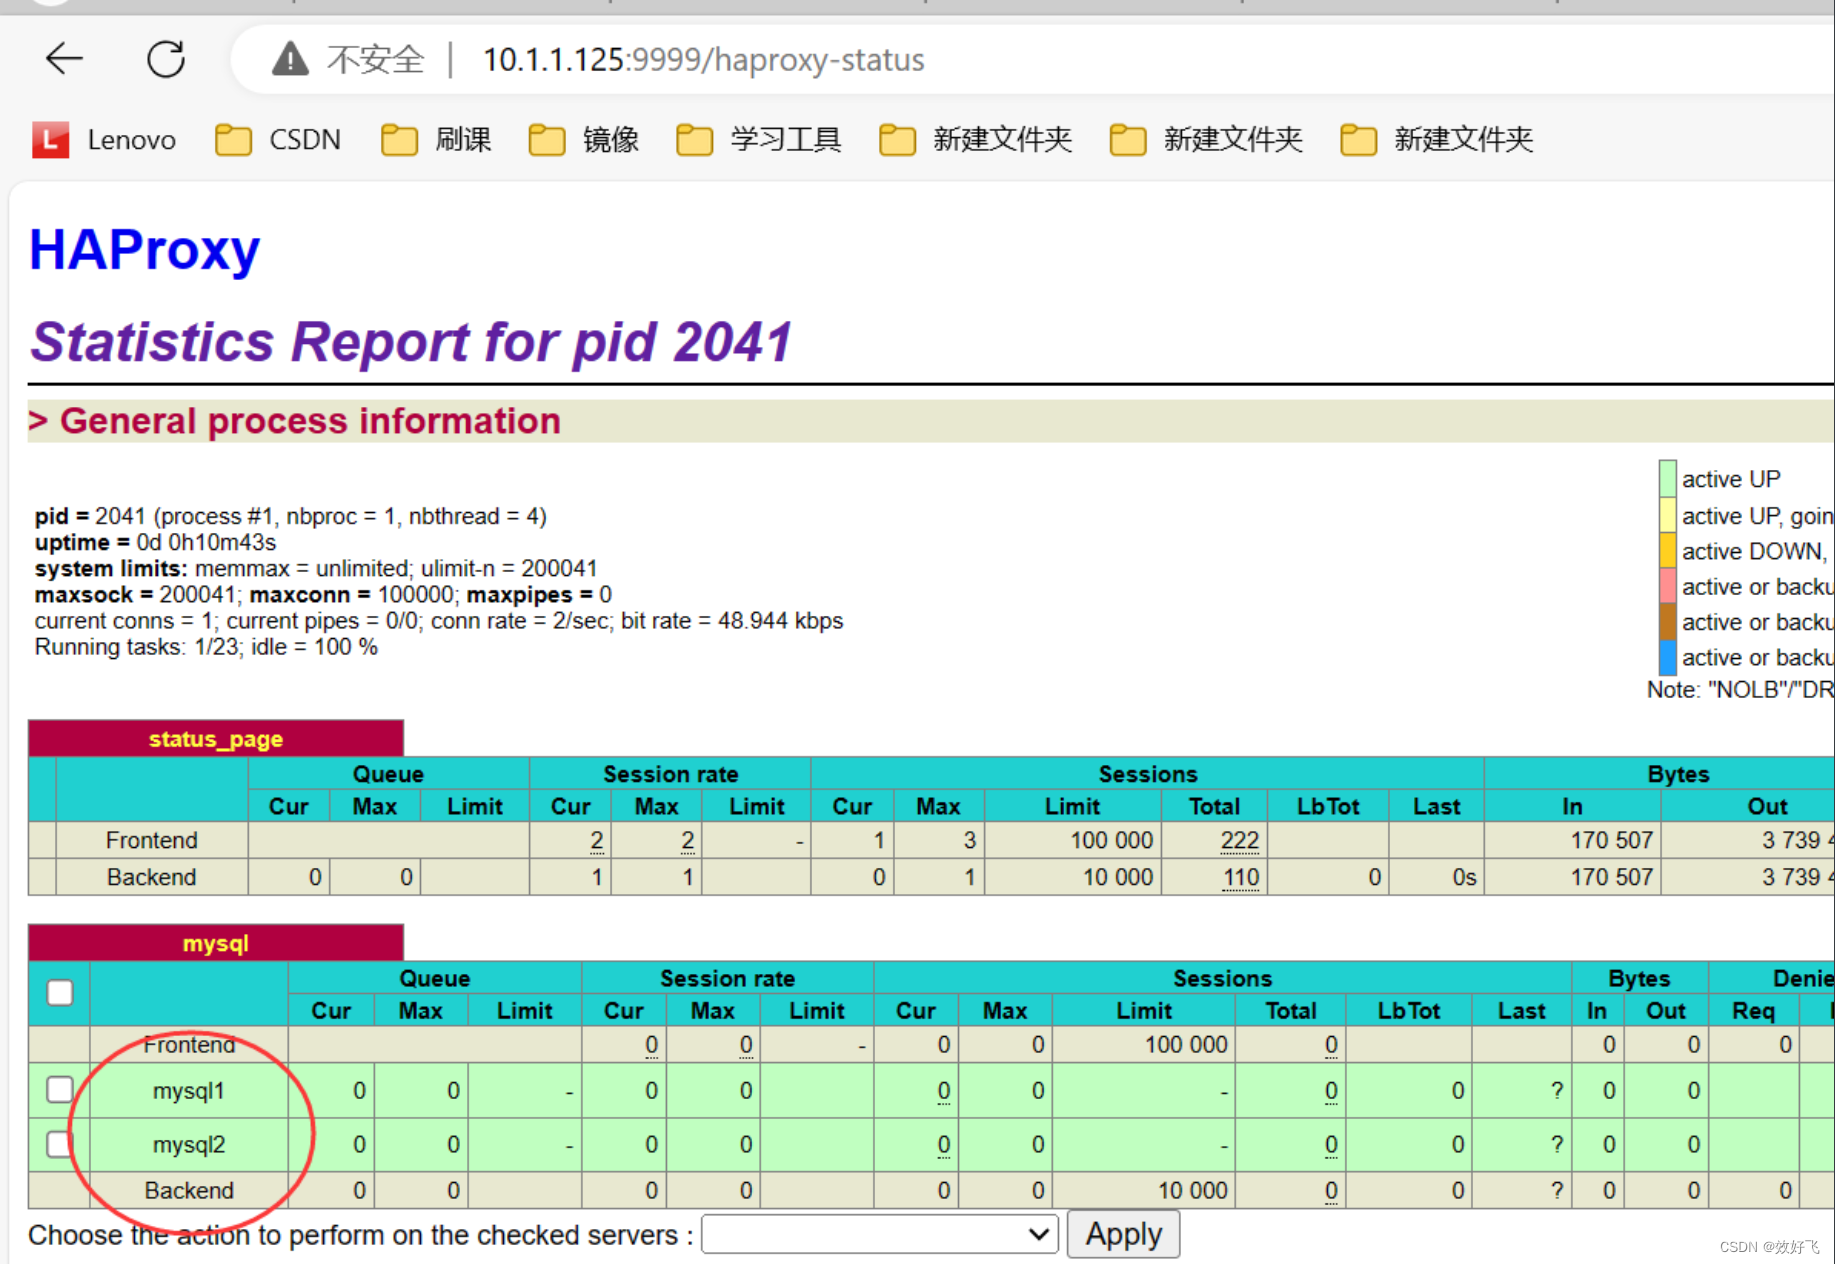
范例:对mysql服务实现四层负载
[root@hap2 ~]# vim /etc/haproxy/haproxy.cfg
listen mysql
    bind 10.1.1.125:3306
    mode tcp
    balance leastconn
    server mysql1 10.1.1.126:3306 check
    server mysql2 10.1.1.123:3306 check #如果不写端口号,可以转发,但无法check状态
#在后端服务器上安装和配置mysql5.7
[root@nginx-web1 ~]# vim /etc/my.cnf
[mysqld]
server-id=126
#测试
mysql> show variables like 'hostname';
+---------------+------------+
| Variable_name | Value      |
+---------------+------------+
| hostname      | nginx-web1 |
+---------------+------------+
1 row in set (0.01 sec)

mysql> select @@server_id;
+-------------+
| @@server_id |
+-------------+
|         126 |
+-------------+
1 row in set (0.00 sec)


 1283
1283


 被折叠的 条评论
为什么被折叠?
被折叠的 条评论
为什么被折叠?
 到【灌水乐园】发言


