


安装
- 以linux安装为例,从镜像源复制链接,使用 wget 命令下载安装文件,如:
wget https://repo.anaconda.com/archive/Anaconda3-2022.10-Linux-x86_64.sh - 运行 .sh 文件
./Anaconda3-2020.02-Linux-x86_64.sh安装即可。若权限不足,可执行chmod u+x *.sh,然后再安装。 source .bashrc使之生效,注意你的配置文件位置。
chmod:权限管理命令change the permissions mode of a file的缩写。u 代表所有者,x 代表执行权限,+ 表示增加权限。chmod u+x *.sh 就表示对当前目录下的 *.sh文件的所有者增加可执行权限。
source:使当前shell读入shell文件并依次执行文件中的所有语句,通常用于重新执行刚修改的初始化文件,使之立即生效,而不必注销并重新登录。
常用命令
conda create -n 名字
conda activate 名字
conda install 包名
conda deactivate
conda remove -n 名字 --all
conda info
conda info --envs
conda envs list
换源
临时:pip install -i https://pypi.tuna.tsinghua.edu.cn/simple 包名
查看当前使用源:conda config --show-sources
conda config --add channels https://mirrors.tuna.tsinghua.edu.cn/anaconda/pkgs/main
conda config --add channels https://mirrors.tuna.tsinghua.edu.cn/anaconda/pkgs/free
conda config --add channels https://mirrors.tuna.tsinghua.edu.cn/anaconda/pkgs/r
conda config --set show_channel_urls yes
恢复默认源:conda config --remove-key channels
环境复制
在本机复制:
conda create -n 新环境名 --clone 旧环境名
复制到其它地方:
conda activate 环境名
conda env export > 环境名.yaml
conda env create -f 环境名.yaml
注意事项
-
powershell 不能激活虚拟环境,cmd可以,如何解决:以管理员身份启动PowerShell,并执行
Set-ExecutionPolicy RemoteSigned即可解决 -
在虚拟环境中使用pip安装会安装到base中,只有使用conda安装才能安装到该环境中:
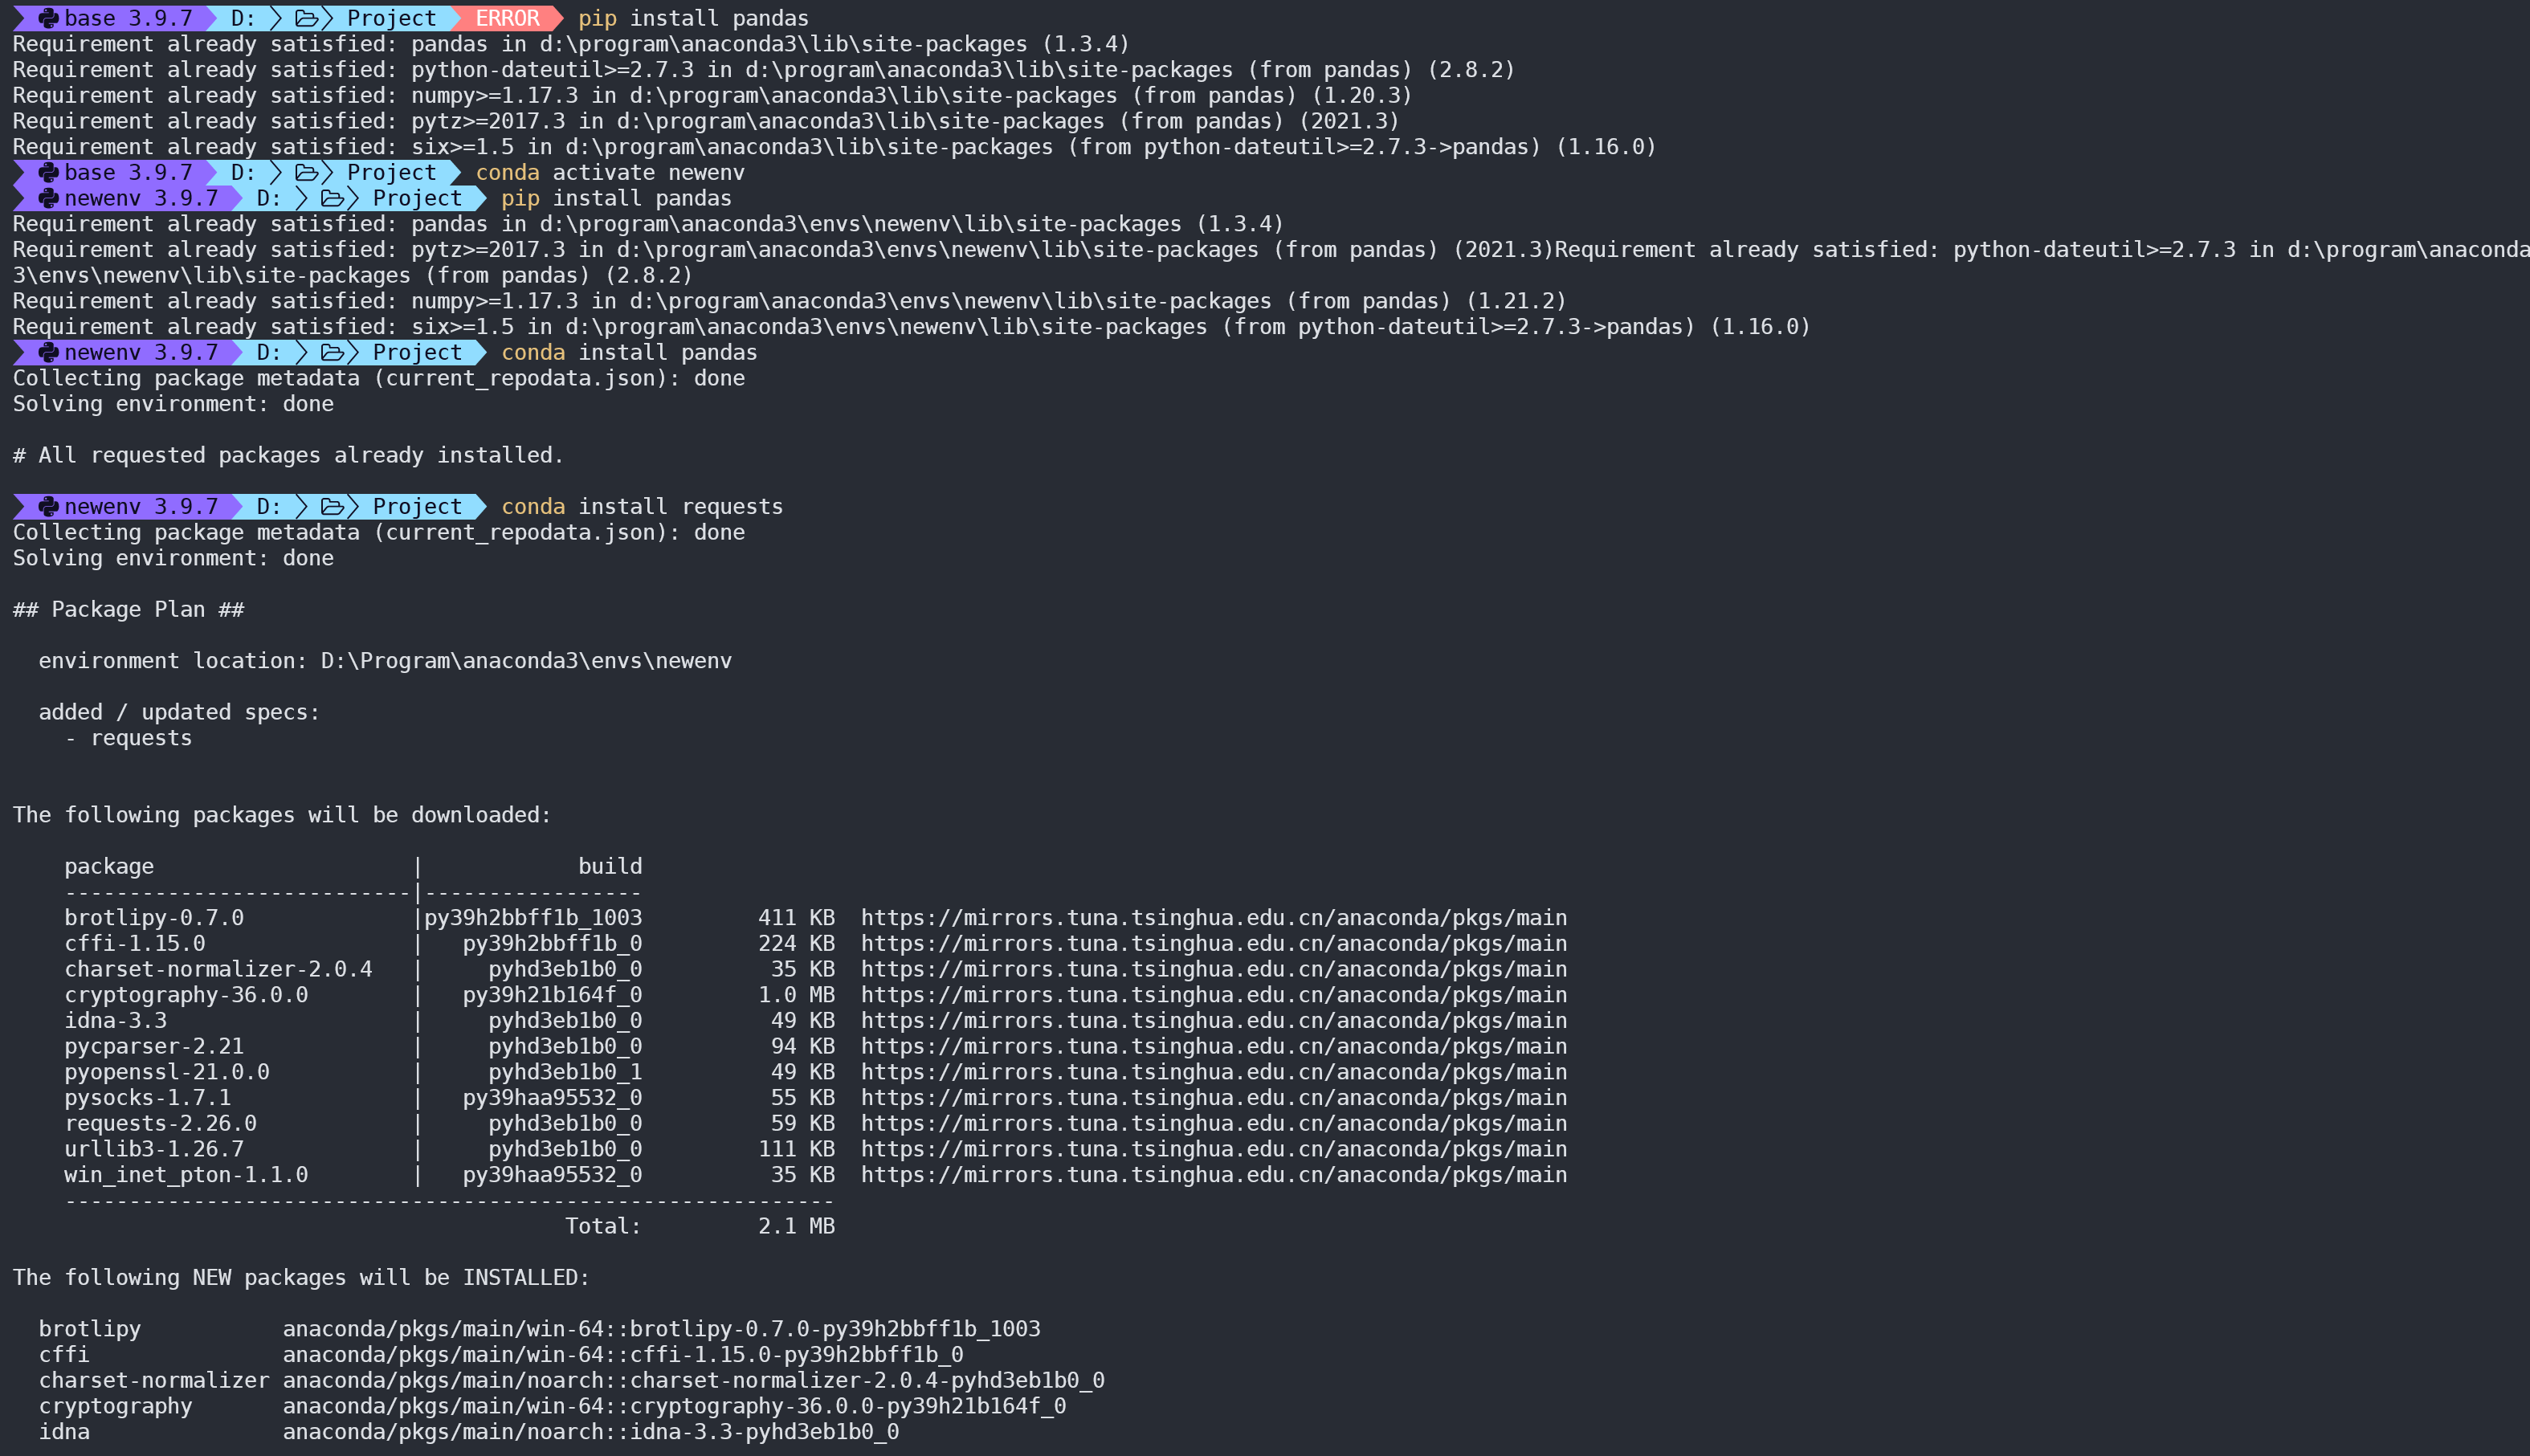
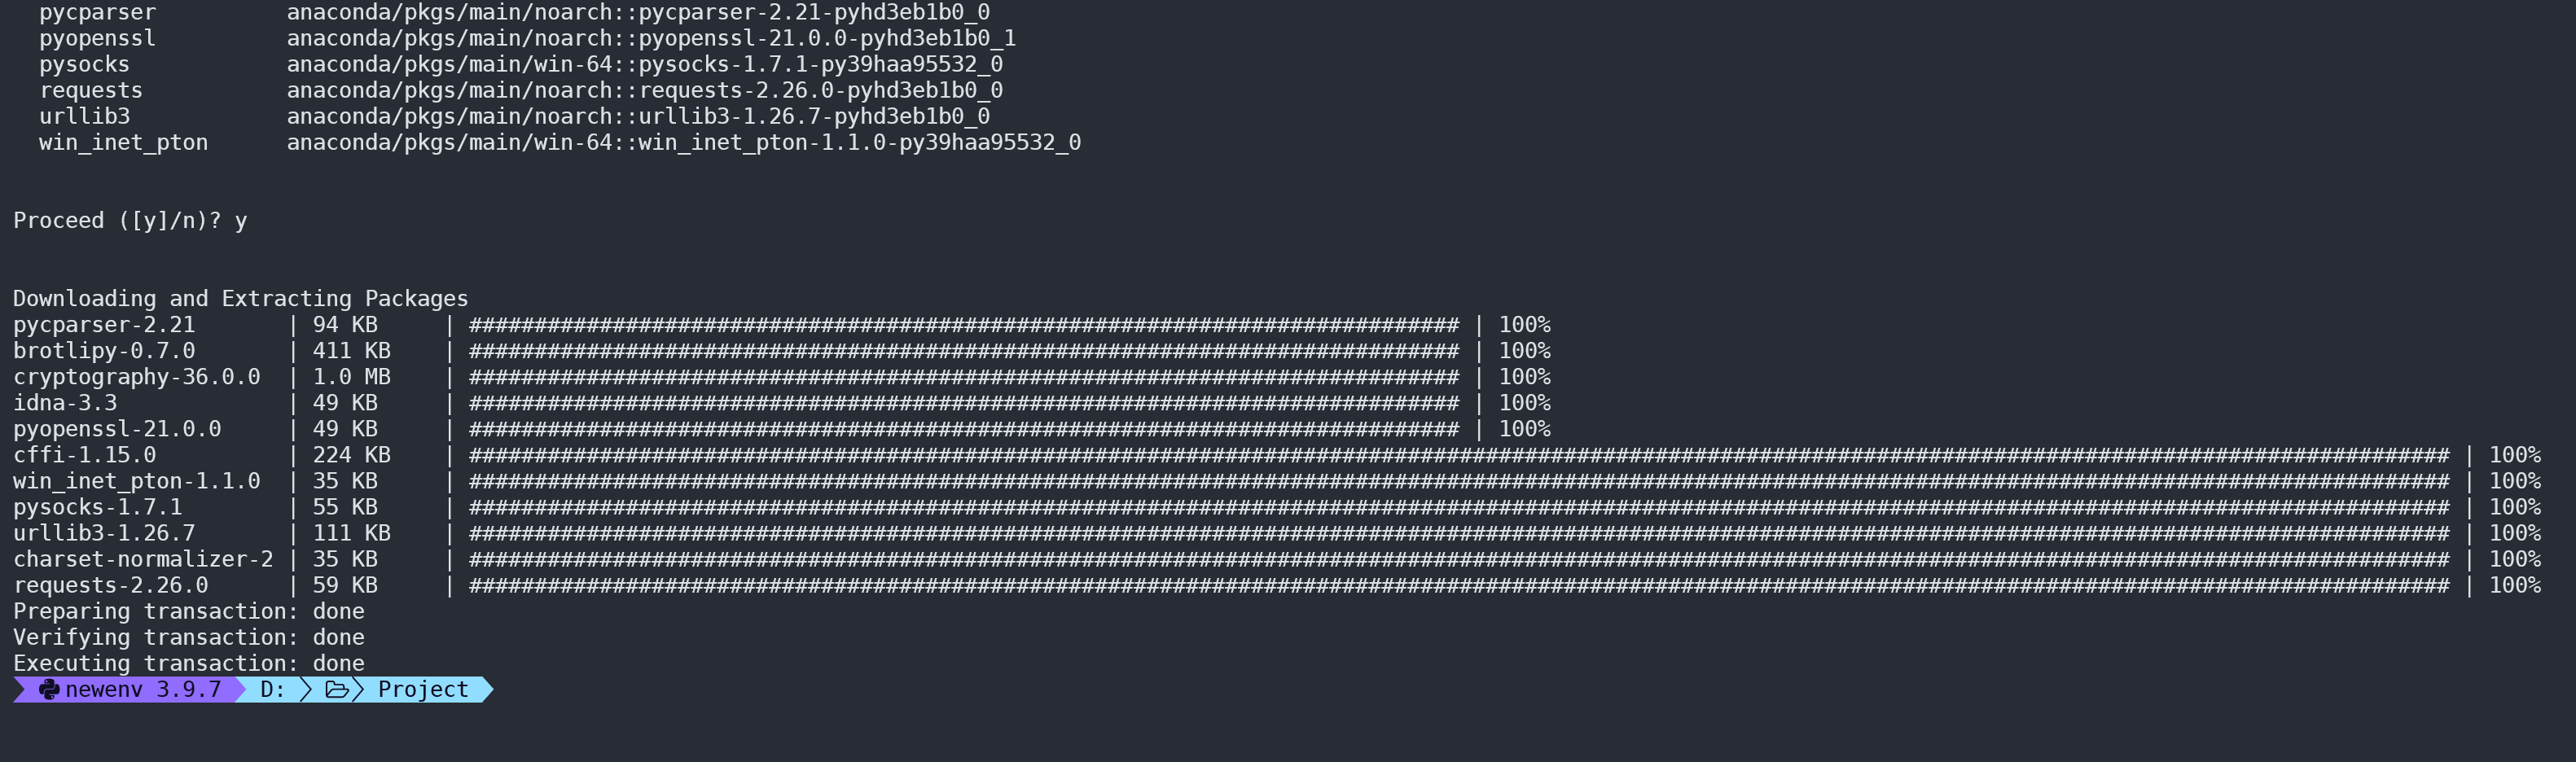
-
vscode jupyter 中使用虚拟环境时,需要在使用的虚拟环境中安装 ipykernel :
conda install -n 环境名 ipykernel --update-deps --force-reinstall或直接在虚拟环境中pip install ipykernal -
conda虚拟环境中安装opencv-python:
conda install -c conda-forge opencv,用pip安装后还是无法导入cv2 -
conda安装tensorflow 1.15:
conda install -c conda-forge tensorflow-gpu=1.15
conda install --channel https://conda.anaconda.org/hanyucui tensorflow-gpu=1.15


 1091
1091


 被折叠的 条评论
为什么被折叠?
被折叠的 条评论
为什么被折叠?
 到【灌水乐园】发言


