


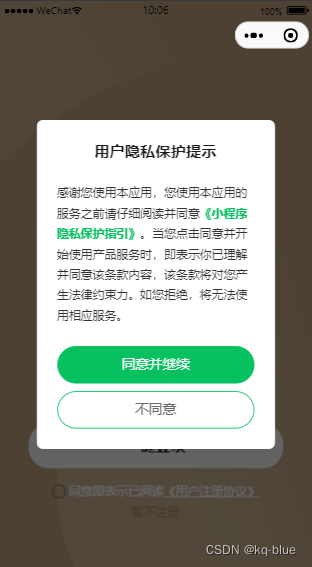
效果如图
首先需要在微信后台配置对应的用户隐私协议且需要通过审核
其次在调试过程中微信开发者工具建议调整版本到3以上,2.23 版本以上才支持
最后在调试时在manifest.json文件中加入
“usePrivacyCheck” : true 和appid同级
"__usePrivacyCheck__" : true
1、封装组件 privacyAgreenPop 用户隐私协议弹框
首先封装privacyAgreenPop 用户隐私协议弹框
u-pop 为uview 弹框组件 如果ui插件用的不是uview,可换成自己使用的ui插件
<template>
	<u-popup v-model="show" mode="center" border-radius="14" :mask-close-able="false">
		<view class="ws-privacy-popup">
			<view class="ws-privacy-popup__header">
				<view class="ws-picker__title">用户隐私保护提示</view>
			</view>
			<view class="ws-privacy-popup__container">
				<text>感谢您使用本应用,您使用本应用的服务之前请仔细阅读并同意</text>
				<text class="ws-privacy-popup__container-protocol"
					@click="openPrivacyContract">《小程序隐私保护指引》</text>
				<text>。当您点击同意并开始使用产品服务时,即表示你已理解并同意该条款内容,该条款将对您产生法律约束力。如您拒绝,将无法使用相应服务。</text>
			</view>
			<view class="ws-privacy-popup__footer">
				<button class="is-agree" id="agree-btn" open-type="agreePrivacyAuthorization"
					@agreeprivacyauthorization="handleAgree">
					同意并继续
				</button>
				<button class="is-disagree" id="disagree-btn" @click="handleDisagree">
					不同意
				</button>
			</view>
		</view>
	</u-popup>
</template>

<script>
	export default {
		name: "privacyAgreenPop",
		props: {
			show: {
				type: Boolean,
				default: false
			},
			goback:{
				type: String,
				default: 'exit',//exit默认退出
			}
		},
		data() {
			return {};
		},
		mounted() {},
		methods: {
			handleAgree() {
				this.$emit("handleAgree")
				this.$emit("update:show", false)

			},
			handleDisagree() {
				if(this.goback == 'exit'){
					uni.exitMiniProgram({
						success: () => {
							uni.exitMiniProgram({success: (res) => { console.log("退出success")}})
						}
					})
				}
				this.$emit("handleDisagree")
				this.$emit("update:show", false)
			},
			/**
			 * 打开隐私协议
			 */
			openPrivacyContract() {
				wx.openPrivacyContract({
					success: (res) => {
					},
					fail: (res) => {
					}
				})
			},
		}
	}
</script>

<style lang="scss" scoped>
	.ws-privacy-popup {
		width: 600rpx;
		padding: 48rpx;
		box-sizing: border-box;
		overflow: hidden;
		width: 560rpx;
		background: #fff;
		border-radius: 24rpx;

		&__header {
			display: flex;
			align-items: center;
			justify-content: center;
			width: 100%;
			height: 52rpx;
			font-size: 36rpx;
			font-family: PingFangSC-Medium, PingFang SC;
			font-weight: 550;
			color: #1a1a1a;
			line-height: 52rpx;
			margin-bottom: 48rpx;
		}

		&__container {
			width: 100%;
			box-sizing: border-box;
			font-size: 28rpx;
			font-family: PingFangSC-Regular, PingFang SC;
			font-weight: 400;
			color: #333333;
			line-height: 48rpx;
			margin-bottom: 48rpx;

			&-protocol {
				font-weight: 550;
				color: #07c160;
			}
		}

		&__footer {
			display: flex;
			flex-direction: column;

			.is-disagree,
			.is-agree {
				width: 100%;
				height: 88rpx;
				background: #ffffff;
				border-radius: 44rpx;
				font-size: 32rpx;
				font-family: PingFangSC-Regular, PingFang SC;
				border: 1px solid #07c160;
				font-weight: 400;
				color: #666666;
			}

			.is-agree {
				background: #07c160;
				color: #ffffff;
				margin-bottom: 18rpx;
			}

			button {
				border: none;
				outline: none;

				&::after {
					border: none;
				}
			}
		}
	}
</style>
2、引入插件
在main.js文件中引入
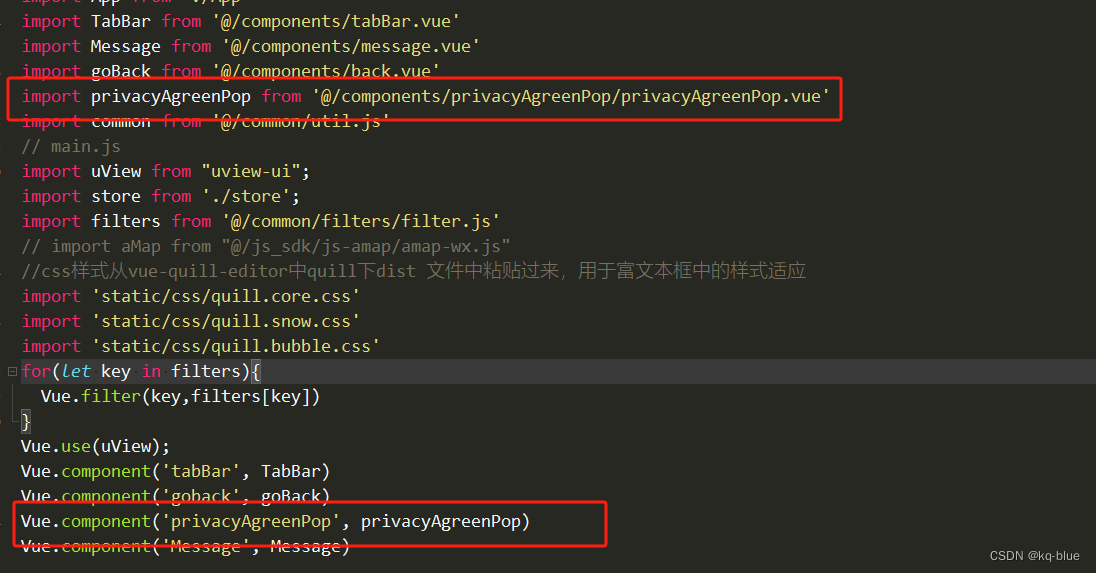
import privacyAgreenPop from '@/components/privacyAgreenPop/privacyAgreenPop.vue';
Vue.component('privacyAgreenPop', privacyAgreenPop)
3、使用插件
在数据存储仓库vuex中存入用户是否同意隐私协议标志 在进入页面的入口中可开始调用
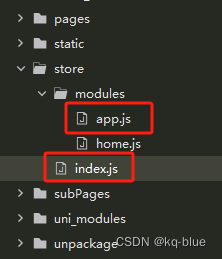
- 在app.js中写入
//app.js
export let appx={
	state:{
		privacyAgree: false,//是否需要调用隐私协议 同意过返回false
	},
	mutations:{
		setPrivacyAgree(state,payload){
			state.privacyAgree = payload;
		}
	},
	actions:{
		getPrivacyAgree(state,payload){
			uni.getPrivacySetting({
				success: res => {
				// 返回结果为: res = { needAuthorization: true/false, privacyContractName: '《xxx隐私保护指引》' }
					this.commit("setPrivacyAgree",res.needAuthorization)
				},
				fail: () => {},
				complete: () => {}
			})
		}
	},
	modules: {}
}
- index.js 文件中引入app.js文件 实现模块化
//index.js
import Vue from 'vue';
import Vuex from 'vuex';
import {appx} from './modules/app.js';
Vue.use(Vuex)


export default new Vuex.Store({
  modules: {
    appx
  }
})
- 在登录页或者 首页,或者你刚进行小程序的入口处页面使用用户隐私协议弹框
<privacyAgreenPop :show.sync="privacyWxPopShow" @handleAgree="handleAgree"></privacyAgreenPop>

onShow(){
	if(this.$store.state.appx.privacyAgree) {this.privacyWxPopShow = true};
},
methods:{
	handleAgree(){
		this.$store.dispatch("getPrivacyAgree")
	},
}


 593
593


 被折叠的 条评论
为什么被折叠?
被折叠的 条评论
为什么被折叠?
 到【灌水乐园】发言


