


目录
一、pytest测试框架概述
pytest是一个非常成熟的测试框架,pytest可以让不懂代码的人也可以使用pytest框架进行测试,且容易上手,对比其它框架也更为灵活,pytest可以结合一些python库来实现web自动化,接口自动化,app自动化测试。
pytest的一些插件也很强大,可以实现很多实用的功能,例如:pytest-html可以生成html格式的自动化测试报告、pytest-xdist在执行测试用例时可以多线程的模式执行、pytest-ordering用于改变测试用例的执行顺序、pytest-rerunfailures在执行失败的用例可进行重新执行、allure-pytest可以生成美观的测试报告
二、使用pytest测试框架的使用规范和使用格式
1、pytest模块名必须以test_开头或者_test结尾,测试类必须以Test开头,并且不能有init方法,测试用例必须以test开头。
2、pytest用例的执行模式和参数:
主函数模式
| 主函数模式 | |
|---|---|
| pytest.main() | 执行所有 |
| pytest.main(['-vs','路径']) | 执行指定用例 |
| pytest.main(['-sv', '执行的文件路径::class名::方法名']) | 以nodeid的方式 |
| pytest.main(['-sv', './多线程test/test_01.py', '-n=2']) | 开启多线程 |
| pytest.main(['-sv', '路径', '--reruns=[number]']) | 执行失败的用例重跑 |
| pytest.main(['-vs','路径','--maxfail=[number]']) | 执行用例失败number条后停止 |
| pytest.main(['-vs','路径','-k=str]) | 只执行包含某个str的用例 |
命令行模式
| 命令行模式 | |
| pytest | 运行所有 |
| pytest -vs 模块名 | 指定模块 |
| pytest -vs 目录路径 | 指定目录 |
| pytest -sv 执行的文件路径::class名::方法名 | nodeid |
| pytest -vs 路径 -n number | 开启多线程 |
| pytest -vs 路径 --reruns number | 执行失败的用例重跑 |
| pytest -vs 路径 --maxfail number | 执行用例失败number条后停止 |
| pytest -vs 路径 -k "str" | 只执行包含某个str的用例 |
参数详解
| 参数详解 | |
| 表示输出调试信息,包括print()打印的信息 | -s |
| 输出详细信息 | -v |
| -vs | |
| 支持多线程或者分布式运行测试用例,开启number个线程 | -n number |
| 失败用例重跑number次 | --reruns [number] |
| 表示只要要一个用例报错,那么测试停止 | -x |
| 出现number个用例失败就停止 | --maxfail number |
| 只执行包含 str 的测试用例 | -k str |
| 生成html的测试报告 | --html ./report/report.html |
3、pytest.ini 配置文件
pytest.ini文件可以对pytest进行初始化,是pytest单元测试的框架的核心配置文件,这个文件一般放在根目录下,文件名只能是pytest.ini,编码格式必须是ANSI,可以改变pytest的一些默认设置,在pytest每次执行时都会去读取这个文件。
pytest.ini 文件的配置:
[pytest]
# 命令行参数,用空格分隔
addopts = -vs
# 测试用例文件夹,可自己配置, ../pytestproject为上一层的pytestproject文件夹
testpaths = ../pytestporject
# 配置测试搜索的模块文件名称
python_files = test*.py
# 配置测试搜索的测试类名
python_classes = Test*
#配置测试搜索的测试函数名
python_functions = test
4、pytest的执行顺序是默认从上到下执行的,可以利用装饰器对用例的执行属性进行配置,用例的也可以进行分组操作,也是使用装饰器和修改pytest.ini文件中的值,用例在执行中也是可以跳过的,这些后面都会详细介绍。
三、pytest案例 and 实战
1、安装pytest
# 在dos窗口执行
pip install pytest
2、新建一个测试用例
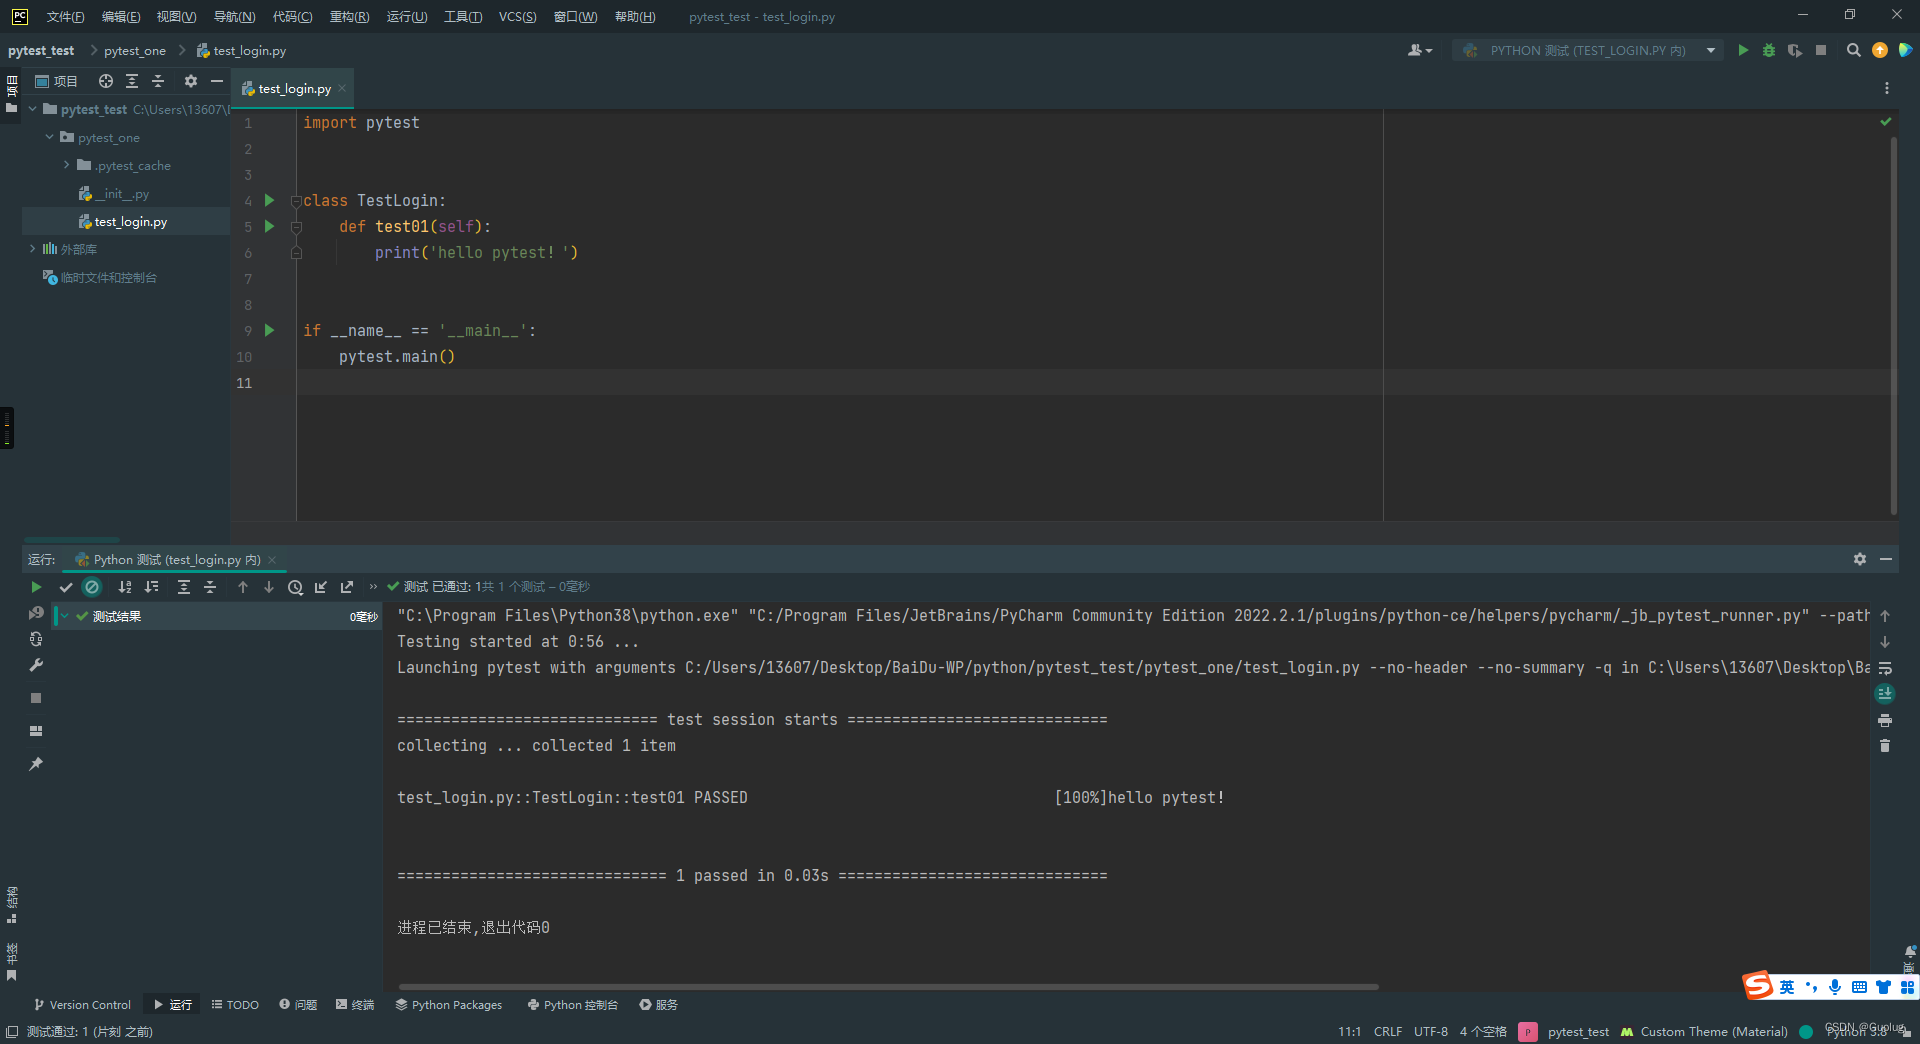
这里需要注意pytest模块、测试类和测试用例的格式,从执行结果来看,有1条用例通过了用了0.03S,还有我们使用的pytest的版本这里我使用的是主函数的执行方式,这里可以创建一个main函数使用起来会更加方便。
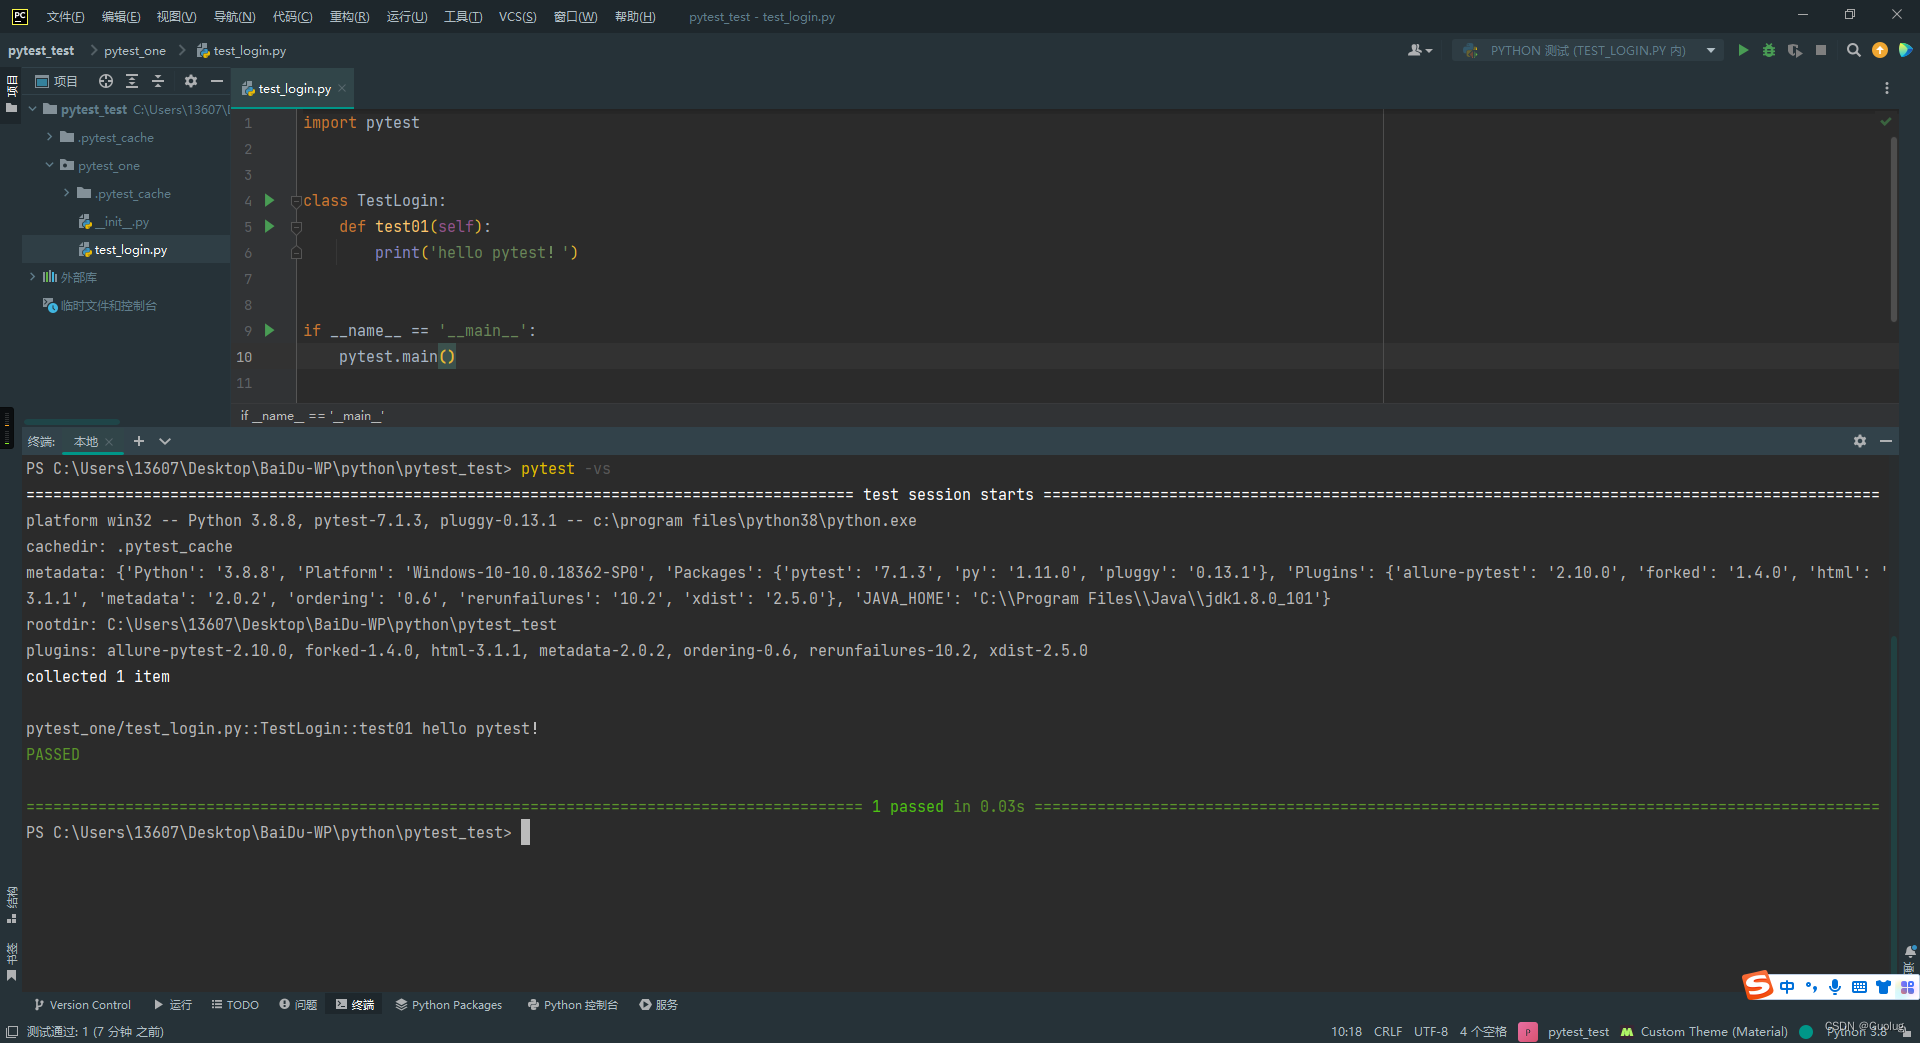
3、在终端执行pytest用例
# 在dos窗口输入并且是项目路径下
# 这里表示执行当前项目下的所有用例,-vs的参数用法请参考上面的参数详解
pytest -vs
4、配置pytest.ini文件
[pytest]
# 命令行参数,用空格分隔
addopts = -vs
# 测试用例文件夹,可自己配置
testpaths = ../pytestproject
# 配置测试搜索的模块文件名称
python_files = test_*.py
# 配置测试搜索的测试类名
python_classes = Test*
#配置测试搜索的测试函数名
python_functions = test
在项目的根目录下创建pytest.ini文件,并且输入以上内容,一旦创建了此文件后续执行用例会依靠pytest.ini中的配置来执行,并且每次执行用例时都会先回去此文件的配置。pytest.ini的配置是非常灵活的。
addopts 表示在执行时的默认参数,当前的默认参数是 -vs
testpaths 这是一个测试用例的路径,当你有不同的用例库时,就可以通过配置来指定不同的用例库
python_files 用例模块的命名规则
python_classes 用例类名的命名规则
python_functions 用例方法名的命名规则
5、设置测试用例的执行顺序
设置测试用例执行顺序使用python中的装饰器就可以,在测试用例的上方输入以下内容
import pytest


class TestLogin:

    # order的值表示这用例执行的顺序
    @pytest.mark.run(order=6)
    def test01(self):
        print('1hello pytest!')

    @pytest.mark.run(order=5)
    def test02(self):
        print('2hello pytest!')

    @pytest.mark.run(order=4)
    def test03(self):
        print('3hello pytest!')

    @pytest.mark.run(order=3)
    def test04(self):
        print('4hello pytest!')

    @pytest.mark.run(order=2)
    def test05(self):
        print('5hello pytest!')

    @pytest.mark.run(order=1)
    def test06(self):
        print('6hello pytest!')


if __name__ == '__main__':
    pytest.main()
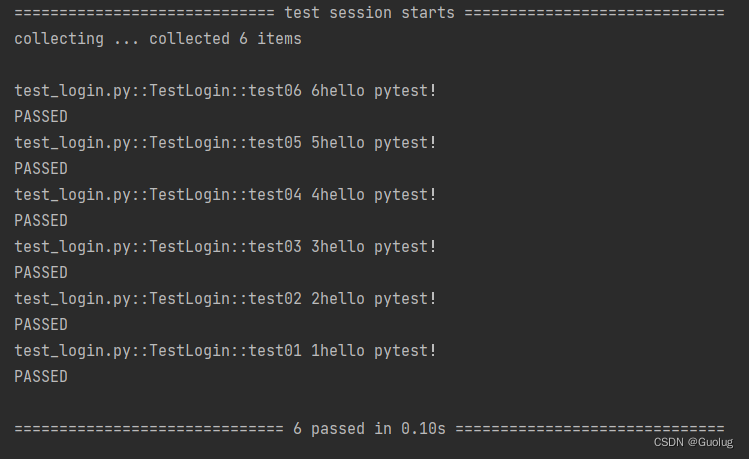
执行效果可以看出 '6hello pytest' 是第一个执行的,'1hello pytest' 是第6个执行的
6、测试用例的分组
测试用例的分组需要满足两个条件,一要在pytest.ini文件中对markers进行设置,二要在测试用例上使用@pytest.mark.装饰器
# 在 pytest.ini 文件中的配置
[pytest]
addopts = -vs
testpaths = ./OneDayPytest
python_files = test_*.py
python_classes = Test*
python_functions = test
markers =
    UI : ui测试用例分组
    function : 功能测试用例分组
配置网markers属性后添加装饰器
import pytest


class TestLogin:
    @pytest.mark.UI()
    @pytest.mark.run(order=6)
    def test01(self):
        print('ui测试用例分组——1')

    @pytest.mark.UI()
    @pytest.mark.run(order=5)
    def test02(self):
        print('ui测试用例分组——2')

    @pytest.mark.UI()
    @pytest.mark.run(order=4)
    def test03(self):
        print('ui测试用例分组——3')

    @pytest.mark.function
    @pytest.mark.run(order=3)
    def test04(self):
        print('功能测试用例分组——1')

    @pytest.mark.function
    @pytest.mark.run(order=2)
    def test05(self):
        print('功能测试用例分组——2')

    @pytest.mark.function
    @pytest.mark.run(order=1)
    def test06(self):
        print('功能测试用例分组——3')


if __name__ == '__main__':
    pytest.main()
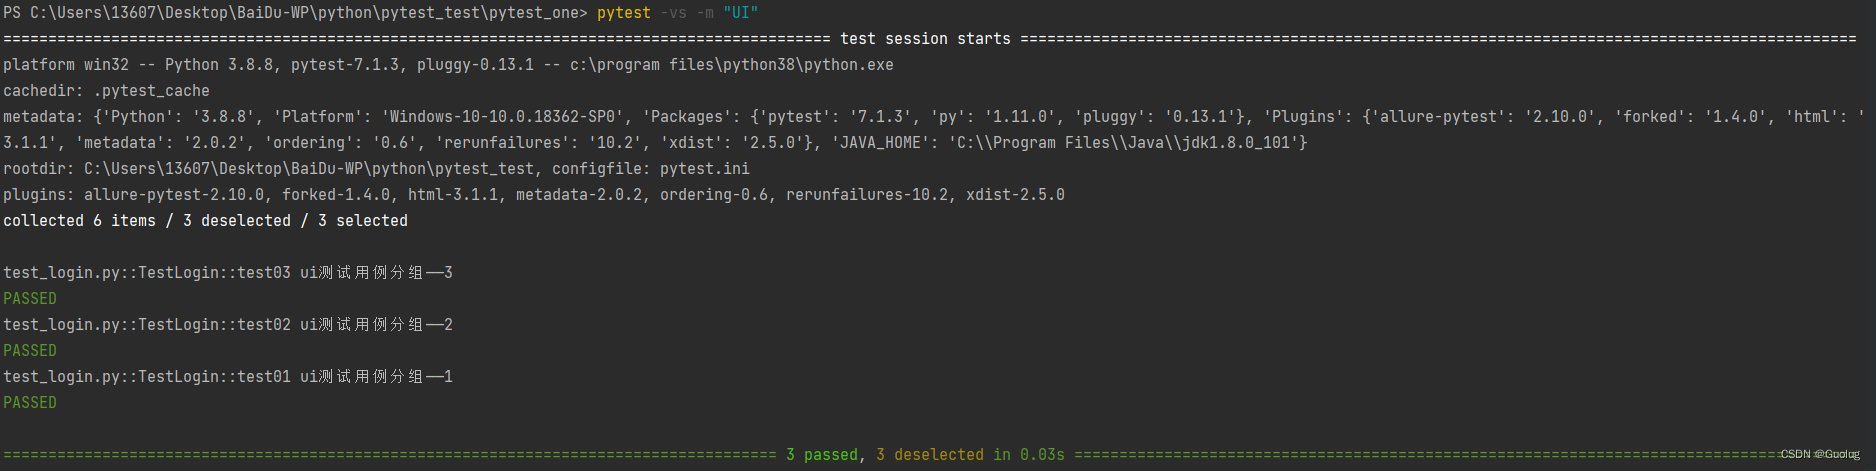
执行UI分组的测试用例
pytest -vs -m "UI"
# 分组也可以使用 or
pytest -vs -m "UI and function"
# 表示UI分组和function分组都执行
运行结果,只执行了有UI分组修饰的用例
7、跳过某个测试用例
跳过用例分两种,一种是无判断自己跳过一种是判断条件为真跳过:
无条件跳过 : @pytest.mark.skip(reason="跳过原因")
判断为真跳过 : @pytest.mark.skipif(boolean条件,reason="跳过原因")


 1362
1362


 被折叠的 条评论
为什么被折叠?
被折叠的 条评论
为什么被折叠?
 到【灌水乐园】发言


