


配置JavaSpring
使用maven配置:在pom.xml文件中输入以下依赖
   <dependencies>
        <dependency>
            <groupId>org.springframework</groupId>
            <artifactId>spring-context</artifactId>
            <version>5.3.18</version>
        </dependency>
    </dependencies>
配置applicationContext.xml
<?xml version="1.0" encoding="UTF-8"?>
<beans xmlns="http://www.springframework.org/schema/beans"
       xmlns:xsi="http://www.w3.org/2001/XMLSchema-instance"
       xsi:schemaLocation="http://www.springframework.org/schema/beans http://www.springframework.org/schema/beans/spring-beans.xsd">

    <bean id="stu" class="POJO.Student">
        <property name="name" value="John"></property>
        <property name="age" value="18"></property>
        <property name="id" value="1"></property>
    </bean>
</beans>
创建Student类
/注意包名对应
public class Student {
    private String name;
    private int age;
    private int id;

    public Student(String name, int age, int id) {
        this.name = name;
        this.age = age;
        this.id = id;
    }

    //省略无参构造函数,getter和setter方法
}
有些Idea不会自动配置module-info文件,可以根据需要配置,不然会显示Error creating bean with name 'stu' defined in class path resource [applicationContext.xml]: Instantiation of bean failed;
测试:如果可以正常跑说明Spring配置成功!
package test;
import POJO.Student;
import org.springframework.context.support.ClassPathXmlApplicationContext;

public class SpringTest {
    public static void main(String[] args) {
        //读取配置文件
        ClassPathXmlApplicationContext applicationContext = new ClassPathXmlApplicationContext("applicationContext.xml");
        Student stu = applicationContext.getBean("stu", Student.class);
        System.out.println(stu);
    }
}
IOC
IOC(概念)
IOC中文名是控制反转。
用最简单的话来说就是:解耦合。
把对象的创建,对象之间调用的过程都交给Spring管理
IOC(底层原理)
(1)xml解析、工厂设计模式
(2)反射
正常情况下我们要先声明创建对象,才可以访问其字段和方法。耦合度极高!
IOC底层原理
使用工厂设计模式:就可以先在工厂中创建对象,再将对象传给需要的地方。(初步实现耦合)再xml解析出需要的类,使用反射进一步解耦合。
(1)使用xml配置文件,配置创建的对象:
<bean id="stu" class="POJO.Student"> <property name="name" value="John"></property> <property name="age" value="18"></property> <property name="id" value="1"></property> </bean>(2)有service类和dao类,创建工厂类:

此时如果要修改声明的类,只用修改xml文件即可。
此时的耦合度已经进一步降低!!
IOC(的接口)
(1)IOC思想基于IOC容器完成,IOC容器底层就是对象工厂。
(2)Spring提供IOC容器实现的两种方式
- BeanFactory:加载xml配置文件的时候不会创建对象,getBean的时候才创建对象
- ApplicationContext:BeanFactory接口的子接口,功能更加强大。对象的创建是在服务器启动时,使用的时候已经创建好了。
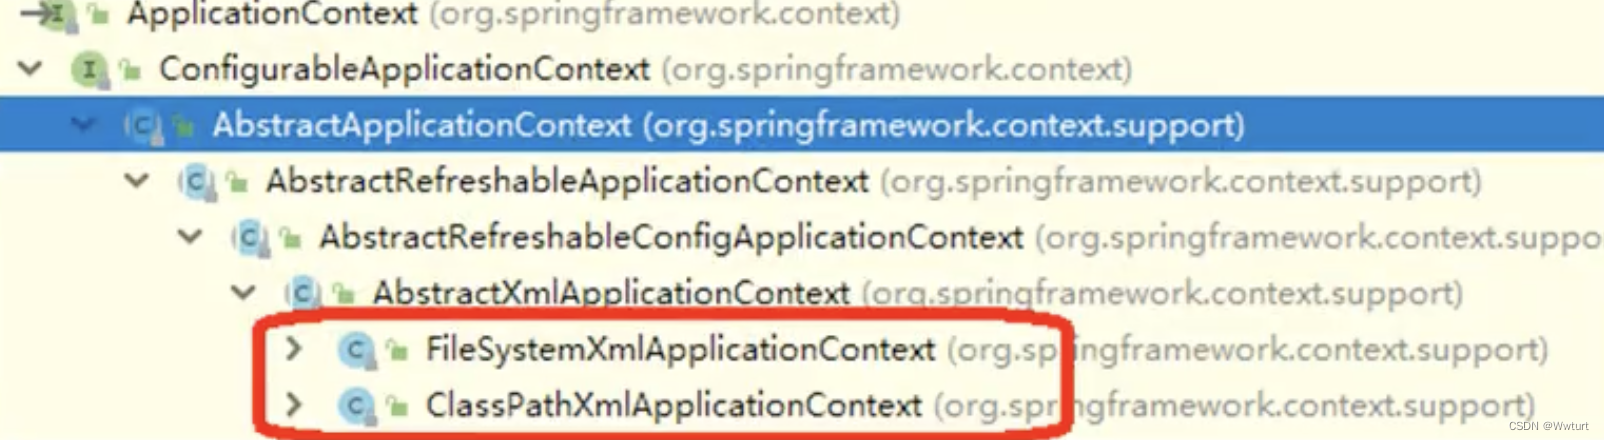
(3)ApplicationContext接口有实现类:
- FileSystemXmlApplicationContext( 文件磁盘路径 )
- ClassSystemXmlApplicationContext( src下类路径 )
IOC操作bean管理
Bean管理指的是两个操作:
(1)创建对象
(2)注入属性
Bean管理的操作:
基于xml配置文件方式实现
*id是一个标识,标识这个bean
*class填写全类名
·第一行使用默认使用无参构造方法构造对象
<bean id="stu" class="POJO.Student"></bean>
DI:是IOC的具体实现。注入属性,在创建对象的基础之上。 第一种注入方式:通过set方法注入
第二种注入方式:通过有参构造函数注入 <bean id="stu" class="POJO.Student"> <property name="name" value="John"></property> <property name="age" value="18"></property> <property name="id" value="1"></property> </bean>第一种方式⬆️
    <bean id="stu2" class="POJO.Student">
        <constructor-arg name="name" value="Willion"></constructor-arg>
        <constructor-arg name="id" value="2"></constructor-arg>
        <constructor-arg name="age" value="20"></constructor-arg>
    </bean>
第二种方式⬆️
IOC操作Bean管理(xml注入其他类型属性)
1.null值
    <bean id="stu" class="POJO.Student">
        <property name="id">
            <null/>
        </property>
    </bean>
2.属性值包括特殊符号
<![CDATA[<<Lion>>]]> 黄色部分可以写入特殊字符
或者转译<(<) >(>)
    <bean id="stu" class="POJO.Student">
        <property name="name">
            <value>
                <![CDATA[<<Lion>>]]>
            </value>
        </property>
    </bean>
注入属性-外部bean
(1)创建两个service类和dao类
(2)在service调用dao里面的方法
public class StudentDaoImpl implements StudentDao{

    @Override
    public void update() {
        System.out.println("service runs");
    }
}
public class StudentService { public void read(){ System.out.println("Students are reading"); } }public interface StudentDao { void update(); }(3)在Spring配置文件中进行配置( 注意ref放的是对象id )
注意两点:
1.bean中class不可以写入接口,所以只可以写入实现接口的类
2.本写法分别调用了两个类的无参构造方法并且调用了StudentService的set方法
<!--service和dao对象创建-->
    <!--
    ref里面放的是该beans里面配置对应id的对象
    将外部bean注入进来
    -->
    <bean id="StudentService" class="service.StudentService">
        <property name="studentDao" ref="StudentDao"></property>
    </bean>

    <bean id="StudentDao" class="dao.StudentDaoImpl"></bean>
注入属性-内部bean和级联赋值
1、内部bean
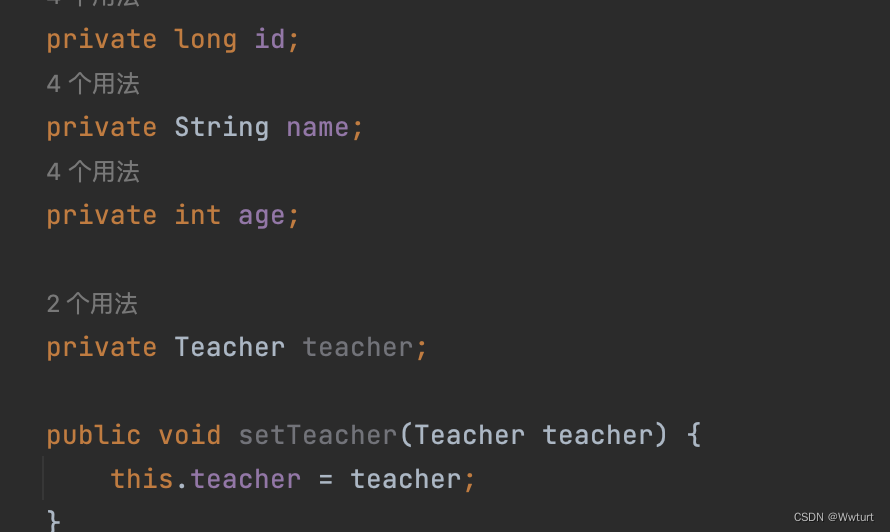
(1)一对多关系:学生和老师
(2)在实体类中以对象的形式表示一对多
即在学生类(多)中创建字段老师(一)
(3)在xml文件中进行配置
    <bean id="Student" class="POJO.Student">
        <property name="id" value="3"></property>
        <property name="name" value="Garson"></property>
        <property name="age" value="20"></property>
        <property name="teacher">
            <bean id="teacher" class="POJO.Teacher">
                <property name="name" value="Nadine"></property>
                <property name="subject" value="speaking"></property>
            </bean>
        </property>
    </bean>
(4)进行测试
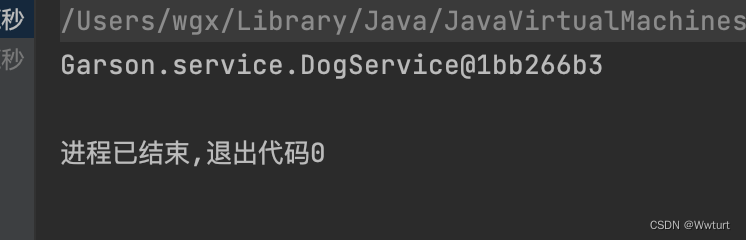
    @Test
    public void testManyOne(){
        //根据配置文件执行相关操作
        ApplicationContext applicationContext = new ClassPathXmlApplicationContext("bean2.xml");
        //获取指定id号的对象
        Student student = applicationContext.getBean("Student",Student.class);
        //进行操作
        System.out.println(student+" - "+student.getTeacher());
    }
Spring的执行步骤 1、通过ApplicationContext去执行相应的配置文件
此时根据文件中写入的逻辑创建对象
2、通过getBean得到相应对象 测试结果:
2、级联方式
    <bean id="Student2" class="POJO.Student">
        <property name="id" value="3"></property>
        <property name="name" value="Garson"></property>
        <property name="age" value="20"></property>
        <!--对应下面的bean-->
        <property name="teacher" ref="teacher"></property>
        <property name="teacher.subject" value="speaking"></property>
        <property name="teacher.name" value="Betty"></property>
    </bean>
    <bean id="teacher" class="POJO.Teacher"></bean>

IOC操作Bean管理(xml注入集合属性)
public class Emp {
    private List<String> list;
    private String[] array;
    private Map<String,String> map;
    // getter、setter、toString方法和构造函数
}
1、注入数组类型属性 2、注入List集合类型属性 3、注入Map集合类型属性
<bean id="Emp" class="POJO.Emp">
        <!--数组类型注入-->
        <property name="array">
            <array>
                <value>content1</value>
                <value>content2</value>
                <value>content3</value>
            </array>
        </property>
        <!--list类型注入-->
        <property name="list">
            <list>
                <value>content1</value>
                <value>content2</value>
                <value>content3</value>
            </list>
        </property>
        <!--map类型注入-->
        <property name="map">
            <map>
                <entry key="1" value="content1"></entry>
                <entry key="2" value="content2"></entry>
                <entry key="3" value="content3"></entry>
            </map>
        </property>
    </bean>
添加两个细节:
1、写入的对象不是String类型怎么办
//Emp中的List2存放Student类的List
<bean id="Emp" class="POJO.Emp">
        <property name="list2">
            <list>
                <ref bean="student1"></ref>
                <ref bean="student2"></ref>
                <ref bean="student3"></ref>
            </list>
        </property>
    </bean>

    <bean id="student1" class="POJO.Student"></bean>
    <bean id="student2" class="POJO.Student"></bean>
    <bean id="student3" class="POJO.Student"></bean>
2、想把某一字段提取出来当成该类的static类字段怎么办
(1)在Spring配置文件中引入名称空间util
<?xml version="1.0" encoding="UTF-8"?>
<beans xmlns="http://www.springframework.org/schema/beans"
       xmlns:xsi="http://www.w3.org/2001/XMLSchema-instance"
       xmlns:util="http://www.springframework.org/schema/util"
       xsi:schemaLocation="http://www.springframework.org/schema/beans http://www.springframework.org/schema/beans/spring-beans.xsd
                           http://www.springframework.org/schema/util http://www.springframework.org/schema/util/spring-util.xsd">


</beans>
(2)使用util标签完成List集合注入
ref全称reference,可以引用其他的bean标签。
<!--1、创建list并且提取-->
    <util:list id="StudentList">
        <ref bean="student1"></ref>
        <ref bean="student2"></ref>
        <ref bean="student3"></ref>
    </util:list>
<!--2、使用-->
    <bean id="emp" class="POJO.Emp">
        <property name="list2">
            <ref bean="StudentList"></ref>
        </property>
    </bean>
</beans>
IOC操作Bean管理(FactoryBean)
1、Spring有两种类型bean,一种普通bean,一种FactoryBean。
2、普通bean定义类型和返回类型一样,FactoryBean可以不一样。
具体做法
(1)创建一个myBean类作为FactoryBean实现接口
重写getObject方法
package factorybean;
import POJO.Student;
import org.springframework.beans.factory.FactoryBean;
public class myBean implements FactoryBean<Student>{

    @Override
    public Student getObject() throws Exception {
        return new Student();
    }

    @Override
    public Class<?> getObjectType() {
        return null;
    }

    @Override
    public boolean isSingleton() {
        return FactoryBean.super.isSingleton();
    }
}
(2)在配置文件中定义myBean类
<bean id="myBean" class="factorybean.myBean"></bean>(3)测试
    @Test
    public void testBeanFactory(){
        ApplicationContext applicationContext = new ClassPathXmlApplicationContext("bean4.xml");
        Student mybean = applicationContext.getBean("myBean", Student.class);
        System.out.println(mybean);
    }
配置文件中是myBean类但实际返回值是Student类
IOC容器Bean管理(bean的作用域)
1、在Spring里面默认情况下bean是一个单实例对象
Student mybean1 = applicationContext.getBean("myBean", Student.class);
        Student mybean2 = applicationContext.getBean("myBean", Student.class);
        System.out.println(mybean1+"-"+mybean1.SuperToString());
        System.out.println(mybean2+"-"+mybean2.SuperToString());
(输出的内存地址是相同的)
2、在Spring里面可以设置创建的bean实例是一个单实例还是多实例
(1)Spring配置文件中有属性(scope)用于设置单实例、多实例
(2)scope的值:
第一个值:默认值,singleton,表示是单实例对象
第二个值:prototype,表示是多实例对象

IOC操作Bean管理(bean生命周期)
1、Bean的生命周期
2、Bean生命周期
(1)创建Bean实例(通过构造器)
(2)为bean的属性设置值和对其他bean的引用(调用set方法)
(3)调用了bean的初始化方法(需要进行配置)
    public void initMethod(){
        System.out.println("值行了initMethod方法");
    }
<bean id="Student" class="POJO.Student" init-method="initMethod">(4)bean可以使用了(对象获取到了)
(5)当容器关闭的时候,调用bean的销毁方法(需要进行配置销毁的方法)
    public void destroyMethod(){
        System.out.println("值行了destroyMethod方法");
    }
<bean id="Student" class="POJO.Student" destroy-method="destroyMethod">@Test public void testBeanFactory(){ //根据配置文件执行相关操作 ApplicationContext applicationContext = new ClassPathXmlApplicationContext("bean4.xml"); //获取指定id号的对象 Student mybean1 = applicationContext.getBean("myBean", Student.class); Student mybean2 = applicationContext.getBean("myBean", Student.class); //进行操作 System.out.println(mybean1+"-"+mybean1.SuperToString()); System.out.println(mybean2+"-"+mybean2.SuperToString()); //手动销毁 ((ClassPathXmlApplicationContext)applicationContext).close(); }调用 ((ClassPathXmlApplicationContext)applicationContext).close();
执行销毁,并执行定义的destroyMethod方法
3、Bean的后置处理器(BeanPostProcessor接口)
在Spring调用了set方法和初始化方法之后,会将Bean实例传递给Bean后置处理器的方法
(1)创建类,实现BeanPostProcessor接口
public class MyBeanPost implements BeanPostProcessor { //Bean创建之后调用set方法后执行 @Override public Object postProcessBeforeInitialization(Object bean, String beanName) throws BeansException { return bean; } //Bean初始化之后执行 @Override public Object postProcessAfterInitialization(Object bean, String beanName) throws BeansException { return bean; } }(2)Spring会为所有Bean都添加后置处理器处理
IOC操作Bean管理(xml自动装配)
什么是自动装配:根据属性类型和属性名称,Spring自动完成属性注入
(1)根据属性名称自动注入
    <!--
    autowire两个常用的值
    byName根据属性名称注入。注入值bean的id值和类属性名一致
    -->
    <!--private Teacher teacher;-->
    <bean id="Student" class="POJO.Student" autowire="byName"></bean>
    <bean id="teacher" class="POJO.Teacher"></bean>
(2)根据属性类型自动注入
    <bean id="Student" class="POJO.Student" autowire="byType"></bean>
    <bean id="teacher" class="POJO.Teacher"></bean>
根据类型自动注入相同类型的Bean不可以定义多个
因为Spring无法确定用哪个Bean注入
IOC操作Bean管理(外部属性文件)
1、引入外部属性文件配置数据库连接池
        <dependency>
            <groupId>com.alibaba</groupId>
            <artifactId>druid</artifactId>
            <version>1.1.21</version>
        </dependency>
//命名空间填充xmlns:context="http://www.springframework.org/schema/context" <!--引入外部文件--> <context:property-placeholder location="jdbc.properties"/> <bean id="dataSource" class="com.alibaba.druid.pool.DruidDataSource"> <property name="driverClassName" value="${jdbc.driverclass}"></property> <property name="url" value="${jdbc.url}"></property> <property name="username" value="${jdbc.username}"></property> <property name="password" value="${jdbc.password}"></property> </bean>username=root password=wuguixin url=jdbc:mysql://localhost:3306/Flight driverclass=com.mysql.cj.jdbc.Driver
IOC操作Bean管理(基于注解方式)
1、格式: @注解名称(属性名=属性值,属性名称=属性值)
位置:作用在类、方法、属性上面
目的:简化xml配置
2、Spring针对Bean管理中创建对象提供注解
(1)@Component 普通注解
(2)@Service 用在业务逻辑层
(3)@Controller 用在WEB层
(4)@Repository 用在持久层上
*上面四个注解功能是一致的,都可以用来创建bean实例
3、基于注解方式实现对象创建
xmlns:context="http://www.springframework.org/schema/context"

http://www.springframework.org/schema/context
http://www.springframework.org/schema/context/spring-context.xsd


    <!--
    1、开启组件扫描,多个包用逗号隔开
    2、扫描包上层目录
    -->
    <context:component-scan base-package="POJO"></context:component-scan>
package POJO; import org.springframework.stereotype.Component; //value属性值可以省略(如果不写默认值就是其名称,首字母小写),但一般都要写! @Component(value = "User") //相当于<bean id="User" class=""/> public class User { public void method(){ System.out.println("调用User的Method方法"); } }@Test public void testAutoWire(){ //根据配置文件执行相关操作 ApplicationContext applicationContext = new ClassPathXmlApplicationContext("bean5.xml"); //获取指定id号的对象 Student mybean = applicationContext.getBean("Student", Student.class); //进行操作 System.out.println(mybean); //手动销毁 ((ClassPathXmlApplicationContext)applicationContext).close(); }测试结果:
4、开启组件扫描中的细节配置
(1)包内全扫描
<context:component-scan base-package="POJO"></context:component-scan>(2)自定义过滤器
· type = "annotation"注解扫描
· expression="xxx.Controller"只会扫描带Controller注解的类
(3)哪些不扫描

IOC操作Bean管理(注解方式注入属性)
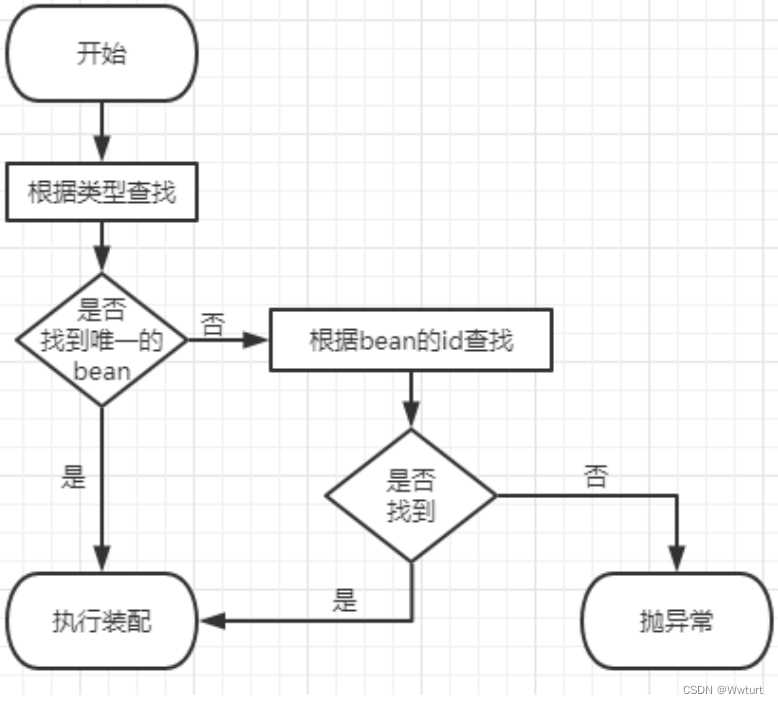
(1)@Autowire - 根据属性名进行自动装配
不需要添加set方法
添加属性注解@Autowire
bean对应的名字要指定准确
将Dog用Component注解自动生成的bean(dog)注入到DogService之中的dog字段中
@Component
public class Dog {}
@Service(value = "DogService") public class DogService { private Dog dog; @Autowired public DogService(Dog dog) { this.dog = dog; } public DogService() { System.out.println("调用DogService无参构造函数"); } }(2)@Qualifier - 根据属性名进行注入
Qualifier是和Autowire搭配使用的。
如果使用Autowire类型注入,当一个接口有多个实现类的时候Spring就不知道使用哪个实现类进行注入了。所以此时可以使用@Qualifier("")指定实现类的名称(前提是该实现类要先用注解赋予名称:如@Service(value = "dog1") )
(3)@Resource - 根据类型名注入,可以根据名称注入
@Resource:即可以根据类型注入,也可以根据名称注入。
Resource注解用法和前面两种一样,在引用数据的上面加上@ Resource,如果是根据属性类型注入,直接@Resource,若是根据属性名注入,形如@Resource(name=“名称”)
(4)@Value - 注入普通类型属性
@Value:注入普通数据类型。
这个注入方法就是注入普通数据类型的,比如int,String,Boolean等都是普通数据类型。使用的时候只需要在属性上面加上
@Value(“值”)就可以了
IOC操作Bean管理(完全注解开发)
使用类代替xml
@Configuration
@ComponentScan(basePackages = {"service"})
public class SpringConfig {
}
@Test public void testAutowireAll(){ ApplicationContext applicationContext = new AnnotationConfigApplicationContext(SpringConfig.class); DogService dogService = applicationContext.getBean("DogService", DogService.class); System.out.println(dogService); }
AOP
场景引入:
问题提出:
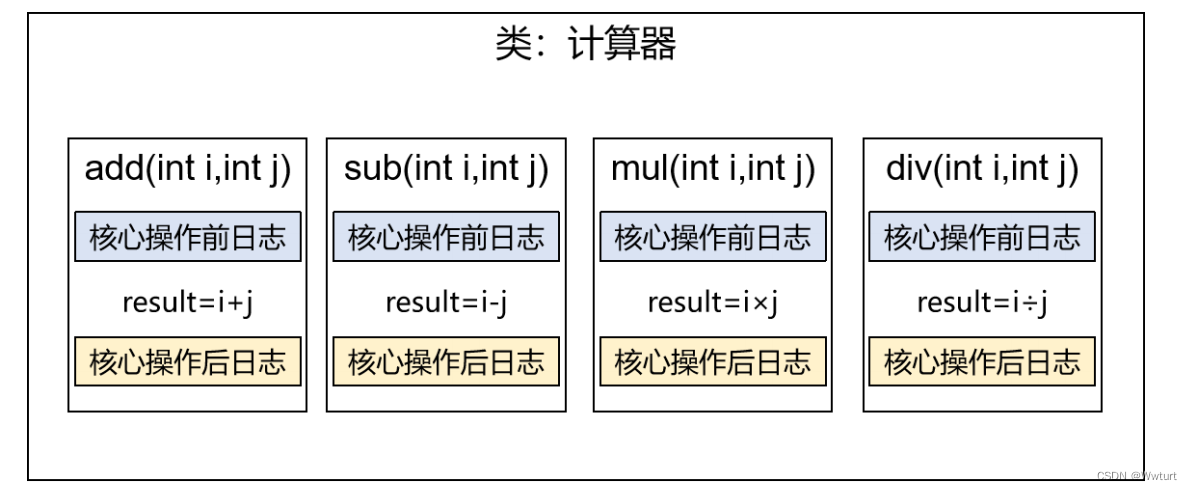
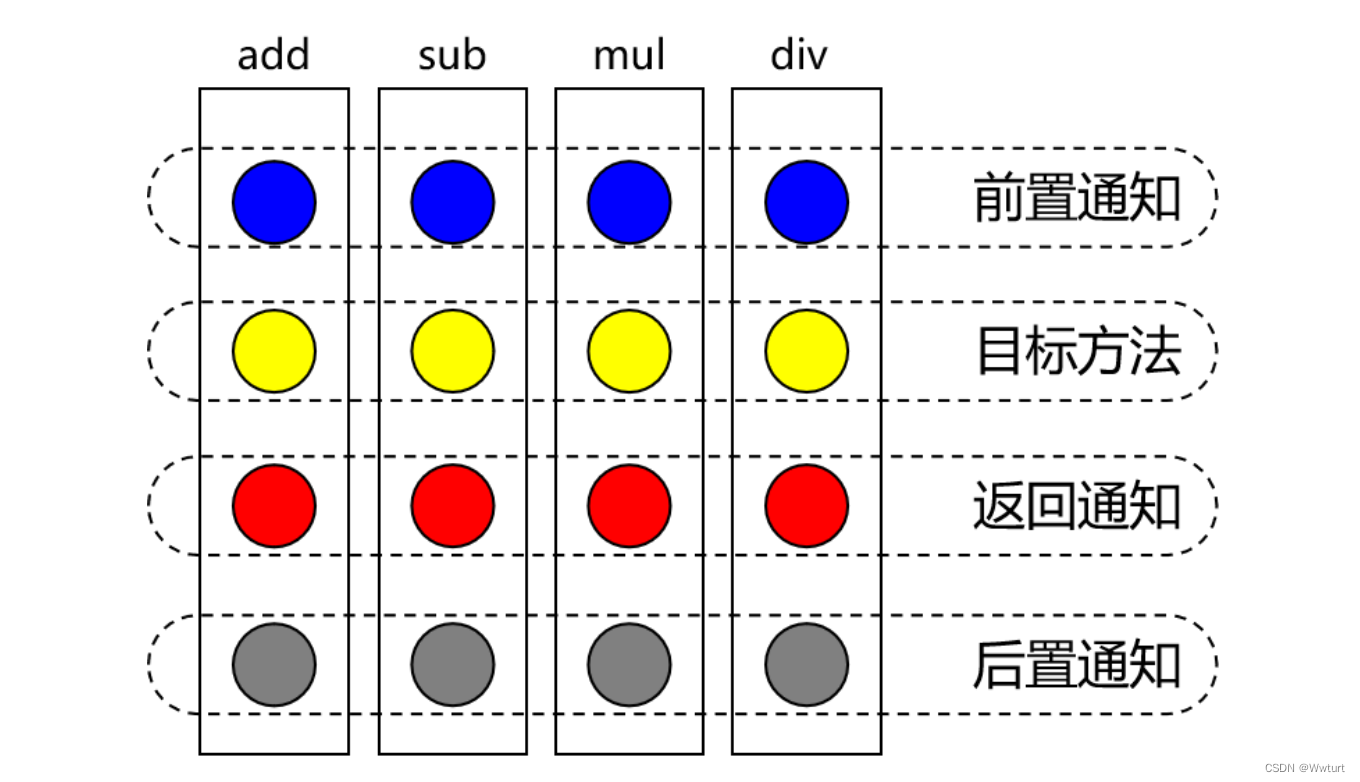
针对带日志功能的实现类,我们发现有如下缺陷
对核心业务功能有干扰,导致程序员在开发核心业务功能时分散了精力
附加功能分散在各个业务功能方法中,不利于统一维护
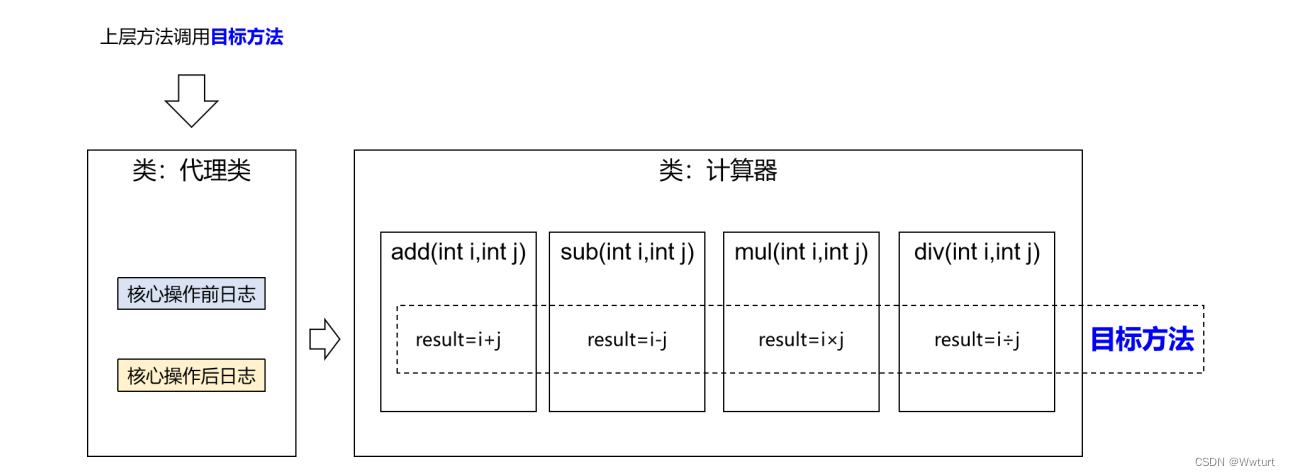
解决思路:
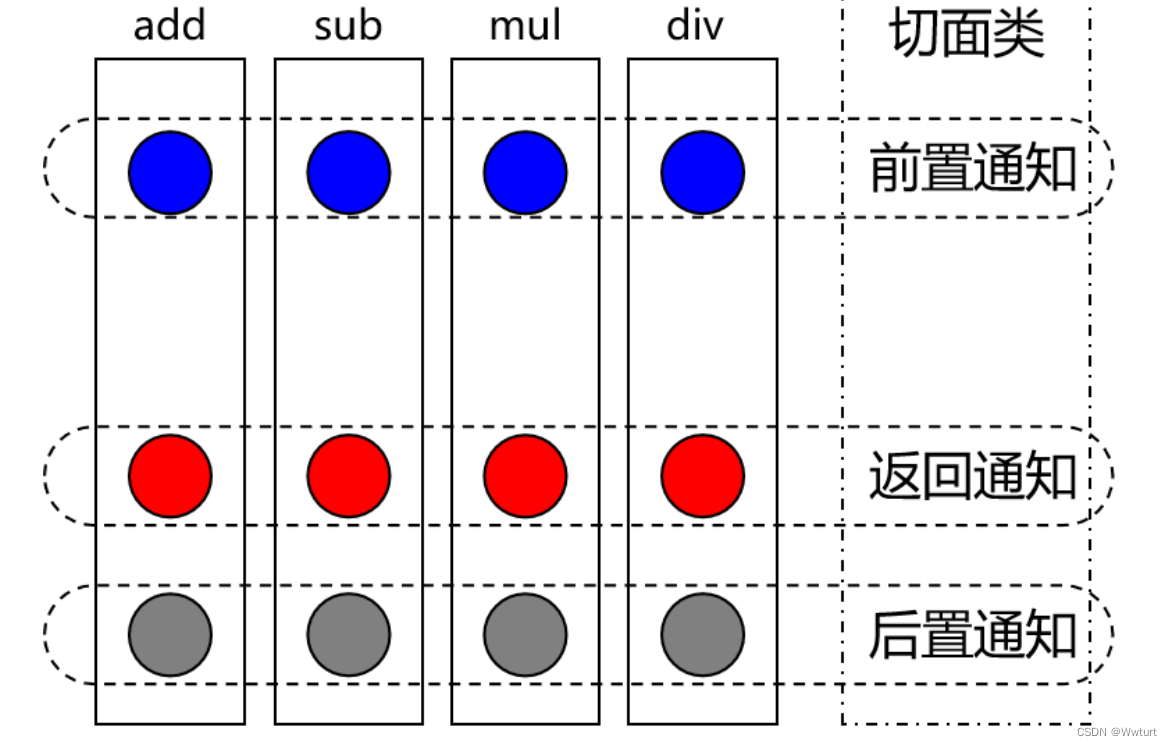
解决这两个问题,核心就是:解耦。我们需要把附加功能从业务功能代码中抽取出来。
困难:
要抽取的代码在方法内部,靠以前把子类中的重复代码抽取到父类的方式没法解决。
所以需要引入新的技术。
AOP(概念)
(1)AOP全称面向切面编程,利用AOP可以降低耦合度,提高开发效率
(2)通过不修改源代码的方式,在主干里面添加新功能
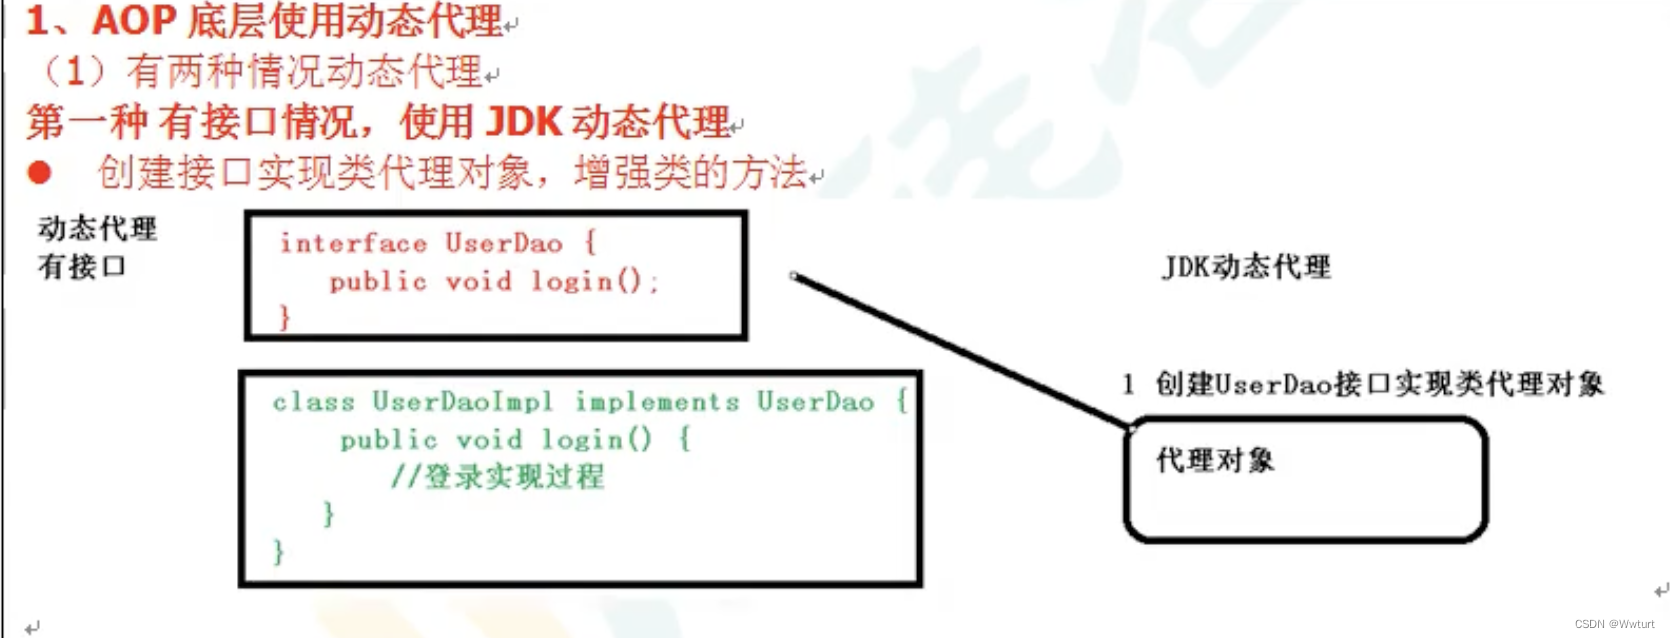
AOP(底层原理)
1、AOP底层使用动态代理
(1)有接口的情况,使用JDK动态代理
- 该接口实现类的代理对象
(2)无接口的情况,使用CGLIB动态代理
- 该类子类的代理对象
AOP(作用)
1、简化代码:把方法中固定位置的重复的代码抽取出来,让被抽取的方法更专注于自己的核心功能,提高内聚性。
2、代码增强:把特定的功能封装到切面类中,看哪里有需要,就往上套,被套用了切面逻辑的方法就被切面给增强了。
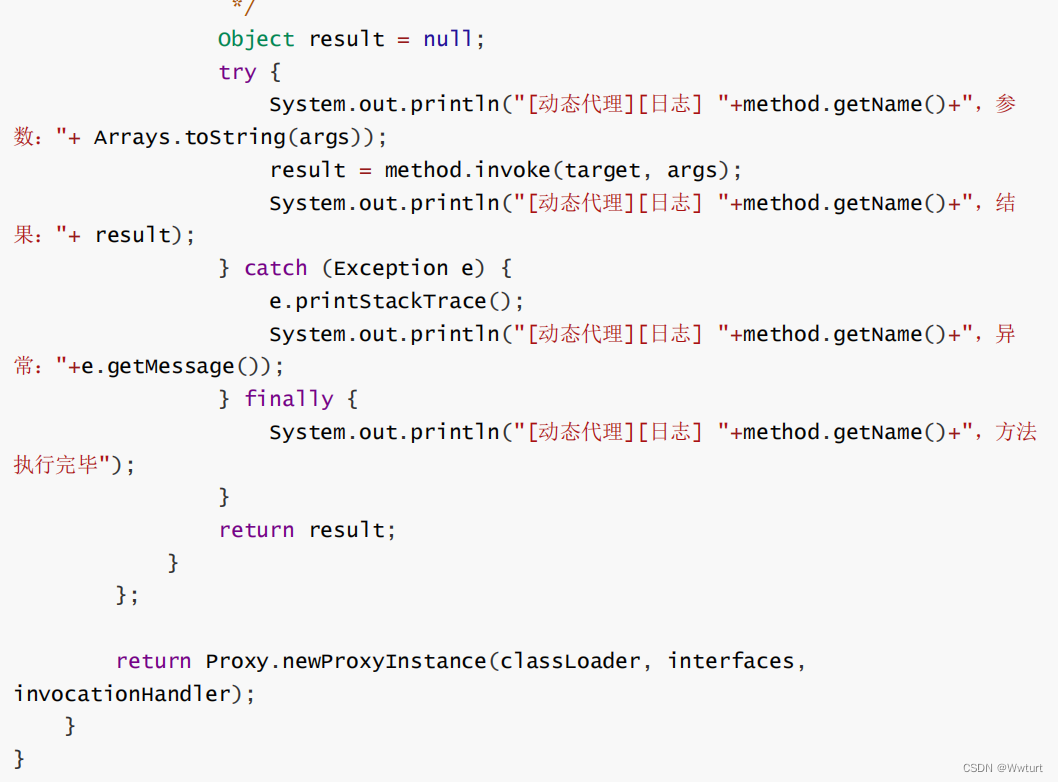
AOP(动态代理)
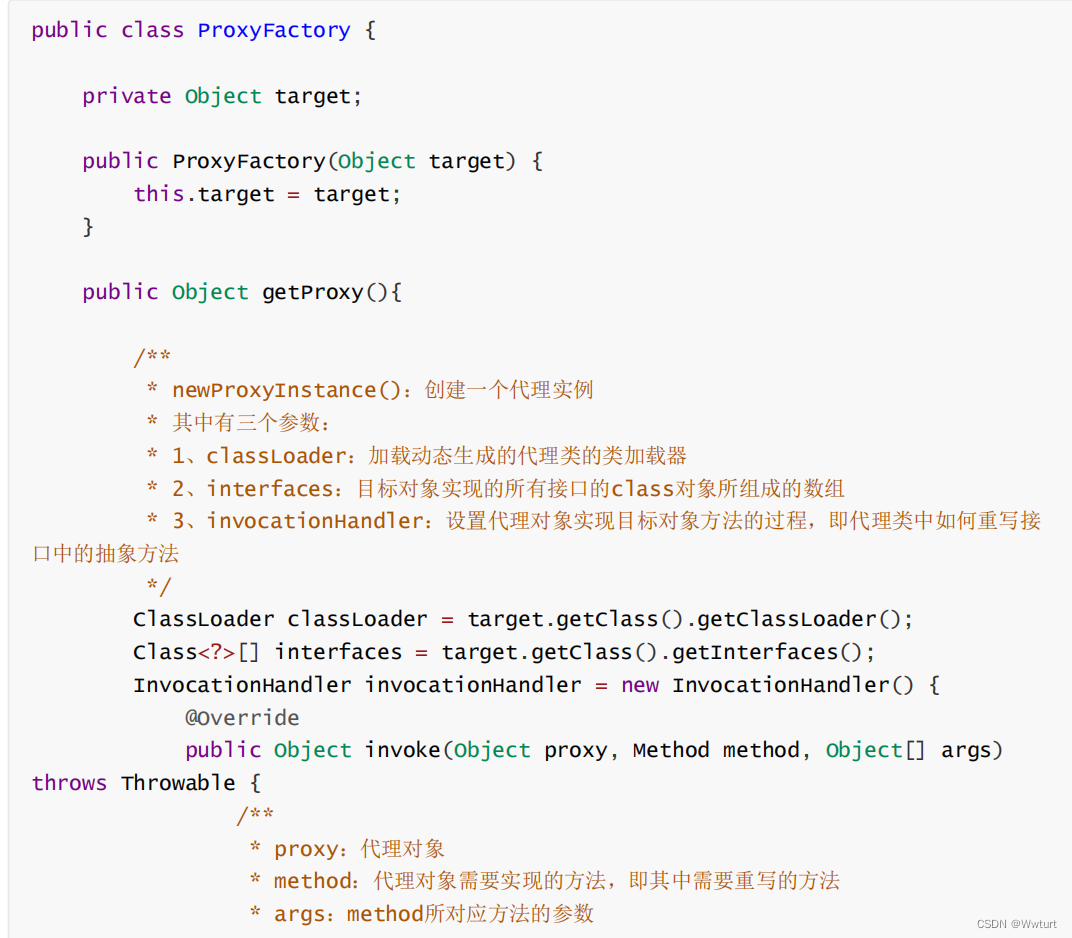
生产代理对象的工厂类:
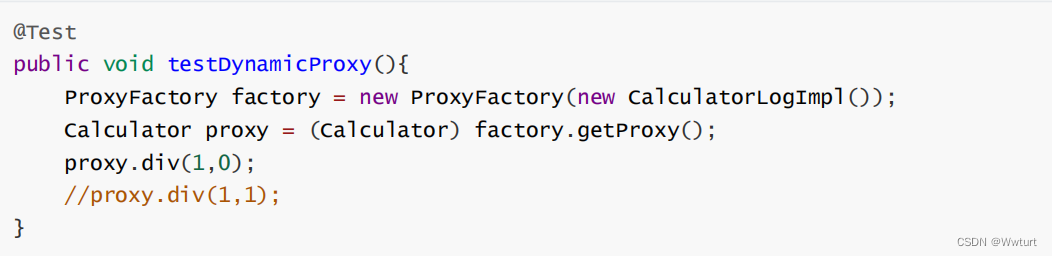
测试:
传一个实现接口类到工厂,工厂进行逻辑写入后传出,实现解耦。
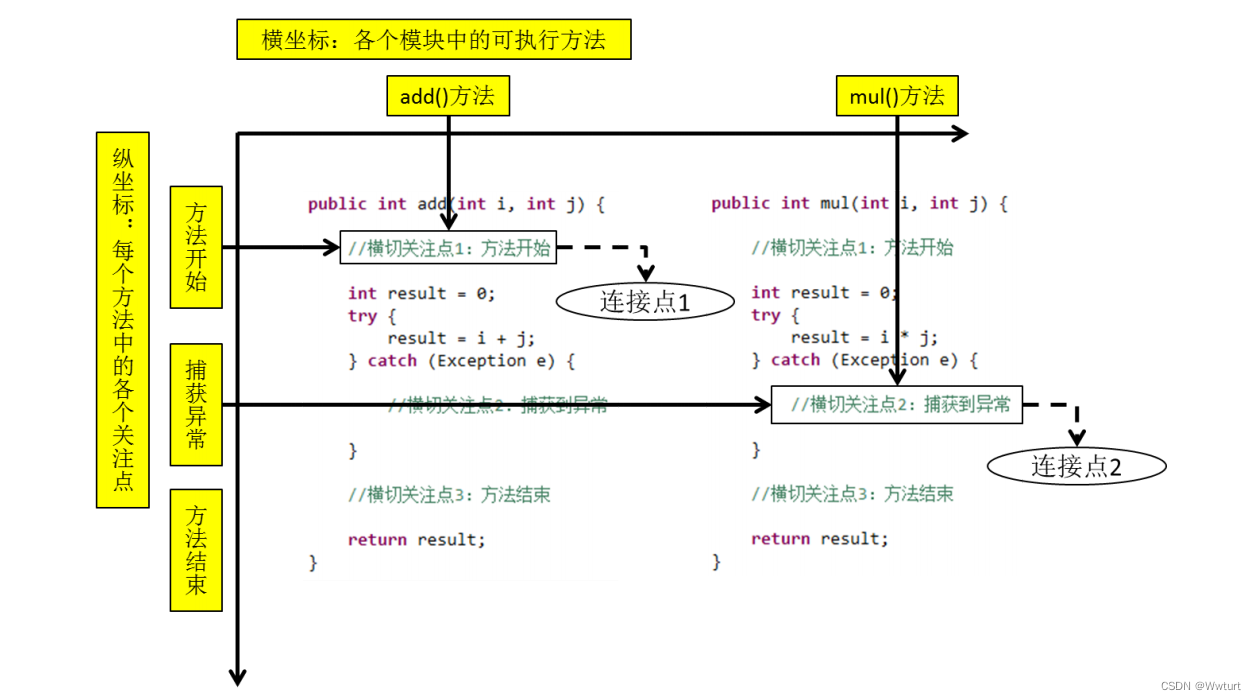
AOP概念及相关术语
1、横切关注点
从每个方法中抽取出来的同一类非核心业务。在同一个项目中,我们可以使用多个横切关注点对相关方法进行多个不同方面的增强。
这个概念不是语法层面天然存在的,而是根据附加功能的逻辑上的需要:有十个附加功能,就有十个横切关注点。
2、通知
每一个横切关注点上要做的事情都需要写一个方法来实现,这样的方法就叫通知方法。
· 前置通知:在被代理的目标方法前执行
· 返回通知:在被代理的目标方法成功结束后执行(寿终正寝)
· 异常通知:在被代理的目标方法异常结束后执行(死于非命)
· 后置通知:在被代理的目标方法最终结束后执行(盖棺定论)
· 环绕通知:使用try...catch...finally结构围绕整个被代理的目标方法,包括上面四种通知对· 应的所有位置
3、切面
封装通知的类
4、目标
被代理的目标对象
5、代理
向目标对象应用通知之后创建的代理对象。
6、连接点
向目标对象应用通知之后创建的代理对象。
7、切入点
定位连接点的方式。
每个类的方法中都包含多个连接点,所以连接点是类中客观存在的事物(从逻辑上说)。
如果把连接点看作数据库中的记录,那么切入点就是查询记录的 SQL 语句。Spring 的 AOP 技术可以通过切入点定位到特定的连接点。切点通过 org.springframework.aop.Pointcut 接口进行描述,它使用类和方法作为连接点的查询条件。

基于注解的AOP
(2)cglib就是实例化子类

通过Maven仓库导入相关依赖
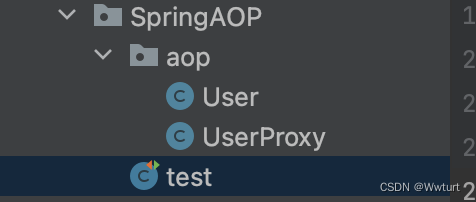
文件结构:
pom.xml:
<?xml version="1.0" encoding="UTF-8"?>
<project xmlns="http://maven.apache.org/POM/4.0.0"
         xmlns:xsi="http://www.w3.org/2001/XMLSchema-instance"
         xsi:schemaLocation="http://maven.apache.org/POM/4.0.0 https://maven.apache.org/xsd/maven-4.0.0.xsd">
    <modelVersion>4.0.0</modelVersion>

    <groupId>com</groupId>
    <artifactId>GarsonSpring</artifactId>
    <version>1.0-SNAPSHOT</version>
    <properties>
        <spring.version>5.2.2.RELEASE</spring.version>
    </properties>
    <build>
        <plugins>
            <plugin>
                <groupId>org.apache.maven.plugins</groupId>
                <artifactId>maven-compiler-plugin</artifactId>
                <configuration>
                    <source>9</source>
                    <target>9</target>
                </configuration>
            </plugin>
        </plugins>
    </build>
    <name>GarsonSpring</name>

    <dependencies>
<!--测试需要的依赖-->
        <dependency>
            <groupId>junit</groupId>
            <artifactId>junit</artifactId>
            <version>4.13.2</version>
            <scope>compile</scope>
        </dependency>
<!--SpringAOP-->
        <dependency>
            <groupId>org.springframework</groupId>
            <artifactId>spring-core</artifactId>
            <version>${spring.version}</version>
        </dependency>
        <dependency>
            <groupId>org.springframework</groupId>
            <artifactId>spring-context</artifactId>
            <version>${spring.version}</version>
        </dependency>
        <dependency>
            <groupId>org.springframework</groupId>
            <artifactId>spring-aop</artifactId>
            <version>${spring.version}</version>
        </dependency>
        <dependency>
            <groupId>org.aspectj</groupId>
            <artifactId>aspectjrt</artifactId>
            <version>1.6.12</version>
        </dependency>
        <dependency>
            <groupId>org.aspectj</groupId>
            <artifactId>aspectjweaver</artifactId>
            <version>1.6.12</version>
        </dependency>
        <dependency>
            <groupId>cglib</groupId>
            <artifactId>cglib</artifactId>
            <version>2.2</version>
        </dependency>

    </dependencies>

</project>
Spring.xml:
<?xml version="1.0" encoding="UTF-8"?>
<beans xmlns="http://www.springframework.org/schema/beans"
       xmlns:xsi="http://www.w3.org/2001/XMLSchema-instance"
       xmlns:aop="http://www.springframework.org/schema/aop"
       xmlns:context="http://www.springframework.org/schema/context"
       xsi:schemaLocation="http://www.springframework.org/schema/beans
                           http://www.springframework.org/schema/beans/spring-beans.xsd
                           http://www.springframework.org/schema/aop
                           http://www.springframework.org/schema/aop/spring-aop.xsd
                           http://www.springframework.org/schema/context
                           http://www.springframework.org/schema/context/spring-context.xsd">
    <!--开启Aspect生成代理对象-->
    <aop:aspectj-autoproxy />
    <!--开启注解扫描-->
    <context:component-scan base-package="SpringAOP.aop" />
</beans>
User:
package SpringAOP.aop;

import org.springframework.stereotype.Component;

@Component
public class User {
    public void add(){
        System.out.println("add...");
    }
}
UserProxy:
package SpringAOP.aop;

import org.aspectj.lang.annotation.Aspect;
import org.aspectj.lang.annotation.Before;
import org.springframework.stereotype.Component;

//增强的类
@Component
@Aspect//生成代理对象
public class UserProxy {

    //前置通知
    @Before("execution(* SpringAOP.aop.*.*(..))")
    public void before(){
        System.out.println("before");
    }

}
AOP(开始操作)
成功完成本模块中的<实际操作>就代表可以正确运行AOP
1、 切入点表达式:
(1)知道对哪个类里面的哪个方法进行增强
(2)语法结构:
此表达式表示对SpringAOP.aop包中的所有类的所有方法进行增强
@Pointcut("execution(* SpringAOP.aop.*.*(..))")
此表达式表示对SpringAOP.aop包中User类的add方法进行增强
@Pointcut("execution(* SpringAOP.aop.User.add(..))")
2、进行通知的配置
(1) 在spring配置文件中,开启注解扫描
·在“通过Maven仓库导入相关依赖”中就已设置
(2)使用注解创建User和UserProxy对象
·即在类前面增加@Component
·使得可以使用xml中的注解创建对象
(3)在增强类(UserProxy)上面添加注解@Aspect
·如果有AspectJ就生成代理对象
(4)在Spring配置文件中开启生成代理对象
·在“通过Maven仓库导入相关依赖”中就已设置
<实际操作(代码复制可直接运行)>
类:
package SpringAOP.aop;

import org.springframework.stereotype.Component;

@Component
public class User {
    public void add(){
        System.out.println("add...");
    }
}
增强类:
package SpringAOP.aop;

import org.aspectj.lang.annotation.Aspect;
import org.aspectj.lang.annotation.Before;
import org.springframework.stereotype.Component;

//增强的类
@Component
@Aspect//生成代理对象
public class UserProxy {

    //前置通知
    @Before("execution(* SpringAOP.aop.*.*(..))")
    public void before(){
        System.out.println("before");
    }

}
测试方法:
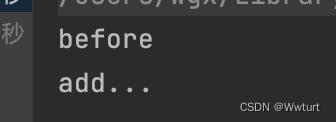
    @Test
    public void test1() {
        ApplicationContext applicationContext = new ClassPathXmlApplicationContext("spring.xml");
        User user = applicationContext.getBean("user", User.class);
        user.add();
    }
测试结果:
总结:
AOP其实就是在一个固定的类外面套一层代理类,在代理类可以增加你希望的方法及操作但却不需要改变原始类。达到了解耦合的目的,更利于维护。

AOP术语
在结束上面的AOP引入,相信我们已经对AOP有一些了解了
接下来我们再了解更深入一点的AOP术语
AOP五种通知
上文我们使用到了@Before。有了在指定方法前执行,
那就肯定有在后面、在异常抛出后、前后都执行...等,下面我们将介绍AOP的五种通知
@Before, 在 join point 前被执行的 advice. 虽然@Before是在 join point 前被执行, 但是它并不能够阻止 join point 的执行, 除非发生了异常。
@AfterReturning, 在一个 join point 正常返回后执行的 advice
@AfterThrowing, 当一个 join point 抛出异常后执行的 advice
@After( = final), 无论一个 join point 是正常退出还是发生了异常, 都会被执行的 advice
@Around, 在 join point 前和 joint point 退出后都执行AOP相同切入点的抽取
(很多人这一点讲的很复杂)
我用流程来说明:其实@Before的对象现在是pointCutDemo()方法了,但是pointCutDemo指向的是SpringAOP.aop.User类中的add()方法。所以Before还是会在add()方法之前执行
一句话:before() 在 pointCutDemo = User.add() 方法前执行
    @Pointcut("execution(* SpringAOP.aop.User.add(..))")
    public void pointCutDemo(){}


    //前置通知
    @Before("pointCutDemo()")
    public void before(){
        System.out.println("before");
    }
有多个增强类对同一个同一个方法进行增强
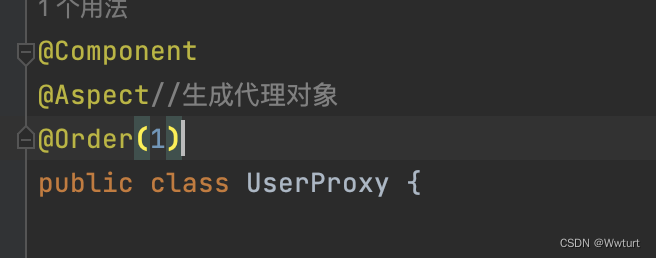
设置增强类优先级
就是有很多男生约一个女生吃饭,那女生就要给男生们排序号啦
有多个代理类想代理,我们给代理类设置一个优先级
在增强类上面添加注解@Order(数字类型值),数字类型值越小等级越高


 702
702


 被折叠的 条评论
为什么被折叠?
被折叠的 条评论
为什么被折叠?
 到【灌水乐园】发言


