


拢共分三步
1、引入依赖
        <dependency>
            <groupId>io.springfox</groupId>
            <artifactId>springfox-boot-starter</artifactId>
            <version>3.0.0</version>
        </dependency>
        <dependency>
            <groupId>com.github.xiaoymin</groupId>
            <artifactId>knife4j-spring-boot-starter</artifactId>
            <version>3.0.2</version>
        </dependency>
2、写配置类
import org.springframework.context.annotation.Bean;
import org.springframework.context.annotation.Configuration;
import springfox.documentation.builders.ApiInfoBuilder;
import springfox.documentation.builders.PathSelectors;
import springfox.documentation.builders.RequestHandlerSelectors;
import springfox.documentation.service.ApiInfo;
import springfox.documentation.spi.DocumentationType;
import springfox.documentation.spring.web.plugins.Docket;
import springfox.documentation.swagger2.annotations.EnableSwagger2;

@EnableOpenApi
@Configuration
public class swaggerConfig {
    //api接口包扫描路径
    private static final String SWAGGER_SCAN_BASE_PACKAGE =
            "com.cjh.srx.controller";
    //当前接口文档的版本
    private static final String VERSION = "1.1.1";

    @Bean
    public Docket createRestApi(){
        return new Docket(DocumentationType.OAS_30)
                .apiInfo(apiInfo())
                .select()
                //配置api(接口)所在包的路径
                .apis(RequestHandlerSelectors.basePackage(SWAGGER_SCAN_BASE_PACKAGE))
                //可以根据url路径设置哪些请求加入文档,忽略哪些请求
                .paths(PathSelectors.any())
                .build();
    }

    public ApiInfo apiInfo(){
        return new ApiInfoBuilder()
                .title("测试接口文档")//设置文档的标题
                .description("测试接口文档的描述")//设置文档的描述
                .version(VERSION)//设置文档的版本信息
                //自己的域名
                .termsOfServiceUrl("http://localhost:8989/")
                .build();
    }

}
3、在接口上添加注解
Swagger的一些注解:
@Api:修饰整个类,描述该Controller的作用
@ApiOperation:描述一个类的一个方法,或者说一个接口
@ApiParam:单个参数描述 @ApiModel:用对象来接收参数,用在实体类上
@ApiProperty:用对象接收参数时,描述对象的一个字段
@ApiResponse:HTTP响应其中1个部分的描述
@ApiResponses:HTTP响应整体描述
@ApiIgnore:使用该注解忽略这个API
@ApiError :发生错误返回的信息
@ApiImplicitParam:描述一个请求参数,可以配置参数的中文含义,还可以给参数设 置默认值
@ApiImplicitParams:描述由多个 @ApiImplicitParam 注解的参数组成的请求参数列 表
import com.cjh.srx.entity.BookInfo;
import com.cjh.srx.service.BookInfoService;
import io.swagger.annotations.Api;
import io.swagger.annotations.ApiOperation;
import org.springframework.beans.factory.annotation.Autowired;
import org.springframework.web.bind.annotation.GetMapping;
import org.springframework.web.bind.annotation.RequestMapping;
import org.springframework.web.bind.annotation.RestController;

import java.util.List;

@Api("书籍信息管理")
@RestController
public class BookInfoController {

    @Autowired
    private BookInfoService bookInfoService;

    @ApiOperation("查询所有书籍")
    @GetMapping("/info/all")
    public List<BookInfo> getAllBookInfo(){
        return bookInfoService.getAllBookInfo();
    }

}
4、打开浏览器输入swagger默认网址就可以啦
换成自己的项目地址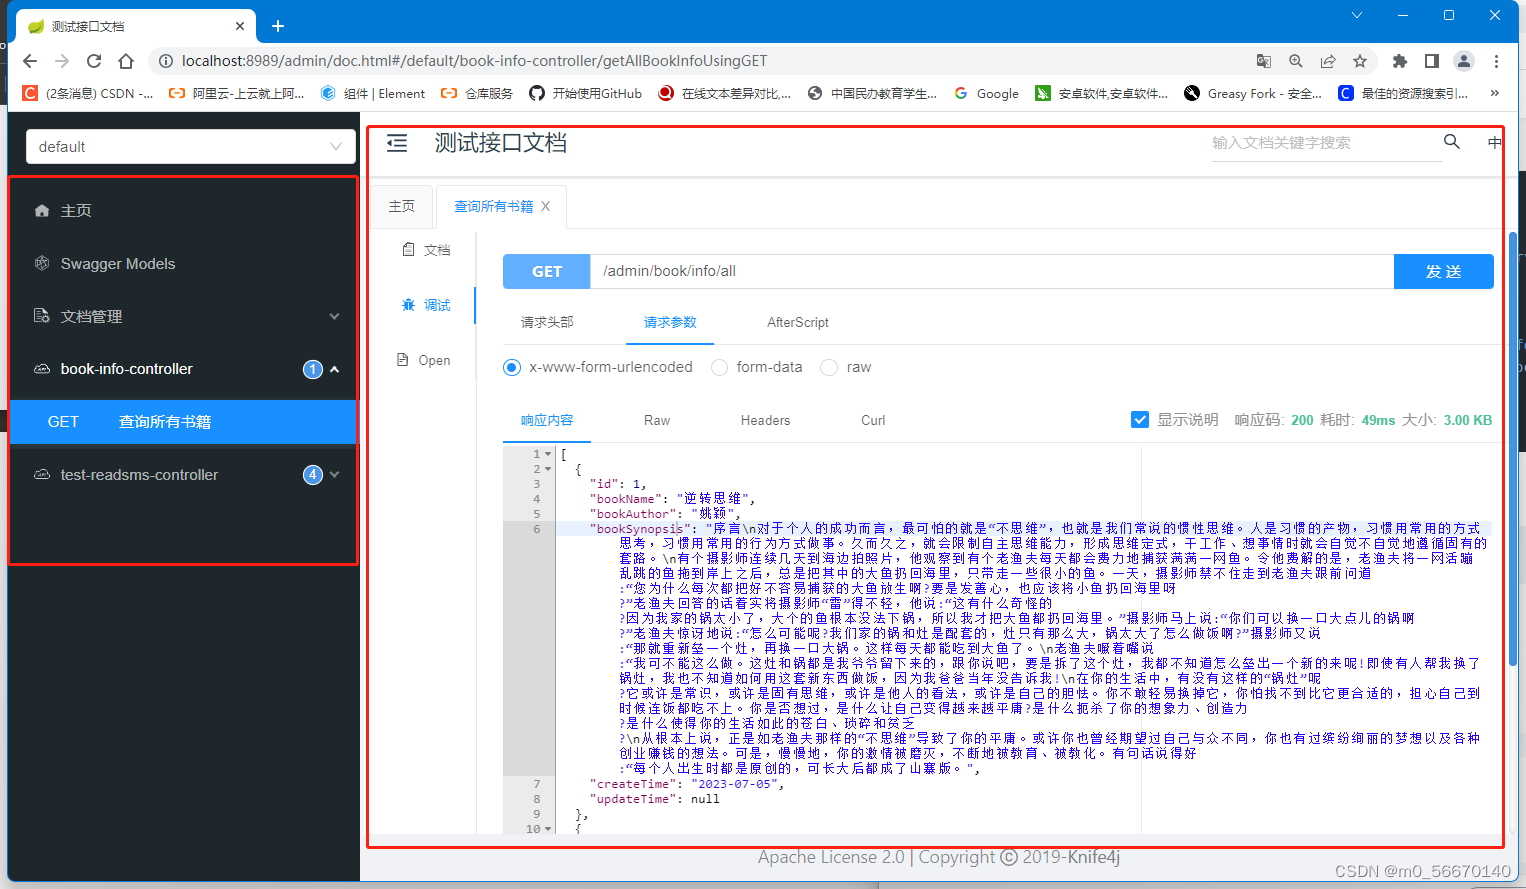
左侧是你加了注解的接口的列表,右侧是填写参数和发送请求。
重点:如果springboot版本是2.6.x以上的需要在配置文件加一段配置,否则会报空指针异常。
#这个配置是因为Spring fox使用路径匹配是基于AntPathMatcher的,而Spring Boot 2.6.X使用的是PathPatternMatcher。
spring:
   mvc:
    pathmatch:
      matching-strategy: ant_path_matcher


 893
893


 被折叠的 条评论
为什么被折叠?
被折叠的 条评论
为什么被折叠?
 到【灌水乐园】发言


