


目录
一、现状
1.前端发送给网关:网关88端口
2.目标项目:8080端口
前端发送的请求:http://localhost:88/api/captcha.jpg
后端需接收请求:http://localhost:8080/renren-fast/captcha.jpg
发送的路径与需要路径不一样,发送请求后出现404报错找不到所需路径,所有可以通过网关的形式将转发为所需的路径
二、配置网关路由
1.目标项目和网关项目的pom文件都需要引入Nacos作为注册配置中心
<dependencys>
<!--Nacos 作为注册中心 -->
<dependency>
    <groupId>com.alibaba.cloud</groupId>
    <artifactId>spring-cloud-starter-alibaba-nacos-discovery</artifactId>
</dependency>
<!--Nacos 作为配置中心 -->
<dependency>
    <groupId>com.alibaba.cloud</groupId>
    <artifactId>spring-cloud-starter-alibaba-nacos-config</artifactId>
</dependency>
</dependencys>
<dependencyManagement> <dependencies> <dependency> <groupId>com.alibaba.cloud</groupId> <artifactId>spring-cloud-alibaba-dependencies</artifactId> <version>2021.1</version> <type>pom</type><scope>import</scope> </dependency> </dependencies> </dependencyManagement>
2.目标项目和网关项目application.java文件中使用 @EnableDiscoveryClient

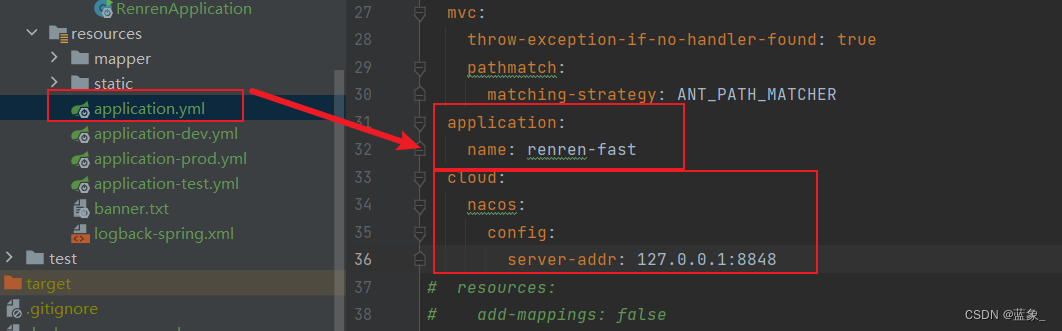
3. 目标项目application.yml文件中配置项目名称及Nocas地址
三、Gateway 的路径重写
1.在网关项目中的application.yml中配置路由规则,将请求重定向到指定的服务

id: 路由规则的唯一标识符。在这个例子中,admin_route是这个路由规则的 ID。
uri: 请求重定向到的服务地址。在这个例子中,http://localhost:8080是目标服务地址。
predicates: 路由断言,用于匹配请求路径。在这个例子中,只有一个断言Path=/api/**,它匹配所有以/api开头的请求路径。
filters: 过滤器,用于对请求进行修改。在这个例子中,只有一个过滤器RewritePath=/api/(?<segment>.*),/renren-fast/$\{segment},它将匹配到的请求路径中的/api/替换为/renren-fast/,并且将原路径中的其他部分作为参数传递给新的路径。spring: cloud: gateway: routes: - id: admin_route uri: http://localhost:8080 predicates: - Path=/api/** filters: - RewritePath=/api/(?<segment>.*),/renren-fast/$\{segment}
四、跨域访问
发送请求是88端口,接收的是8080,会因为CORS策列(同源策略)出现跨域禁止访问问题
跨域具体官方文档介绍
解决方案:1. 使用nginx部署为同一域
2.配置当次请求允许跨域
这里用的第二种方法:
在网关项目中创建配置文件

@Configuration
public class MyCorsConfiguration {

    @Bean
    public CorsWebFilter corsWebFilter(){
        UrlBasedCorsConfigurationSource source = new UrlBasedCorsConfigurationSource();

        CorsConfiguration corsConfiguration = new CorsConfiguration();

        // 1.配置跨域
        corsConfiguration.addAllowedHeader("*");
        corsConfiguration.addAllowedMethod("*");
        corsConfiguration.addAllowedOrigin("http://localhost:8001");
        corsConfiguration.setAllowCredentials(true);

        source.registerCorsConfiguration("/**",corsConfiguration);
        System.out.println("跨域访问=======================================");
        return new CorsWebFilter(source);
    }
}
@Configuration注解表明这个类可以被 Spring 框架用于配置服务。
@Bean注解定义了一个名为corsWebFilter的 bean,这个 bean 会在 Spring 应用上下文启动时被创建。
UrlBasedCorsConfigurationSource是一个 CORS 配置源,它根据 URL 模式来注册 CORS 配置。
CorsConfiguration是一个 CORS 配置对象,它定义了哪些源可以发起跨域请求,哪些 HTTP 方法被允许,以及是否允许携带认证信息等。
addAllowedHeader("*")允许任何头信息。
addAllowedMethod("*")允许任何 HTTP 方法(GET、POST、PUT、DELETE 等)。
addAllowedOrigin("http://localhost:8001")允许特定的源(在这个例子中是http://localhost:8001)发起跨域请求。注意,这里没有使用"*",这意味着只有指定的源被允许。
setAllowCredentials(true)指示这个 CORS 配置支持发送认证信息(如 cookies)。当这个属性为 true 时,必须在响应中包含Access-Control-Allow-Credentials头,并且它的值也必须是 true。
source.registerCorsConfiguration("/**", corsConfiguration)将上面的 CorsConfiguration 注册到所有的 URL 路径上(/**是一个通配符,匹配所有的 URL)。
return new CorsWebFilter(source)创建了一个 CorsWebFilter 实例,它将会使用之前定义的 CorsConfiguration 来处理跨域请求。
注意:
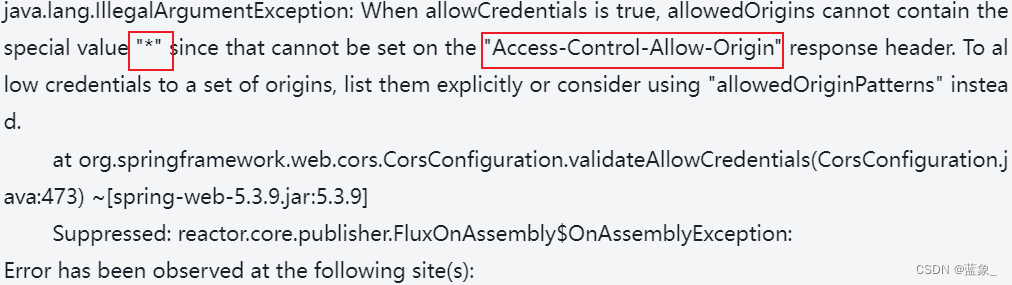
1.出现这个错误时,是因为当allowCredentials设置为true时,不能使用特殊值"*"来配置allowedOrigins,使用"*"时,无法在响应头中设置"Access-Control-Allow-Origin",这会使得跨域请求中的Cookie等认证信息无法传递。
方法:
(1)明确列出所有允许的源(allowedOrigins),而不是使用"*"。
(2)使用allowedOriginPatterns来允许特定模式的源。

corsConfiguration.addAllowedOrigin("http://localhost:8001");
corsConfiguration.addAllowedOriginPattern("*");
2.出现CORS错误说明这个链接需要配置,继续添 addAllowedOrigin("http://localhost:8001")即可,如果不知道需要添加什么端口直接看浏览器的错误信息即可。


 1194
1194

 被折叠的 条评论
为什么被折叠?
被折叠的 条评论
为什么被折叠?
 到【灌水乐园】发言


