


概述
尝试使用Helm部署wordpress博客服务
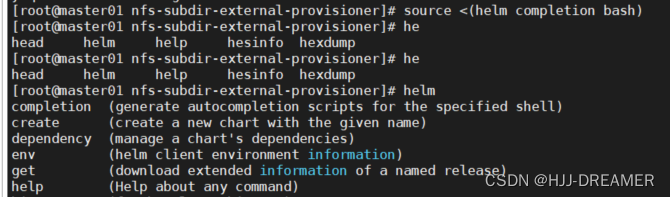
Helm命令
bash自动补全
wordpress案例
install
helm repo add bitnami https://charts.bitnami.com/bitnami
helm install wordpress bitnami/wordpress \
--namespace=wordpress \
--create-namespace \
--set global.storageClass=nfs-client \
--set wordpressUsername=admin \
--set wordpressPassword=password \
--set replicaCount=2 \
--set service.type=NodePort \
--set service.nodePorts.http=30808 \
--set persistence.enabled=true \
--set persistence.size=10Gi \
--set volumePermissions.enabled=true \
--set mariadb.enabled=true \
--set mariadb.architecture=standalone \
--set mariadb.auth.rootPassword=password \
--set mariadb.auth.password=password \
--set mariadb.primary.persistence.enabled=true \
--set mariadb.primary.persistence.size=8Gi \
--set memcached.enabled=true \
--set wordpressConfigureCache=true
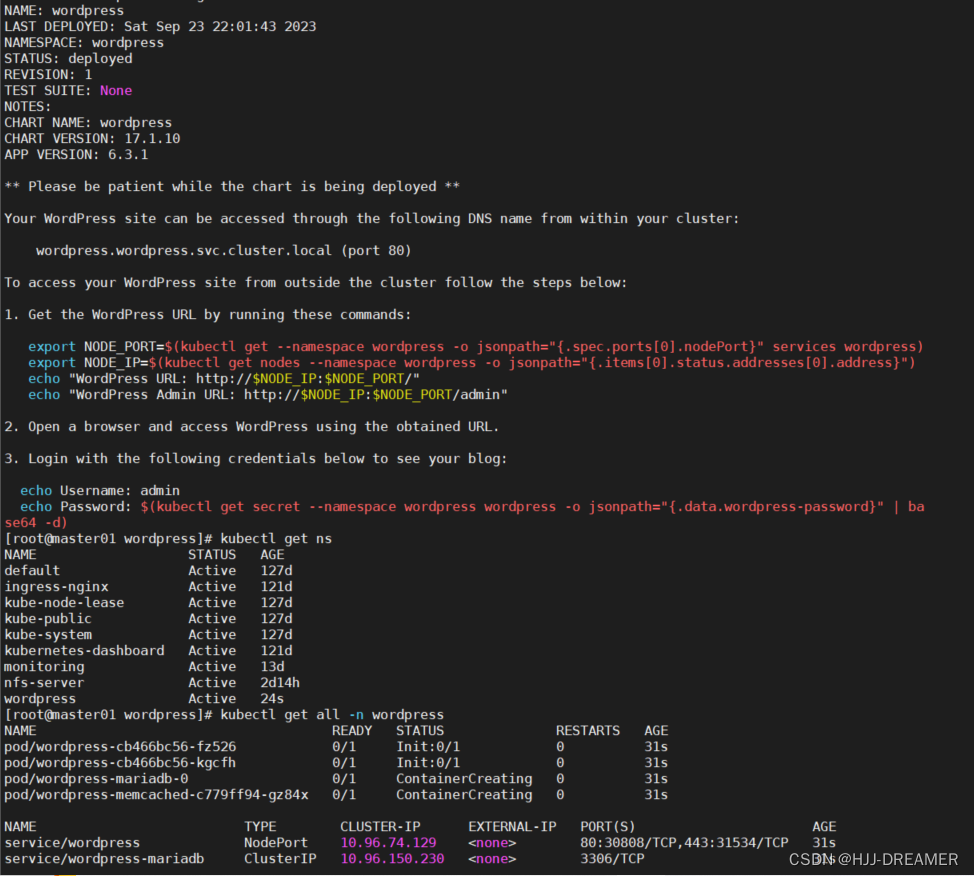
NAME: wordpress
LAST DEPLOYED: Sat Sep 23 22:01:43 2023
NAMESPACE: wordpress
STATUS: deployed
REVISION: 1
TEST SUITE: None
NOTES:
CHART NAME: wordpress
CHART VERSION: 17.1.10
APP VERSION: 6.3.1
** Please be patient while the chart is being deployed **
Your WordPress site can be accessed through the following DNS name from within your cluster:
wordpress.wordpress.svc.cluster.local (port 80)
To access your WordPress site from outside the cluster follow the steps below:
1. Get the WordPress URL by running these commands:
export NODE_PORT=$(kubectl get --namespace wordpress -o jsonpath="{.spec.ports[0].nodePort}" services wordpress)
export NODE_IP=$(kubectl get nodes --namespace wordpress -o jsonpath="{.items[0].status.addresses[0].address}")
echo "WordPress URL: http://$NODE_IP:$NODE_PORT/"
echo "WordPress Admin URL: http://$NODE_IP:$NODE_PORT/admin"
2. Open a browser and access WordPress using the obtained URL.
3. Login with the following credentials below to see your blog:
echo Username: admin
echo Password: $(kubectl get secret --namespace wordpress wordpress -o jsonpath="{.data.wordpress-password}" | base64 -d)
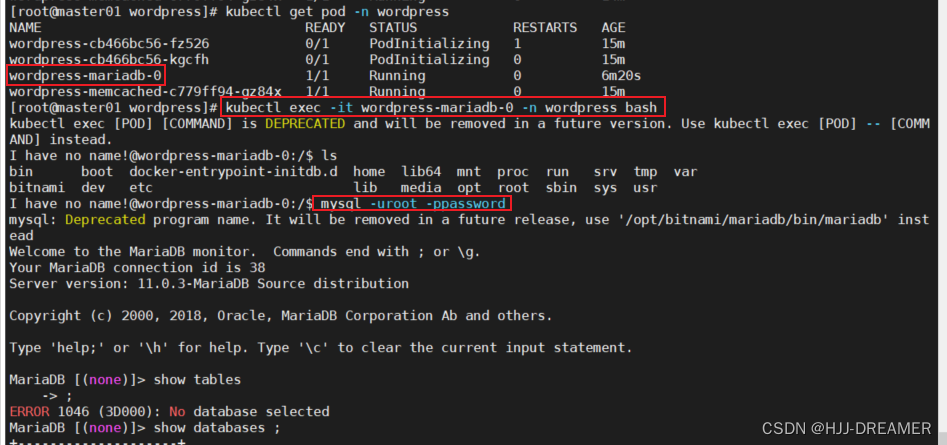
 登录后端mariadb数据库
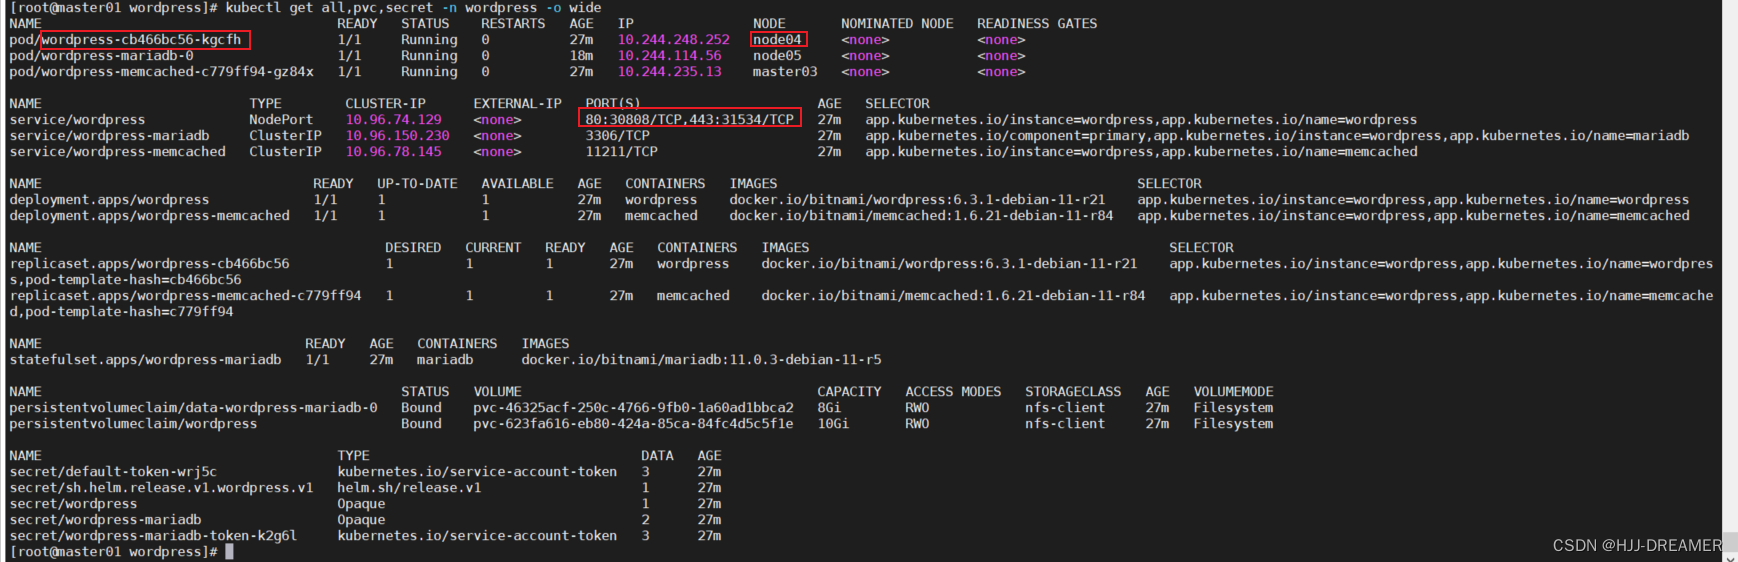
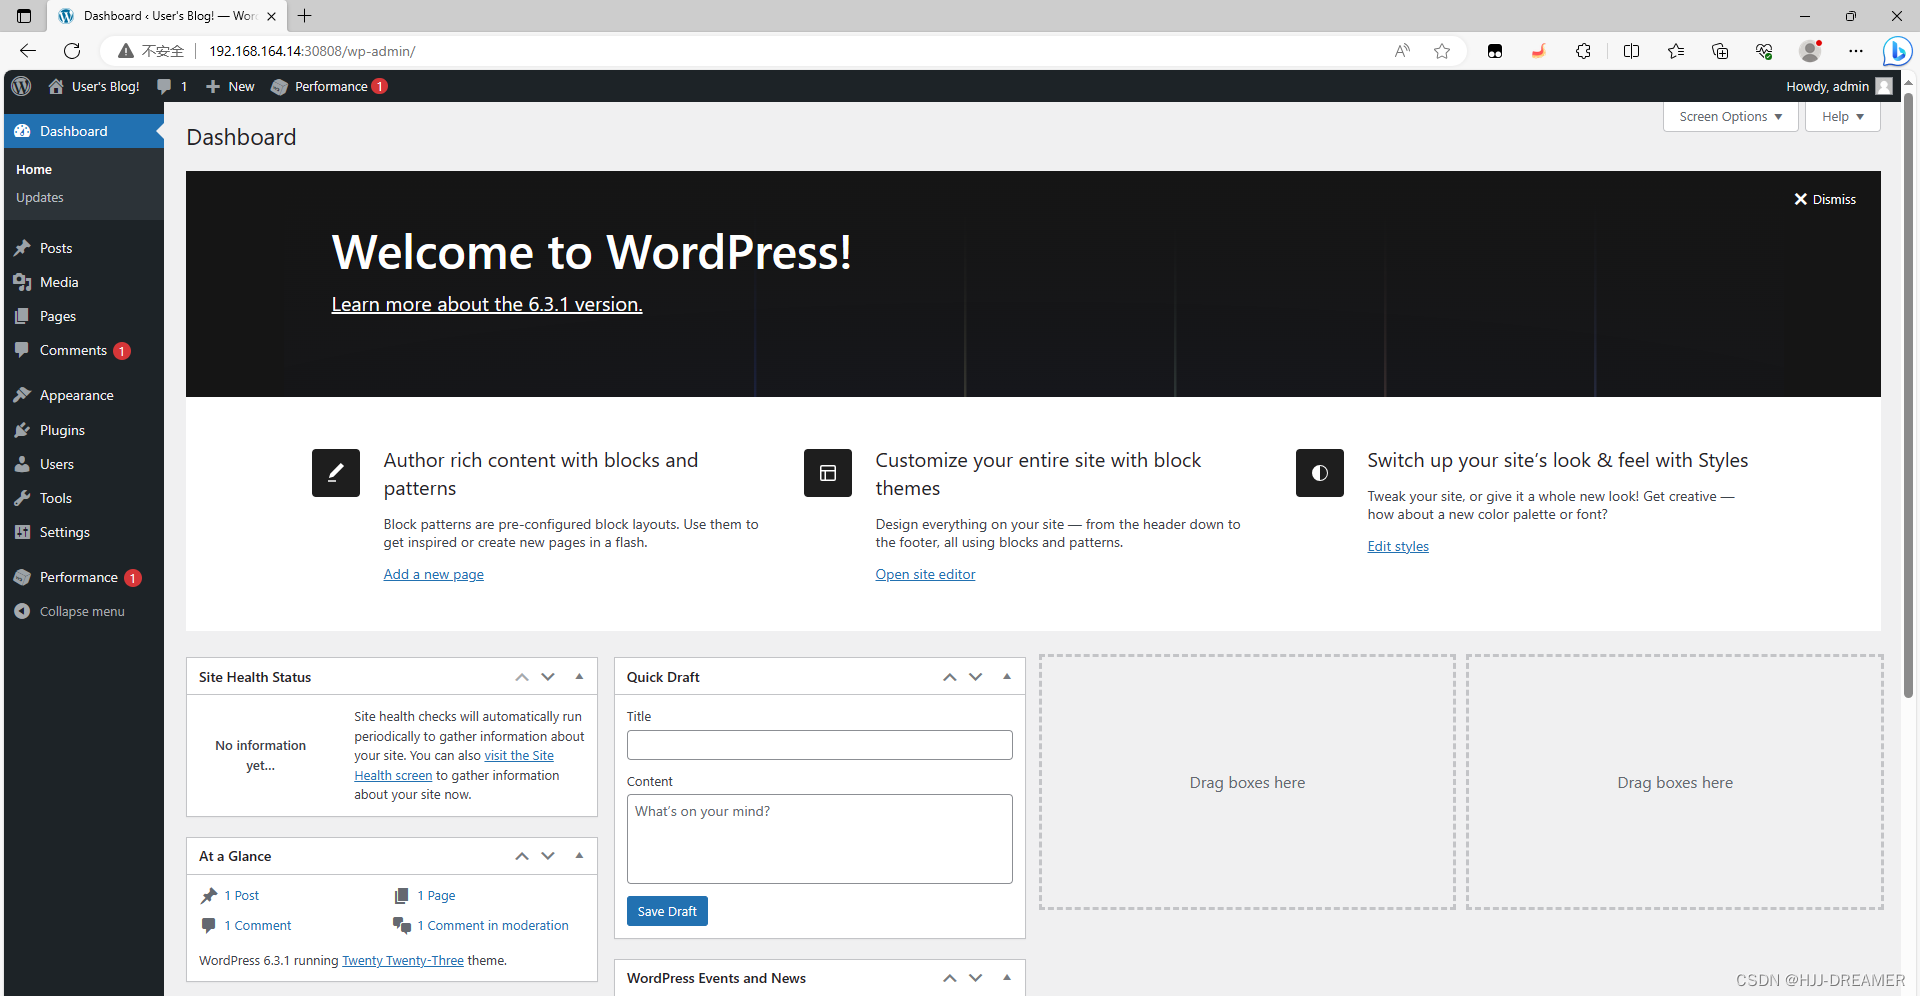
部署成功后端:
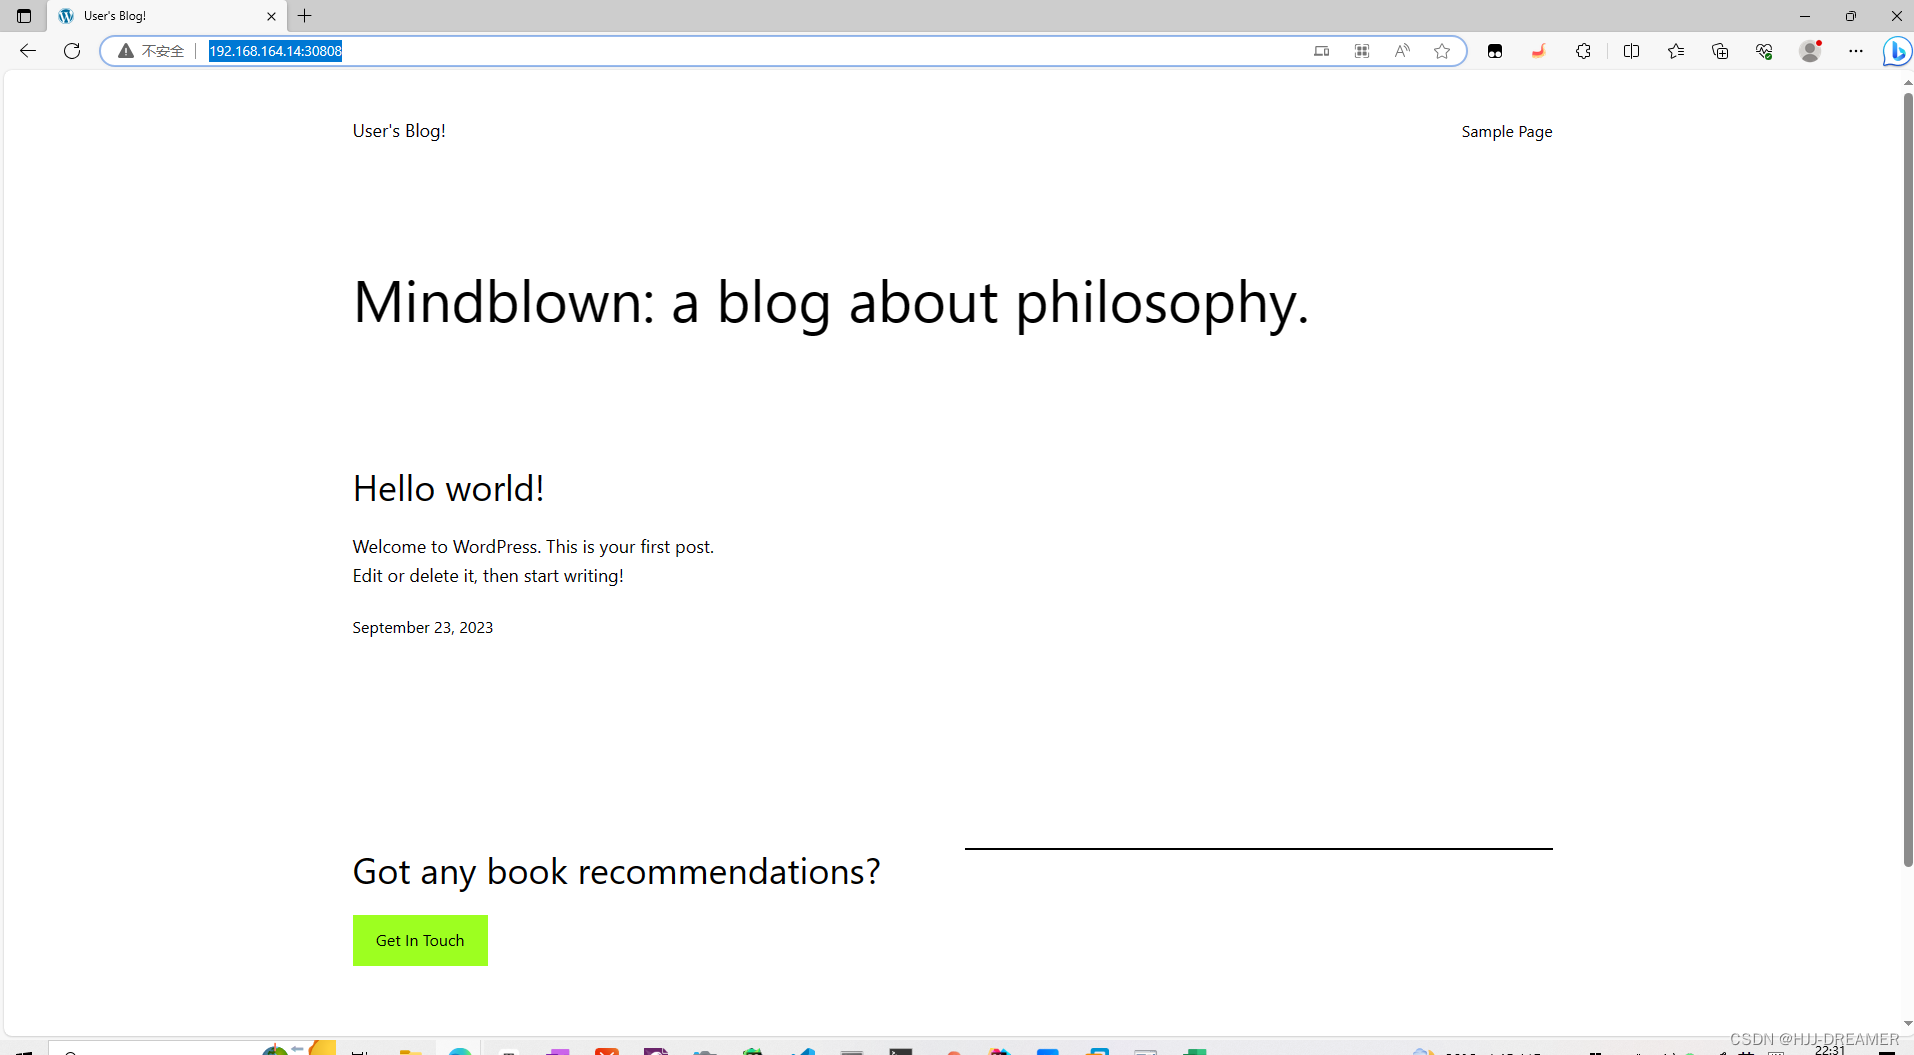
网页验证(非网页管理员访问):User's Blog! http://192.168.164.14:30808/
登录页面:
NODE_PORT=$(kubectl get --namespace wordpress -o jsonpath="{.spec.ports[0].nodePort}" services wordpress)
NODE_IP=$(kubectl get nodes --namespace wordpress -o jsonpath="{.items[0].status.addresses[0].address}")


echo "WordPress URL: http://$NODE_IP:$NODE_PORT/"
#WordPress URL: http://192.168.164.14:30808/


echo "WordPress Admin URL: http://$NODE_IP:$NODE_PORT/admin"
#WordPress Admin URL: http://192.168.164.14:30808/admin
网站管理员访问: http://192.168.164.14:30808/admin

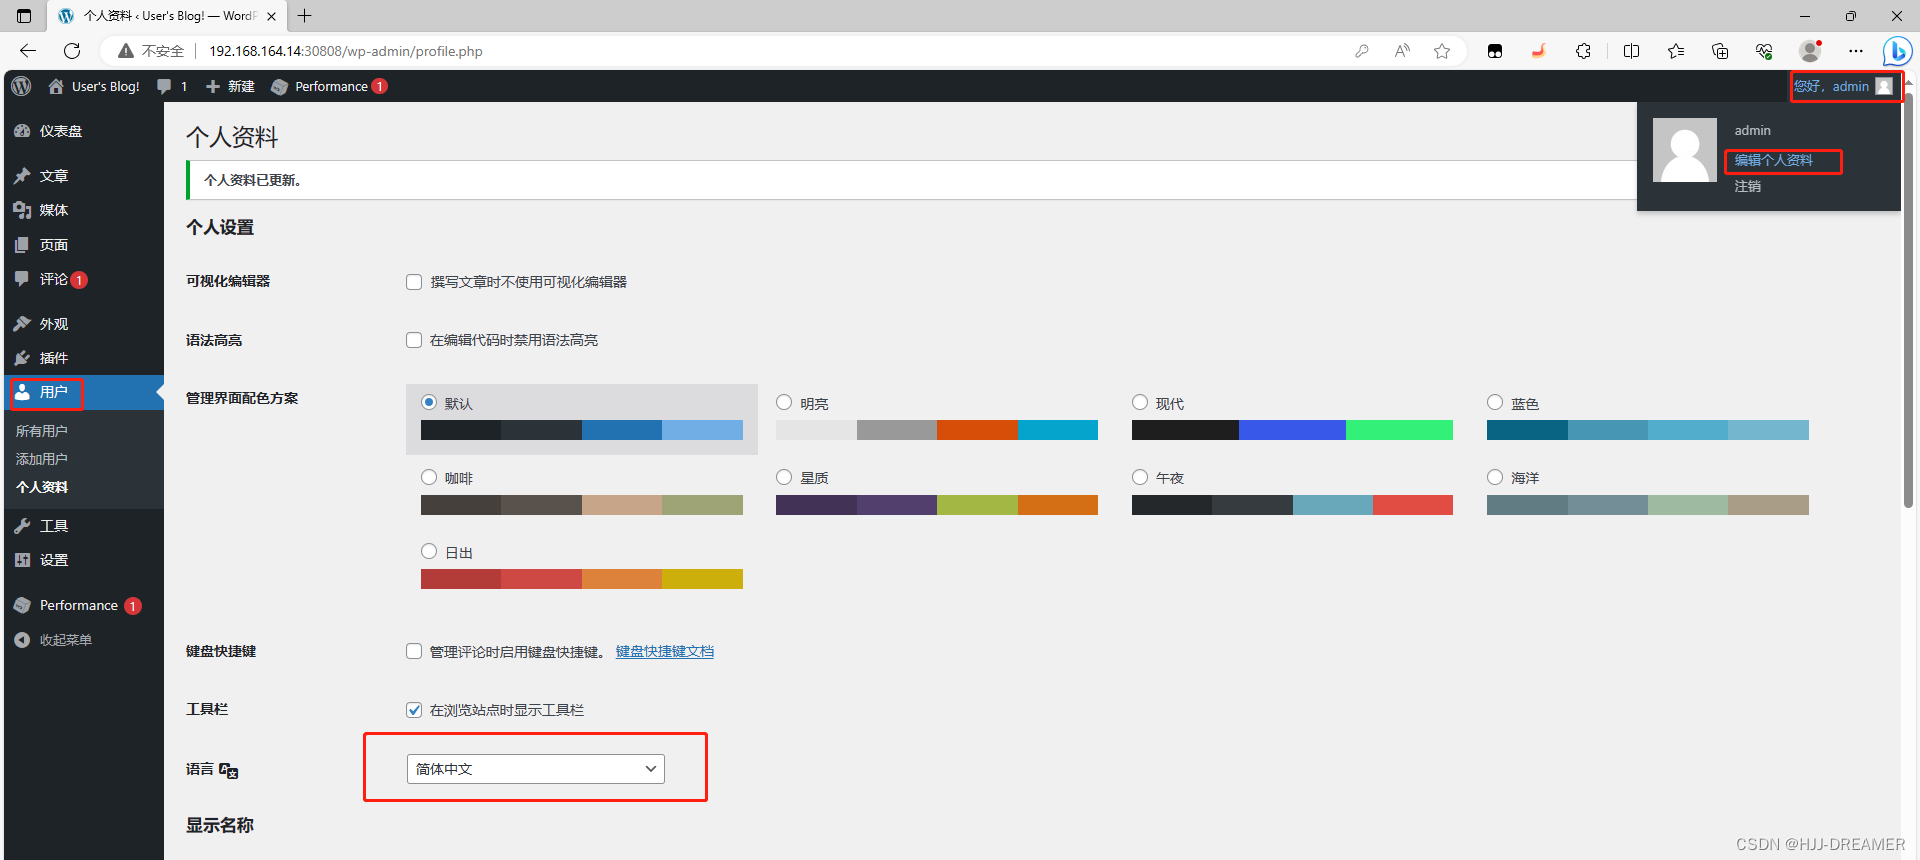
修改中文:
uninstall
helm uninstall wordpress -n wordpress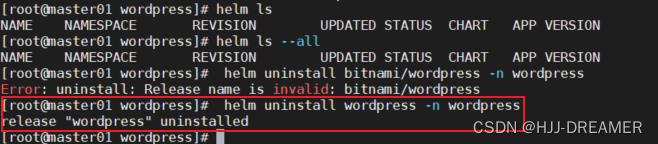
查看名称空间并强制删除对应资源才能算删除干净

kubectl delete ns wordpress --force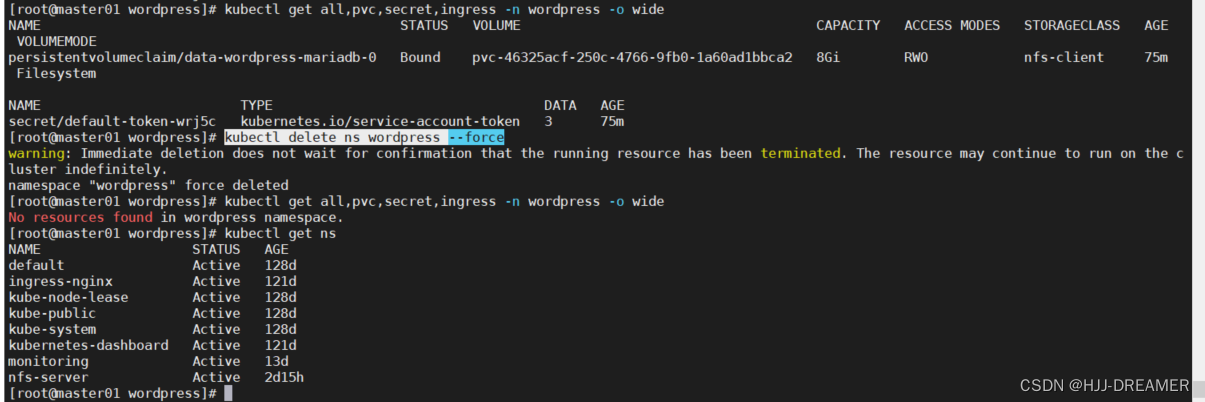
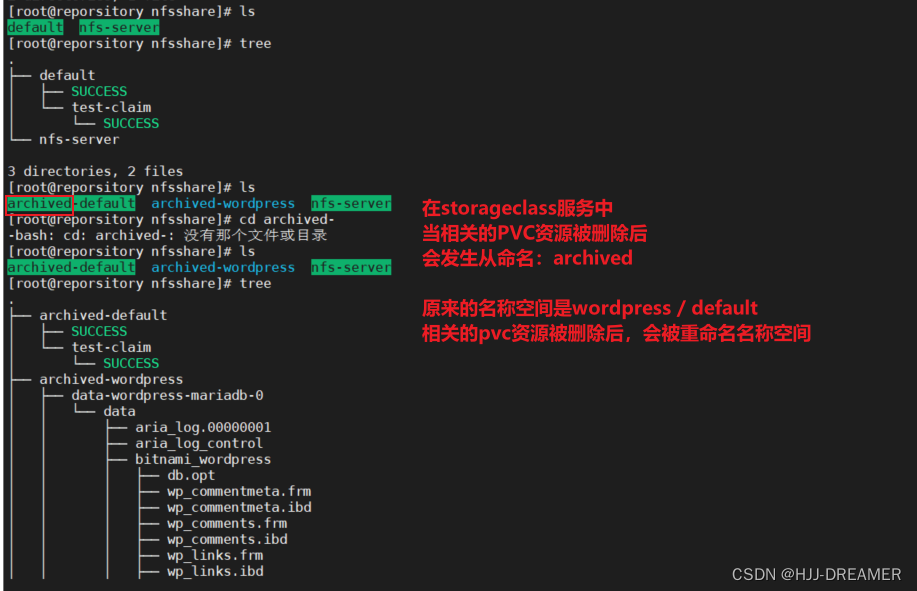
查看nfs服务器内的文件内容
参考文档
kubernetes部署nfs-subdir-external-provisioner_willops的博客-CSDN博客


 735
735

 被折叠的 条评论
为什么被折叠?
被折叠的 条评论
为什么被折叠?
 到【灌水乐园】发言


