


目录
前言
一共分四篇:
教你完全学会JavaScript(基础篇-更新中)从入门到精通
教你完全学会JavaScript(DOM篇-完结)从入门到精通
教你完全学会JavaScript(BOM篇-更新中)从入门到精通
教你完全学会JavaScript(jQuery篇-等待)从入门到精通
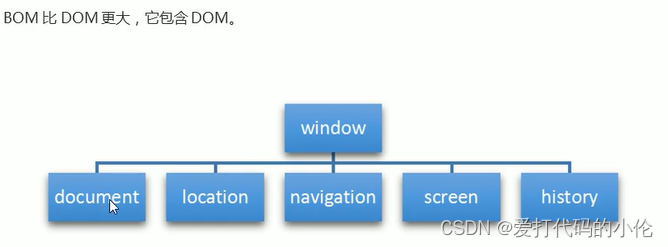
1.什么是BOM
浏览器对象模型,它提供了独立于内容而与浏览器窗口进行交互的对象,其核心对象是window。

<!DOCTYPE html>
<html lang="en">
<head>
    <meta charset="UTF-8">
    <meta http-equiv="X-UA-Compatible" content="IE=edge">
    <meta name="viewport" content="width=device-width, initial-scale=1.0">
    <title>Document</title>
</head>
<body>
    <script>
        var num=10;
        console.log(num);
        console.log(window.num);
        function fn(){
            console.log(11);
        }
        fn();
        window.fn();
        alert(11);
        window.alert(11);
        console.log(window);
    </script>
</body>
</html>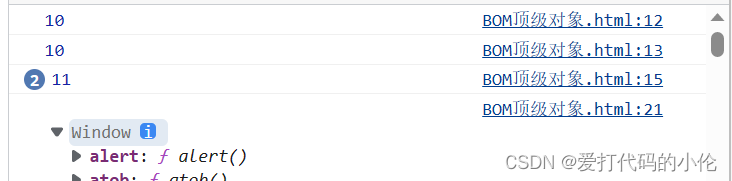
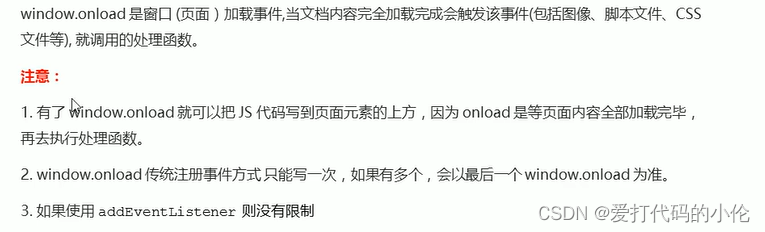
2.window常见事件
window.οnlοad=function(){}
window.addEventListener("load",function(){})
window.addEventListener("DOMContentLoaded",function(){})
<!DOCTYPE html>
<html lang="en">
<head>
    <meta charset="UTF-8">
    <meta http-equiv="X-UA-Compatible" content="IE=edge">
    <meta name="viewport" content="width=device-width, initial-scale=1.0">
    <title>Document</title>
</head>
<body>
    <script>
        // 1.这个方式只能写一个,如果有多个,会以最后一个window.onload为准
        // // window.onload就是等页面中的其他元素都加载完了才开始加载
        // window.onload=function(){
        //     var btn=document.querySelector('button');
        //     btn.addEventListener('click',function(){
        //         alert('点击我');
        //     })
        // }
        // window.onload=function(){
        //     alert(22);
        // }
        // 2.使用addEventListener没用限制
        window.addEventListener('load',function(){
            var btn=document.querySelector('button');
            btn.addEventListener('click',function(){
            alert('点击我');})
        })
        window.addEventListener('load',function(){
            alert(22);
        })
        document.addEventListener('DOMContentLoaded',function(){
            alert(33);
        })
        // load等页面内容全部加载完毕,包括页面的dom元素 图片 法拉盛 css等
        // DOMContextLoaded 是DOm加载完毕,不包括图片 falsh 长沙市等可以执行 加载速度比load更快一些

    </script>
    <button>点击</button>
</body>
</html>
3.调整窗口大小事件
<!DOCTYPE html>
<html lang="en">
<head>
<meta charset="UTF-8">
<meta http-equiv="X-UA-Compatible" content="IE=edge">
<meta name="viewport" content="width=device-width, initial-scale=1.0">
<title>Document</title>
<style>
div{
width: 100px;
height: 100px;
background-color: pink;
}
</style>
</head>
<body>
<script>
window.addEventListener('load',function(){
var div=document.querySelector('div');
// 当我的窗口大小发生变化就会触发这个事件
window.addEventListener('resize',function(){
console.log('变化了');//可以尝试一下拉动窗口,F12进行调试的时候会看见变化
console.log(window.innerWidth);
console.log(window.innerHeight);
if(window.innerWidth<=800){
div.style.display='none';
}else{
div.style.display='block';
}
})
})
</script>
<div></div>
</body>
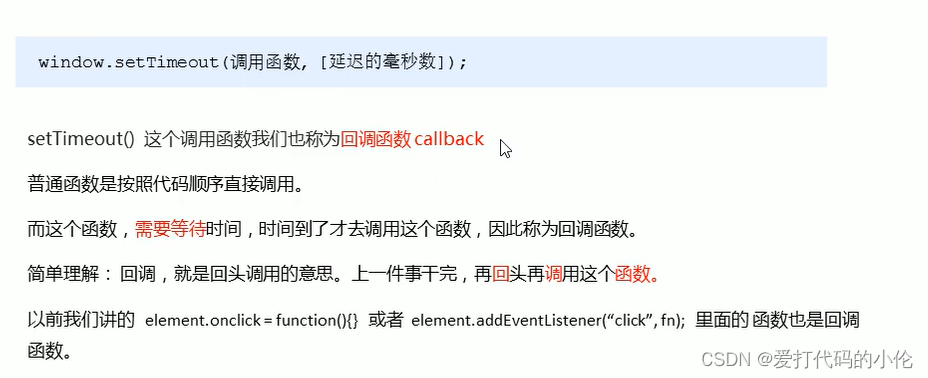
</html>4.定时器
window.setTimeout();用于设置一个定时器,该定时器在定时器到期后调用函数。
<!DOCTYPE html>
<html lang="en">
<head>
    <meta charset="UTF-8">
    <meta http-equiv="X-UA-Compatible" content="IE=edge">
    <meta name="viewport" content="width=device-width, initial-scale=1.0">
    <title>Document</title>
</head>
<body>
    <!-- 1.setTimeout -->
    <script>
        // setTimeout(() => {
        //    console.log('3秒时间到了');
        // }, 3000);

        function callback(){
            console.log('爆炸了');
        }
        var time1=setTimeout(callback,3000);//3秒后爆炸
        var time2=setTimeout(callback,5000);//5秒后爆炸
    </script>
</body>
</html>
5.5秒之后关闭图片
<!DOCTYPE html>
<html lang="en">
<head>
    <meta charset="UTF-8">
    <meta http-equiv="X-UA-Compatible" content="IE=edge">
    <meta name="viewport" content="width=device-width, initial-scale=1.0">
    <title>Document</title>
</head>
<body>
    <!-- 核心思路:5秒之后,就是这个广告隐藏起来 -->
    <img src="../images/zzx.png" alt="" class="ad">
    <script>
        var ad=document.querySelector('.ad');
        setTimeout(function(){
            ad.style.display='none';
        },5000);
    </script>
</body>
</html>
6.清除setTimeout定时器
<!DOCTYPE html>
<html lang="en">
<head>
    <meta charset="UTF-8">
    <meta http-equiv="X-UA-Compatible" content="IE=edge">
    <meta name="viewport" content="width=device-width, initial-scale=1.0">
    <title>Document</title>
</head>
<body>
    <button>点击停止</button>
    <script>
        var btn=document.querySelector('button');
        var timer=setTimeout(function(){
            console.log('爆炸了');
        },5000);
        btn.addEventListener('click',function(){
            clearTimeout(timer);
        })
    </script>
</body>
</html>
7.定时器
<!DOCTYPE html>
<html lang="en">
<head>
    <meta charset="UTF-8">
    <meta http-equiv="X-UA-Compatible" content="IE=edge">
    <meta name="viewport" content="width=device-width, initial-scale=1.0">
    <title>Document</title>
</head>
<body>
    <script>
        // 1.setInterval就是持续调用定时器 会重复调用 以下代码就是每隔一秒进行调用
        setInterval(function(){
            console.log('输出');
        },1000);

    </script>
</body>
</html>
8.倒计时
<!DOCTYPE html>
<html lang="en">
<head>
    <meta charset="UTF-8">
    <meta http-equiv="X-UA-Compatible" content="IE=edge">
    <meta name="viewport" content="width=device-width, initial-scale=1.0">
    <title>Document</title>
    <style>
        div {
            margin: 200px;
        }

        span {
            display: inline-block;
            width: 40px;
            height: 40px;
            background-color: #333;
            font-size: 20px;
            color: #fff;
            text-align: center;
            line-height: 40px;
        }
    </style>
</head>
<body>
    <div>
        <span class="hour"></span>
        <span class="minute"></span>
        <span class="second"></span>
    </div>
    <script>
        // 1.核心思路:输入的时间减去现在的时间就是剩余的时间 就是倒计时
        // 用时间戳来做 用户输入时间总的毫秒数(活动什么时候结束)减去现在时间的总的毫秒数 ,得到的就是剩余时间的毫秒数
        var hour=document.querySelector('.hour');
        var minute=document.querySelector('.minute');
        var second=document.querySelector('.second');
        var inputTime=+new Date('2023-5-22 22:00:00');//用户输入的时间
        countDown();//我们先调用一次这个函数 防止第一次刷新页面有空面
        // 开启定时器 每隔一秒就调用定时器
        setInterval(countDown,1000);
        function countDown(time){//+new Date()返回总的毫秒数
            var nowtime=+new Date();//现在的时间
            // var inputTime=+new Date(time);//用户输入的时间
            var times=(inputTime-nowtime)/1000;//返回的是用户输入时间总的毫秒数 /1000:毫秒变成秒数 1秒=1000毫秒

            // 剩余时间变成时分秒
            // var d=parseInt(times/60/60/24);//天
            // d=d<10?'0'+d:d;
            var h=parseInt(times/60/60%24);//times就是剩余时间总的秒数
            h=h<10?'0'+h:h;
            hour.innerHTML=h;//剩余的小时给黑色盒子
            var m=parseInt(times/60%60);
            m=m<10?'0'+m:m;
            minute.innerHTML=m;
            var s=parseInt(times%60);
            s=s<10?'0'+s:s;
            second.innerHTML=s;
            // return d+'天'+h+'时'+m+'分'+s+'秒';
        }
        // console.log(countDown('2023-5-20 18:00:00'));
        var date=new Date();
        console.log(date);
    </script>
</body>
</html>
9.清除定时器
<!DOCTYPE html>
<html lang="en">
<head>
    <meta charset="UTF-8">
    <meta http-equiv="X-UA-Compatible" content="IE=edge">
    <meta name="viewport" content="width=device-width, initial-scale=1.0">
    <title>Document</title>
</head>
<body>
    <button class="begin">开启定时器</button>
    <button class="stop">停止定时器</button>
    <script>
        var begin=document.querySelector('.begin');
        var stop=document.querySelector('.stop');
        var timer=null;//在外面定义一个全局变量
        begin.addEventListener('click',function(){
            timer=setInterval(function(){
                console.log('你好小伦');
            },1000);
        })
        stop.addEventListener('click',function(){
            clearInterval(timer);
        })
    </script>
</body>
</html>
10.发送短信
<!DOCTYPE html>
<html lang="en">
<head>
    <meta charset="UTF-8">
    <meta http-equiv="X-UA-Compatible" content="IE=edge">
    <meta name="viewport" content="width=device-width, initial-scale=1.0">
    <title>Document</title>
</head>
<body>
    手机号码:<input type="number"><button>发送</button>
    <script>
        var btn=document.querySelector('button');
        var time=10;
        btn.addEventListener('click',function(){
            btn.disabled=true;//就是一点击 就禁止使用
            var timer=setInterval(function(){
               if(time==0){
                   clearInterval(true);//时间等于0秒的时候就开始清除定时器
                   btn.disabled=false;//把禁用的按钮恢复
                   btn.innerHTML='发送';//把按钮的文字重新恢复成发送
                   time=10;
               }else{
                   btn.innerHTML='还剩下'+time+'秒';
                   time--;
               }
            },1000);

        })
    </script>
</body>
</html>
11.this指向问题
<!DOCTYPE html>
<html lang="en">
<head>
    <meta charset="UTF-8">
    <meta http-equiv="X-UA-Compatible" content="IE=edge">
    <meta name="viewport" content="width=device-width, initial-scale=1.0">
    <title>Document</title>
</head>
<body>
    <button>点击</button>
    <script>
    //   this 指向问题 一般情况下this的最终指向的是哪个调用它的对象
    // 1.全局作用域或者普通函数中this指向全局对象window
    console.log(this);  //window
    function fn(){
        console.log(this);//window
        setTimeout(function(){
            console.log(this);//window
        },1000);
    }


    </script>
</body>
</html>
12.5秒跳转页面
<!DOCTYPE html>
<html lang="en">
<head>
    <meta charset="UTF-8">
    <meta http-equiv="X-UA-Compatible" content="IE=edge">
    <meta name="viewport" content="width=device-width, initial-scale=1.0">
    <title>Document</title>
</head>
<body>
    <button>点击</button>
    <div></div>
    <script>
        var btn=document.querySelector('button');
        var div=document.querySelector('div');
        btn.addEventListener('click',function(){
            location.href='http://www.baidu.com';//点击之后就会跳转哦
        })
        var timer=5;
        setInterval(function(){
            if(timer==0){
                location.href='http://ww.baidu.com';
            }else{
                div.innerHTML='你将在'+timer+'秒之后跳转到到百度';
                timer--;
            }
        },1000);
    </script>
</body>
</html>
13.获取URL参数
login.html
<!DOCTYPE html>
<html lang="en">
<head>
<meta charset="UTF-8">
<meta http-equiv="X-UA-Compatible" content="IE=edge">
<meta name="viewport" content="width=device-width, initial-scale=1.0">
<title>Document</title>
</head>
<body>
<form action="index.html">
用户名:<input type="text" name="uname">
<input type="submit" value="登录">
</form>
</body>
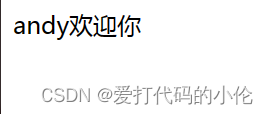
</html>index.html
<!DOCTYPE html>
<html lang="en">
<head>
    <meta charset="UTF-8">
    <meta http-equiv="X-UA-Compatible" content="IE=edge">
    <meta name="viewport" content="width=device-width, initial-scale=1.0">
    <title>Document</title>
</head>
<body>
    <div></div>
    <script>
        console.log(location.search);//?uname=andy
        //1.先去掉? substr('起始的位置',截取几个字符):
        var params=location.search.substr(1);//意思就是从第一个字符开始截取到最后一个:uname=andy
        console.log(params);
        //2.利用=把字符串分割成数组 split('=');
        var arr=params.split('=');
        console.log(arr);
        var div=document.querySelector('div');
        // 3.把数据写入div中
        div.innerHTML=arr[1]+'欢迎你';
    </script>
</body>
</html>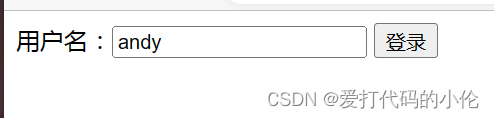

15.location常见的方法
<!DOCTYPE html>
<html lang="en">
<head>
    <meta charset="UTF-8">
    <meta http-equiv="X-UA-Compatible" content="IE=edge">
    <meta name="viewport" content="width=device-width, initial-scale=1.0">
    <title>Document</title>
</head>
<body>
    <button>点击</button>
    <script>
        var btn=document.querySelector('button');
        btn.addEventListener('click',function(){
            // location.assign('http://www.baidu.com');//可以后退,就是知道跳转前是什么页面
            // location.replace('http://www.baidu.com');//就是它是没有后退功能的
            location.reload();//相当于刷新 重新加载整个页面
        })
    </script>
</body>
</html>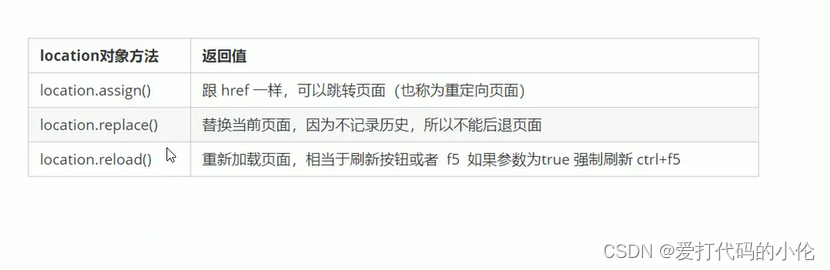
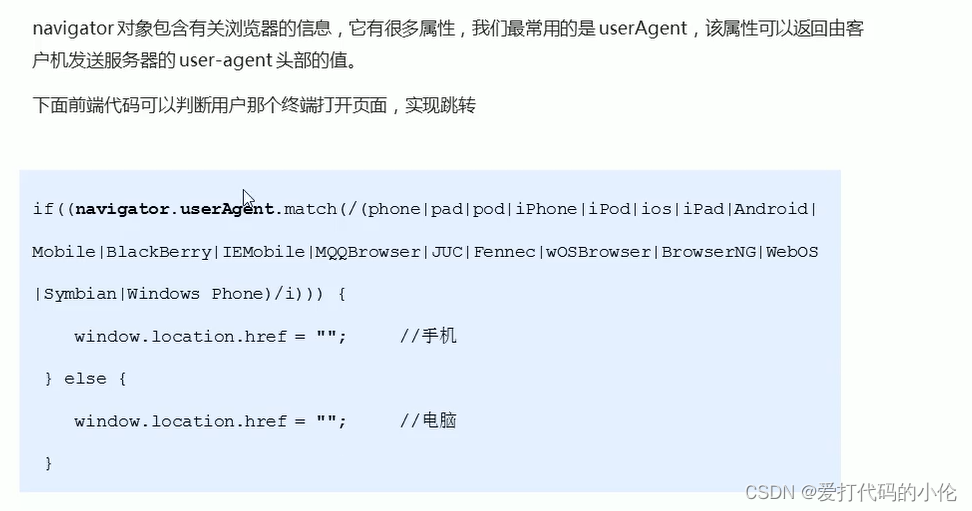
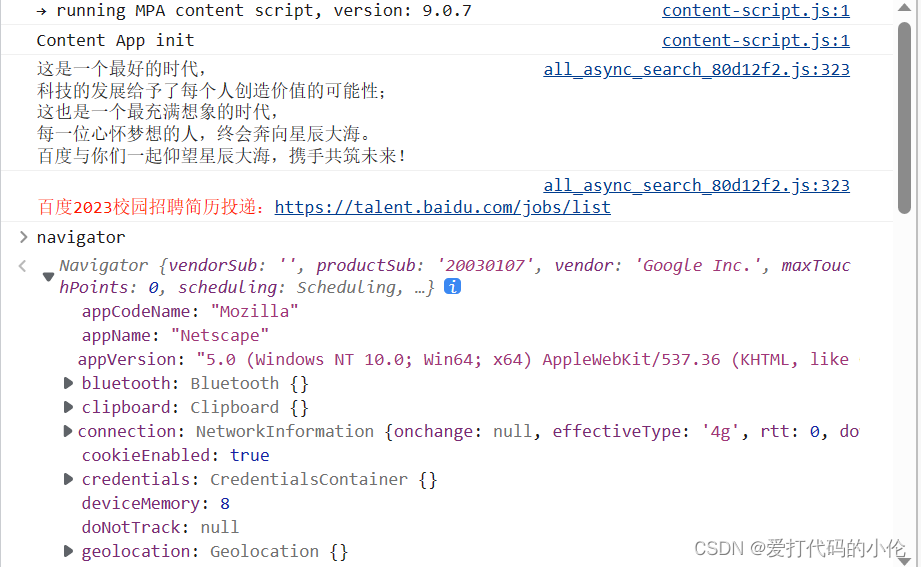
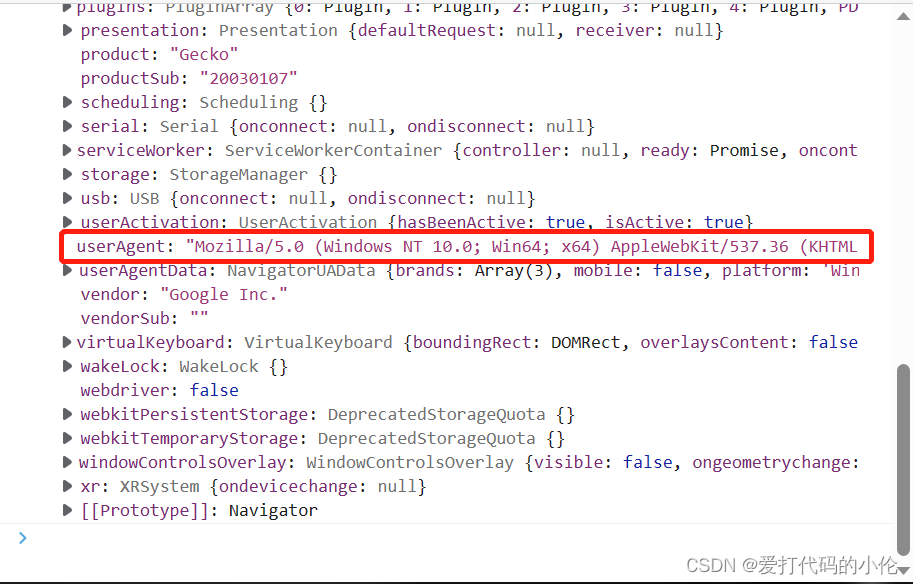
16.navigator对象(就是知道用哪个浏览器)
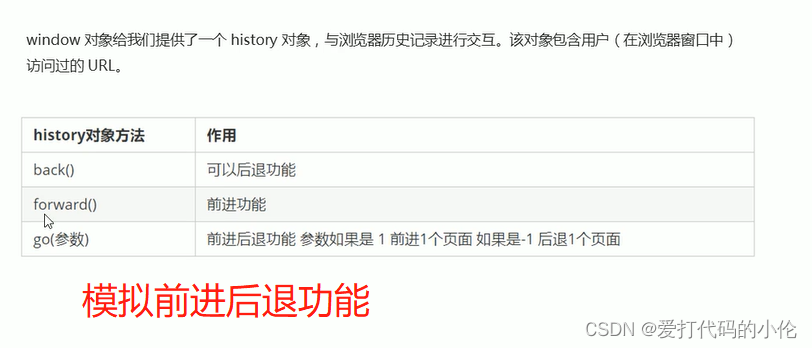
17.history对象
index.html
<!DOCTYPE html>
<html lang="en">
<head>
    <meta charset="UTF-8">
    <meta http-equiv="X-UA-Compatible" content="IE=edge">
    <meta name="viewport" content="width=device-width, initial-scale=1.0">
    <title>Document</title>
</head>
<body>
    <a href="list.html">点击我去往list页面</a>
    <button>前进</button>
    <script>
        var btn=document.querySelector('button');
        btn.addEventListener('click',function(){
            // history.forward();
            history.go(1);
        })
    </script>
</body>
</html>
list.html
<!DOCTYPE html>
<html lang="en">
<head>
<meta charset="UTF-8">
<meta http-equiv="X-UA-Compatible" content="IE=edge">
<meta name="viewport" content="width=device-width, initial-scale=1.0">
<title>Document</title>
</head>
<body>
<a href="index.html">点击我去往index页面</a>
<button>后退</button>
<script>
var btn=document.querySelector('button');
btn.addEventListener('click',function(){
// history.back();
history.go(-1);
})
</script>
</body>
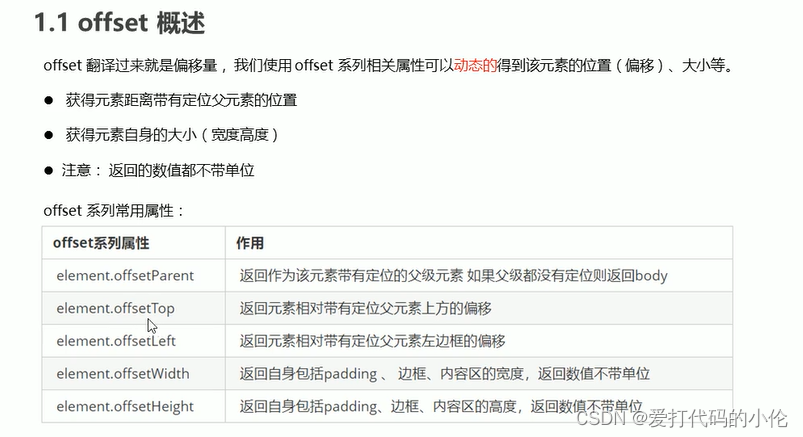
</html>18.offset概述
19.offset于style区别
<!DOCTYPE html>
<html lang="en">

<head>
    <meta charset="UTF-8">
    <meta name="viewport" content="width=device-width, initial-scale=1.0">
    <meta http-equiv="X-UA-Compatible" content="ie=edge">
    <title>Document</title>
    <style>
        .box {
            width: 200px;
            height: 200px;
            background-color: pink;
            padding: 10px;
        }
    </style>
</head>

<body>
    <div class="box" style="width: 200px;"></div>
    <script>
        // offset与style的区别
        var box = document.querySelector('.box');
        console.log(box.offsetWidth);
        console.log(box.style.width);
        // box.offsetWidth = '300px';
        box.style.width = '300px';
    </script>
</body>

</html>
20.缓动动画多个目标值之间移动
<!DOCTYPE html>
<html lang="en">
<head>
<meta charset="UTF-8">
<meta name="viewport" content="width=device-width, initial-scale=1.0">
<meta http-equiv="X-UA-Compatible" content="ie=edge">
<title>Document</title>
<style>
div {
position: absolute;
left: 0;
width: 100px;
height: 100px;
background-color: pink;
}
span {
position: absolute;
left: 0;
top: 200px;
display: block;
width: 150px;
height: 150px;
background-color: purple;
}
</style>
</head>
<body>
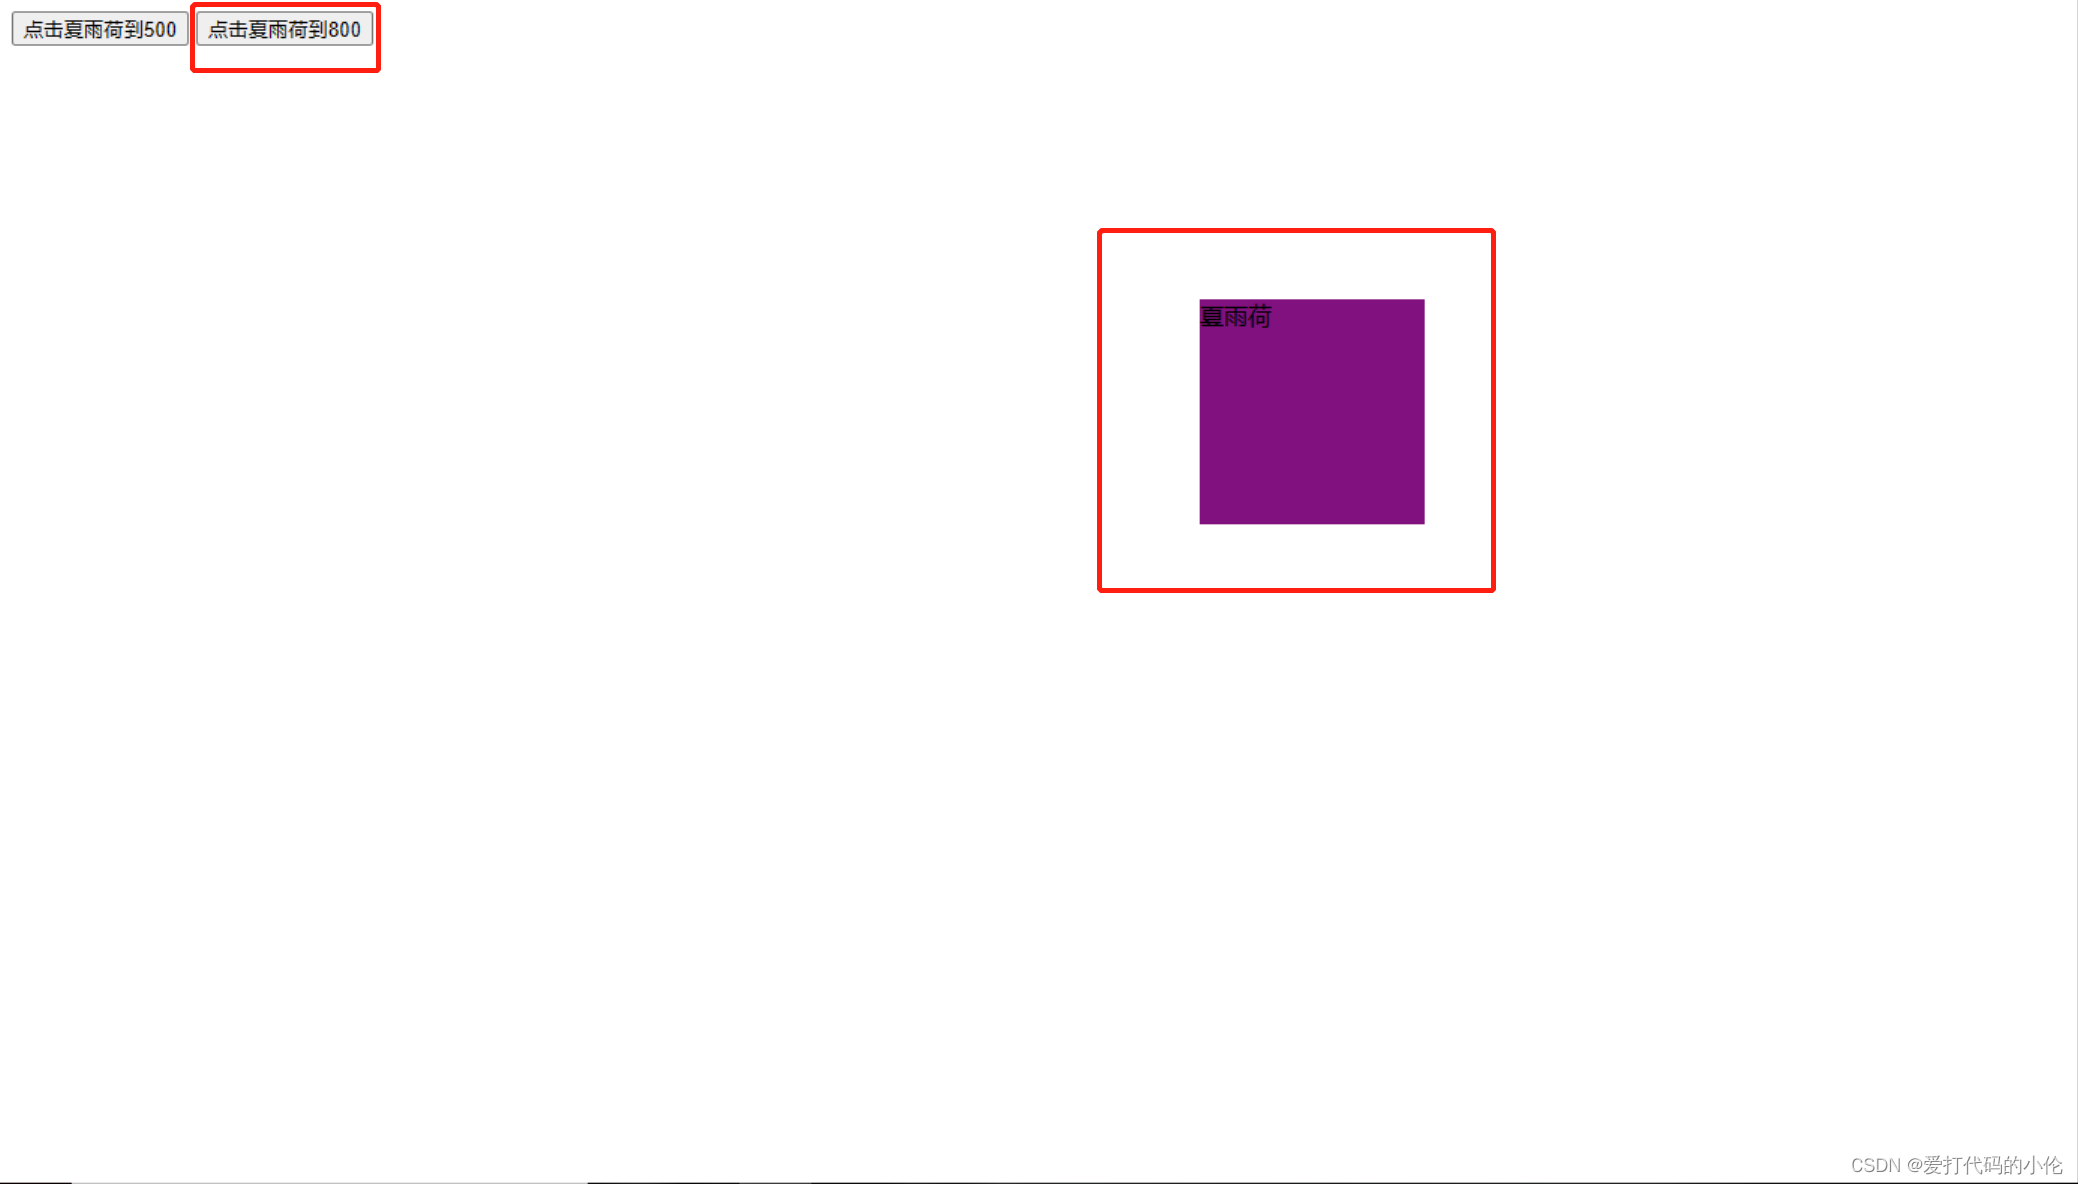
<button class="btn500">点击夏雨荷到500</button>
<button class="btn800">点击夏雨荷到800</button>
<span>夏雨荷</span>
<script>
// 缓动动画函数封装obj目标对象 target 目标位置
// 思路:
// 1. 让盒子每次移动的距离慢慢变小, 速度就会慢慢落下来。
// 2. 核心算法:(目标值 - 现在的位置) / 10 做为每次移动的距离 步长
// 3. 停止的条件是: 让当前盒子位置等于目标位置就停止定时器
function animate(obj, target) {
// 先清除以前的定时器,只保留当前的一个定时器执行
clearInterval(obj.timer);
obj.timer = setInterval(function() {
// 步长值写到定时器的里面
// 把我们步长值改为整数 不要出现小数的问题
// var step = Math.ceil((target - obj.offsetLeft) / 10);
var step = (target - obj.offsetLeft) / 10;
step = step > 0 ? Math.ceil(step) : Math.floor(step);
if (obj.offsetLeft == target) {
// 停止动画 本质是停止定时器
clearInterval(obj.timer);
}
// 把每次加1 这个步长值改为一个慢慢变小的值 步长公式:(目标值 - 现在的位置) / 10
obj.style.left = obj.offsetLeft + step + 'px';
}, 15);
}
var span = document.querySelector('span');
var btn500 = document.querySelector('.btn500');
var btn800 = document.querySelector('.btn800');
btn500.addEventListener('click', function() {
// 调用函数
animate(span, 500);
})
btn800.addEventListener('click', function() {
// 调用函数
animate(span, 800);
})
// 匀速动画 就是 盒子是当前的位置 + 固定的值 10
// 缓动动画就是 盒子当前的位置 + 变化的值(目标值 - 现在的位置) / 10)
</script>
</body>
</html>

21.缓动动画添加回调函数
<!DOCTYPE html>
<html lang="en">

<head>
    <meta charset="UTF-8">
    <meta name="viewport" content="width=device-width, initial-scale=1.0">
    <meta http-equiv="X-UA-Compatible" content="ie=edge">
    <title>Document</title>
    <style>
        div {
            position: absolute;
            left: 0;
            width: 100px;
            height: 100px;
            background-color: pink;
        }

        span {
            position: absolute;
            left: 0;
            top: 200px;
            display: block;
            width: 150px;
            height: 150px;
            background-color: purple;
        }
    </style>
</head>

<body>
    <button class="btn500">点击夏雨荷到500</button>
    <button class="btn800">点击夏雨荷到800</button>
    <span>夏雨荷</span>
    <script>
        // 缓动动画函数封装obj目标对象 target 目标位置
        // 思路:
        // 1. 让盒子每次移动的距离慢慢变小, 速度就会慢慢落下来。
        // 2. 核心算法:(目标值 - 现在的位置) / 10 做为每次移动的距离 步长
        // 3. 停止的条件是: 让当前盒子位置等于目标位置就停止定时器
        function animate(obj, target, callback) {
            // console.log(callback);  callback = function() {}  调用的时候 callback()

            // 先清除以前的定时器,只保留当前的一个定时器执行
            clearInterval(obj.timer);
            obj.timer = setInterval(function() {
                // 步长值写到定时器的里面
                // 把我们步长值改为整数 不要出现小数的问题
                // var step = Math.ceil((target - obj.offsetLeft) / 10);
                var step = (target - obj.offsetLeft) / 10;
                step = step > 0 ? Math.ceil(step) : Math.floor(step);
                if (obj.offsetLeft == target) {
                    // 停止动画 本质是停止定时器
                    clearInterval(obj.timer);
                    // 回调函数写到定时器结束里面
                    if (callback) {
                        // 调用函数
                        callback();
                    }
                }
                // 把每次加1 这个步长值改为一个慢慢变小的值  步长公式:(目标值 - 现在的位置) / 10
                obj.style.left = obj.offsetLeft + step + 'px';

            }, 15);
        }
        var span = document.querySelector('span');
        var btn500 = document.querySelector('.btn500');
        var btn800 = document.querySelector('.btn800');

        btn500.addEventListener('click', function() {
            // 调用函数
            animate(span, 500);
        })
        btn800.addEventListener('click', function() {
                // 调用函数
                animate(span, 800, function() {
                    // alert('你好吗');
                    span.style.backgroundColor = 'red';
                });
            })
            // 匀速动画 就是 盒子是当前的位置 +  固定的值 10
            // 缓动动画就是  盒子当前的位置 + 变化的值(目标值 - 现在的位置) / 10)
    </script>
</body>

</html>
22.计算鼠标在盒子内的坐标
<!DOCTYPE html>
<html lang="en">

<head>
    <meta charset="UTF-8">
    <meta name="viewport" content="width=device-width, initial-scale=1.0">
    <meta http-equiv="X-UA-Compatible" content="ie=edge">
    <title>Document</title>
    <style>
        .box {
            width: 300px;
            height: 300px;
            background-color: pink;
            margin: 200px;
        }
    </style>
</head>

<body>
    <div class="box"></div>
    <script>
        // 我们在盒子内点击, 想要得到鼠标距离盒子左右的距离。
        // 首先得到鼠标在页面中的坐标( e.pageX, e.pageY)
        // 其次得到盒子在页面中的距离(box.offsetLeft, box.offsetTop)
        // 用鼠标距离页面的坐标减去盒子在页面中的距离, 得到 鼠标在盒子内的坐标
        var box = document.querySelector('.box');
        box.addEventListener('mousemove', function(e) {
            // console.log(e.pageX);
            // console.log(e.pageY);
            // console.log(box.offsetLeft);
            var x = e.pageX - this.offsetLeft;
            var y = e.pageY - this.offsetTop;
            this.innerHTML = 'x坐标是' + x + ' y坐标是' + y;
        })
    </script>
</body>

</html>
23.拖动的模态框
<!DOCTYPE html>
<html>
<head lang="en">
<meta charset="UTF-8">
<title></title>
<style>
.login-header {
width: 100%;
text-align: center;
height: 30px;
font-size: 24px;
line-height: 30px;
}
ul,
li,
ol,
dl,
dt,
dd,
div,
p,
span,
h1,
h2,
h3,
h4,
h5,
h6,
a {
padding: 0px;
margin: 0px;
}
.login {
display: none;
width: 512px;
height: 280px;
position: fixed;
border: #ebebeb solid 1px;
left: 50%;
top: 50%;
background: #ffffff;
box-shadow: 0px 0px 20px #ddd;
z-index: 9999;
transform: translate(-50%, -50%);
}
.login-title {
width: 100%;
margin: 10px 0px 0px 0px;
text-align: center;
line-height: 40px;
height: 40px;
font-size: 18px;
position: relative;
cursor: move;
}
.login-input-content {
margin-top: 20px;
}
.login-button {
width: 50%;
margin: 30px auto 0px auto;
line-height: 40px;
font-size: 14px;
border: #ebebeb 1px solid;
text-align: center;
}
.login-bg {
display: none;
width: 100%;
height: 100%;
position: fixed;
top: 0px;
left: 0px;
background: rgba(0, 0, 0, .3);
}
a {
text-decoration: none;
color: #000000;
}
.login-button a {
display: block;
}
.login-input input.list-input {
float: left;
line-height: 35px;
height: 35px;
width: 350px;
border: #ebebeb 1px solid;
text-indent: 5px;
}
.login-input {
overflow: hidden;
margin: 0px 0px 20px 0px;
}
.login-input label {
float: left;
width: 90px;
padding-right: 10px;
text-align: right;
line-height: 35px;
height: 35px;
font-size: 14px;
}
.login-title span {
position: absolute;
font-size: 12px;
right: -20px;
top: -30px;
background: #ffffff;
border: #ebebeb solid 1px;
width: 40px;
height: 40px;
border-radius: 20px;
}
</style>
</head>
<body>
<div class="login-header"><a id="link" href="javascript:;">点击,弹出登录框</a></div>
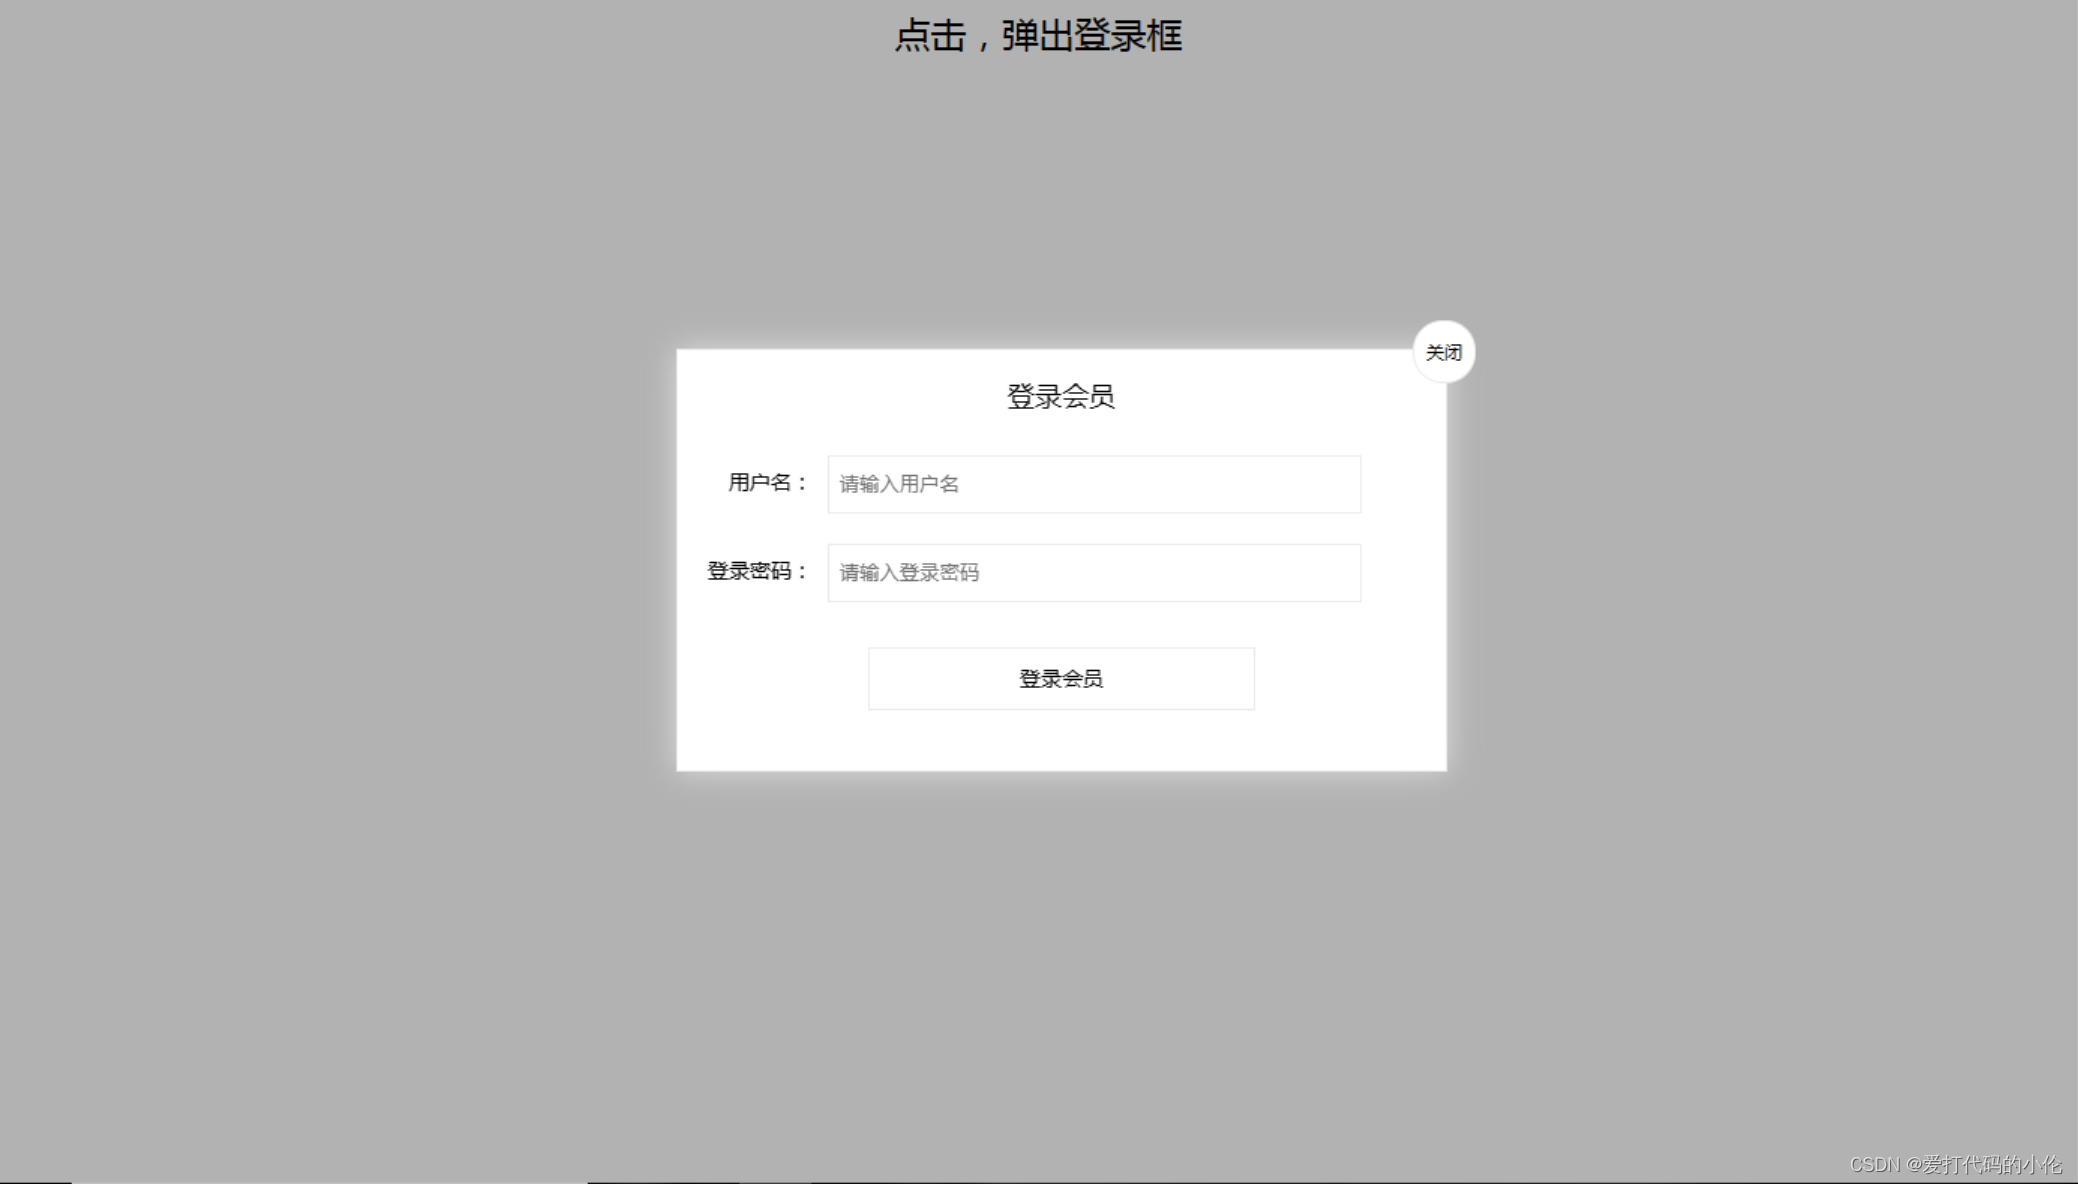
<div id="login" class="login">
<div id="title" class="login-title">登录会员
<span><a id="closeBtn" href="javascript:void(0);" class="close-login">关闭</a></span>
</div>
<div class="login-input-content">
<div class="login-input">
<label>用户名:</label>
<input type="text" placeholder="请输入用户名" name="info[username]" id="username" class="list-input">
</div>
<div class="login-input">
<label>登录密码:</label>
<input type="password" placeholder="请输入登录密码" name="info[password]" id="password" class="list-input">
</div>
</div>
<div id="loginBtn" class="login-button"><a href="javascript:void(0);" id="login-button-submit">登录会员</a></div>
</div>
<!-- 遮盖层 -->
<div id="bg" class="login-bg"></div>
<script>
// 1. 获取元素
var login = document.querySelector('.login');
var mask = document.querySelector('.login-bg');
var link = document.querySelector('#link');
var closeBtn = document.querySelector('#closeBtn');
var title = document.querySelector('#title');
// 2. 点击弹出层这个链接 link 让mask 和login 显示出来
link.addEventListener('click', function() {
mask.style.display = 'block';
login.style.display = 'block';
})
// 3. 点击 closeBtn 就隐藏 mask 和 login
closeBtn.addEventListener('click', function() {
mask.style.display = 'none';
login.style.display = 'none';
})
// 4. 开始拖拽
// (1) 当我们鼠标按下, 就获得鼠标在盒子内的坐标
title.addEventListener('mousedown', function(e) {
var x = e.pageX - login.offsetLeft;
var y = e.pageY - login.offsetTop;
// (2) 鼠标移动的时候,把鼠标在页面中的坐标,减去 鼠标在盒子内的坐标就是模态框的left和top值
document.addEventListener('mousemove', move)
function move(e) {
login.style.left = e.pageX - x + 'px';
login.style.top = e.pageY - y + 'px';
}
// (3) 鼠标弹起,就让鼠标移动事件移除
document.addEventListener('mouseup', function() {
document.removeEventListener('mousemove', move);
})
})
</script>
</body>
</html> 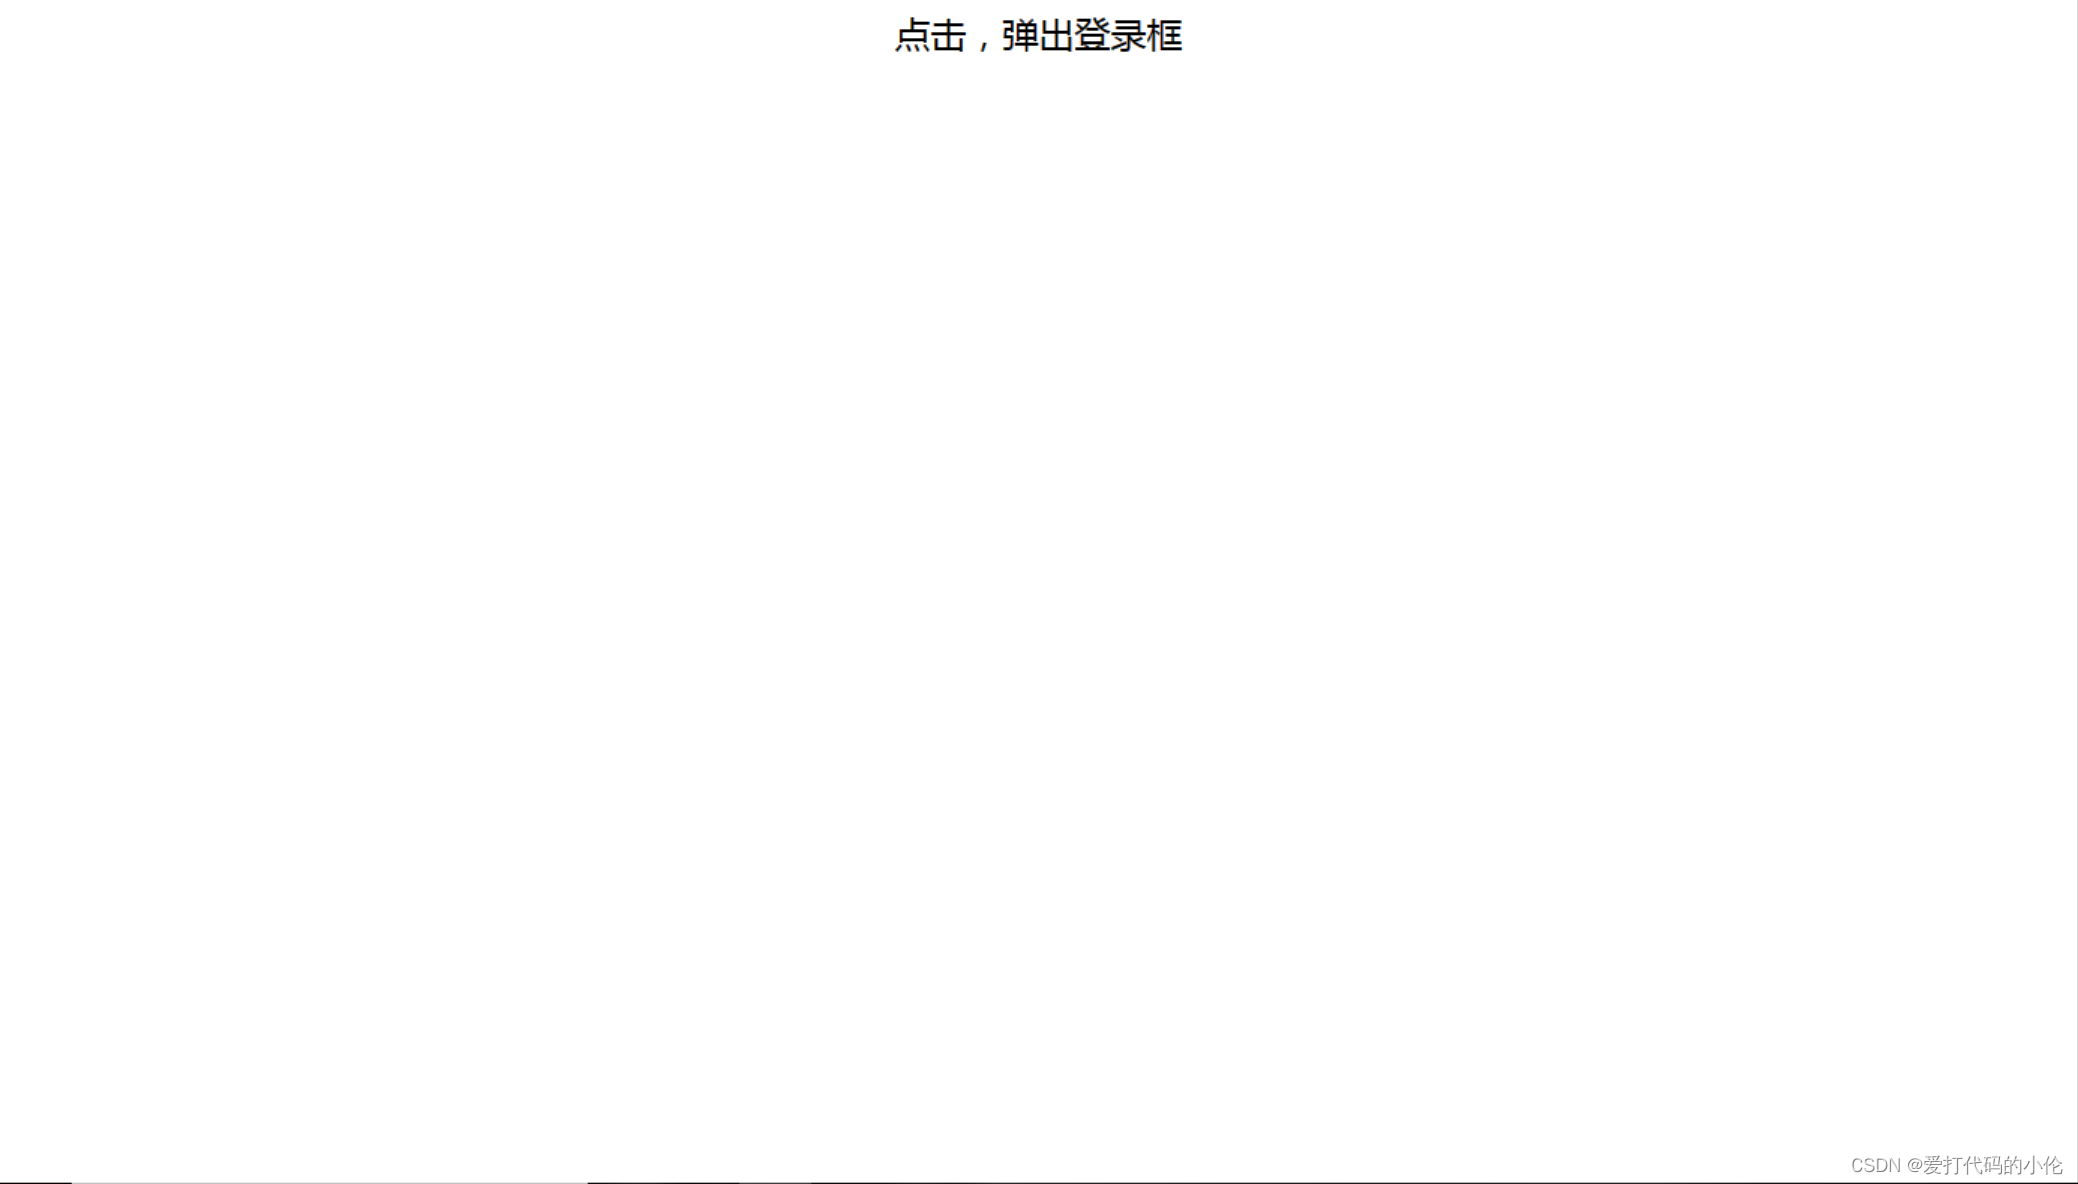
 24.引用animate函数
<!DOCTYPE html>
<html lang="en">

<head>
    <meta charset="UTF-8">
    <meta name="viewport" content="width=device-width, initial-scale=1.0">
    <meta http-equiv="X-UA-Compatible" content="ie=edge">
    <title>Document</title>
    <style>
        .sliderbar {
            position: fixed;
            right: 0;
            bottom: 100px;
            width: 40px;
            height: 40px;
            text-align: center;
            line-height: 40px;
            cursor: pointer;
            color: #fff;
        }

        .con {
            position: absolute;
            left: 0;
            top: 0;
            width: 200px;
            height: 40px;
            background-color: purple;
            z-index: -1;
        }
    </style>
    <script src="animate.js"></script>
</head>

<body>
    <div class="sliderbar">
        <span>←</span>
        <div class="con">问题反馈</div>
    </div>

    <script>
        // 1. 获取元素
        var sliderbar = document.querySelector('.sliderbar');
        var con = document.querySelector('.con');
        // 当我们鼠标经过 sliderbar 就会让 con这个盒子滑动到左侧
        // 当我们鼠标离开 sliderbar 就会让 con这个盒子滑动到右侧
        sliderbar.addEventListener('mouseenter', function() {
            // animate(obj, target, callback);
            animate(con, -160, function() {
                // 当我们动画执行完毕,就把 ← 改为 →
                sliderbar.children[0].innerHTML = '→';
            });

        })
        sliderbar.addEventListener('mouseleave', function() {
            // animate(obj, target, callback);
            animate(con, 0, function() {
                sliderbar.children[0].innerHTML = '←';
            });

        })
    </script>
</body>

</html>
25.仿淘宝返回顶部
<!DOCTYPE html>
<html lang="en">

<head>
    <meta charset="UTF-8">
    <meta name="viewport" content="width=device-width, initial-scale=1.0">
    <meta http-equiv="X-UA-Compatible" content="ie=edge">
    <title>Document</title>
    <style>
        .slider-bar {
            position: absolute;
            left: 50%;
            top: 300px;
            margin-left: 600px;
            width: 45px;
            height: 130px;
            background-color: pink;
        }

        .w {
            width: 1200px;
            margin: 10px auto;
        }

        .header {
            height: 150px;
            background-color: purple;
        }

        .banner {
            height: 250px;
            background-color: skyblue;
        }

        .main {
            height: 1000px;
            background-color: yellowgreen;
        }

        span {
            display: none;
            position: absolute;
            bottom: 0;
        }
    </style>
</head>

<body>
    <div class="slider-bar">
        <span class="goBack">返回顶部</span>
    </div>
    <div class="header w">头部区域</div>
    <div class="banner w">banner区域</div>
    <div class="main w">主体部分</div>
    <script>
        //1. 获取元素
        var sliderbar = document.querySelector('.slider-bar');
        var banner = document.querySelector('.banner');
        // banner.offestTop 就是被卷去头部的大小 一定要写到滚动的外面
        var bannerTop = banner.offsetTop
            // 当我们侧边栏固定定位之后应该变化的数值
        var sliderbarTop = sliderbar.offsetTop - bannerTop;
        // 获取main 主体元素
        var main = document.querySelector('.main');
        var goBack = document.querySelector('.goBack');
        var mainTop = main.offsetTop;
        // 2. 页面滚动事件 scroll
        document.addEventListener('scroll', function() {
                // console.log(11);
                // window.pageYOffset 页面被卷去的头部
                // console.log(window.pageYOffset);
                // 3 .当我们页面被卷去的头部大于等于了 172 此时 侧边栏就要改为固定定位
                if (window.pageYOffset >= bannerTop) {
                    sliderbar.style.position = 'fixed';
                    sliderbar.style.top = sliderbarTop + 'px';
                } else {
                    sliderbar.style.position = 'absolute';
                    sliderbar.style.top = '300px';
                }
                // 4. 当我们页面滚动到main盒子,就显示 goback模块
                if (window.pageYOffset >= mainTop) {
                    goBack.style.display = 'block';
                } else {
                    goBack.style.display = 'none';
                }

            })
            // 3. 当我们点击了返回顶部模块,就让窗口滚动的页面的最上方
        goBack.addEventListener('click', function() {
            // 里面的x和y 不跟单位的 直接写数字即可
            // window.scroll(0, 0);
            // 因为是窗口滚动 所以对象是window
            animate(window, 0);
        });
        // 动画函数
        function animate(obj, target, callback) {
            // console.log(callback);  callback = function() {}  调用的时候 callback()

            // 先清除以前的定时器,只保留当前的一个定时器执行
            clearInterval(obj.timer);
            obj.timer = setInterval(function() {
                // 步长值写到定时器的里面
                // 把我们步长值改为整数 不要出现小数的问题
                // var step = Math.ceil((target - obj.offsetLeft) / 10);
                var step = (target - window.pageYOffset) / 10;
                step = step > 0 ? Math.ceil(step) : Math.floor(step);
                if (window.pageYOffset == target) {
                    // 停止动画 本质是停止定时器
                    clearInterval(obj.timer);
                    // 回调函数写到定时器结束里面
                    // if (callback) {
                    //     // 调用函数
                    //     callback();
                    // }
                    callback && callback();
                }
                // 把每次加1 这个步长值改为一个慢慢变小的值  步长公式:(目标值 - 现在的位置) / 10
                // obj.style.left = window.pageYOffset + step + 'px';
                window.scroll(0, window.pageYOffset + step);
            }, 15);
        }
    </script>
</body>

</html>


 707
707


 被折叠的 条评论
为什么被折叠?
被折叠的 条评论
为什么被折叠?
 到【灌水乐园】发言


