


 本文介绍了如何在SpringBoot项目中集成Springdoc-openapi-starter-webmvc-ui,通过添加依赖、配置application.yml和编写SwaggerConfig,创建并访问API文档。测试用的Controller展示了如何使用OpenAPI注解来标注接口。
1. 引入依赖
在pom.xml里面引入如下俩个依赖
        <dependency>
            <groupId>org.springframework.boot</groupId>
            <artifactId>spring-boot-starter-web</artifactId>
            <version>3.0.2</version>
        </dependency>

        <dependency>
            <groupId>org.springdoc</groupId>
            <artifactId>springdoc-openapi-starter-webmvc-ui</artifactId>
            <version>2.0.2</version>
            <exclusions>
                <exclusion>
                    <artifactId>slf4j-api</artifactId>
                    <groupId>org.slf4j</groupId>
                </exclusion>
            </exclusions>
        </dependency>
2. 配置application.yml文件(其实不配置也行)
server:
  port: 8080
# 配置swagger文档的访问路径
springdoc:
  swagger-ui:
    path: /swagger-ui.html
3. 编写swagger配置类SwaggerConfig
package com.config;

import io.swagger.v3.oas.models.ExternalDocumentation;
import io.swagger.v3.oas.models.OpenAPI;
import io.swagger.v3.oas.models.info.Info;
import io.swagger.v3.oas.models.info.License;
import org.springframework.context.annotation.Bean;
import org.springframework.context.annotation.Configuration;

@Configuration
public class SwaggerConfig {

    @Bean
    public OpenAPI springShopOpenAPI() {
        return new OpenAPI()
                .info(new Info().title("标题")
                        .description("我的API文档")
                        .version("v1")
                        .license(new License().name("Apache 2.0").url("http://springdoc.org")))
                .externalDocs(new ExternalDocumentation()
                        .description("外部文档")
                        .url("https://springshop.wiki.github.org/docs"));
    }

}
4. 编写一个测试用的controller类
package com.controller;

import io.swagger.v3.oas.annotations.Operation;
import io.swagger.v3.oas.annotations.Parameter;
import io.swagger.v3.oas.annotations.tags.Tag;
import org.springframework.web.bind.annotation.GetMapping;
import org.springframework.web.bind.annotation.RestController;

@RestController
@Tag(name = "测试Controller", description = "这是描述")
public class IndexController {

    @GetMapping("/hello")
    @Operation(summary = "测试接口")
    public String index(@Parameter(name = "name", description = "名称") String name) {
        return "hello " + name;
    }

}
5. 编写启动类Application
package com;

import org.springframework.boot.SpringApplication;
import org.springframework.boot.autoconfigure.SpringBootApplication;

@SpringBootApplication
public class Application {

    public static void main(String[] args) {
        SpringApplication.run(Application.class, args);
    }
}
然后启动项目,打开浏览器访问 http://localhost:8080/swagger-ui.html
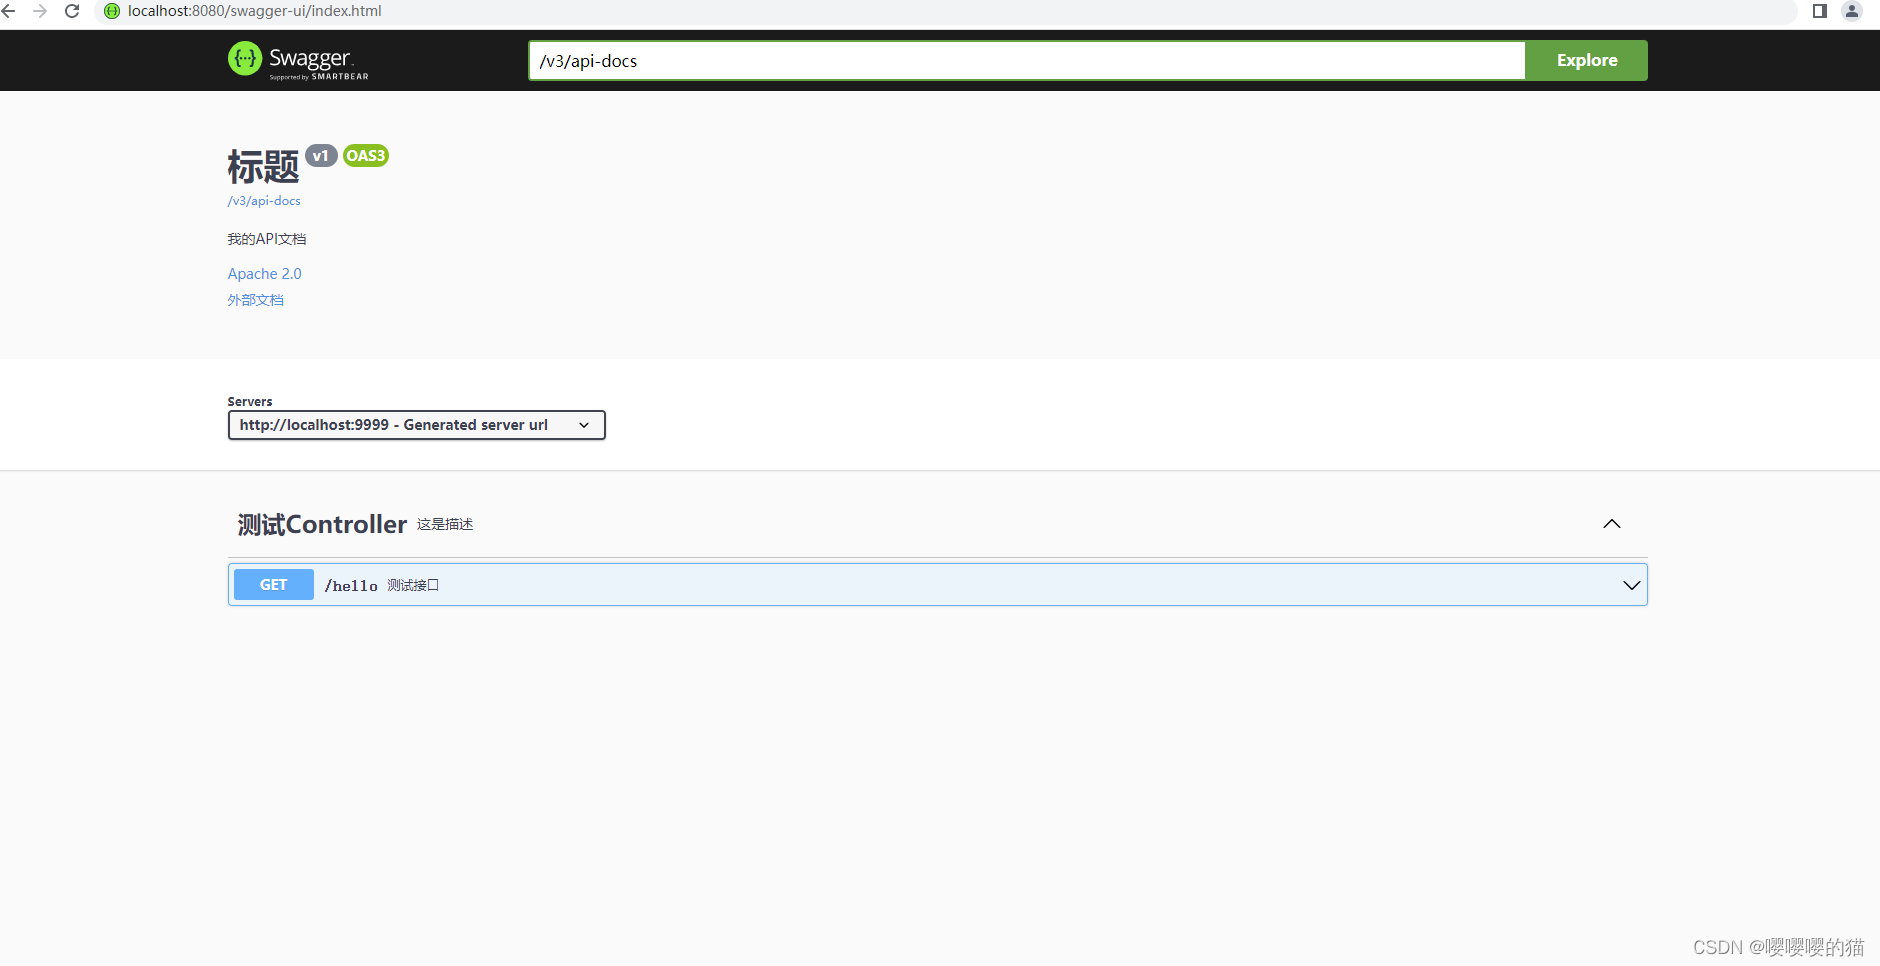
就可以看到生成的文档了
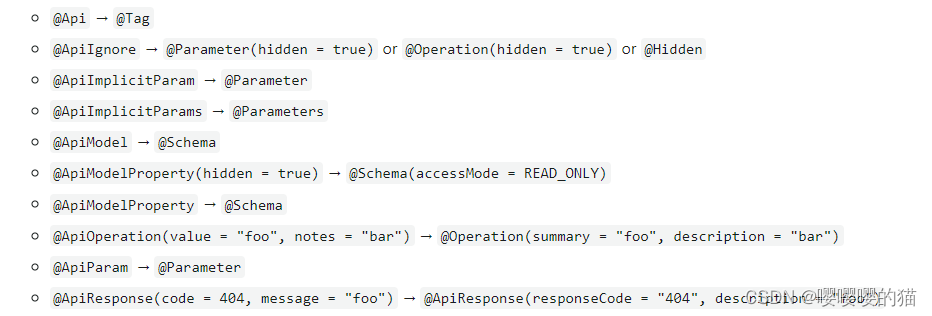
最后附上swagger2到open api的注解变化


 1114
1114

 被折叠的 条评论
为什么被折叠?
被折叠的 条评论
为什么被折叠?
 到【灌水乐园】发言


